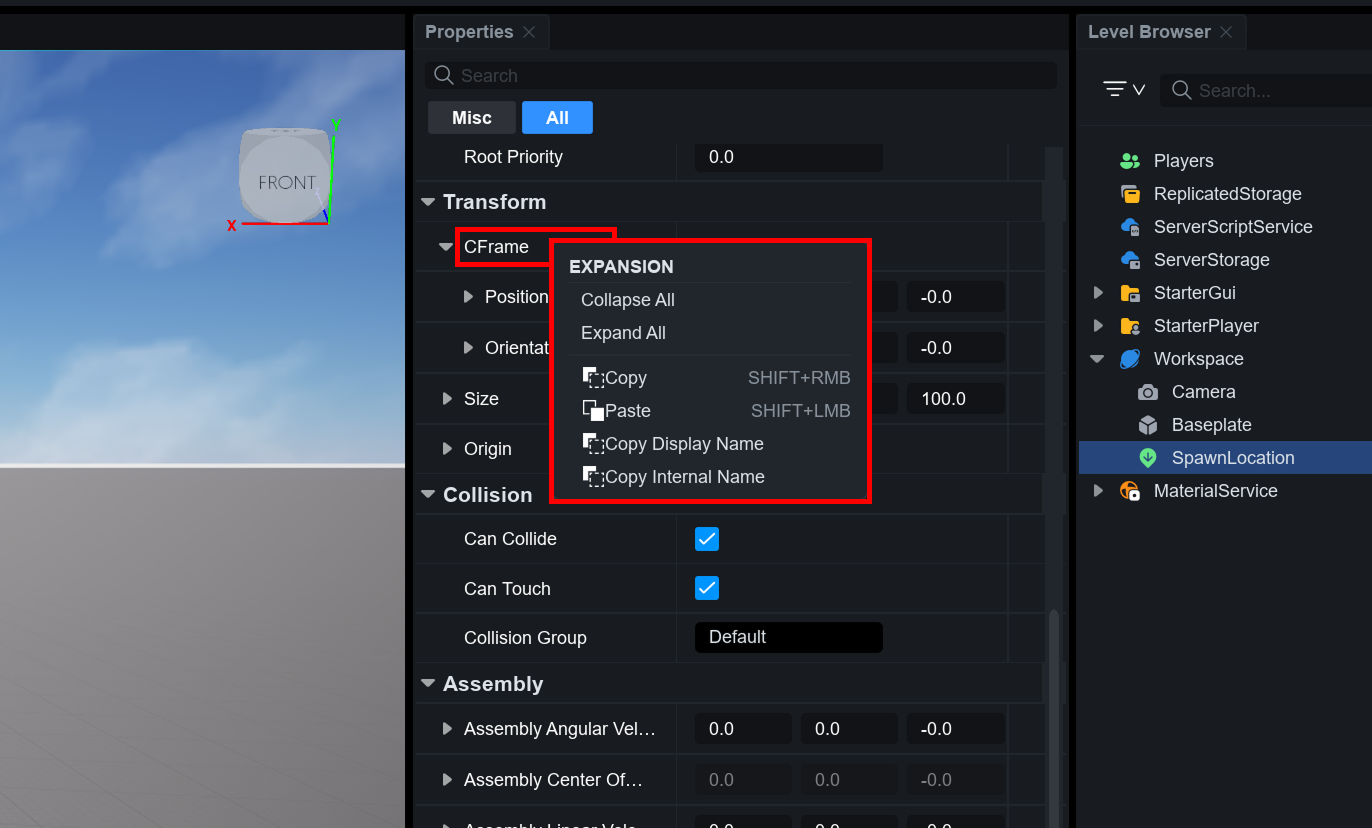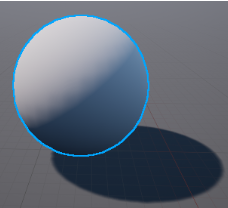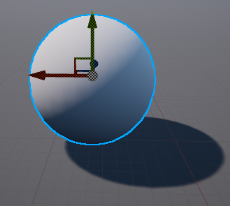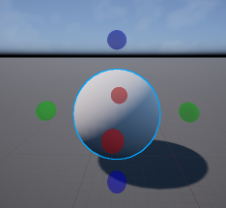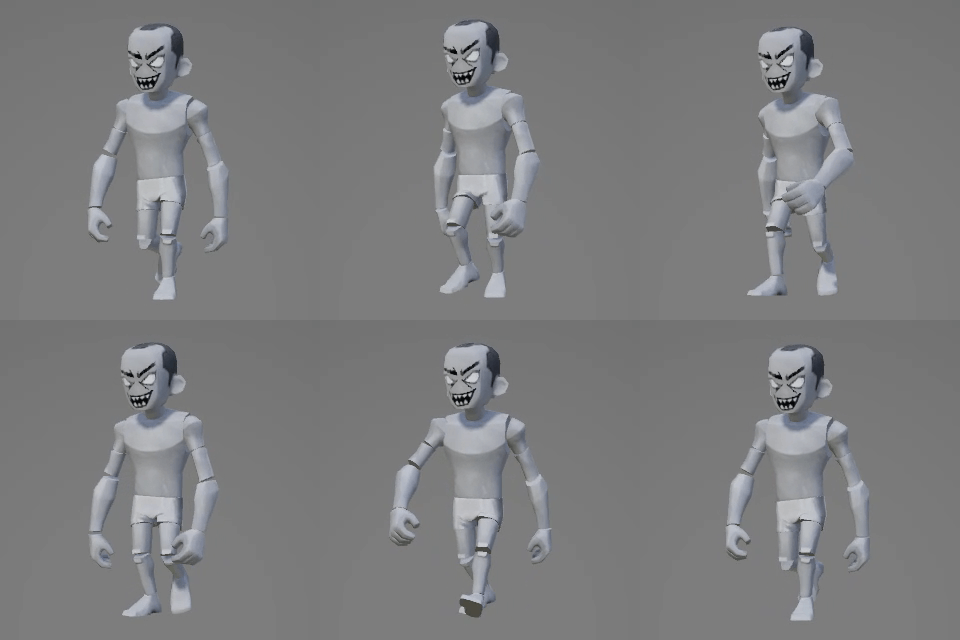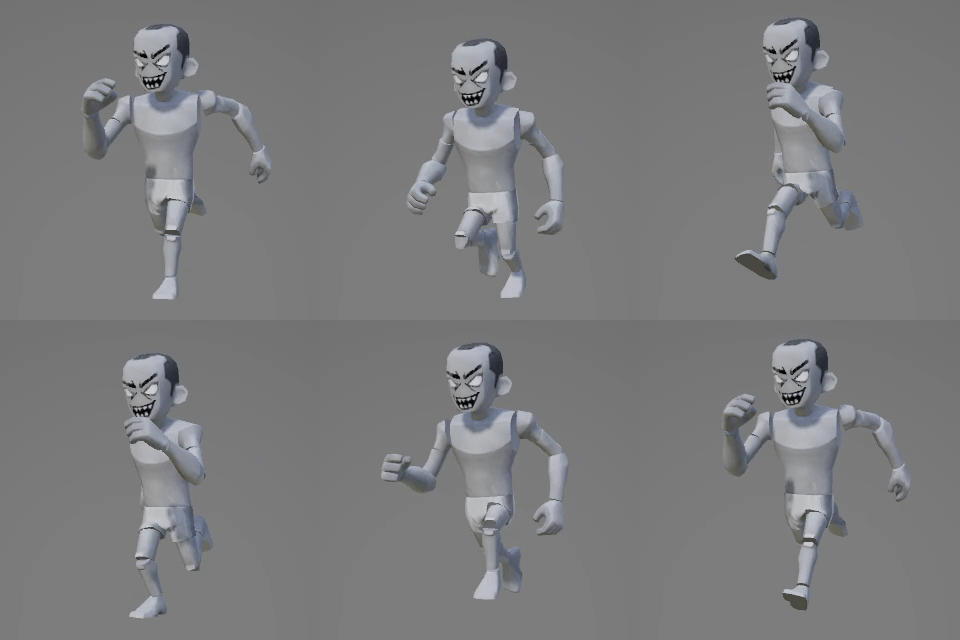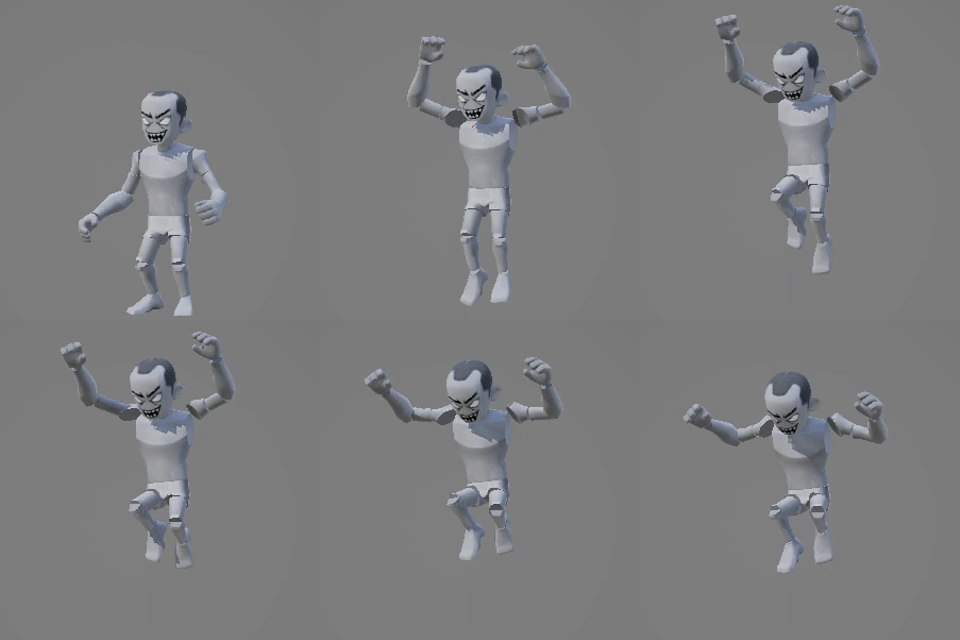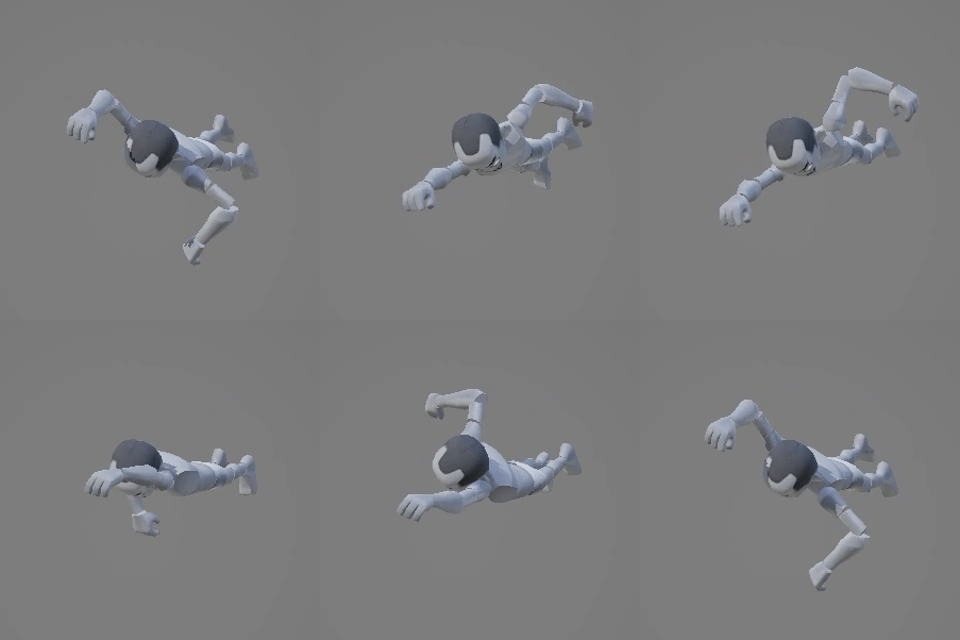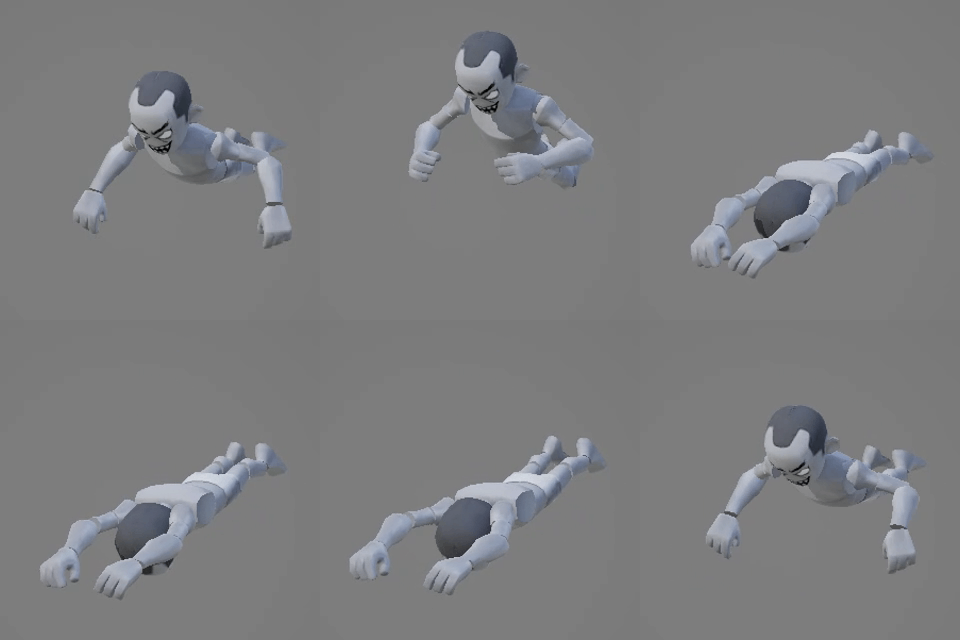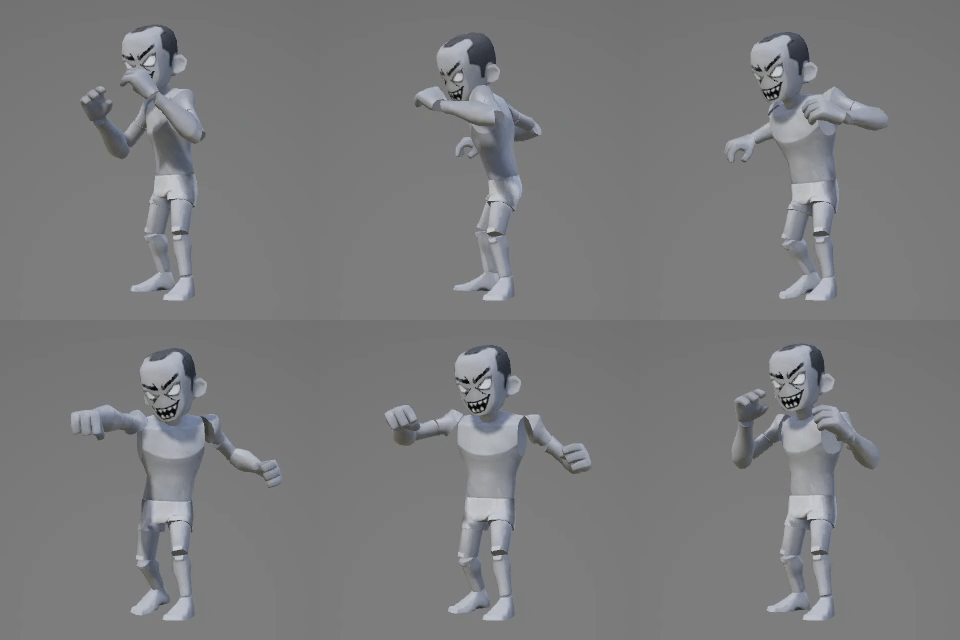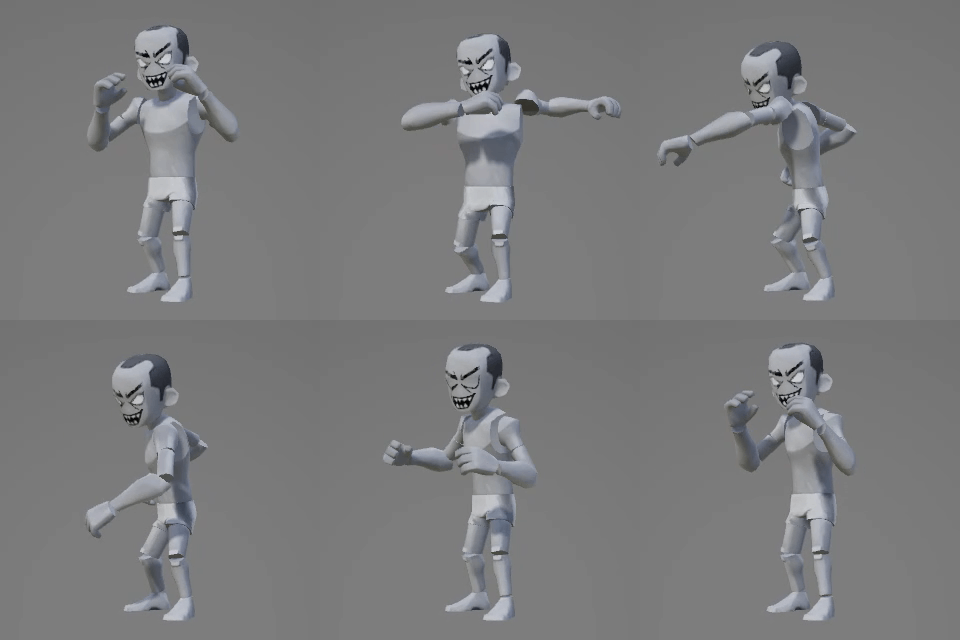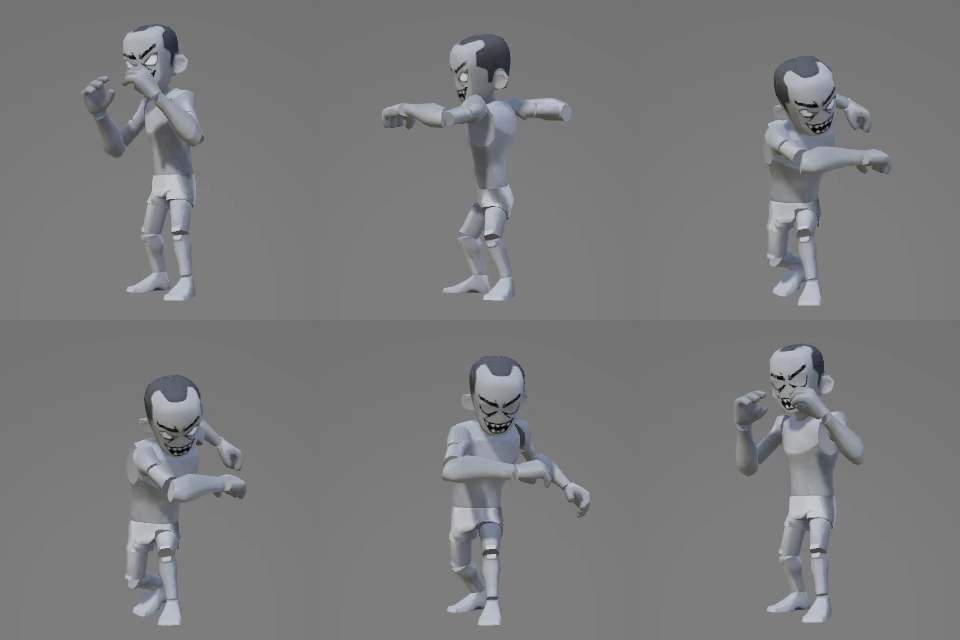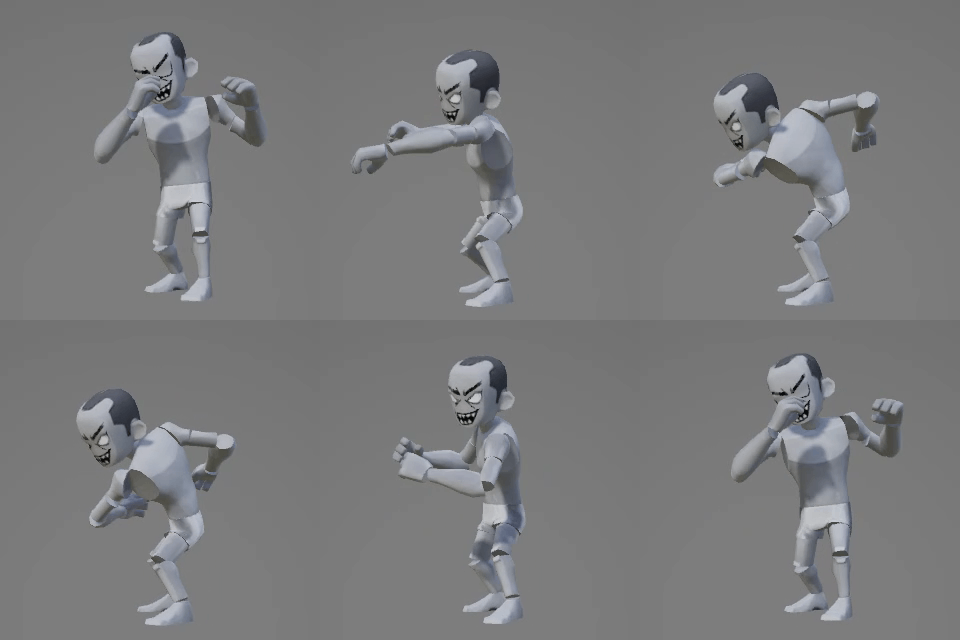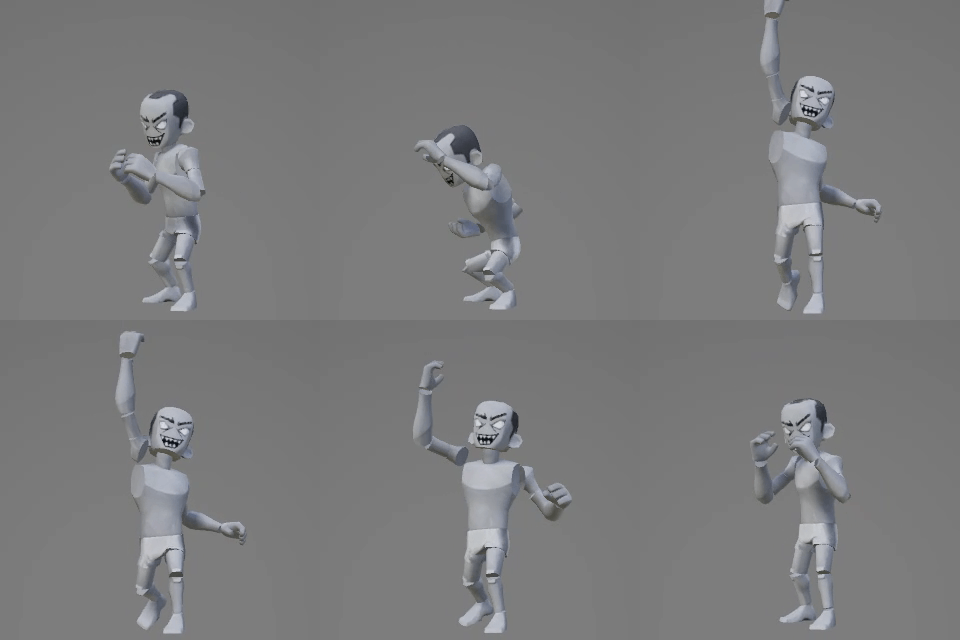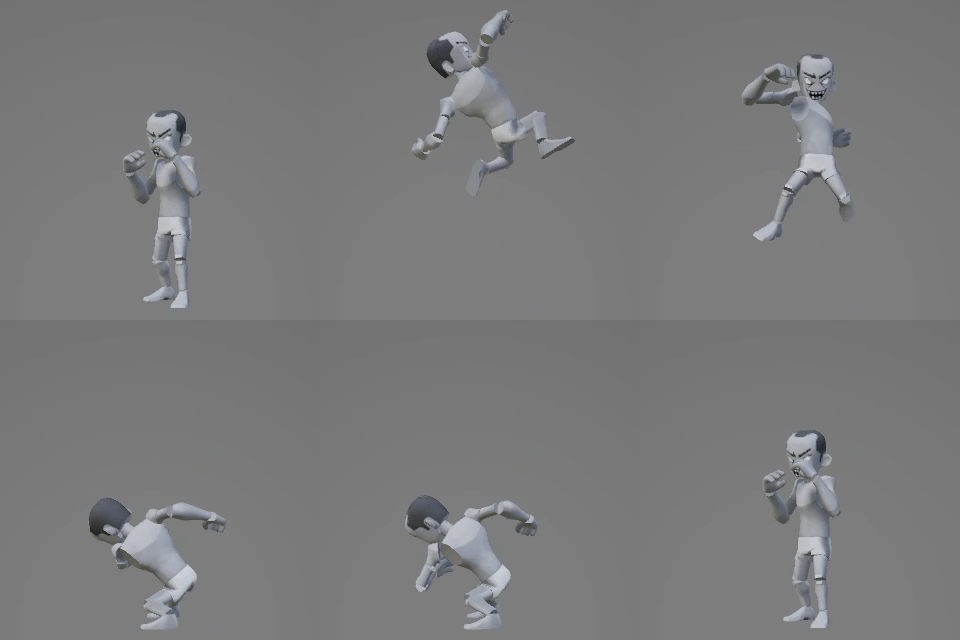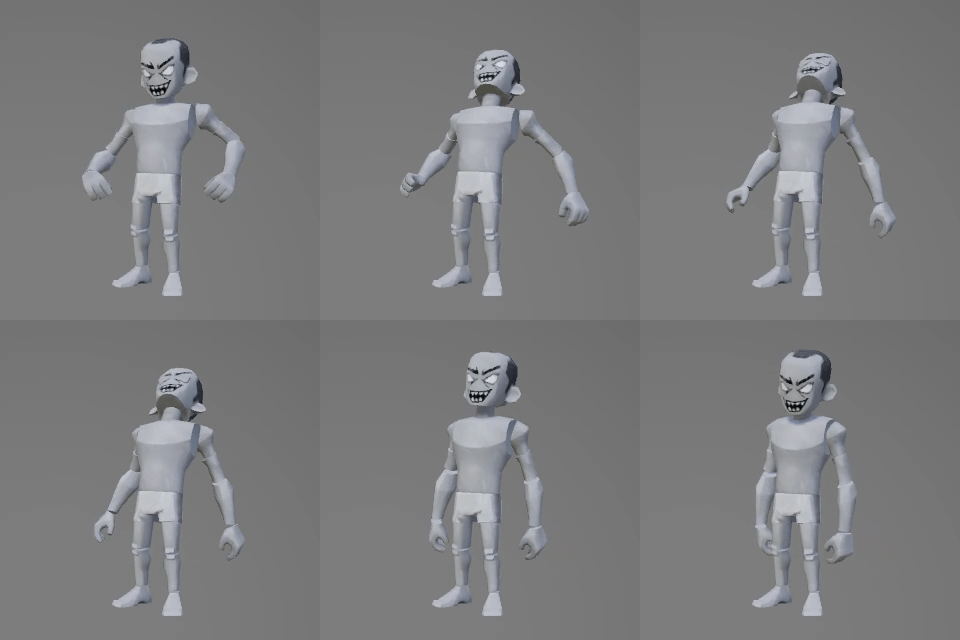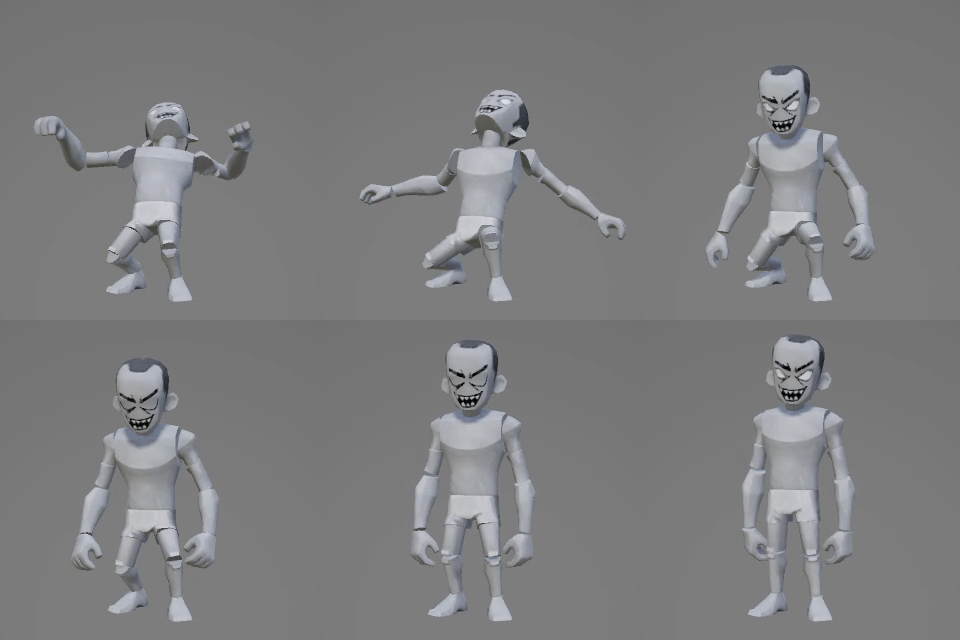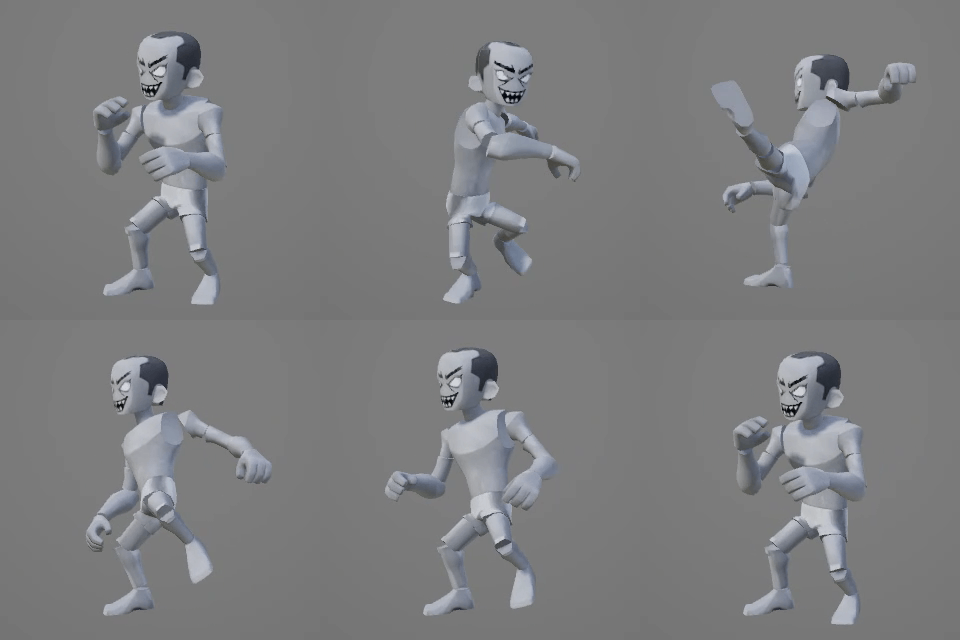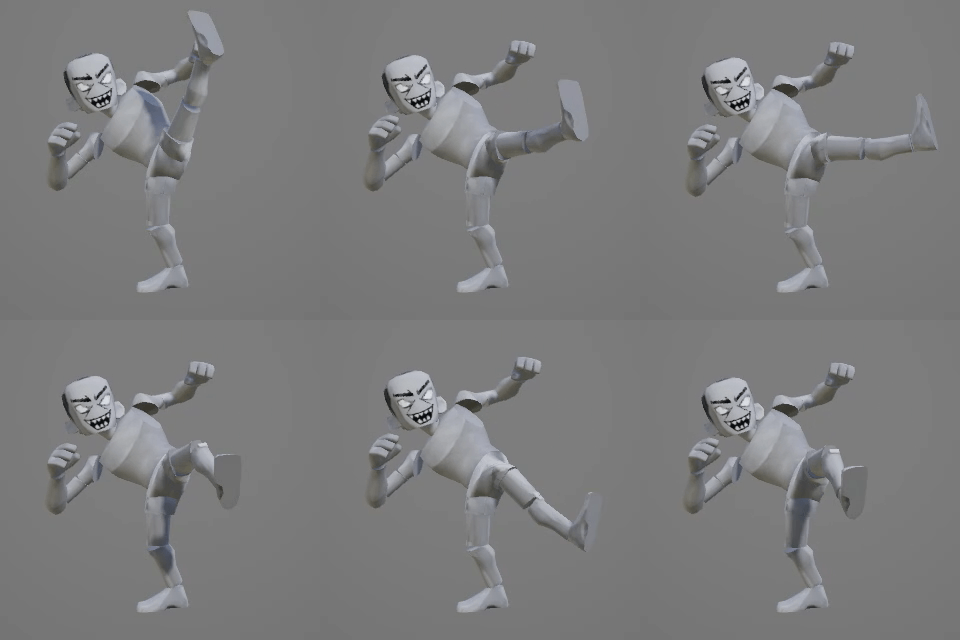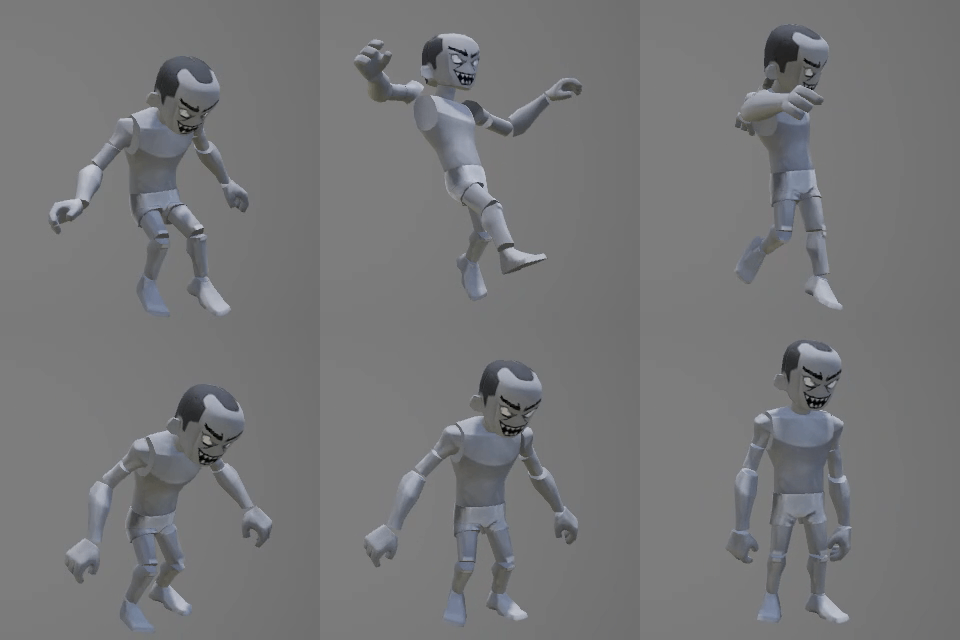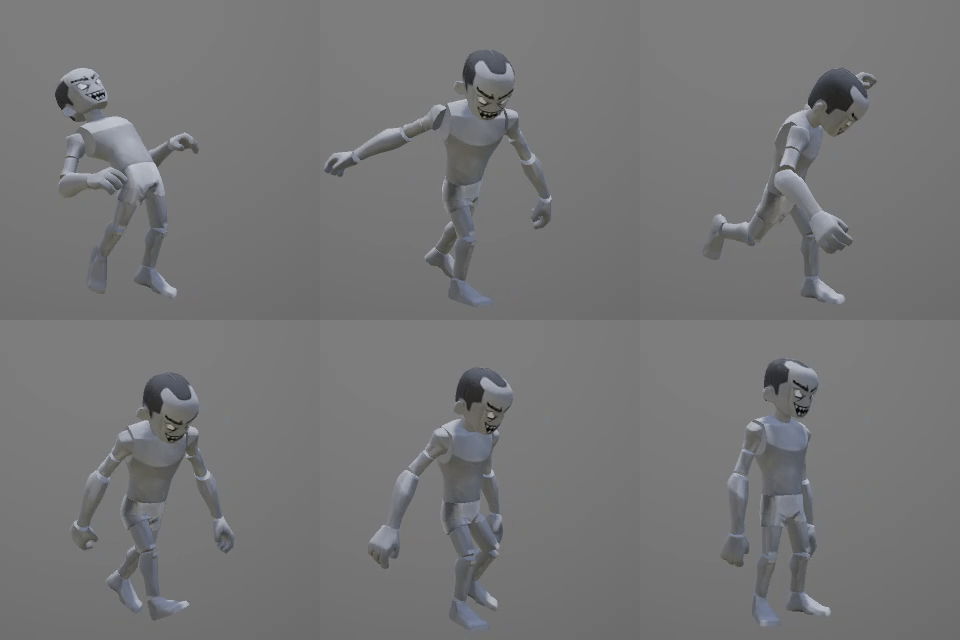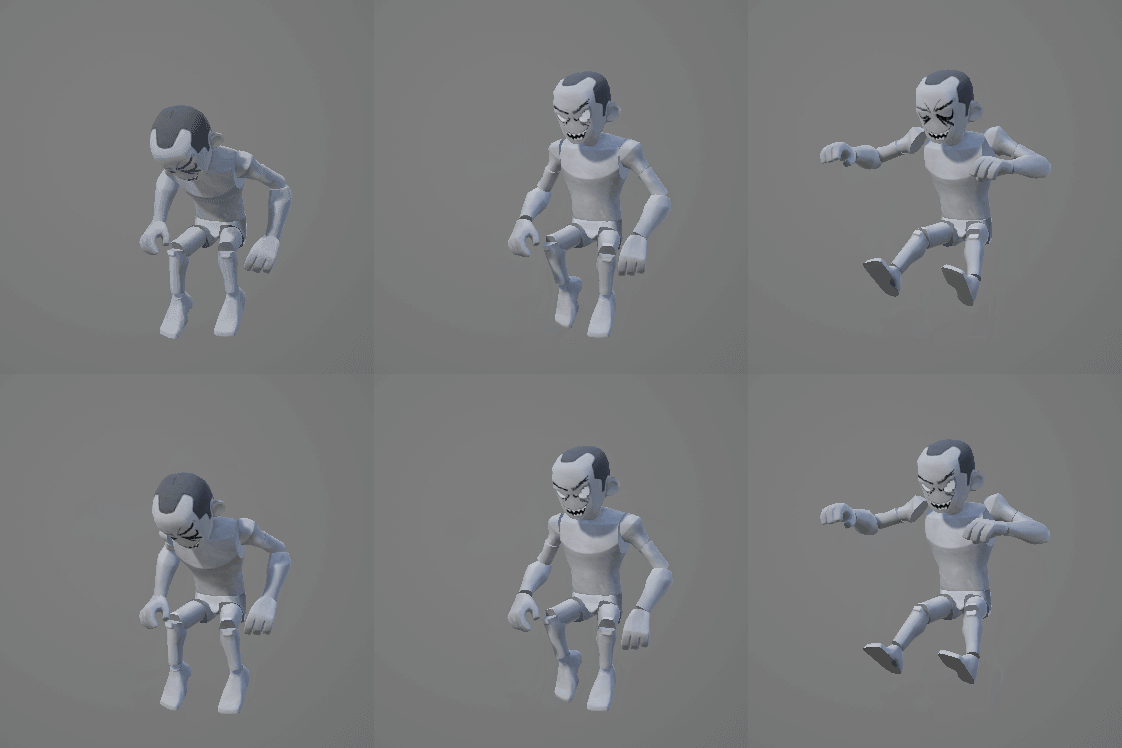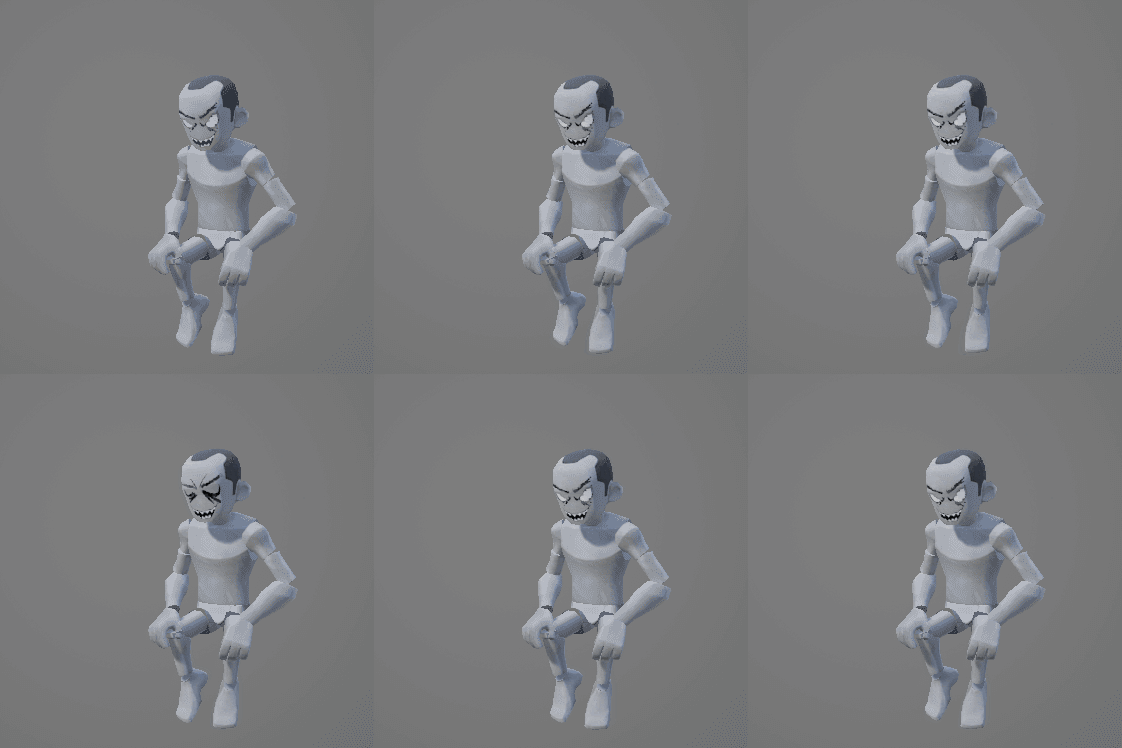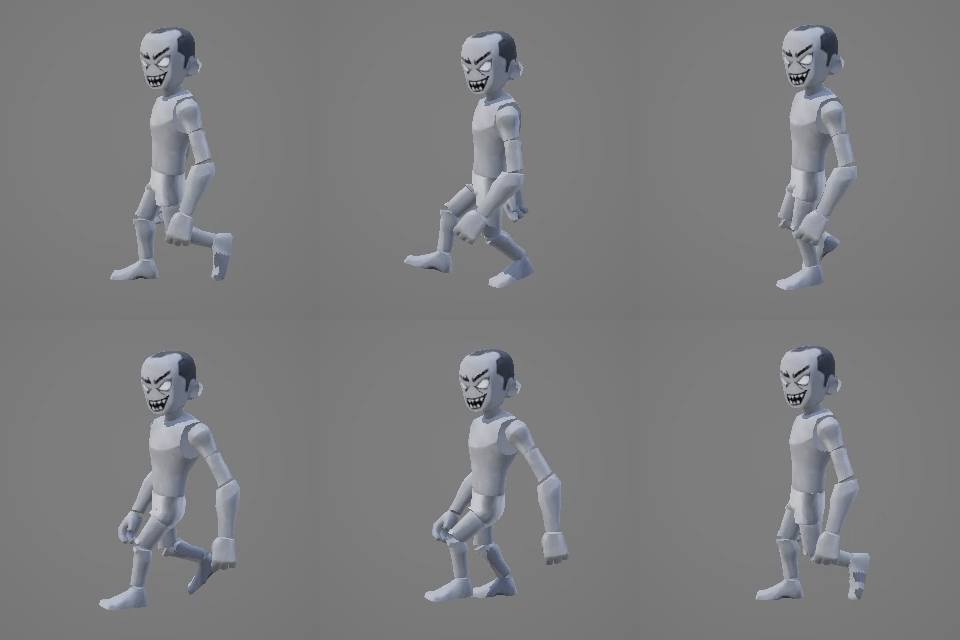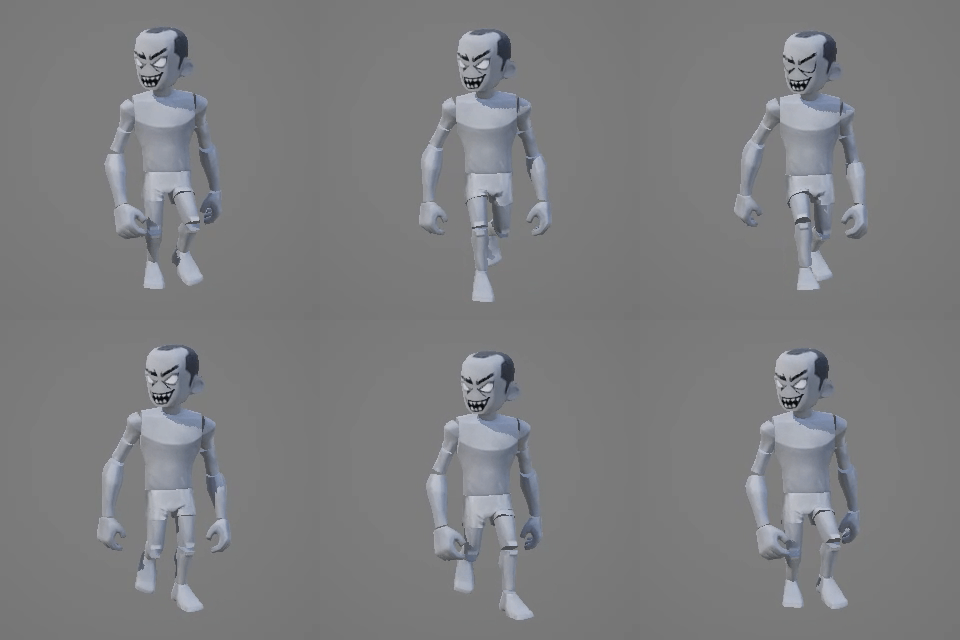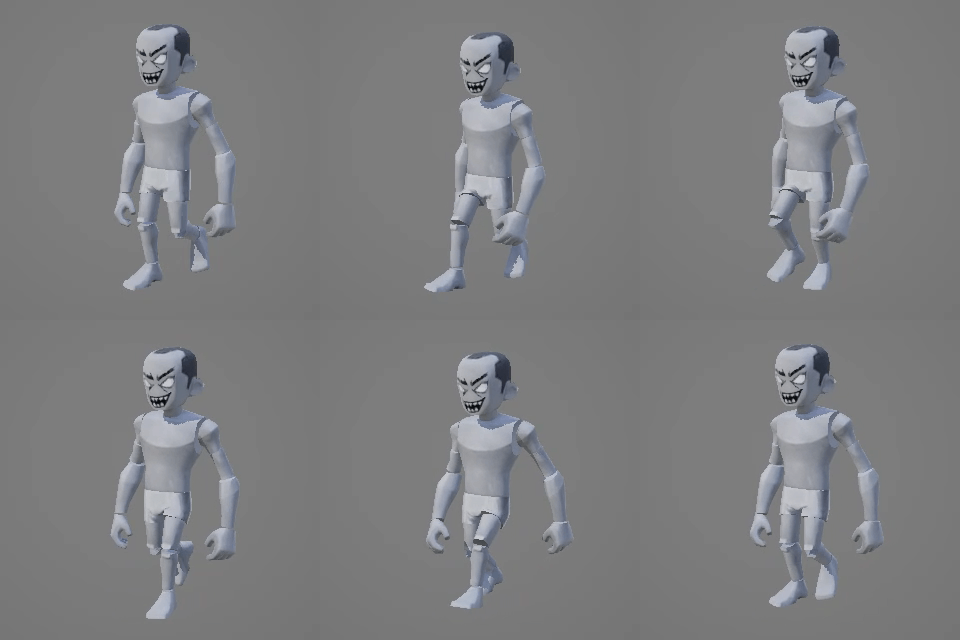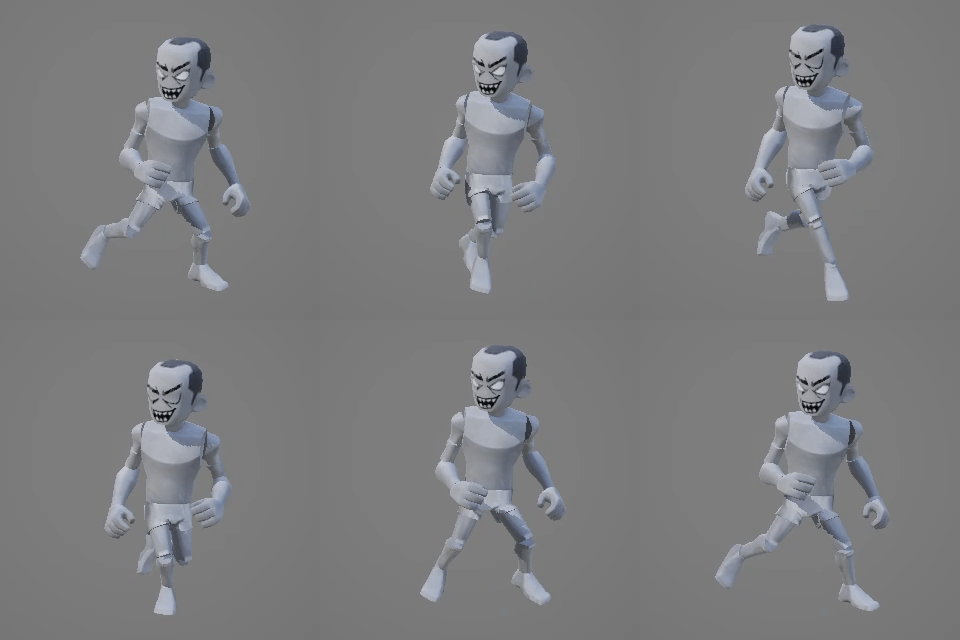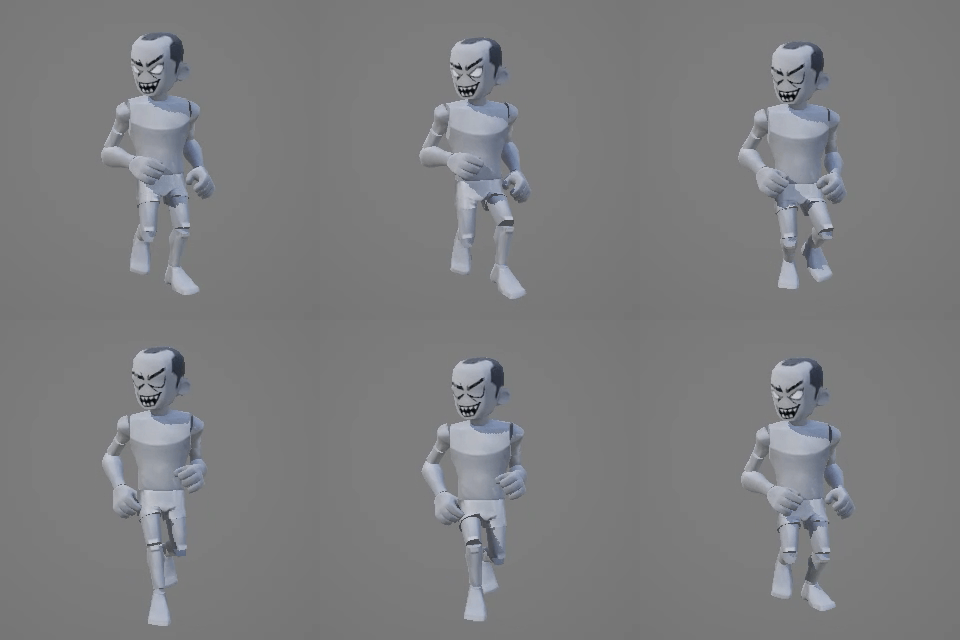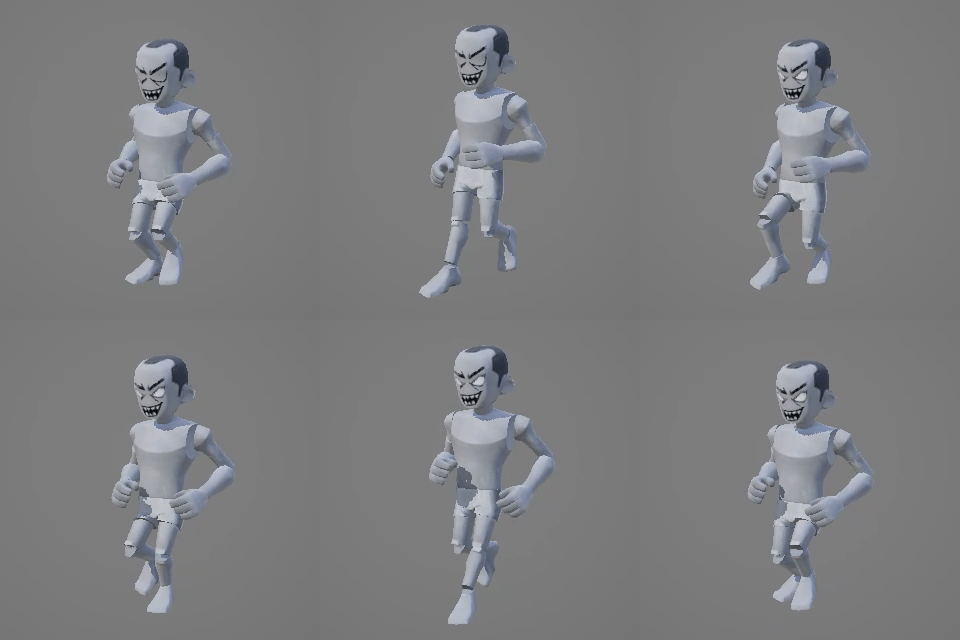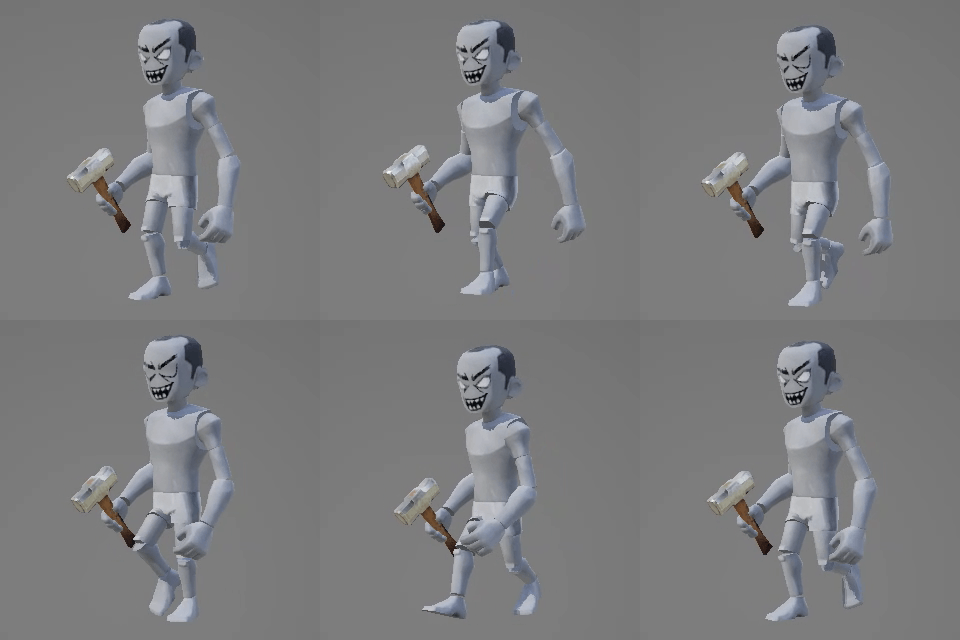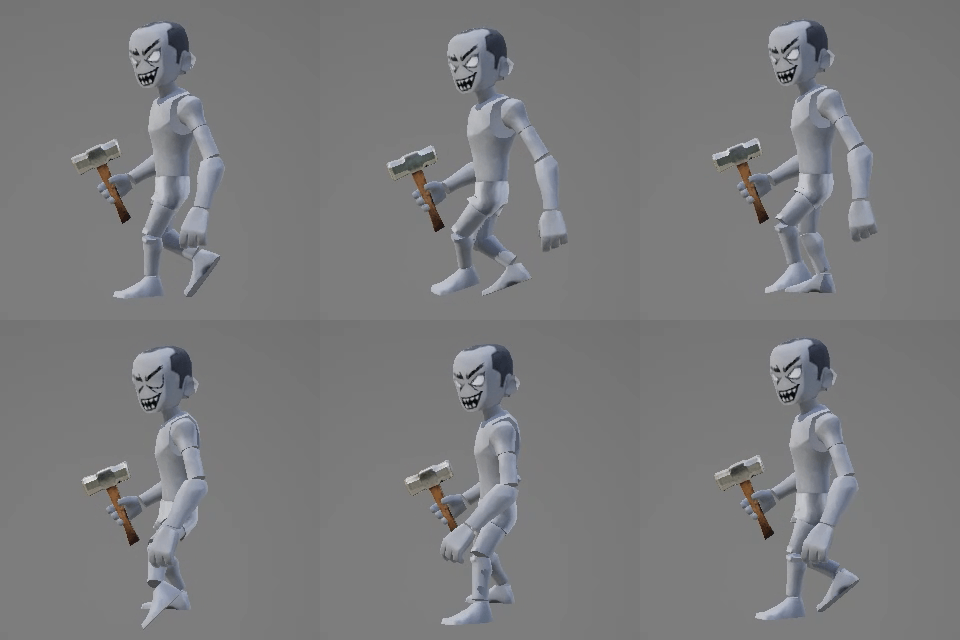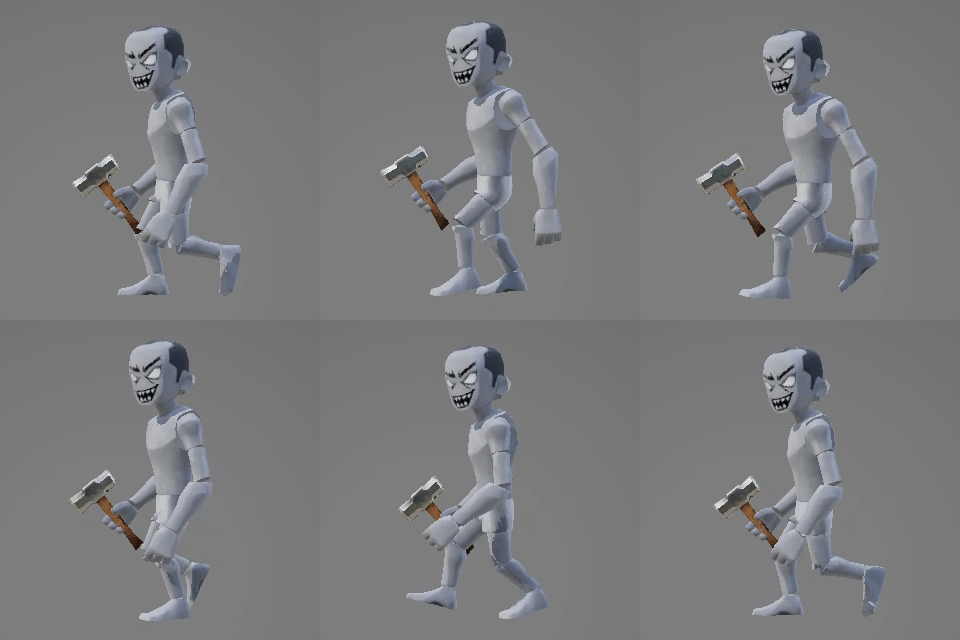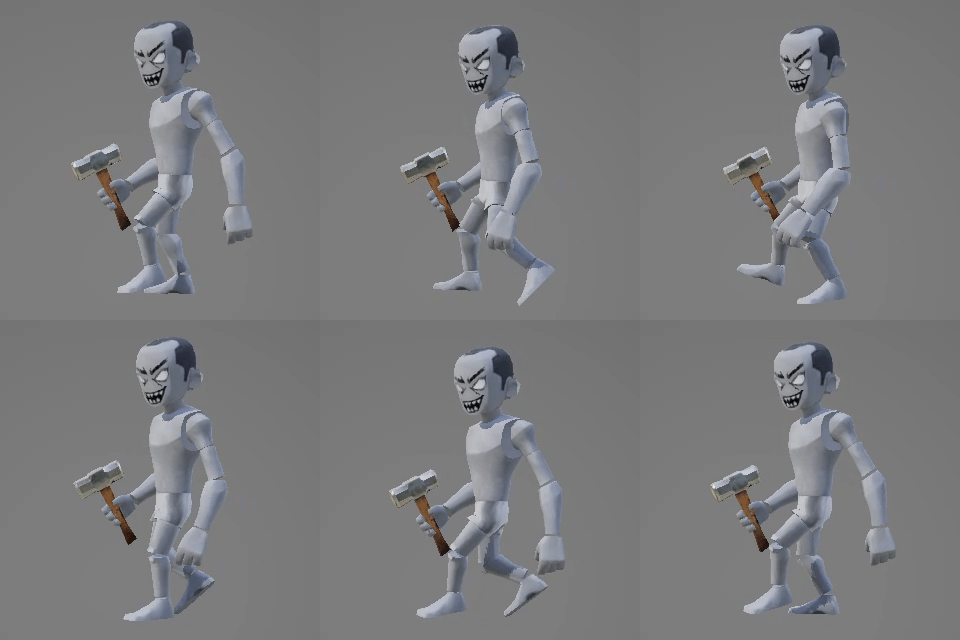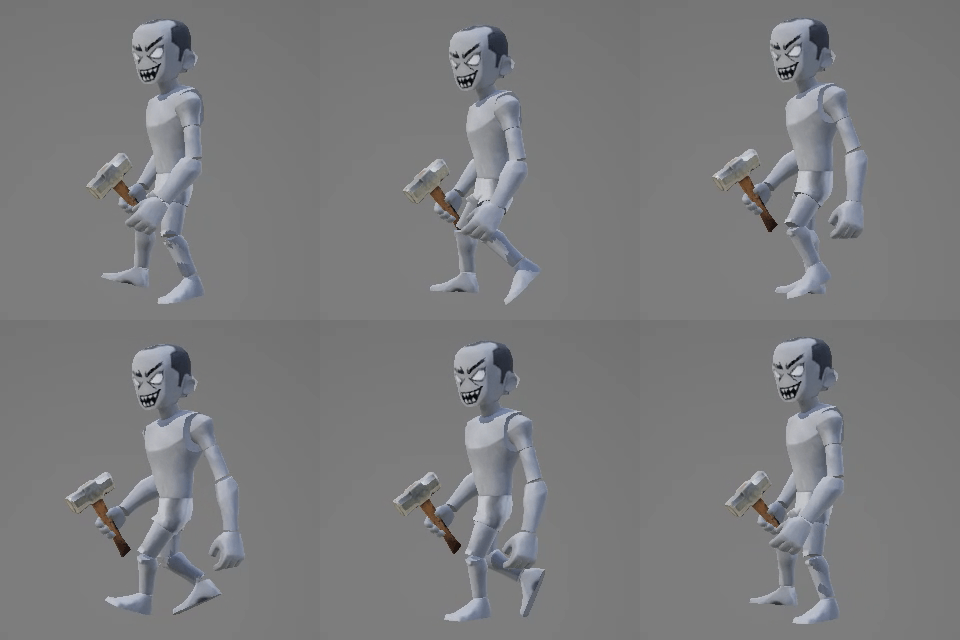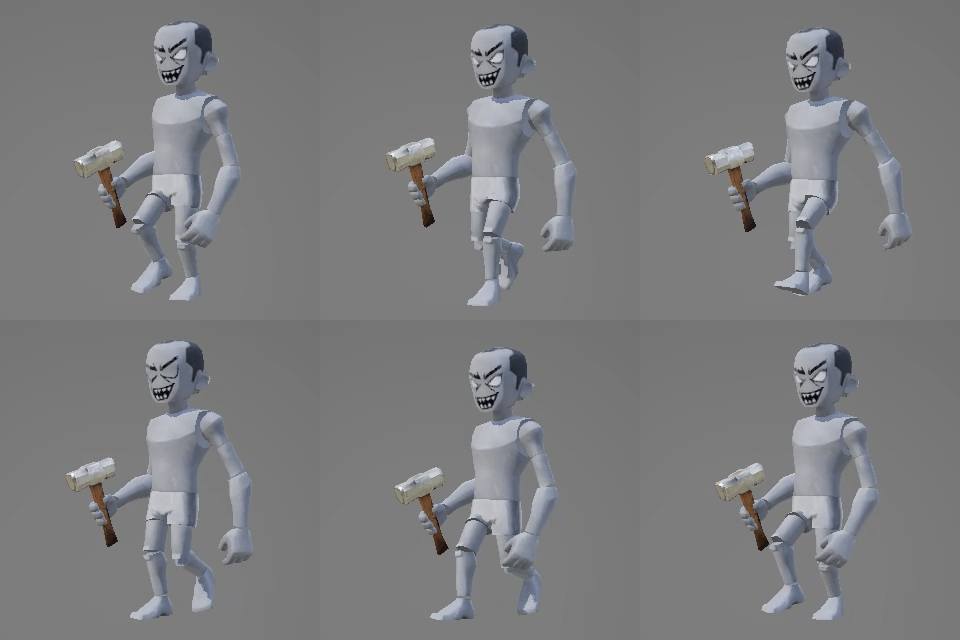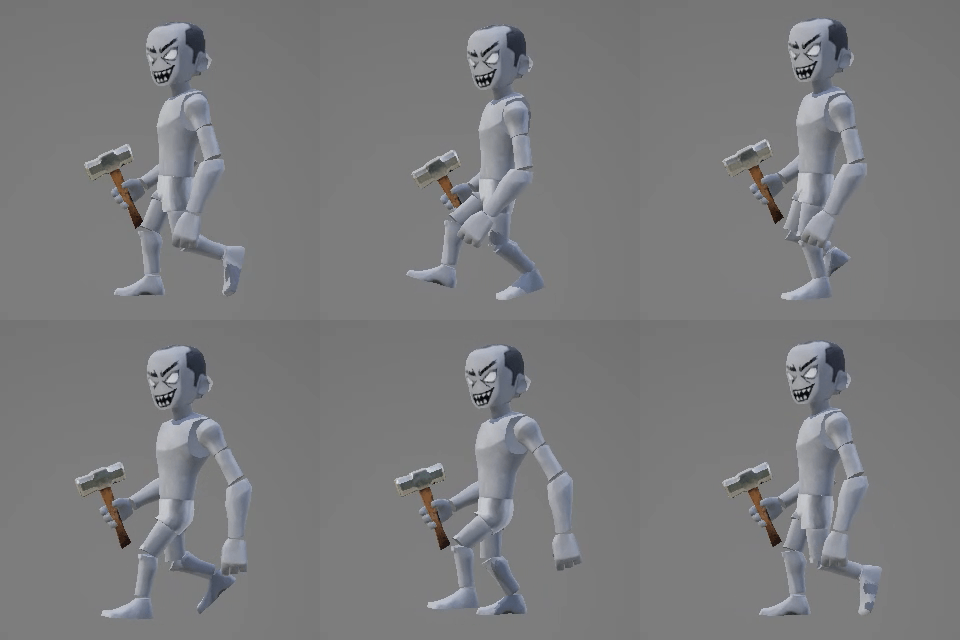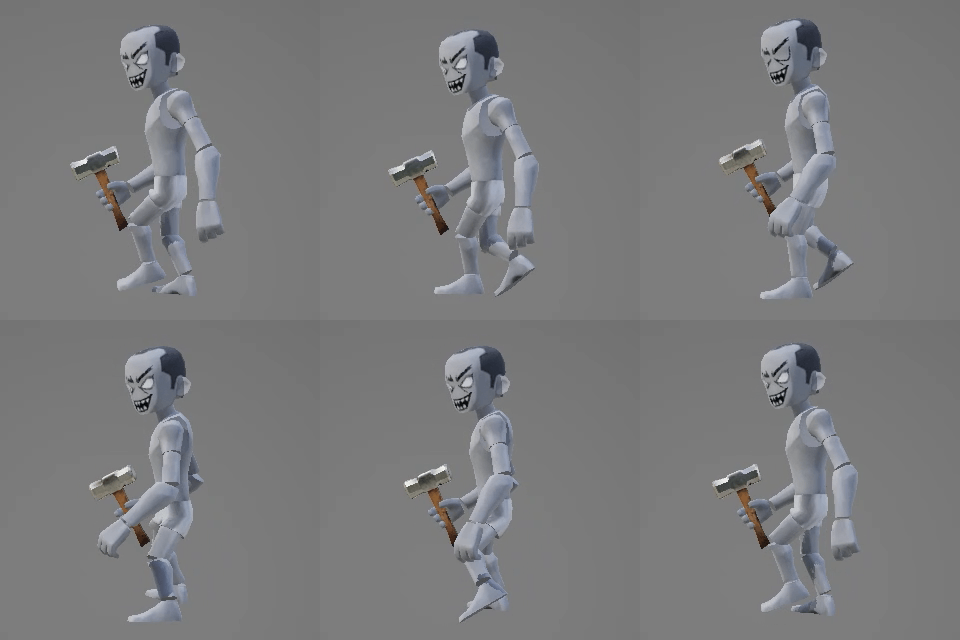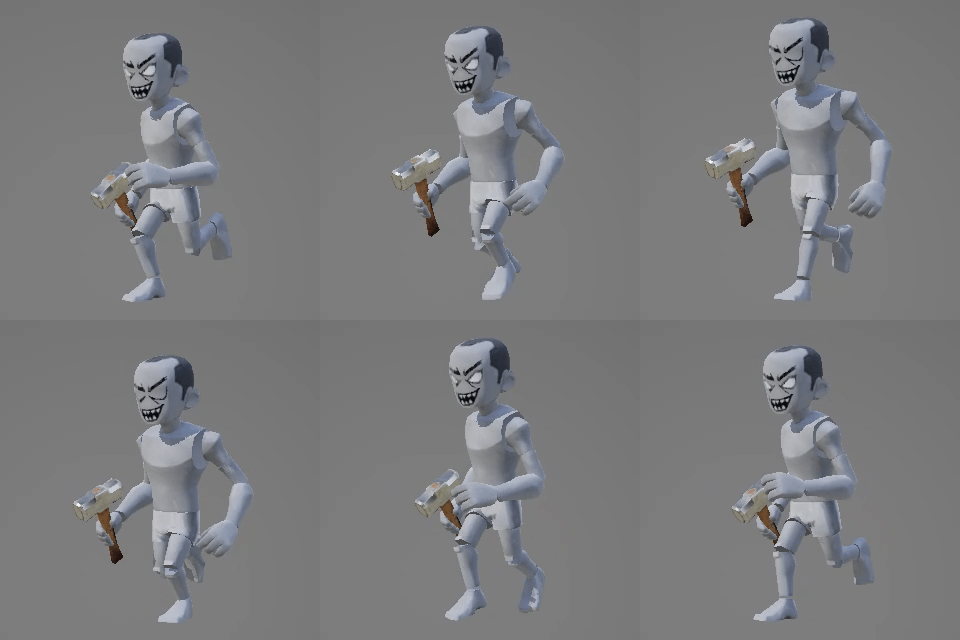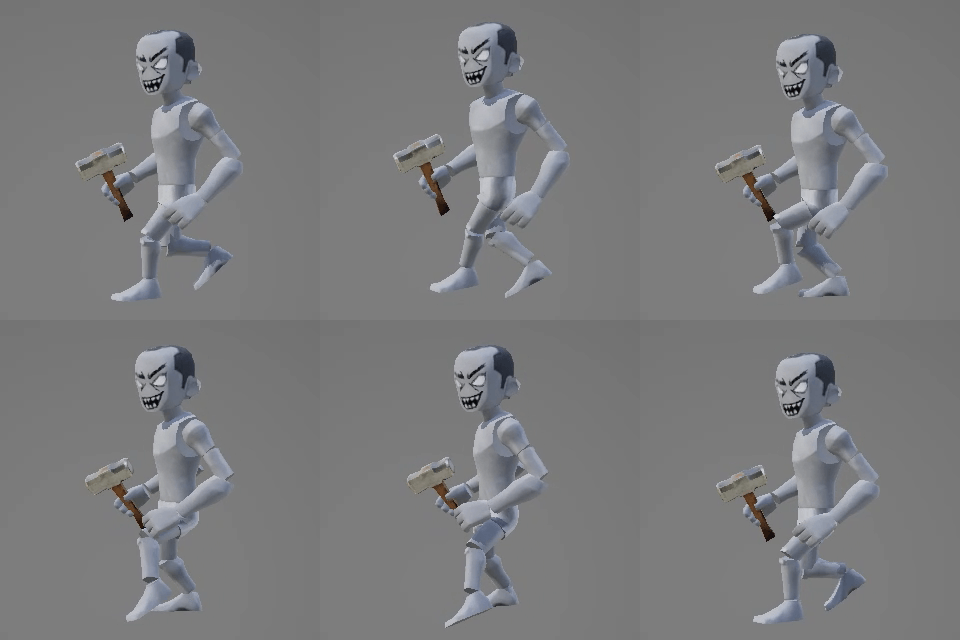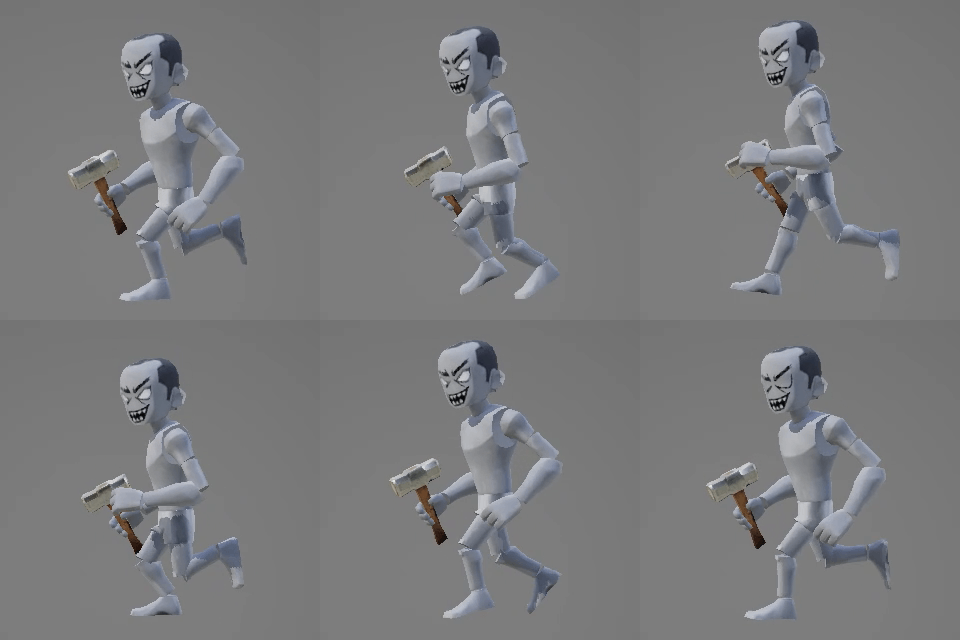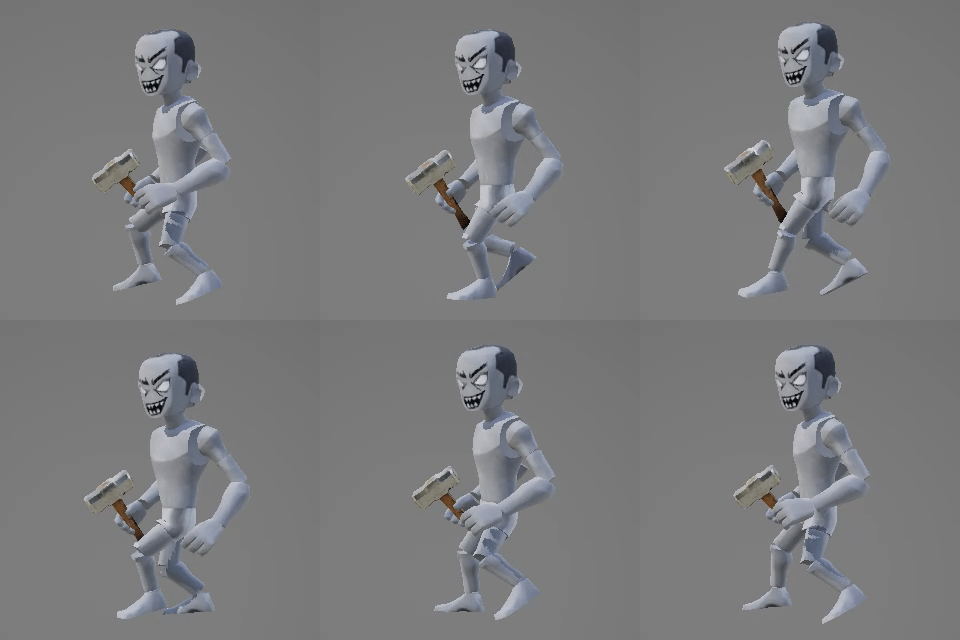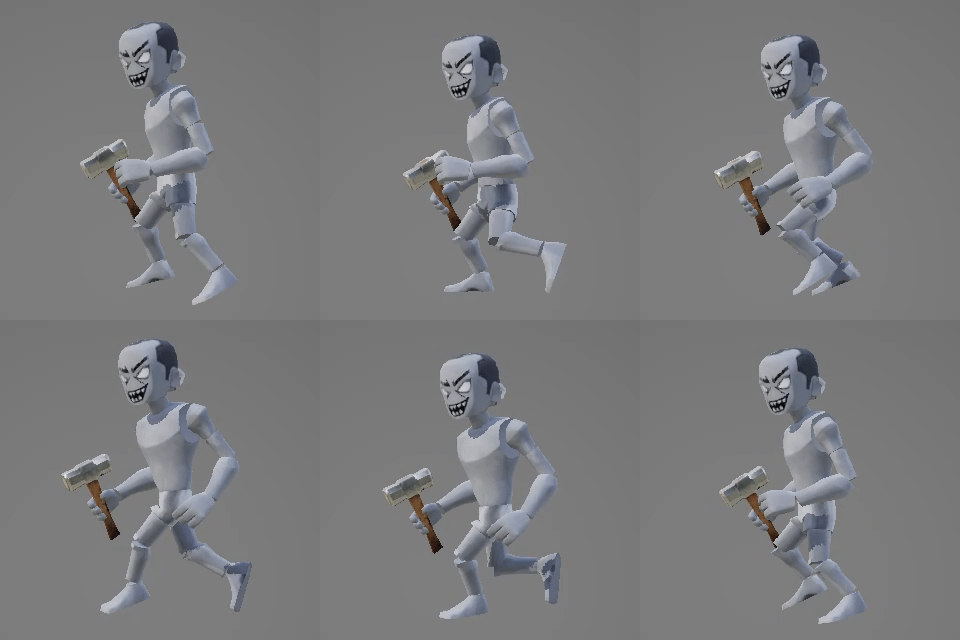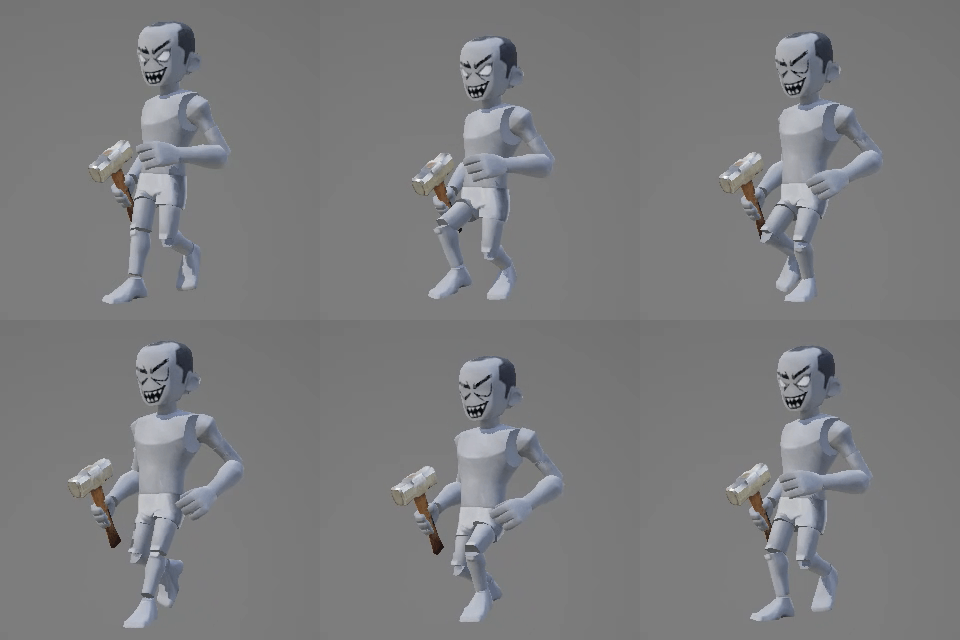

# Introduction to OVERDARE

<figure><img src="/files/cT068rYfSVL2Jwd2o8CM" alt=""><figcaption></figcaption></figure>

## **About OVERDARE**

OVERDARE is a **next-generation User-Generated Content (UGC) platform** that allows creators to produce and share unique and innovative games and experiences. It provides an environment where anyone can easily and conveniently access game creation, with the goal of enabling creators and players to interact and create new content and diverse experiences together.

OVERDARE offers a variety of tools and services to turn creative ideas into reality, supporting users to create their own games and items and **share them with the world**.

## **About OVERDARE Studio**

OVERDARE Studio is the core feature of the OVERDARE platform. It is a powerful tool that allows creators to directly create and manage 3D content. Through OVERDARE Studio, creators can design in-game objects (world assets), build game maps (worlds), and implement **their own unique game environments**. It is designed to be easy to use for everyone, from beginners to experts, enabling anyone to create a creative game environment.

#### **Key Features**

1. **World Creation**: Creators can make backgrounds and objects for their games or register externally created assets in OVERDARE Studio for use.
2. **Scripting Language Support**: Luau script is available to easily and quickly implement game logic.
3. **World Deployment**: Creators can register the worlds created in OVERDARE Studio to play with users worldwide.

#### **Workflow**

* **Creating in OVERDARE Studio**: After creating world assets and worlds in OVERDARE Studio, they can be saved to the server using the “Save to OVERDARE” feature. The content can then be managed in the Creator Hub.
* **Sharing Content**: Once assets and worlds are created and registered in the Creator Hub, they are exposed in the OVERDARE Studio or App, allowing other creators and players to use them.

**Features**

* OVERDARE Studio clearly separates the server and client environments and minimizes replication for enhanced security against client-side hacking and tampering.

OVERDARE Studio simplifies the game creation process, helping creators quickly design and share their unique game environments. With all processes handled within the OVERDARE platform, **from creation to deployment and management**, creators can efficiently produce content and easily provide it to users worldwide.

## OVERDARE Discord Server

Join the [OVERDARE Creator Community Server](https://discord.com/invite/CbxxNTva98) on Discord to actively engage in game development, ask questions, share information, and participate in community activities!


# Get Started


# OVERDARE App

## Brazil, Mexico, and the United States

Please download and install the corresponding version of the app from the link below.\
(Currently, only AOS is supported.)

👉 **Android** : [App Download Link](https://play.google.com/store/apps/details?id=com.overdare.overdare\&pcampaignid=web_share) (Google Play)

## For Other Countries

Currently, the OVERDARE App is only available in **Brazil, Mexico, and the United States**. Therefore, to use the OVERDARE App in regions other than these, you must change your app store account to one of these countries or use a VPN.

If you wish to access it without changing your account’s country or using a VPN, you must **apply for test access**.

### 1. How to Apply for Test Access

👉 [Early Access Program Registration](https://docs.google.com/forms/d/10teOBSrb41V_a9orf4lB7SrwdoQP9xGcM9vFkle8c7M/edit?ts=67ce98f9)

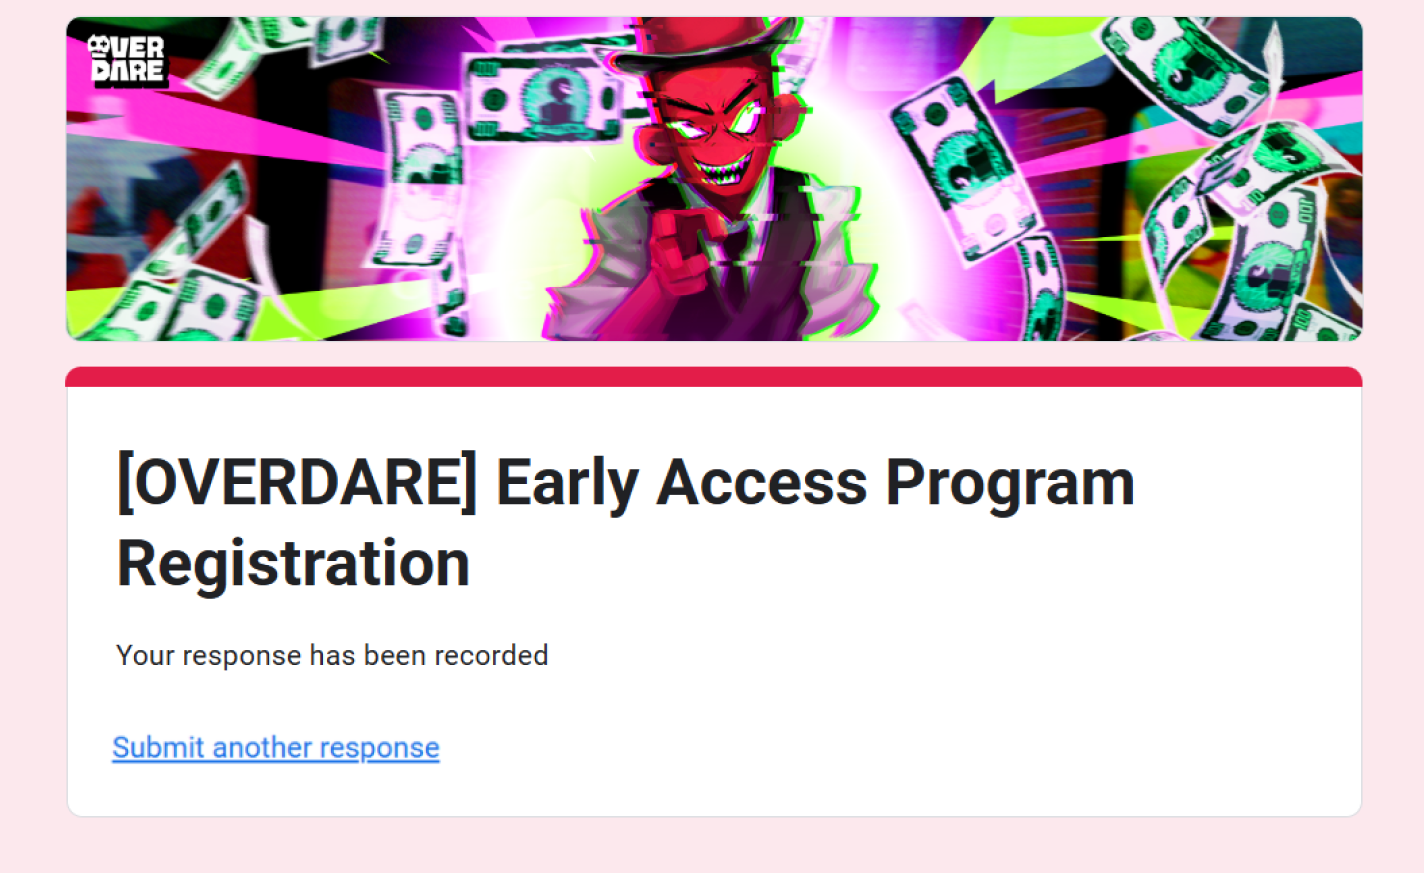
Access the **Early Access Program Registration** page, review the content, enter your **email address**, and click the **submit button**.

If the submission is successful, the following page will be displayed.

<figure><img src="/files/61HPaELbFK2N1xrdw6bj" alt=""><figcaption></figcaption></figure>

### 2. Check Test Access Results and Install the OVERDARE App

If your application is approved, an **approval confirmation email** will be sent to the email address you provided.\
(Approval may take some time.)

After receiving the confirmation email, scan the **QR code corresponding to your device** from the image below to install the **OVERDARE App** and start using it.

(For iOS, scanning the QR code with TestFlight installed will take you to the OVERDARE App.)

<figure><img src="/files/HUb1cJS8biAp2YiAwGM0" alt=""><figcaption></figcaption></figure>

If your application is approved but you cannot access or run the OVERDARE App, check the following:

* Verify that the email you applied with is correct.
* Clear the OVERDARE App’s storage, data, and cache to reset the app, then try running it again.
* If TestFlight fails to run on iOS, update the TestFlight software.


# OVERDARE Studio

## Installation Guide

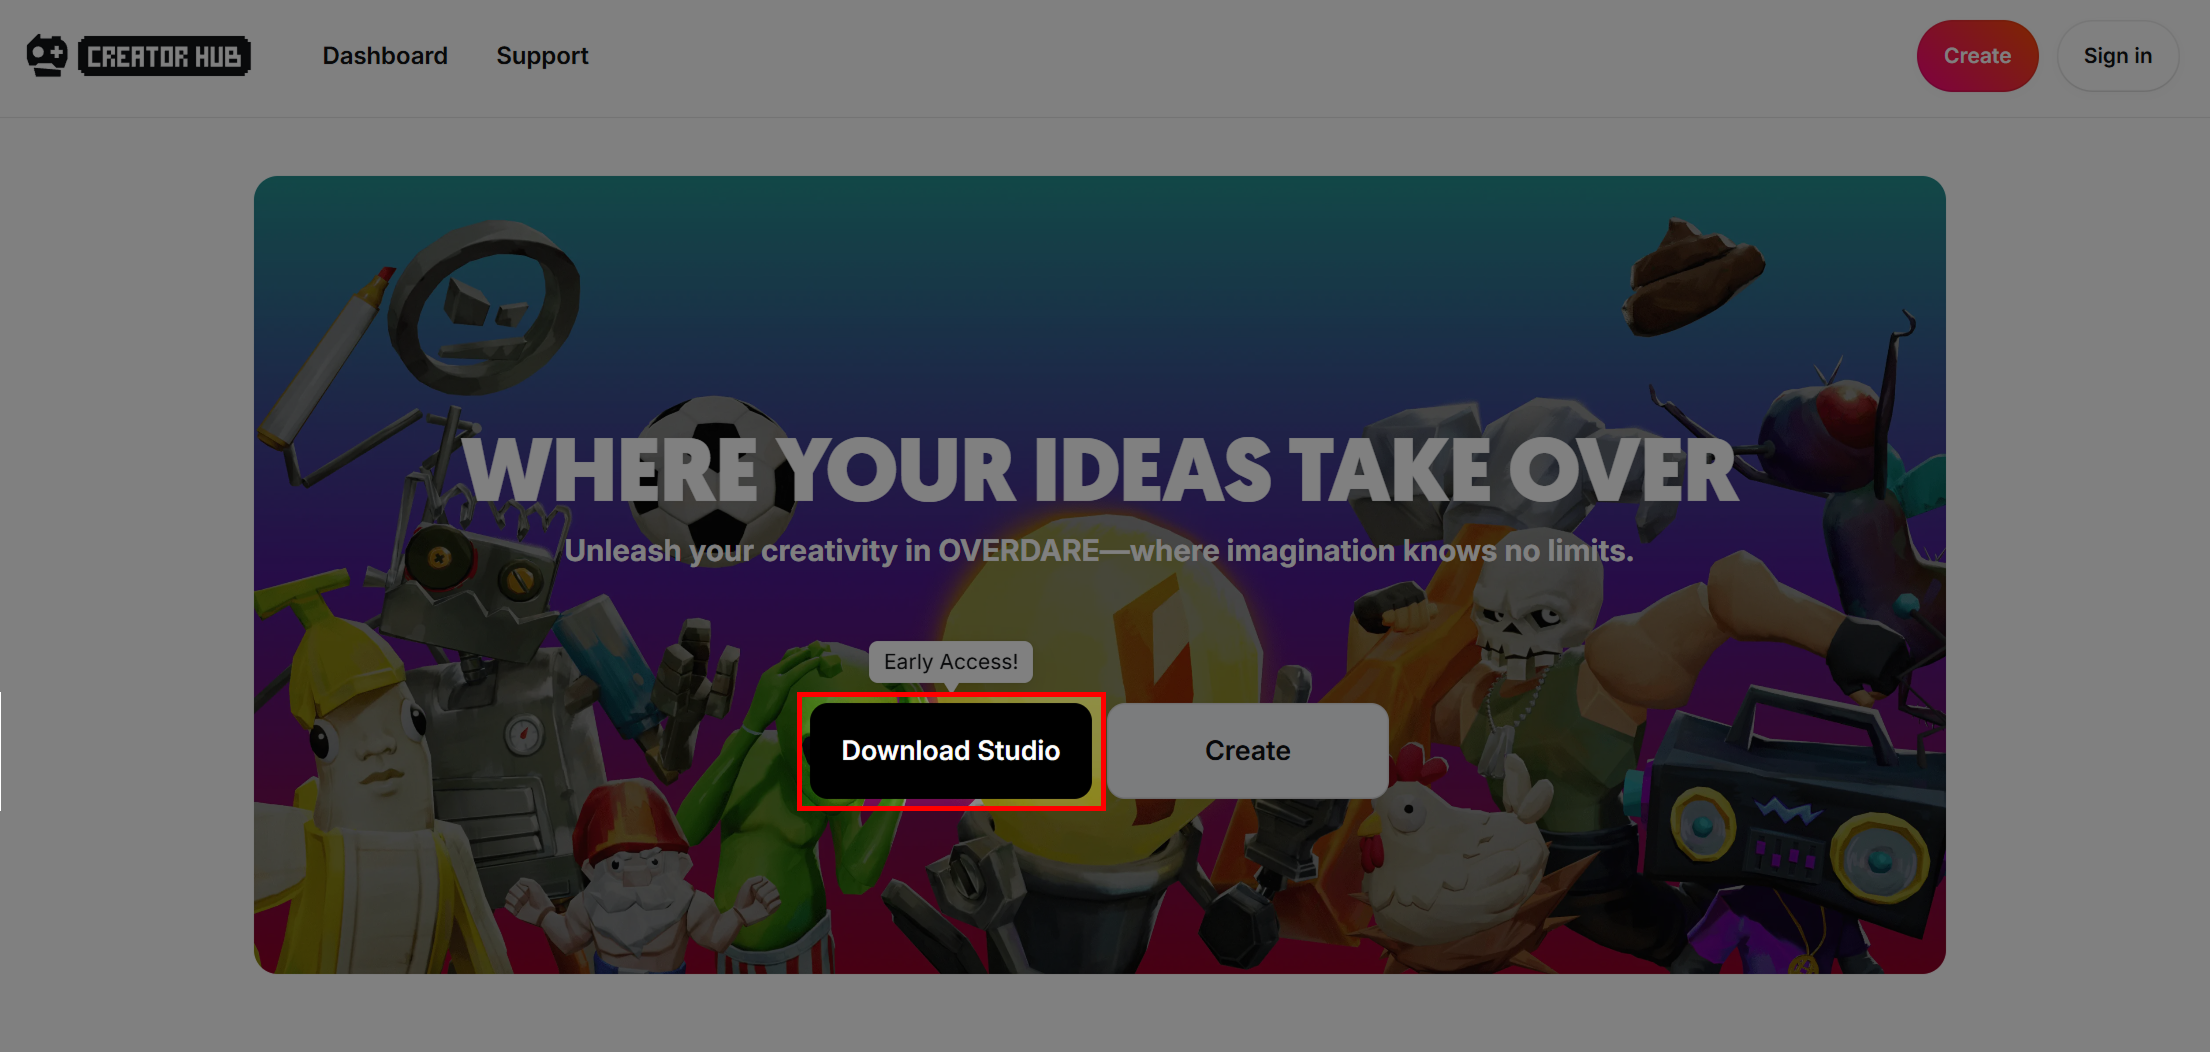
1. Go to [**Creator Hub**](https://create.overdare.com/).
2. Click the **Download Studio button** in Creator Hub.\
   (You'll need an Epic Games account to install OVERDARE Studio.)

   <figure><img src="/files/jkw3szbaVAhqbl0flvN9" alt=""><figcaption></figcaption></figure>
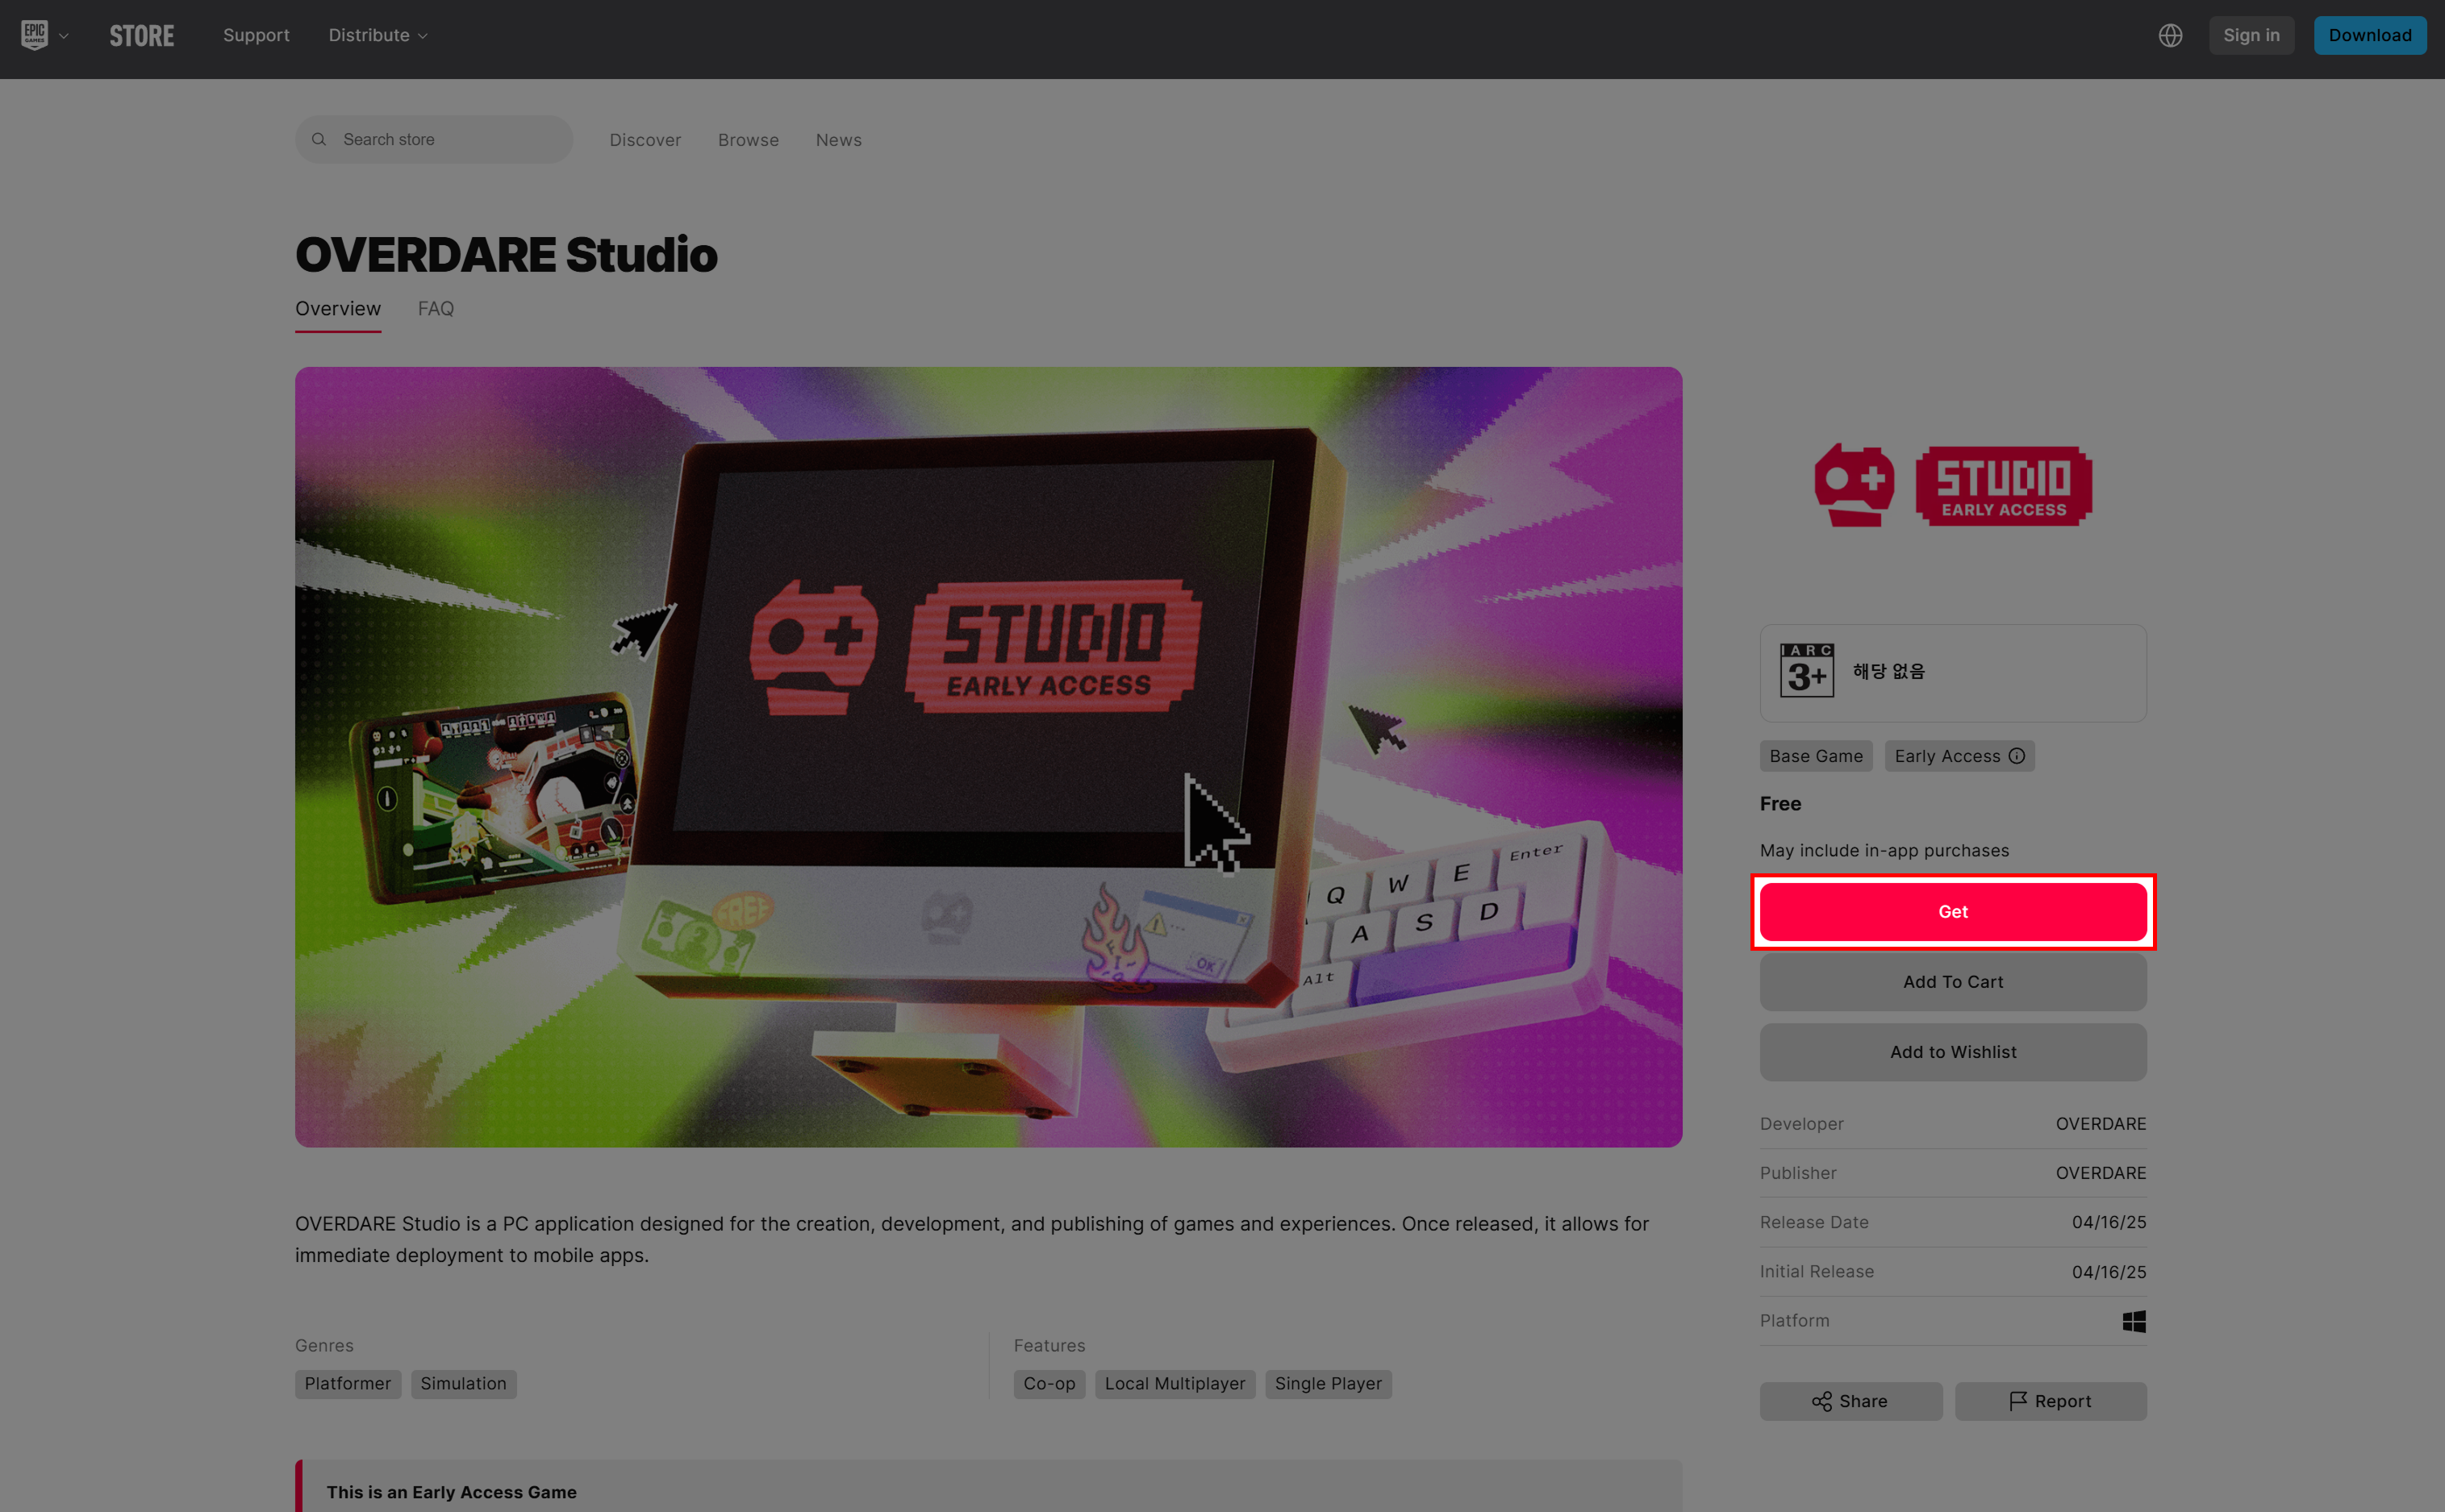
3. When you enter the Epic Store, click the **Get button**.

   <figure><img src="/files/tDUsNMujC1SZXGiPAGik" alt=""><figcaption></figcaption></figure>
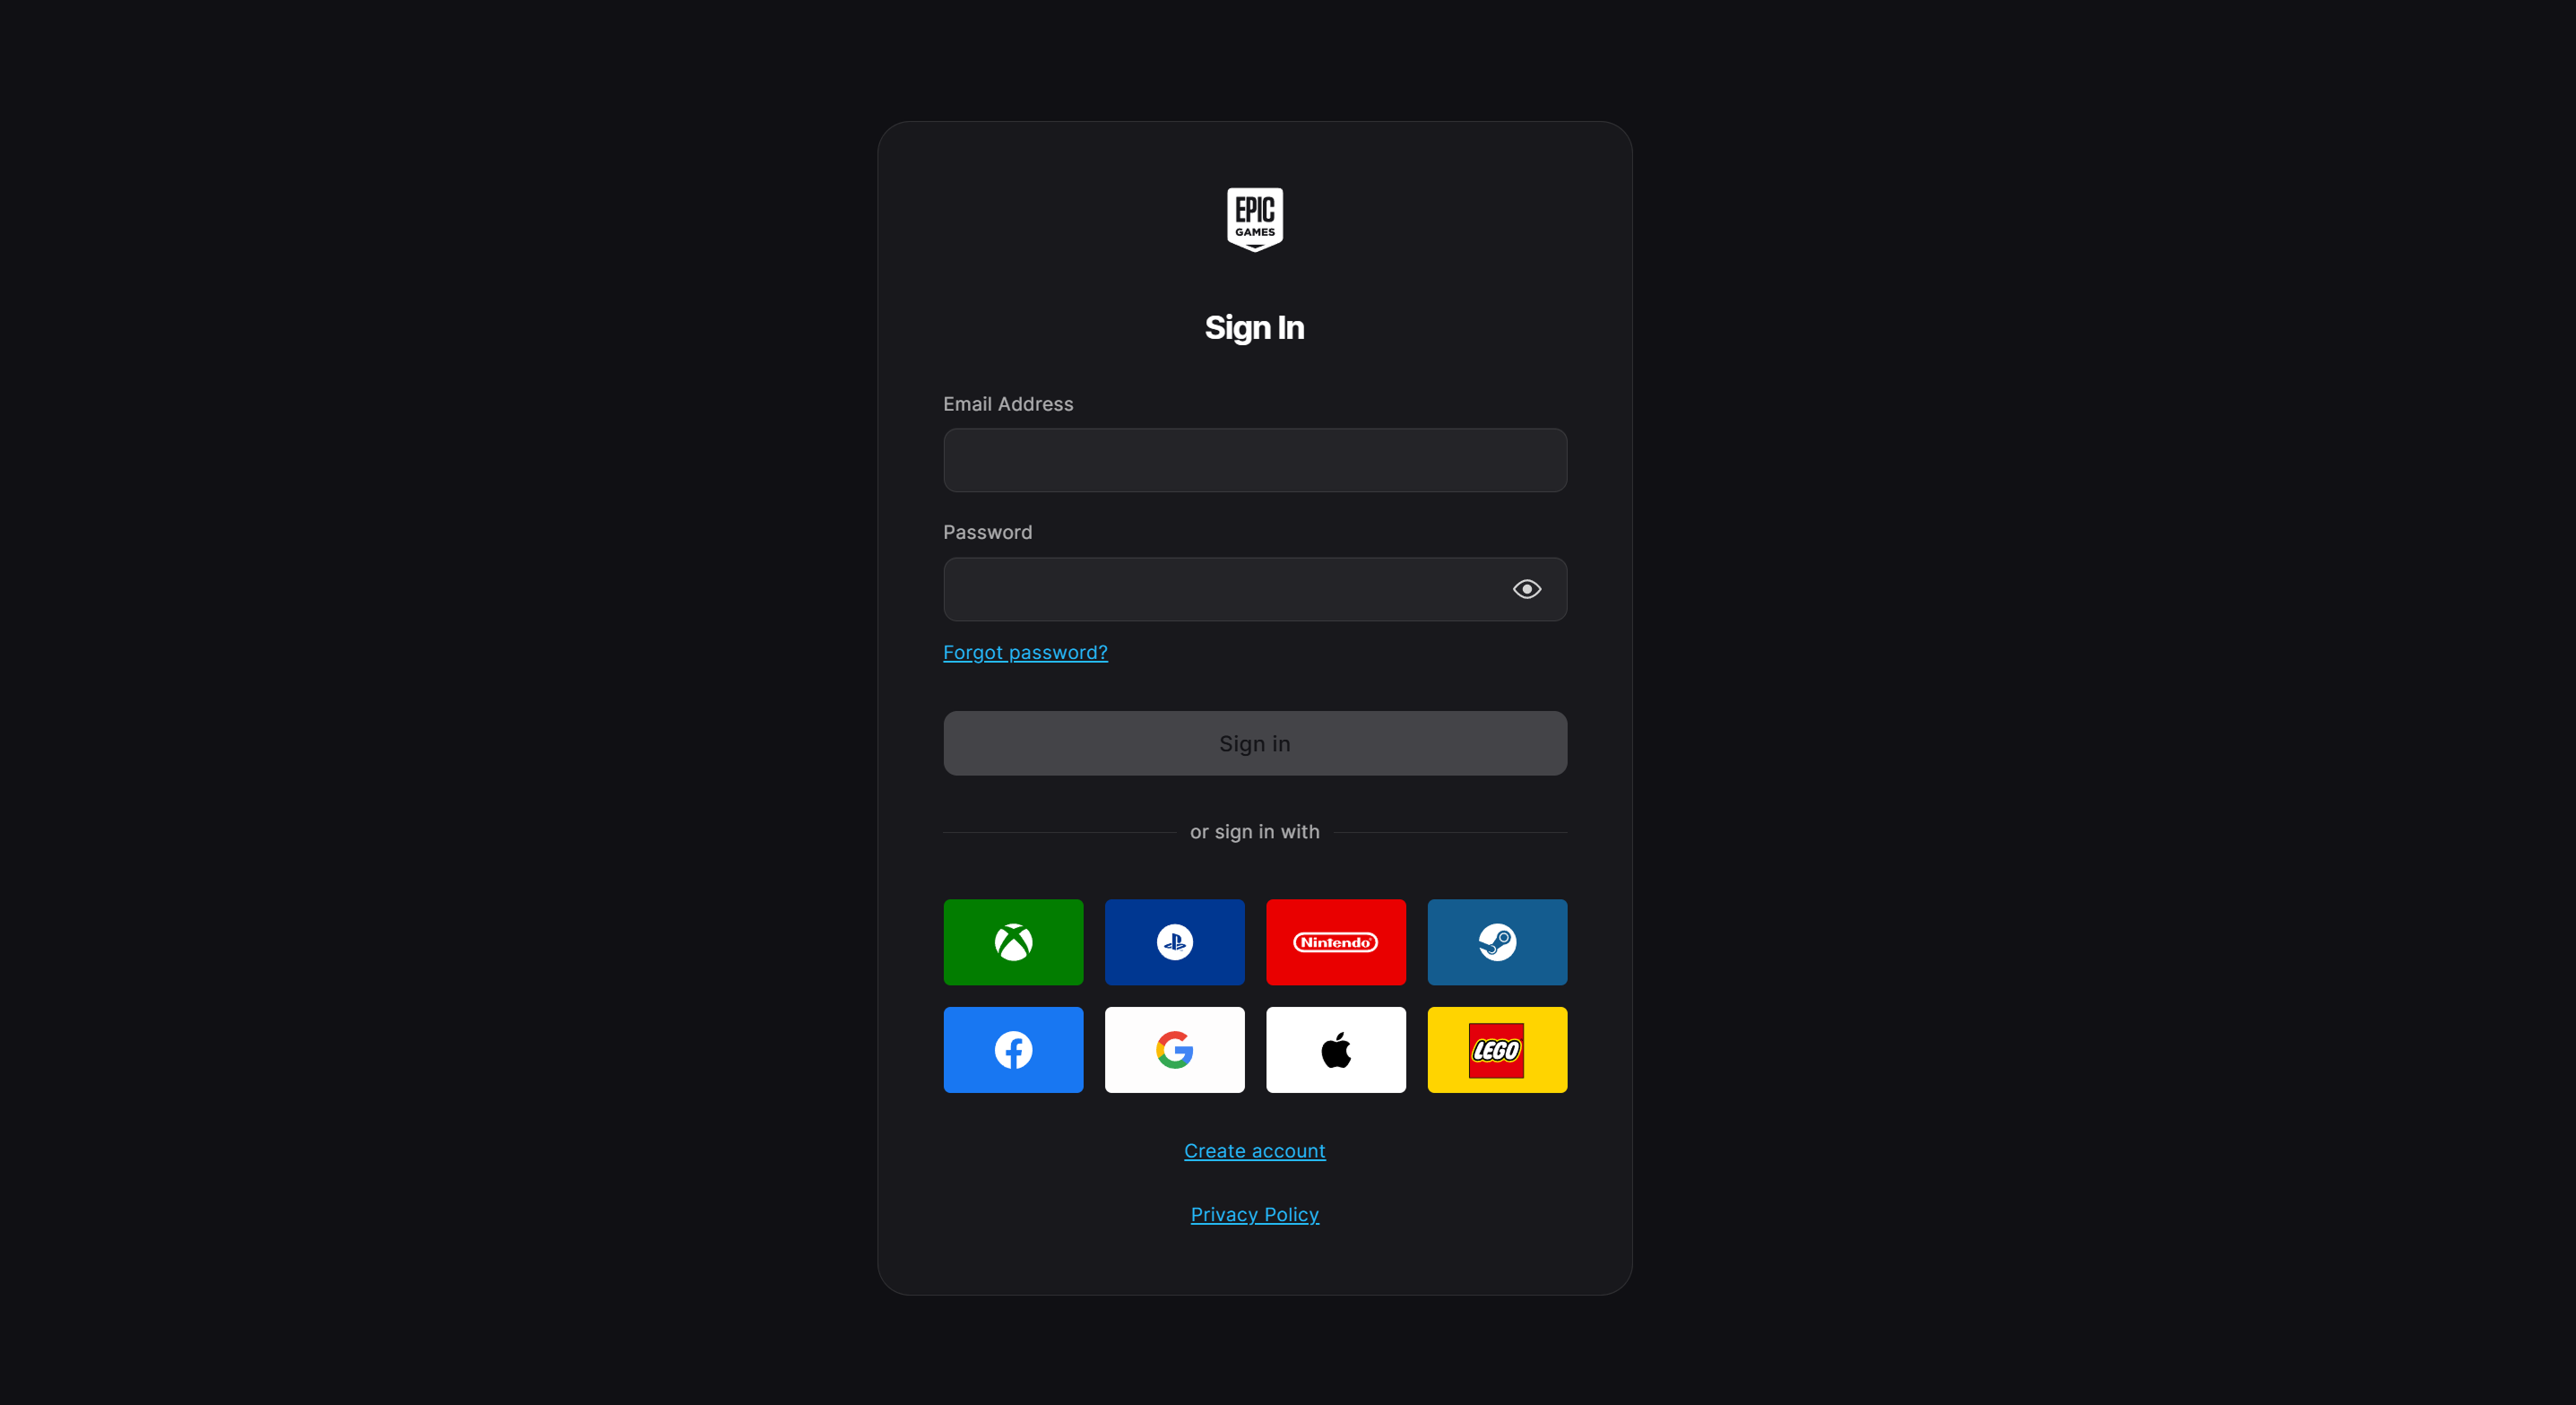
4. Login to your Epic Games account.\
   (If you are not already registered, you must create an account.)

   <figure><img src="/files/2ehMyD8xpmeKd1c1pHx7" alt=""><figcaption></figcaption></figure>
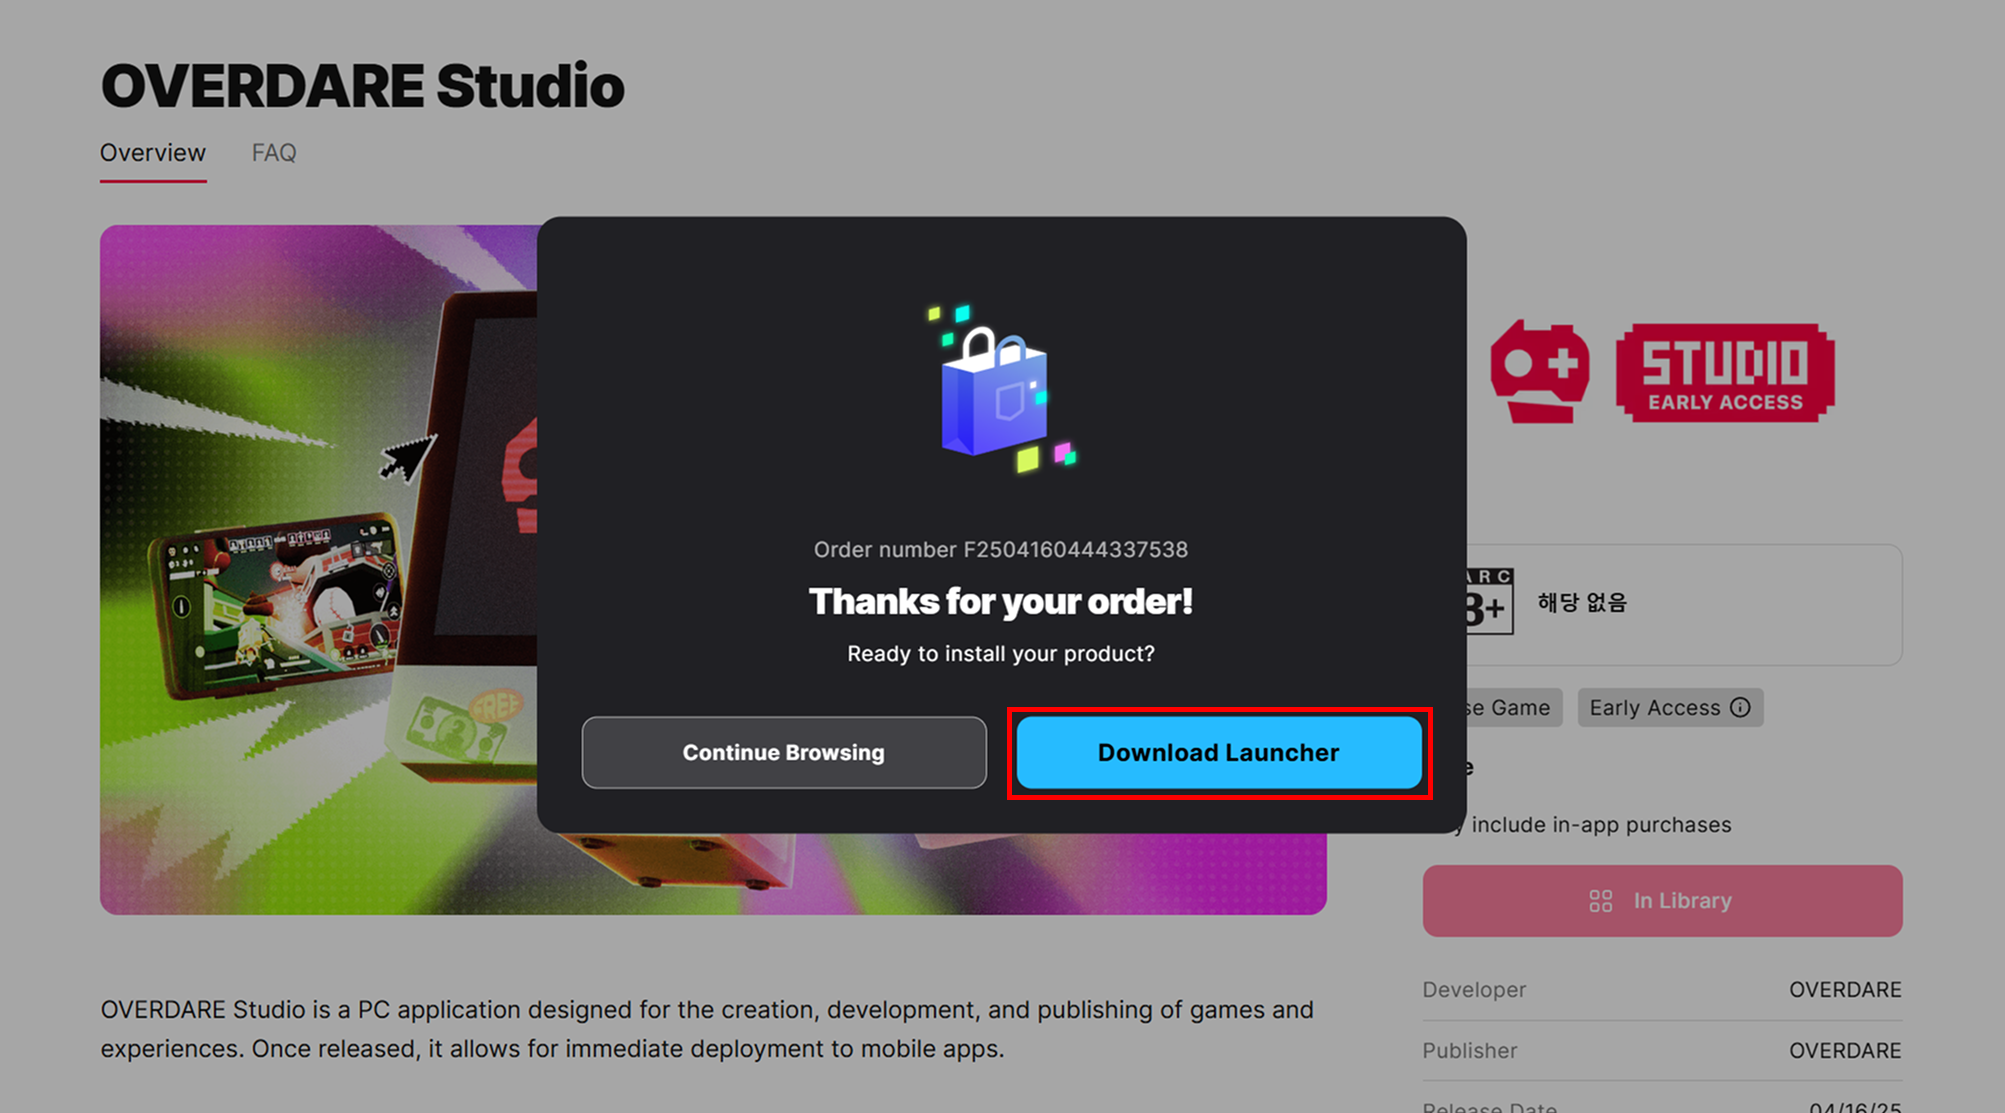
5. Once you log in, your order will be processed. (OVERDARE Studio is **free**, so don’t worry!)\
   When your order is complete, click the **Download Launcher button** from the results screen, or download the Epic Game Launcher from the [Epic Games page](https://store.epicgames.com/).\
   (Wait until the Epic Game Launcher download is completed in your browser’s download history, then run and **install** the Epic Game Launcher.)

   <figure><img src="/files/BiYs5hDa0mJyIXmJHSEE" alt=""><figcaption></figcaption></figure>

   1. <mark style="color:$danger;">If you encounter any issues, please try switching to a different web browser such as Chrome, Edge, or Safari and attempt again. Due to a current bug in the Epic Store, the process may not complete normally.</mark>
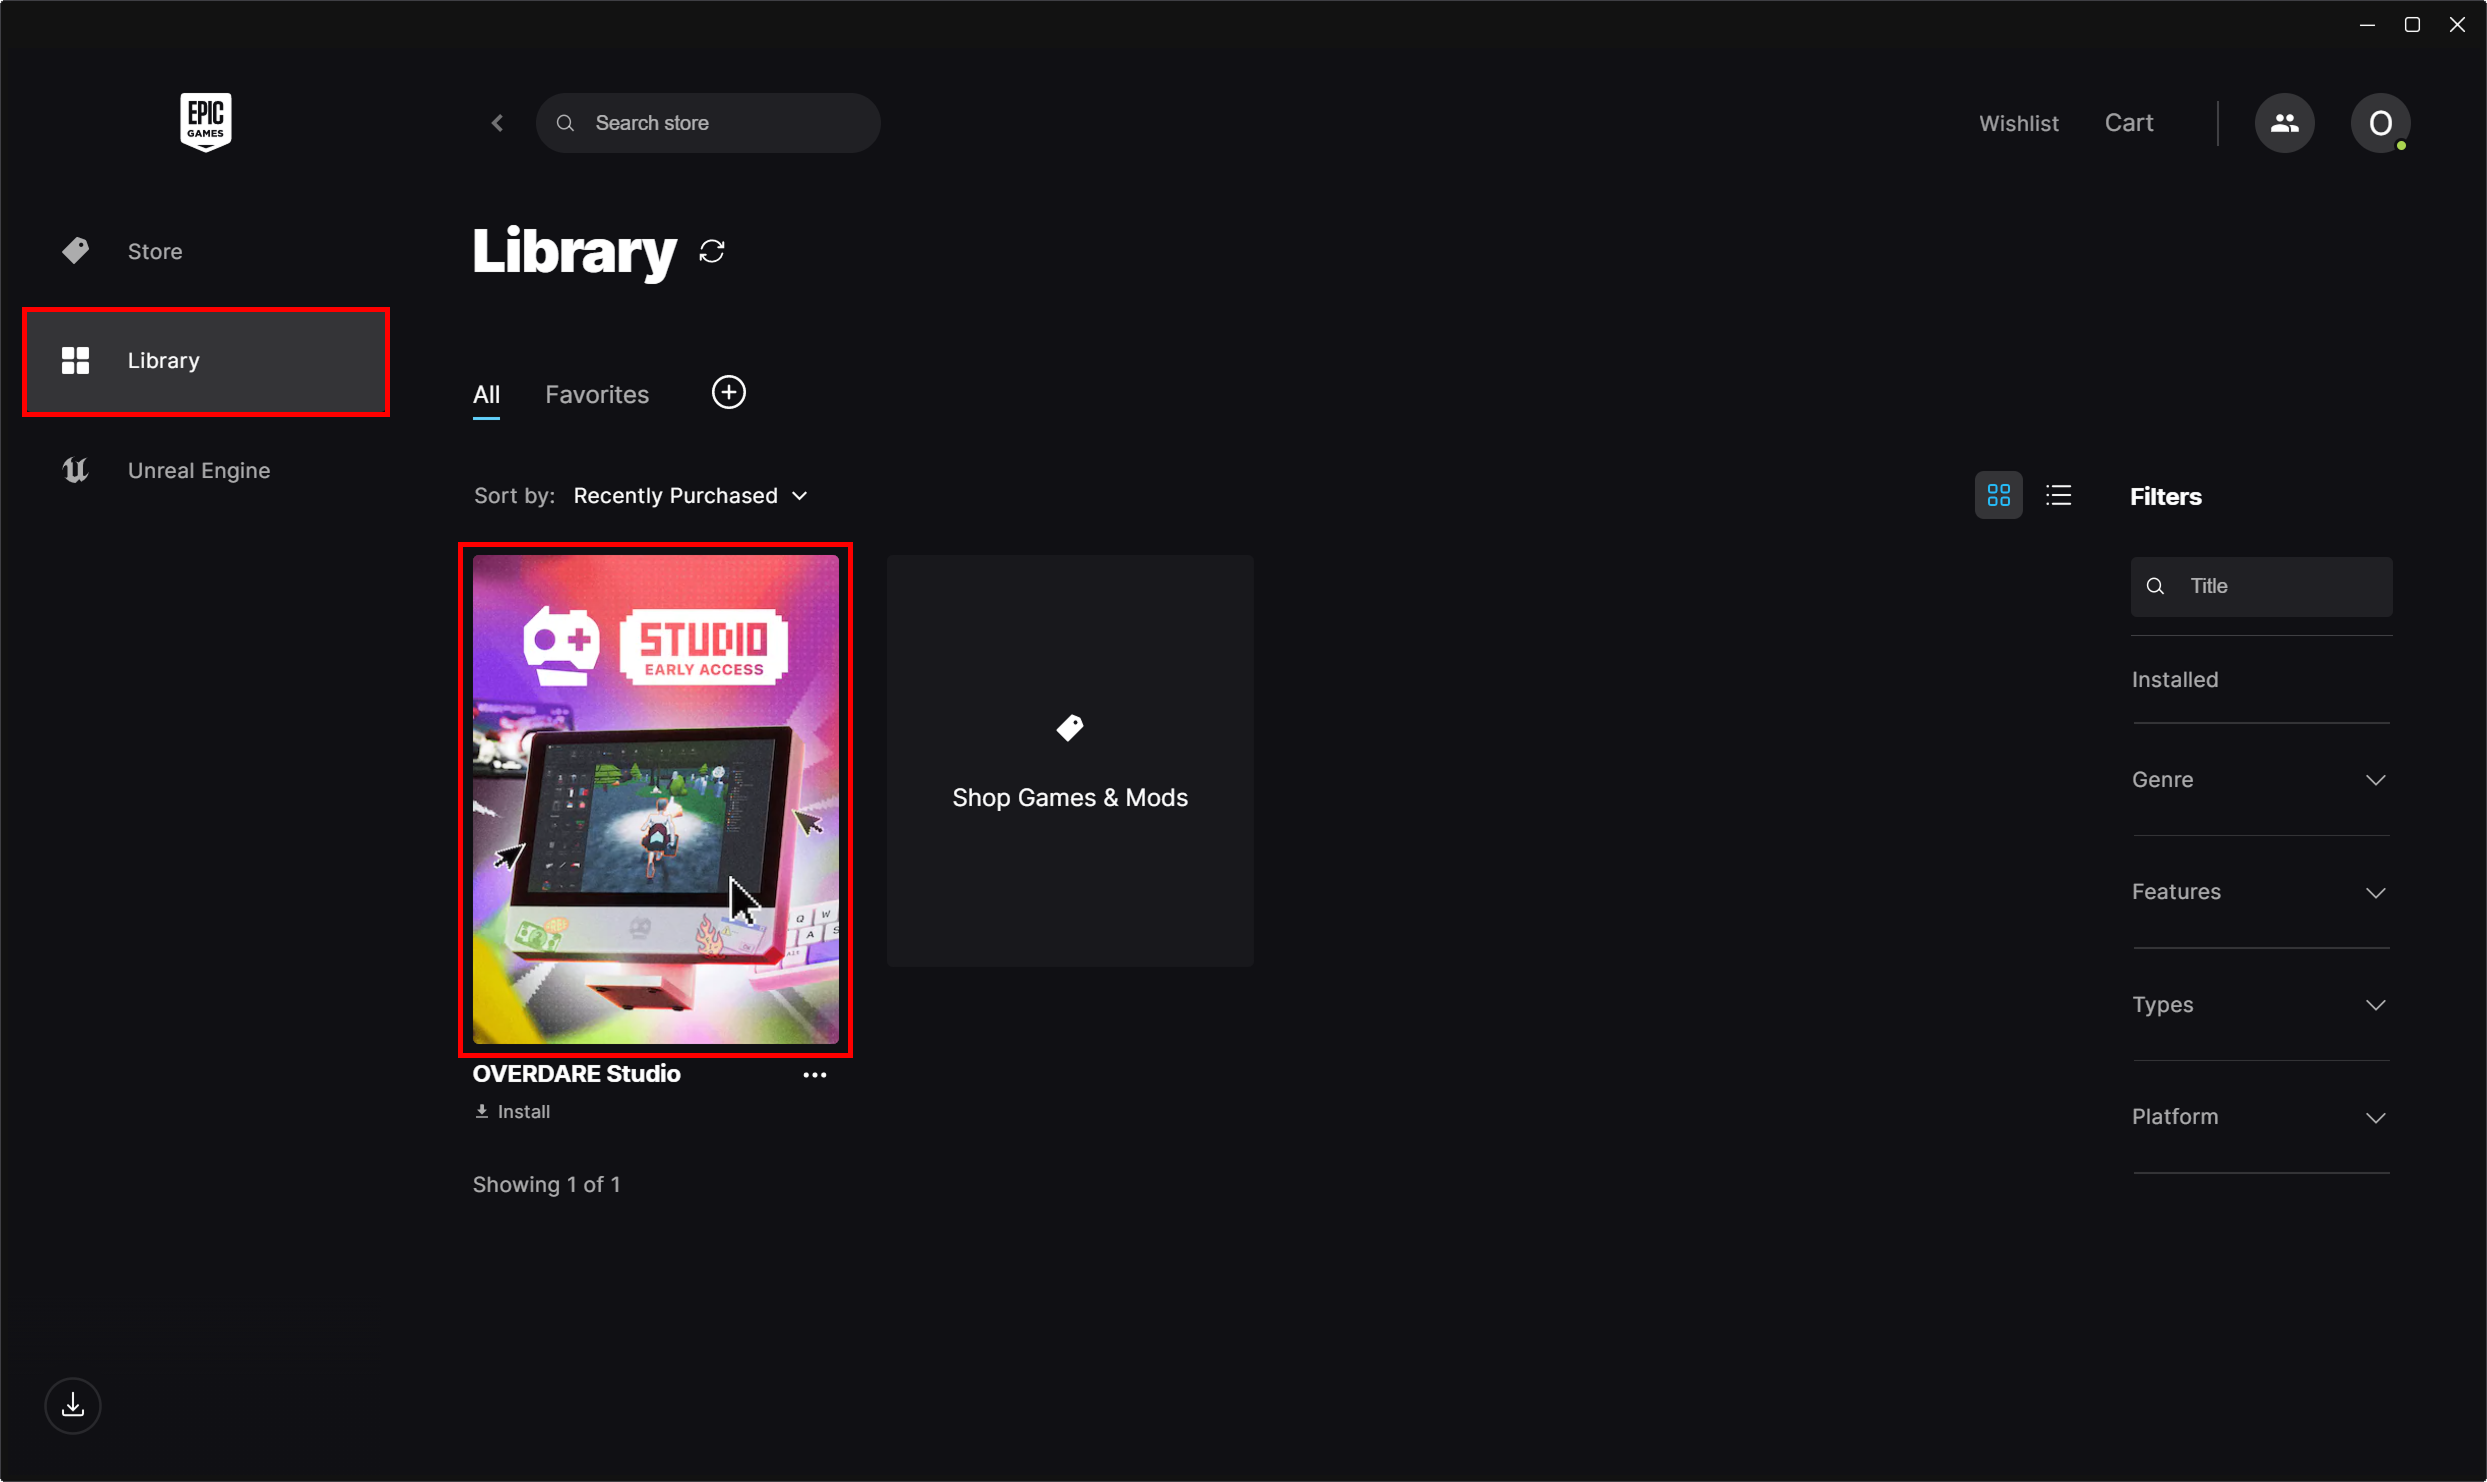
6. Once it is installed, run the **Epic Game Launcher**, and click the **OVERDARE Studio thumbnail** in the **Library tab**.

   <figure><img src="/files/zvpEf1SVl4H3nALtIjig" alt=""><figcaption></figcaption></figure>
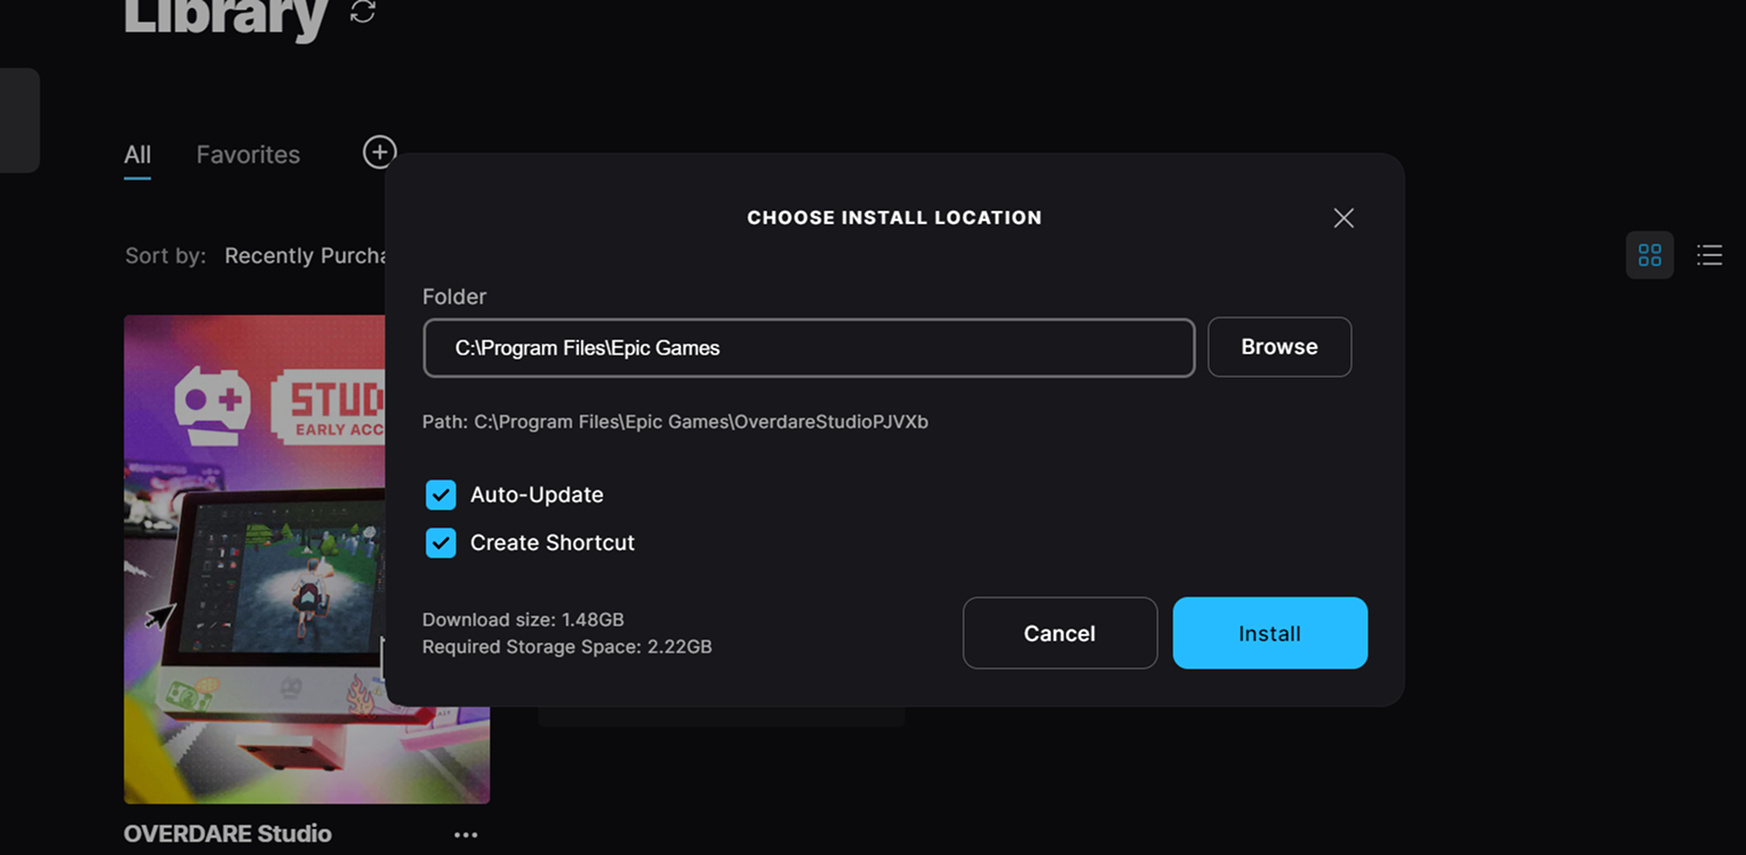
7. Save OVERDARE Studio to the **installation path**, and click the **Install button**.

   <figure><img src="/files/2Zeerq6lbYuTNzgSXg9h" alt=""><figcaption></figcaption></figure>
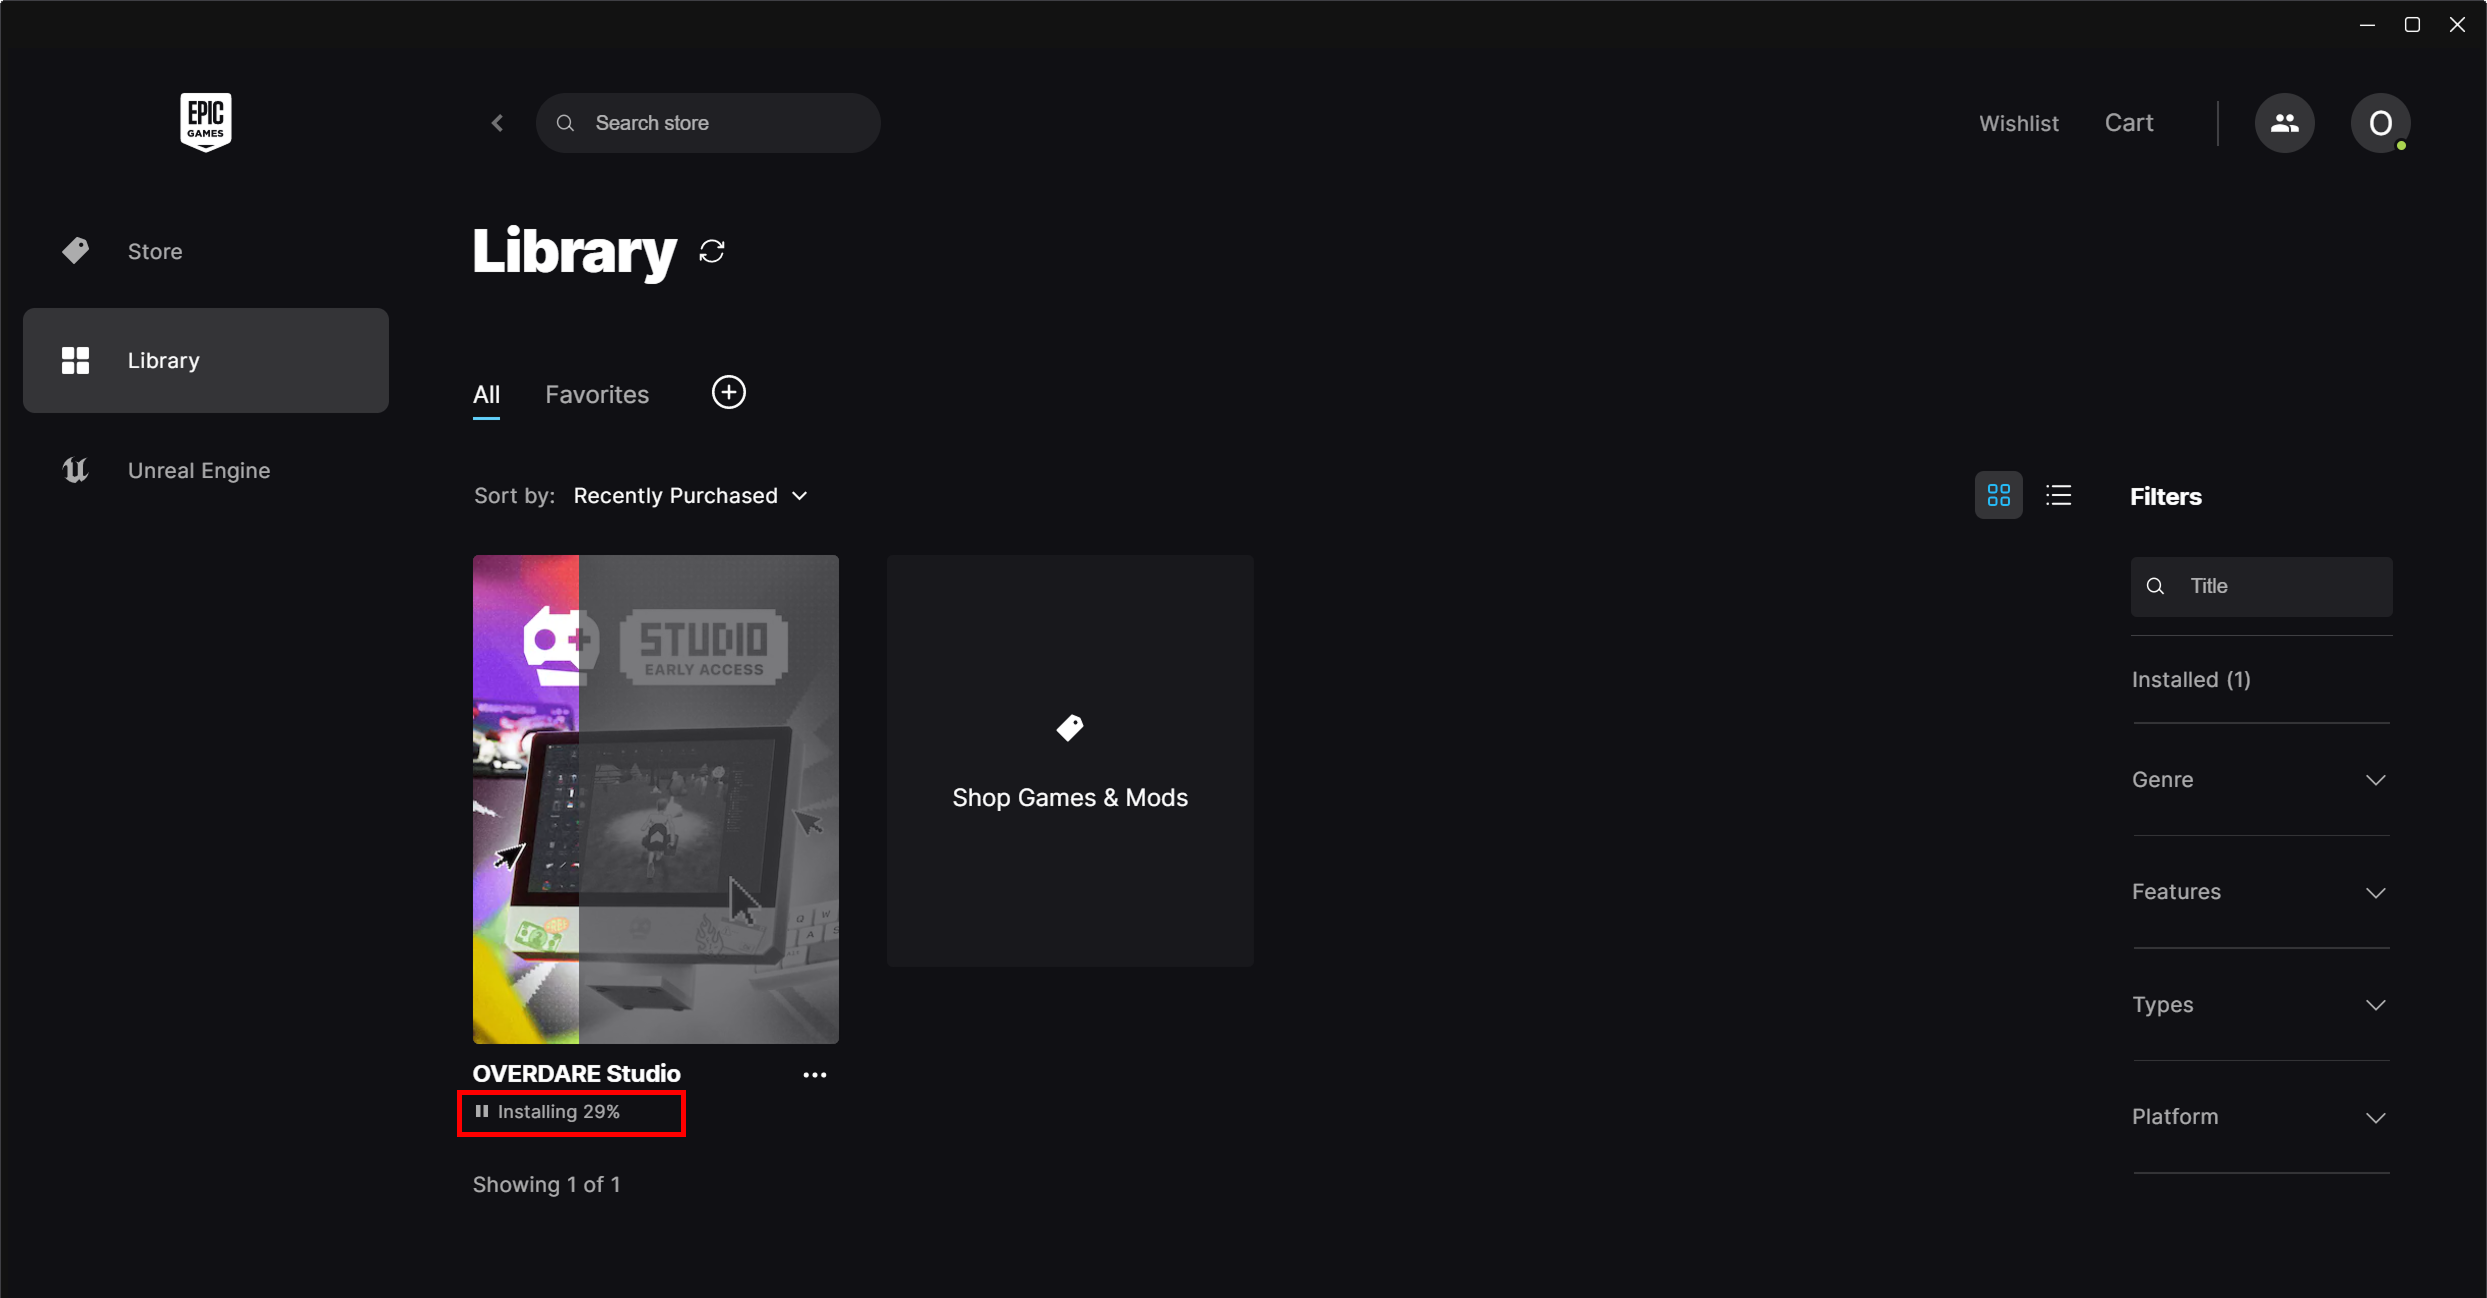
8. When the installation starts, the **progress** will appear under the OVERDARE Studio thumbnail.

   <figure><img src="/files/tk2JTM97QpgoJLXlK8mb" alt=""><figcaption></figcaption></figure>
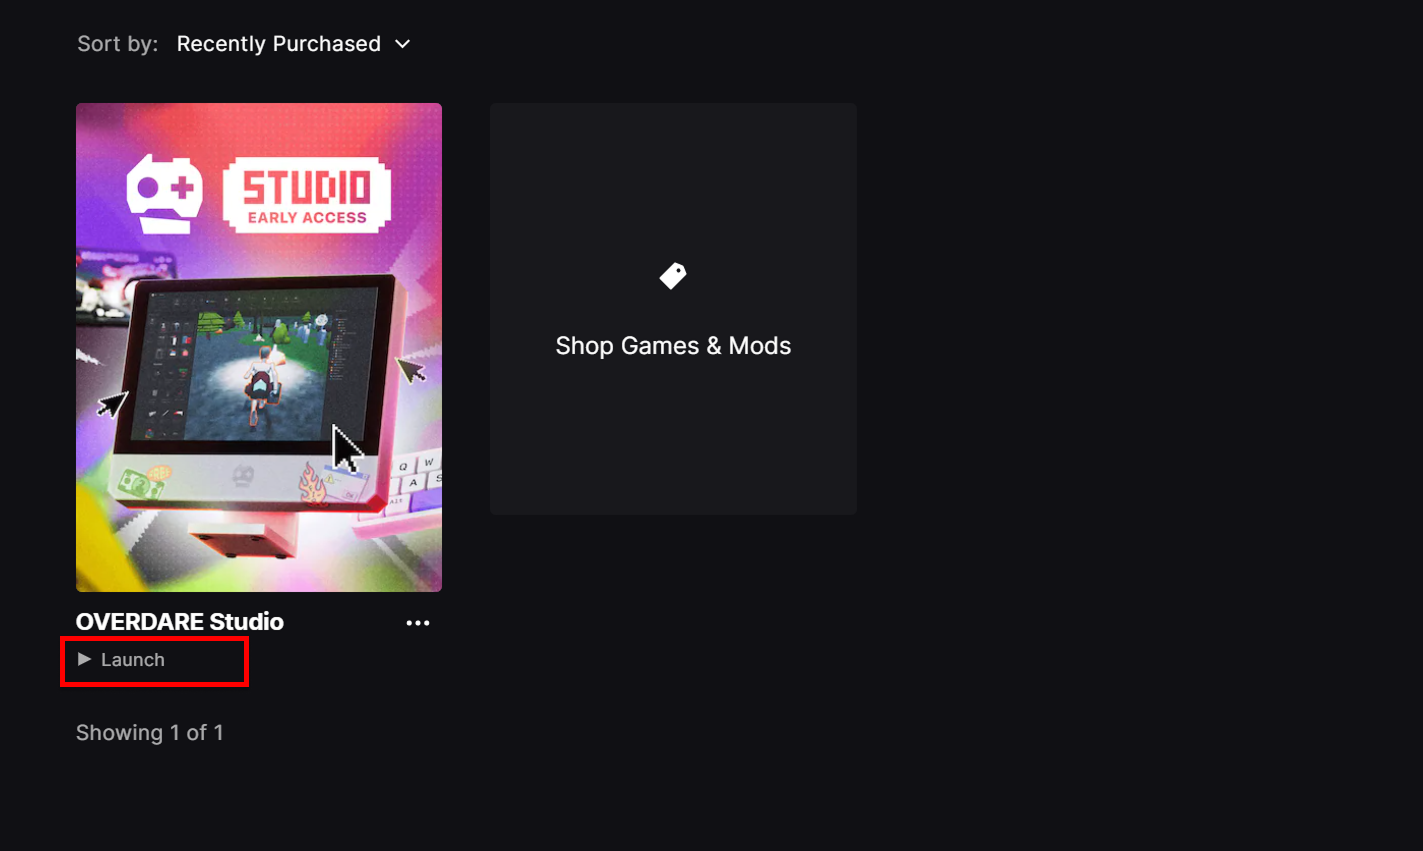
9. When the installation is completed, a **Launch** icon will appear. Now click the **OVERDARE Studio thumbnail** to run the program!

   <figure><img src="/files/NAGh7Rgi8FdnJ0YNG2ZP" alt=""><figcaption></figcaption></figure>
10. When you run OVERDARE Studio for the first time, you may be asked to confirm the **URL registration** and **registry**. Please allow all.\
    ![](/files/Y89dsoIreBE34BStVsgk)
11. When OVERDARE Studio is running, click the **Sign In button** and login to OVERDARE Studio.\
    (If you do not have an account, please create an account from the [**Creator Hub**](https://create.overdare.com/) before logging in.)

    <figure><img src="/files/YfS0F2epY7zozrP3Zclc" alt=""><figcaption></figcaption></figure>

    ❗ **Tip**: If you’re **unable to login** to the website, **check whether pop-up blockers are enabled** in your\
    internet browser.\
    \&#xNAN;*(*&#x43;hrome: *Settings → Privacy and Security → Site Settings → Activate Pop-ups and Redirects)*
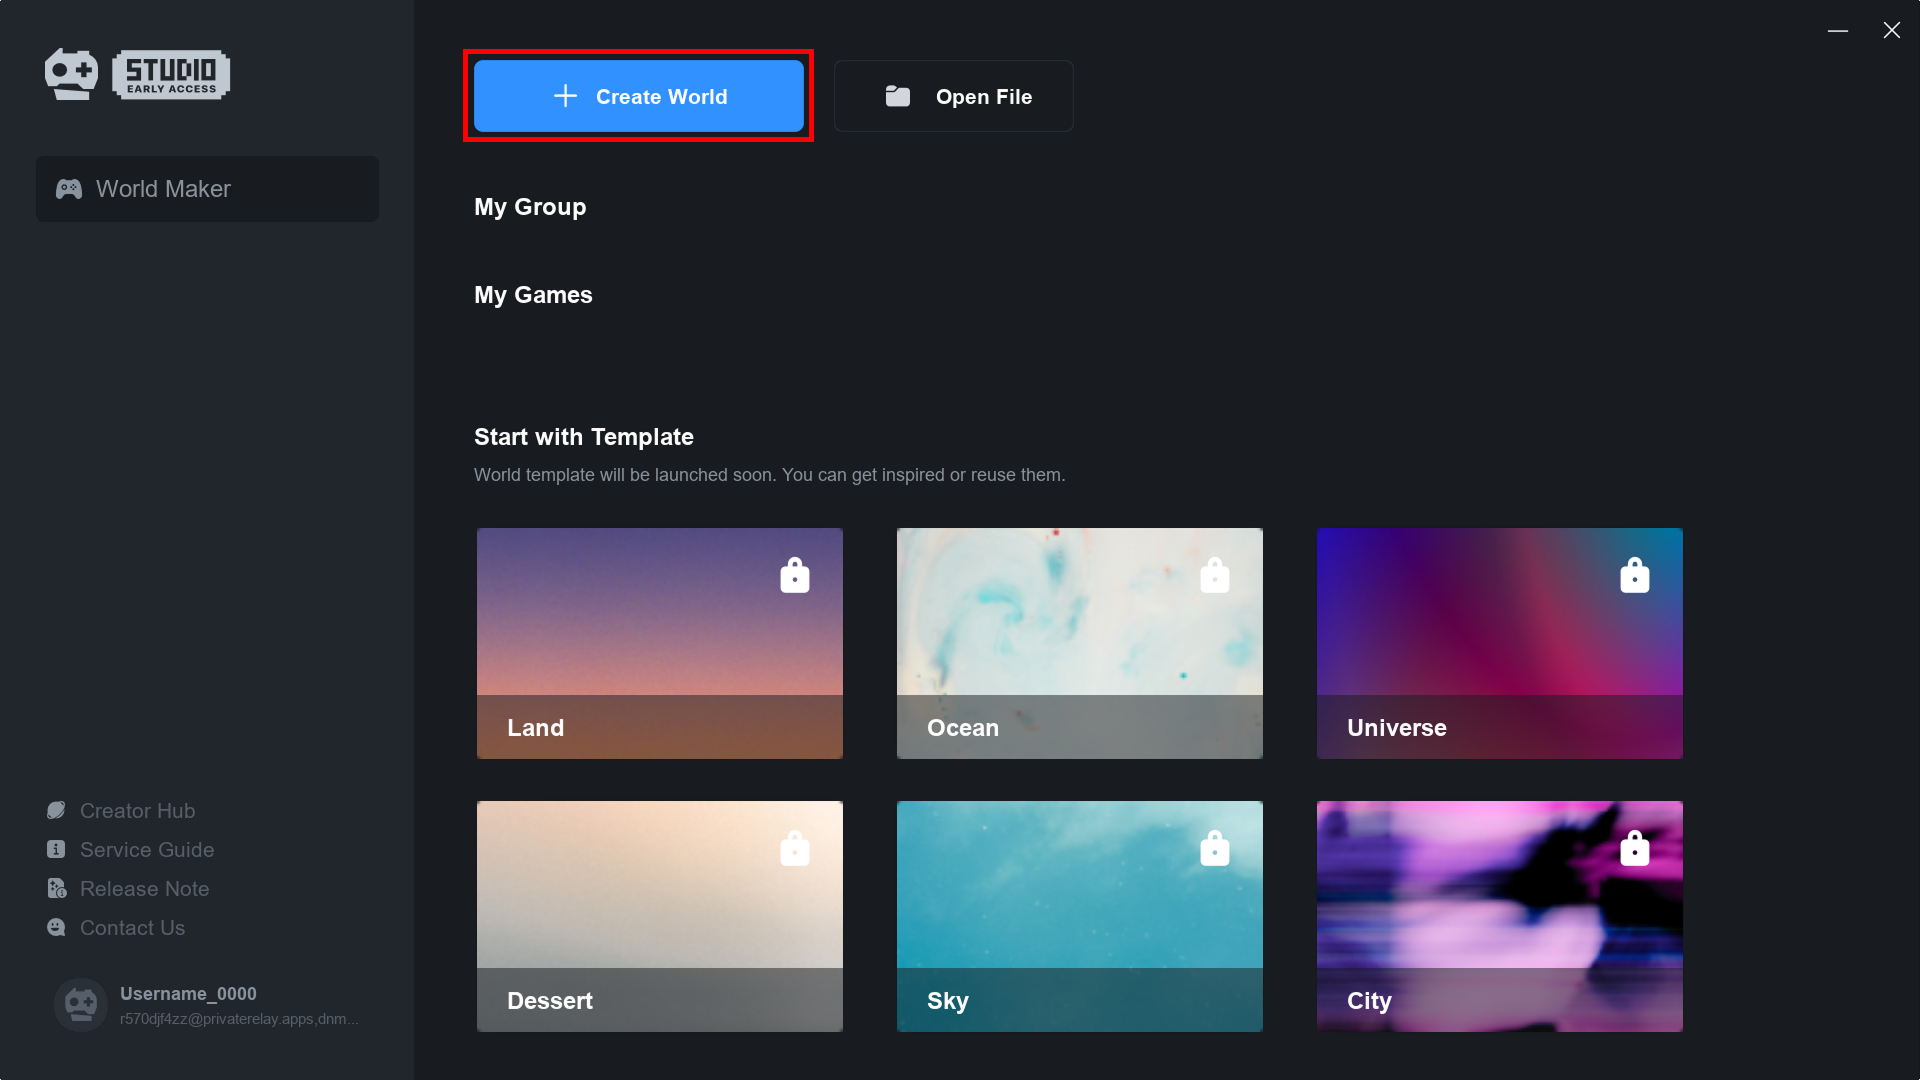
12. To create a new project, click the **Create World button**.

    <figure><img src="https://stackedit.io/.gitbook/assets/install-studio-3.png" alt=""><figcaption></figcaption></figure>

    <figure><img src="/files/LQW0wLSLG5iEF0ZwGSAb" alt=""><figcaption></figcaption></figure>
13. Create a **new folder** to save your new project file and save.
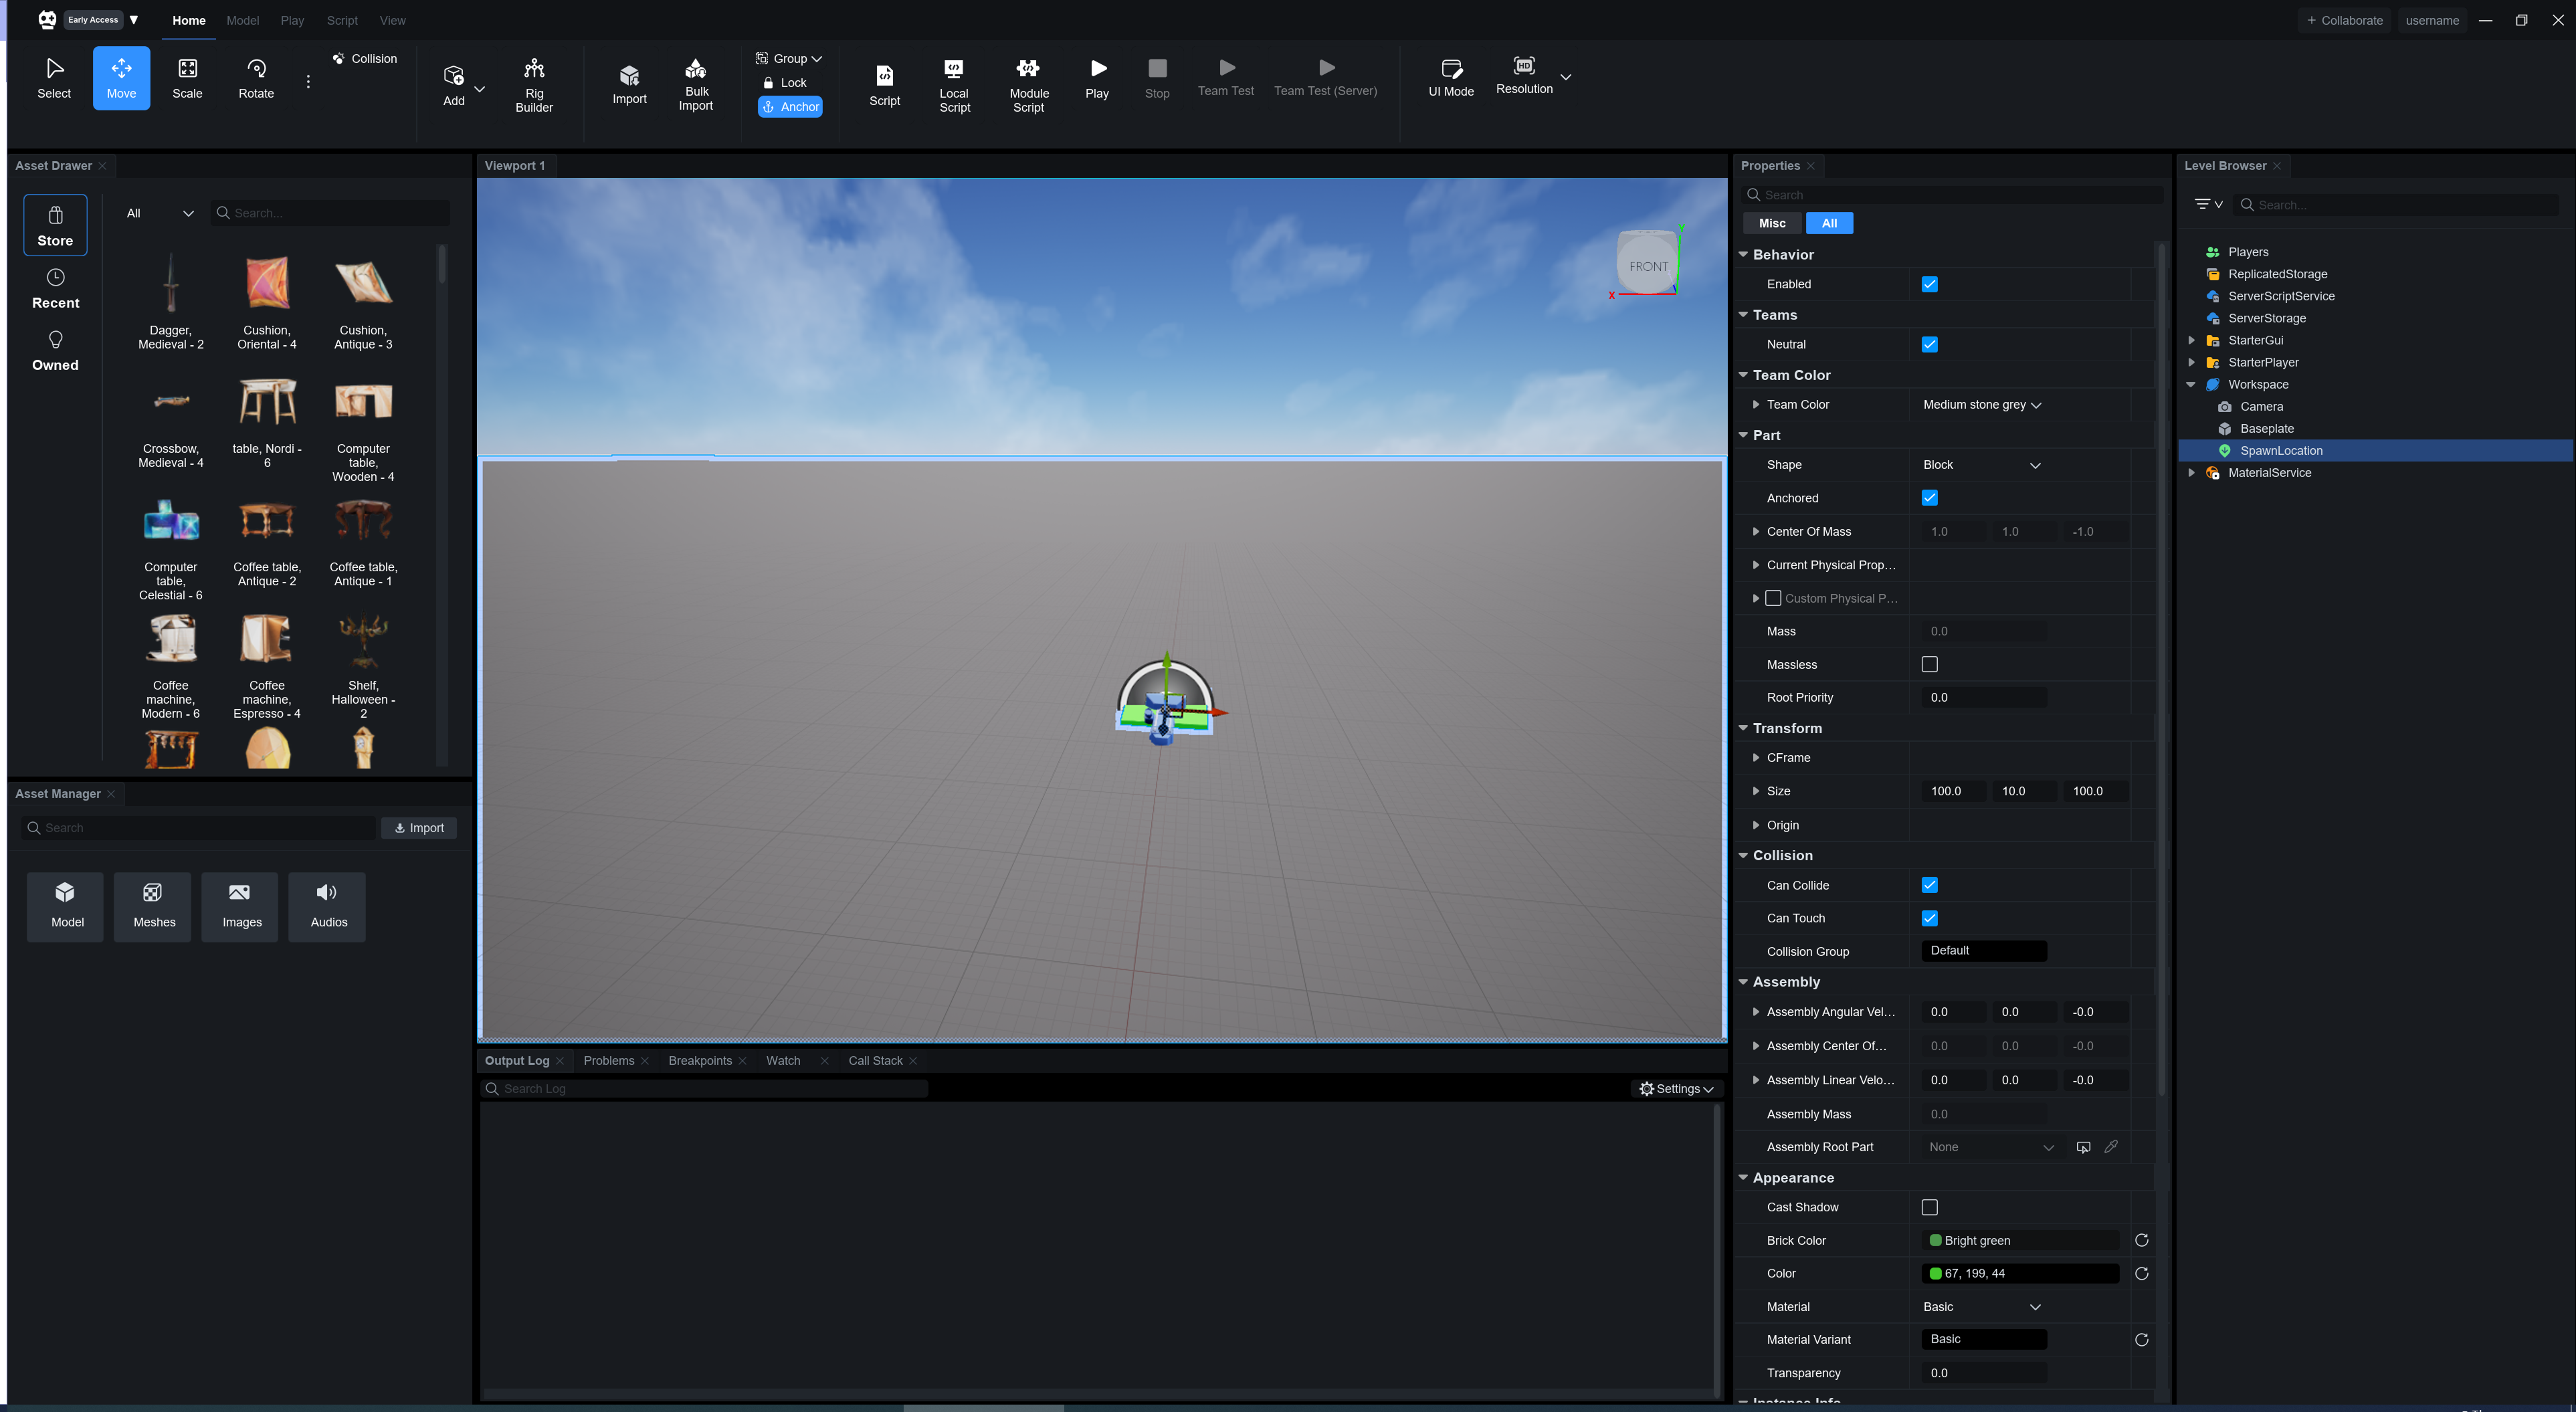
14. Now you can bring the game of your imaginations to life!

    <figure><img src="/files/e3IdGW7ZVfsv924rd2n7" alt=""><figcaption></figcaption></figure>


# Policy


# Community Guidelines

OVERDARE is a mobile interactive UGC platform for creating, expressing, befriending, and playing. OVERDARE is committed to creating a mature space for users of different nationalities, races or religions to create and play safely and joyfully.

The OVERDARE community guidelines are designed to induce OVERDARE users to have fair and free interactions in an environment that is safe, productive, and respectful.

The OVERDARE community guidelines apply to all forms of communication, content creation, profile composition, and activities within the app, covering all services provided by OVERDARE.

Violation of these guidelines is grounds for content deletion, permanent account bans, and other punitive actions.

## **Threats to the Safety of Minors**

* Grooming, exploitation, and preying upon minors.
* Sexual treatment of minors.
* Sexual communication with minors, including the demand for sexually explicit materials from minors or sharing of sexually explicit materials with minors.
* Sharing of, requests for, and discussions of materials on sexual exploitation of minors.
* Sharing of content or communication on violence against and abuse of minors.

\*minor: Persons Aged 13 to 19 or in Another Age Range of Minors as Defined in a Particular Service Region.

## **Content on Sexual Behavior or Sexually Explicit Materials**

* Sexual or seductive gestures or communication.
* Pursuit of or requests for unwanted online relations, and seduction intended to establish unwanted online relations.
* Sexual communication, including the demand for sexually explicit materials or sharing of sexually explicit materials.
* Descriptions of, allusions to, or expressions of sexual activity.
* Displaying, sharing, or requesting content or links related to prostitution or sexually explicit materials.
* Sexual harassment, and actions or content involving the disclosure of sexual orientation or preferences, or threatening such actions or content.

## **Violent Content**

* Content on domestic violence.
* Content on physical or sexual violence.
* Content on animal cruelty and torture.
* Realistic depictions of bleeding, graphic violence, or death.
* Content on the threatening or promotion of killings, injuries, or violence.
* Glamorization or promotion of violent crimes or communication.
* Content on terrorism or extremism.(Examples: Depictions of attacks, leaders, icons, slogans, manifestos, flags, strategic plans, recruitment, fundraising, encouragement, promotion)

## **Content Expressing Abuse and Ostracization**

* Abusive communication directed at individuals or family members, including profanities, slander, and ridicule.
* Threatening to cause injuries in real life. Threatening to make false reports.
* Content amounting to ridicule or abuse directed at a user or group.
* Behavior or content amounting to manipulation, threats, blackmailing, or demands intended to force the sharing of personal information or account information.
* Behavior or content amounting to unjustified attacks on a certain user within a certain world or content.

## **Content on Suicide or Self-harm**

* Descriptions of methods of suicide or self-harm.
* Romanticization, promotion, or depictions of instances or methods of suicide or self-harm.
* Manipulation into engaging in dangerous activities in real life.

## **Content on Bigotry Toward Socially Sensitive Issues**

* Content on bigotry toward certain races, age groups, countries, religions, political beliefs, etc.
* Content on bigotry toward certain genders, sexual identities, etc.
* Content on bigotry toward certain diseases, physical conditions, mental/physical disabilities, etc.
* Content on bigotry toward certain classes, occupations, etc.

## **Content on Illegal Activities or Controlled Goods or Services**

* Drugs, pharmaceuticals, controlled substances, alcohol, tobacco, e-cigarettes, etc.
* Counterfeit goods and services.
* Human trafficking and human exploitation.
* Endangered species.
* Overt or covert prostitution services.
* Stolen goods.
* Fraud.
* Weapons, firearms, ammunition, explosives, and instructions on the making of explosives.

## **Content on Dangerous Activities or the Formation of a Dangerous Organization**

* Activities or groups promoting or sharing drugs, tobacco, etc.
* Activities or groups promoting or sharing content on weapons, terrorism, war, killings, etc.
* Activities or groups promoting or sharing content on suicide and self-harm.

## **Content Harming the Soundness of the Platform**

* Impersonation of an individual or group to mislead or deceive.
* Manipulation of popularity or reactions.
* Circulation of false information.
* Spam, fraud, phishing.
* Security threats.
* Trading of platform accounts or the encouragement of such trading.
* Manipulation or encouragement aimed at trading of platform assets outside of the platform.

## **Content in Violation of the**[ **Intellectual Property Rights Policy**](/overdare/policy/intellectual-property-rights-policy)

* Infringement of copyrights, trademarks, or other intellectual property rights of another party, or content amounting to such infringement.
* Production, display, or transmission of copyrighted content, such as images, videos, and items, without the copyright holder’s consent.
* Copying or distribution of another party’s content, including posts, items, music, videos, and images, without the original copyright holder’s consent.
* Content promoting illegal copying of items, images, broadcasts, videos, music, worlds/games, and software requiring a purchase, or providing links to their illegal download.
* Posts sharing bugs or hacking programs designed to neutralize a copyright holder’s protective technologies.
* Instances where another developer’s code is used to create an experience without permission.
* Instances where another artist’s media is used in a user’s experience without permission.
* Unauthorized use of brand logos or designs in content created by a user.

## **Content Including Personal Information**

* Email addresses.
* Passwords or access tokens.
* Home addresses or actual locations.
* Financial information, including credit card or bank account information.
* Medical information.
* Phone numbers.
* Unique identifiers such as resident registration numbers.
* Images of a person who is not the user or a public figure.
* Use of a real name in a username unless in allowed instances.
* Any and all personally identifiable information related to minors, including images and voice or video recordings that are unapproved.

## **Content on Real-World Sensitive Events**

* Acts of mass violence against individuals or property.
* Recreation of specific real-world natural disasters or catastrophic accidents.
* Content that mocks or glorifies victims of specific incidents.
* Content that supports or glorifies perpetrators or outcomes of specific incidents.
* Exploiting real-world sensitive events for commercial purposes.
* Inflammatory content related to real-world borders, territories, or jurisdictional disputes.

## **Visibility Restrictions on World Quality**

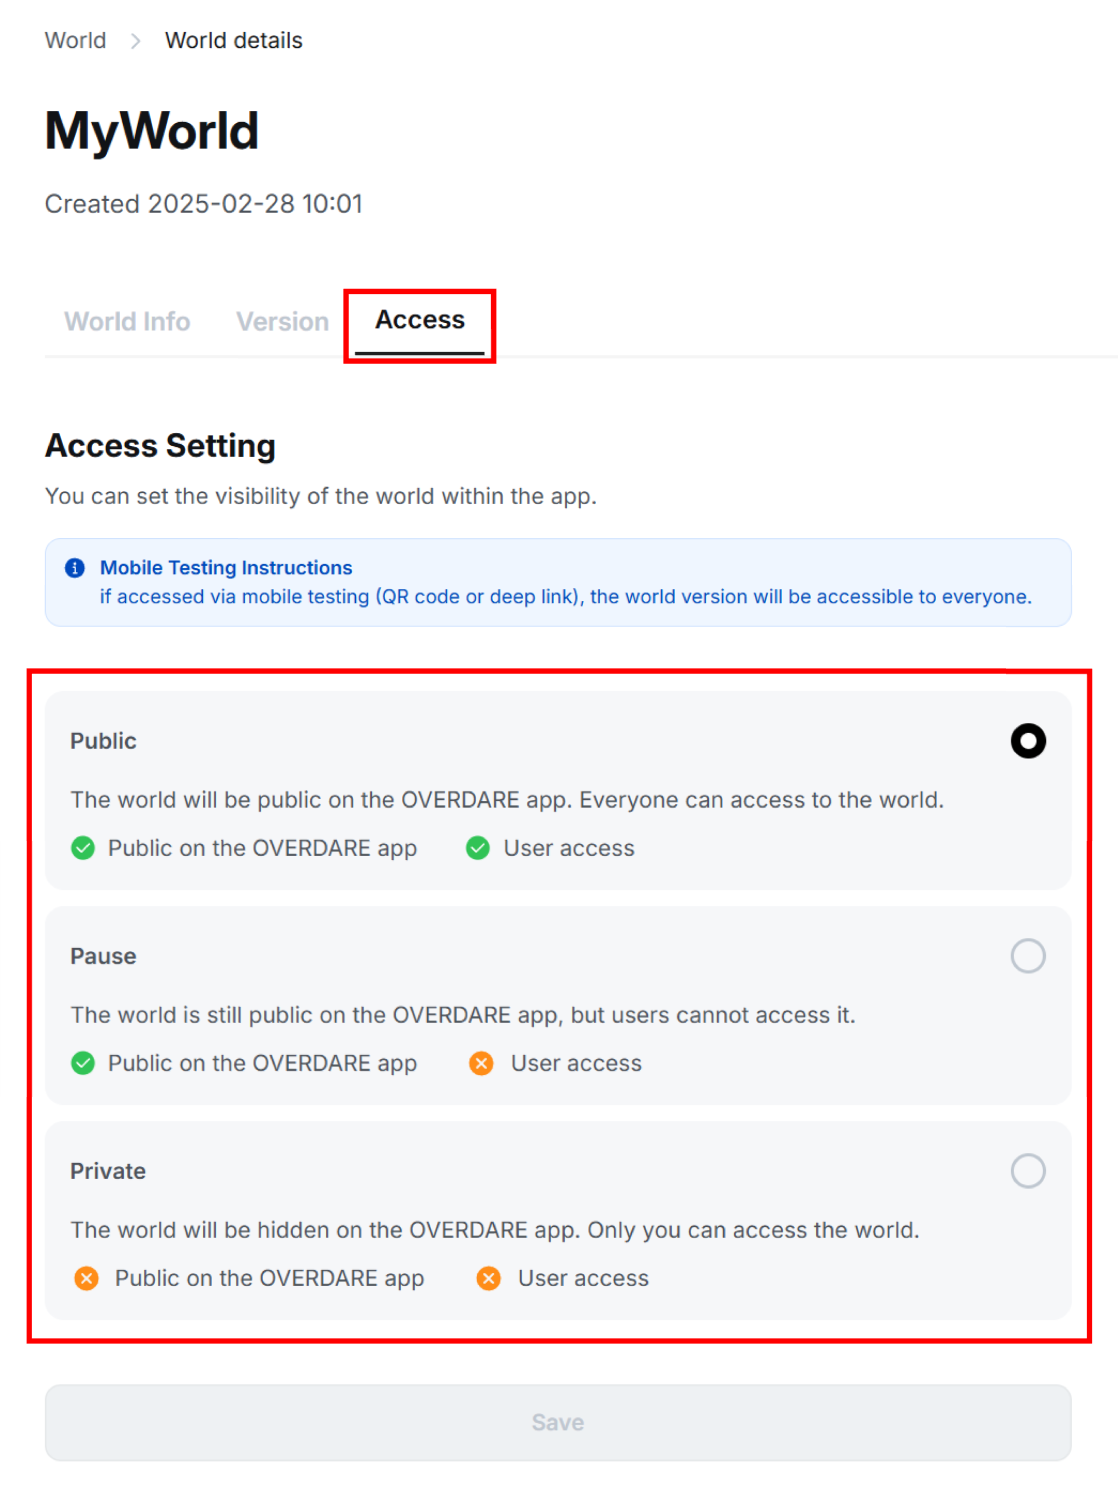
To ensure the best possible experience for users, if a world's core loop does not function properly or its quality is significantly low, we may adjust its visibility on the platform or decide not to feature it. This will not result in account/world deletion or additional penalties, and creators can modify and republish their worlds at any time through the Creator Hub.

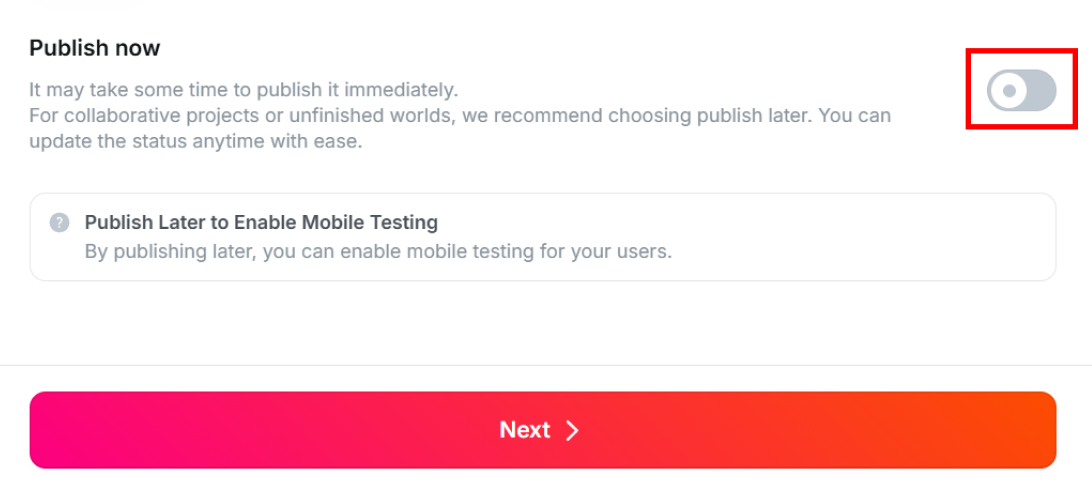
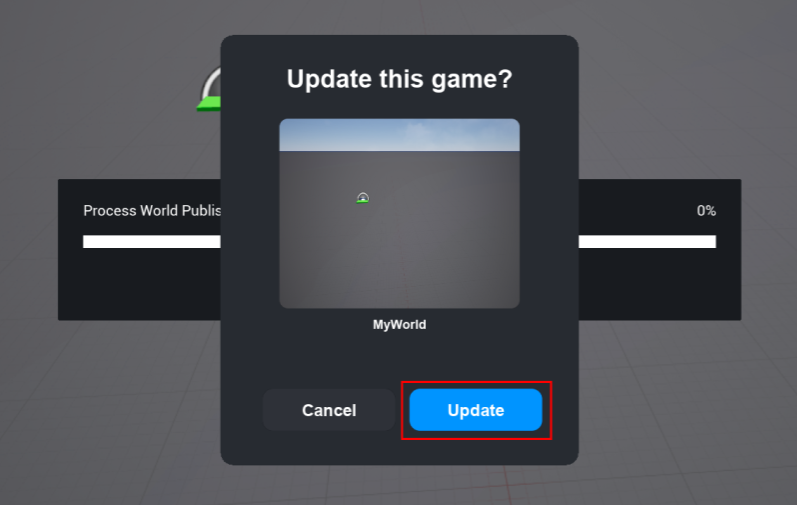
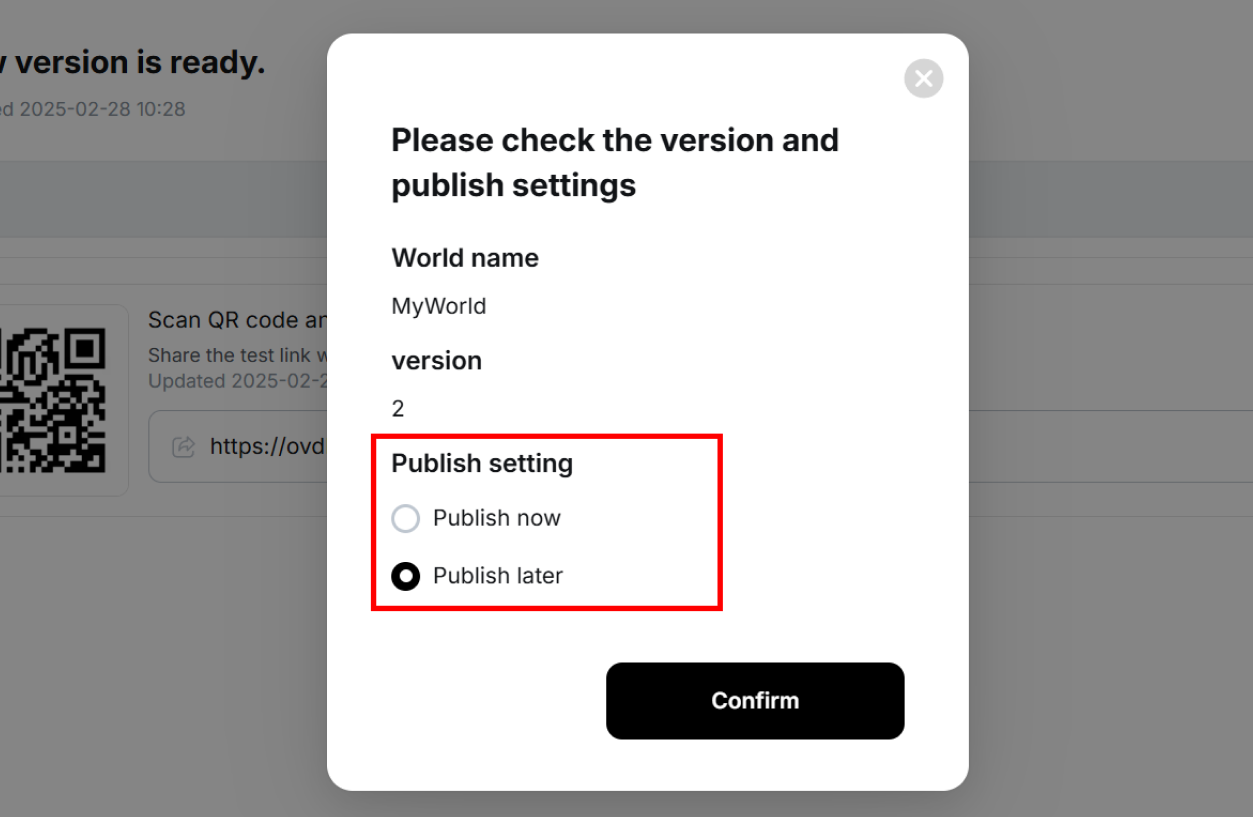
Please note that even if you opt for publish later, the world can still be accessed via a direct link. We recommend keeping test worlds private and making them public only after thorough testing.

For additional info, please refer to [World Publish](/manual/studio-manual/get-started/world-publish).

Please report any of the above infringements in accordance with the [**Reporting Guidelines**](/overdare/policy/reporting-guidelines)**.**


# UGC Creation Guidelines

UGC (user-generated content) is content created by users with the use of tools supplied by OVERDARE. At present, OVERDARE users can create Items, World Assets and Worlds in the [Creator Hub](https://create.overdare.com/).

OVERDARE strives for a free, safe, and healthy creative environment for its creators, and respects creators’ right to content use.

These guidelines, the ground rules for creating UGC, and those intended to aid creators in creative activity can be revised as necessary. Separate policies may also apply in individual cases as necessary.

The rules to be followed by creators in the creation of OVERDARE content are as follows.

* Observe the[ OVERDARE Community Guidelines](/overdare/policy/overdare-community-guidelines)**.**
* Respect intellectual property rights, portrait rights, and other rights protected by law.
* Accurately apply the specifications indicated by OVERDARE when creating content.
* If your content gets rejected after a review, take note of the feedback provided and make edits.
* Immediately address inadequacies or violations by making the necessary edits or deletions.

Keep the following in mind when creating OVERDARE content.

* OVERDARE can restrict or suspend without notice the sale of cotent or delete any content in violation of the UGC Creation Guidelines during or after review.
* The responsibility for content created, published, or sold by creators on OVERDARE lies with the creators themselves.
* Creators must verify the license of any World Assets they use or upload that are not their own creations. OVERDARE assumes no responsibility for such assets.
* Content suspected of violating copyright may be made private or deleted without the creator's consent. Additionally, any revenue generated from such copyrighted works may be withheld.

Before uploading created content on external platforms, please read the [Guidelines on the External Use of OVERDARE UGC](/overdare/policy/guidelines-on-the-external-use-of-overdare-ugc).

Please follow the link shown below in order to view the UGC Creation Guidelines in full.

{% content-ref url="/pages/QnMdz1IM2kVKvMOyu4q8" %}
[Studio Manual](/manual/studio-manual)
{% endcontent-ref %}


# World Product Guidelines

OVERDARE empowers creators to design and monetize digital items within their own Worlds through World Products. These are user-generated items purchased with BLUC and consumed inside a specific World (e.g., level boosts, special-attribute weapons, donation-only tokens).

World Products give creators new opportunities to enhance player experiences while earning revenue. However, creators must meet specific responsibilities to ensure fair transactions and platform integrity.

These guidelines outline the key rules and responsibilities for creators selling World Products on OVERDARE.

### What are World Products?

World Products are digital items sold by creators for BLUC and used within a single World. They may include:

* Functional items (e.g., stat boosts, special effects)
* Decorative or vanity items
* Access or experience-enhancing products
* Donation-based tokens or supporter items

Sales of World Products occur within the World, using BLUC as the currency. Unlike Avatar Items, World Products are not portable across different Worlds.

### Creator Responsibilities

Although OVERDARE is the seller-of-record of World Products, creators are directly responsible for:

* Providing an accurate and truthful description of each item
* Ensuring prompt delivery and activation of the item’s in-game effect after purchase
* Publishing a visible and accessible Support Link for player inquiries
* Responding to buyer complaints within **7 calendar days** with either:
  * A satisfactory resolution to the issue, or
  * A good-faith explanation if no remedy is due

Creators must keep a record of all buyer interactions (e.g., chat logs, emails) and supply these to OVERDARE upon request.

Failure to meet these duties may result in:

* Refunds or BLUC claw-backs from your pending payouts or Earned BLUC balance
* Temporary or permanent restrictions on selling World Products
* Platform penalties, including suspension or account deactivation in serious cases

### Disputes and Refunds

If a buyer is unsatisfied and you cannot resolve the issue within 7 days:

1. The buyer may escalate the dispute to OVERDARE Support.
2. OVERDARE may intervene by mediating the dispute, refunding BLUC to the buyer, or taking other actions as necessary under applicable law.
3. BLUC refunded to buyers may be deducted from your balance along with handling fees.

### Important Considerations

* OVERDARE is the Seller of Record for BLUC-purchased World Products and provides the platform, billing, and transaction infrastructure for those purchases. Creators remain responsible for the content, functionality, delivery, and compliance of their World Products. OVERDARE may review, restrict, remove, refund, or otherwise intervene with respect to World Products as permitted by its Terms and policies.
* World Products sold for currencies other than BLUC are treated as free content. They are not eligible for revenue share, dispute mediation, or support services.
* Repeated failure to deliver items, misleading product descriptions, or unresolved complaints can result in account penalties.
* You must comply with all applicable laws, OVERDARE Terms, and Community Guidelines when creating and selling World Products.

### Data and Privacy

OVERDARE collects transaction data for World Product sales to facilitate delivery, dispute resolution, and regulatory compliance, including:

* World ID, Product ID, Seller ID, purchase details
* Buyer nickname (shared with sellers for item delivery)
* Seller profile (shared with buyers for dispute resolution)

Please review our Privacy Policy for full details on how personal data is processed.

### Get Support

If you have questions about selling World Products or need assistance:

* Visit our [Creator Hub](https://docs.overdare.com/)
* Check the [OVERDARE FAQ](https://www.overdare.com/support/faq)
* Contact [OVERDARE Support](https://www.overdare.com/support/inquiry)

Creating and selling World Products is a powerful way to grow your World and earn BLUC. We ask that you remember your responsibilities as a creator to ensure a fair, enjoyable experience for all players.


# Guidelines on the External Use of UGC

## **Definition of OVERDARE UGC**

Content created by users(players and creators) with the use of services provided by OVERDARE.

## **Scope of OVERDARE UGC**

Includes avatars, emotes, selfie head, items, world asset and worlds created by users.

OVERDARE is a Mobile Interactive UGC(user-generated conent) Platform. Users typically create content and upload it to OVERDARE. All of the content uploaded to OVERDARE is the responsibility of the individual who creates and uploads the content.

## **Definition of the External Use of OVERDARE UGC**

Uploading OVERDARE UGC to a platform other than OVERDARE or holding or distributing derivative OVERDARE UGC by a user in their name or the name of a group or business

Please adhere to the following when creating secondary content using OVERDARE UGC or directly uploading to other platform channels:

* Do not use another user’s content, including avatars, without consent.
* Do not violate the [OVERDARE Community Guidelines](/overdare/policy/overdare-community-guidelines).
* Do not infringe on [intellectual property rights](/overdare/policy/intellectual-property-rights-policy).
* Do not infringe on personal information.
* Indicate OVERDARE as the source when entering OVERDARE UGC in posts, publications, competitions, and other media or events.

How to indicate OVERDARE as the source of OVERDARE UGC: [**OVERDARE Logo Usage Guidelines**](/overdare/policy/overdare-logo-usage-guidelines)

### **Important**

* In the use of UGC for commercial purposes or profit, the user assumes legal liability for issues such as the infringement of OVERDARE’s interests, damage to OVERDARE’s reputation, and a negative influence on society.
* Before using OVERDARE IP (intellectual property), obtain OVERDARE’s consent by submitting a partnership proposal(<overdare.biz@overdare.com>).
* In instances of UGC constituting unauthorized use of IP or violation of laws, OVERDARE can immediately revoke permission to use the OVERDARE IP and request the cessation of the display, distribution, or transmission of the UGC concerned without notice. OVERDARE can also impose additional restrictions on the use of OVERDARE services.
* These guidelines, outlining the ground rules to be followed in the external use of UGC, are intended to promote the creative activity of users and are subject to change. Separate policies may also apply in individual cases.
* These guidelines take effect for the duration of the operation of OVERDARE, and continue to take effect even after OVERDARE user account closure.
* The final interpretation of these guidelines is at the discretion of OVERDARE.


# Logo Usage Guidelines

## **Primary Logo**

​[**Download : OVERDARE Logo**](https://static.overdare.com/downloads/images/overdare_logo.zip)

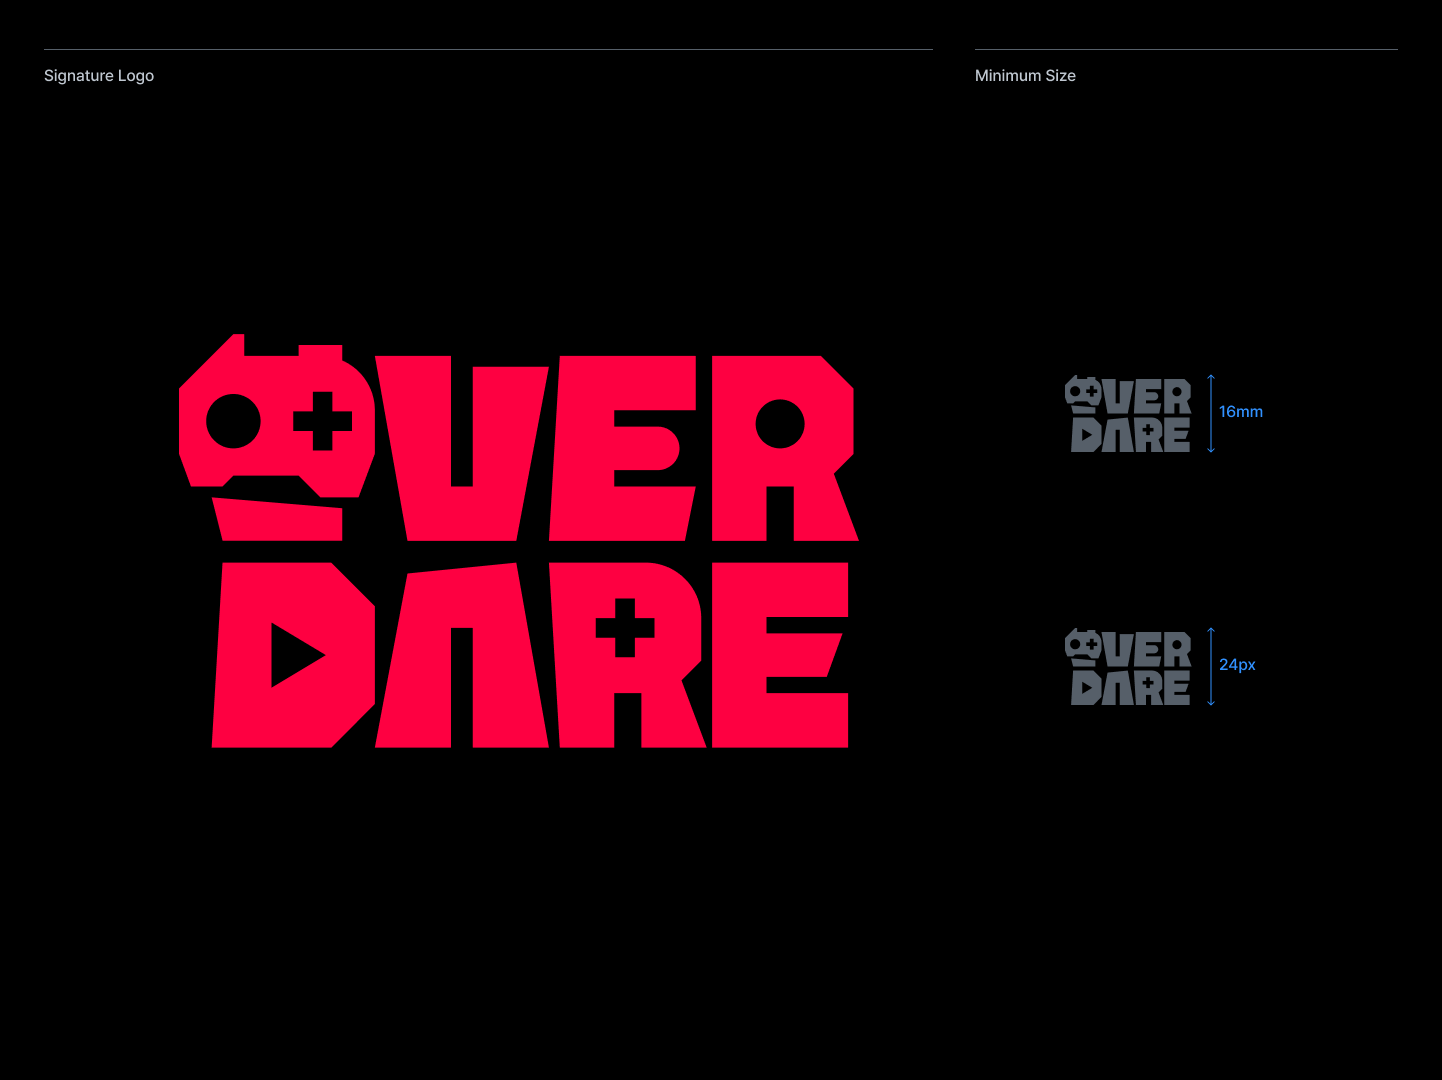
The primary logo and the minimum size regulations for OVERDARE are as follows: To maintain a consistent brand image for OVERDARE, the following regulations must be followed, and the logo must not be altered in any way. OVERDARE logo may not be used in media such as news, media outlets, newspapers, and magazines without the approval or a license agreement from OVERDARE. If adjustments are needed based on the type of media, please contact the designated department at <overdare.biz@overdare.com>.\\

<figure><img src="/files/Z3iuv4jP31DcEv93nogc" alt=""><figcaption></figcaption></figure>

<figure><img src="/files/Wd1OZLReBuJhJUuCi95Y" alt=""><figcaption></figcaption></figure>

### **Brand Logo Combinations**

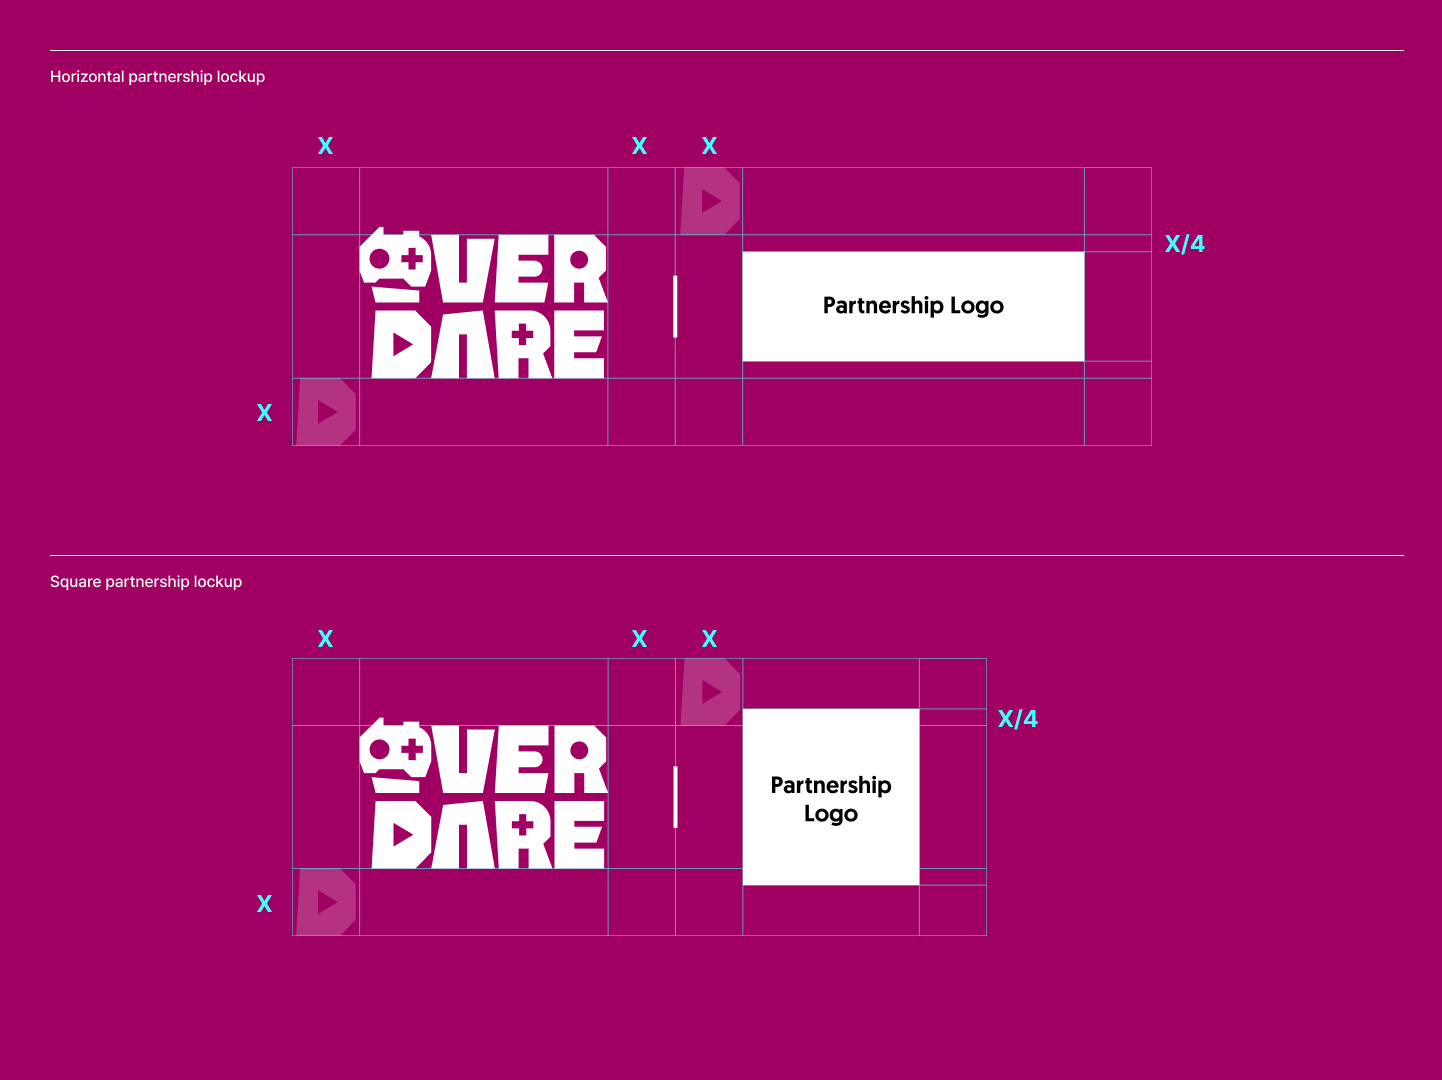
Unauthorized use of the logo in a combination format is restricted without approval through partnership inquiries or a licensing agreement.

When combining the OVERDARE logo with the logos of partner brands, it should be used as follows:

To establish a consistent brand image, these regulations must be strictly adhered to, and the logo may not be altered in any arbitrary form.

If you are interested in a partnership or have questions regarding the use of the logo, or if additional discussions are required depending on the situation, please contact <overdare.biz@overdare.com>.

<figure><img src="/files/ZBGk8KjamaoQMF1lJyUu" alt=""><figcaption></figcaption></figure>

### **Brand Name Usage**

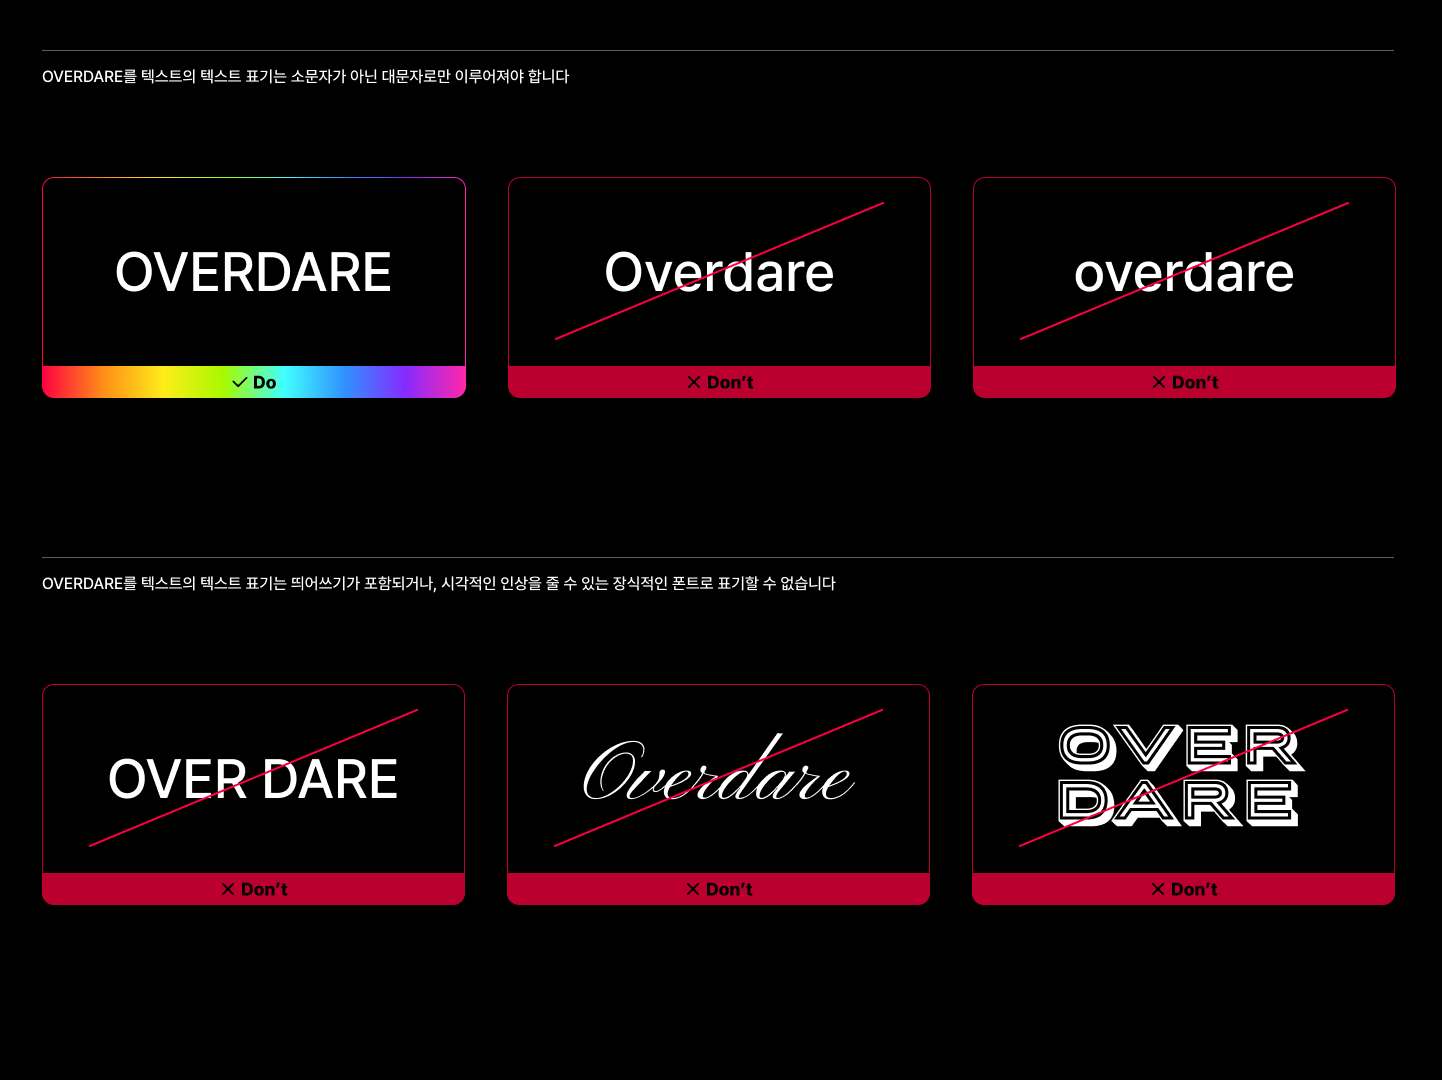
When using the OVERDARE brand name as text in articles or documents, it must be correctly marked according to specified regulations.

* The text representation of OVERDARE must consist solely of uppercase letters, not lowercase.
* The text representation of OVERDARE should not include spaces or be rendered in decorative fonts that could create a visual impression.

<figure><img src="/files/T723rvo24PqKo15bXxVv" alt=""><figcaption></figcaption></figure>

## **Created on OVERDARE Badge**

[**Download : Created-on-OVERDARE\_Badge**](https://static.overdare.com/downloads/images/createdonoverdare_badge.zip)

### **Type of Badge**

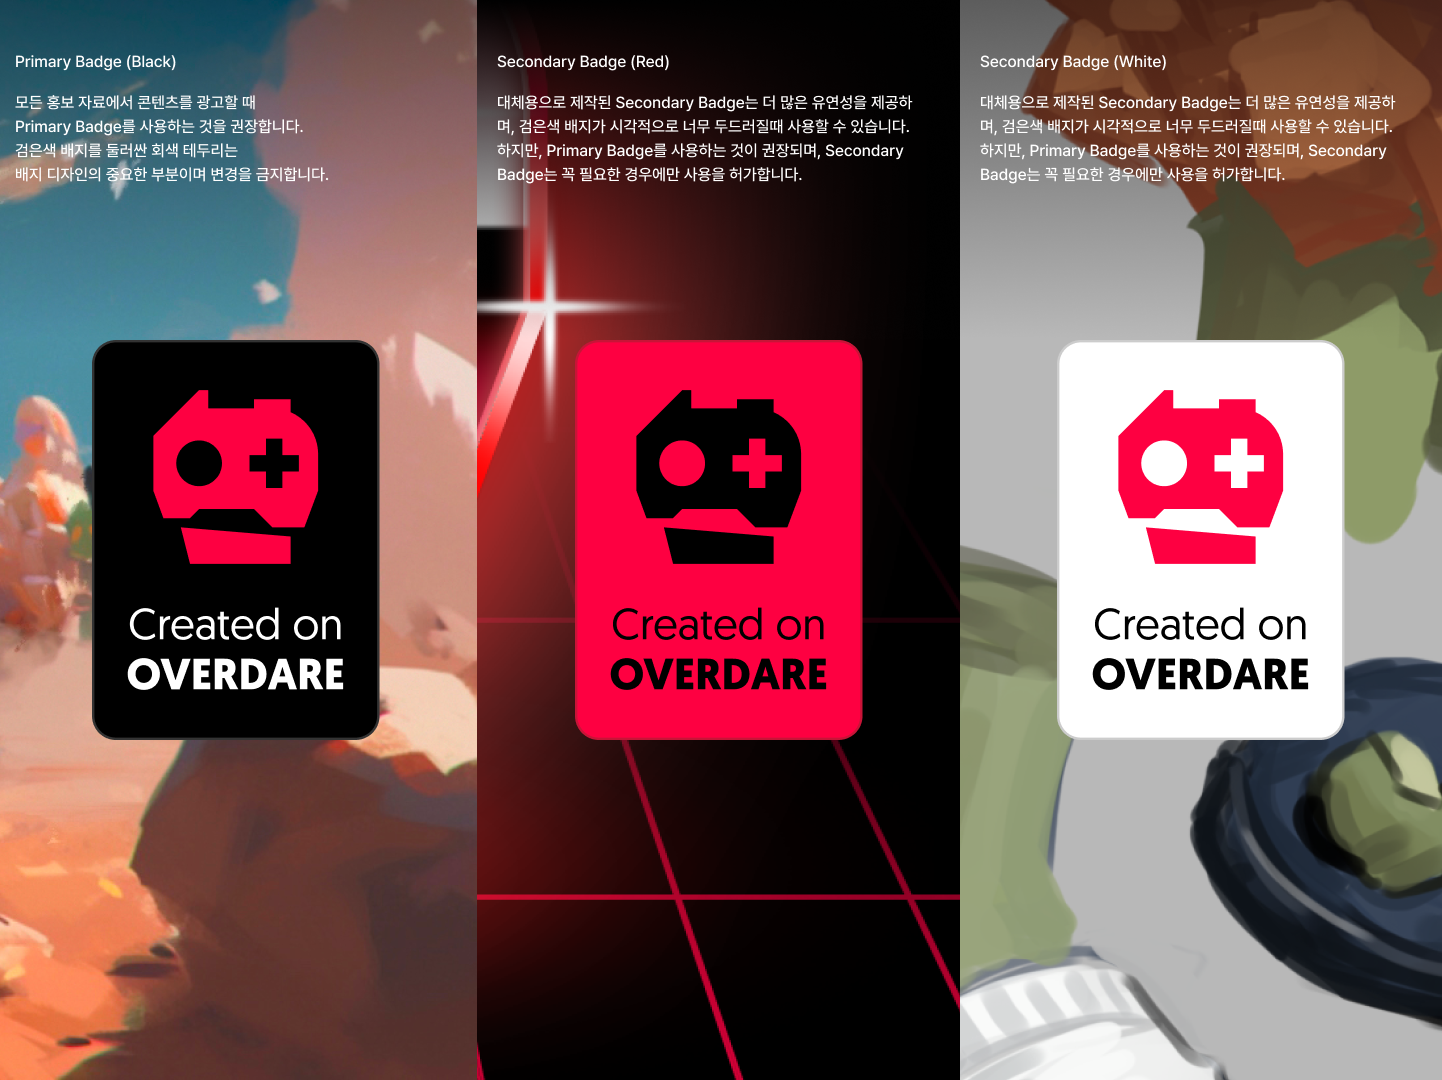
Creators associated with OVERDARE must use the “Created on OVERDARE” Badge to credit their UGC (User Generated Content) when promoting it outside of the platform.

* Use of the "Created on OVERDARE" badge for commercial or profit-making purposes requires approval through OVERDARE partnership inquiries (<overdare.biz@overdare.com>), and unauthorized use may result in legal action.
* The use of the “Created on OVERDARE” badge is encouraged on all marketing materials, but the use of the official OVERDARE logo is forbidden. The badge, like the logo, must not be separated, edited, or altered in any way and must be used according to the regulations stated in these guidelines.
* OVERDARE reserves the right to withhold or revoke approval for content that is deemed to deviate from the tone and manner of the OVERDARE brand or is considered offensive or objectionable to others.
* OVERDARE may revoke the permission to use its trademark at any time.

<figure><img src="/files/L80gUYrMUVT63prQBNmr" alt=""><figcaption></figcaption></figure>

### Badge Placement

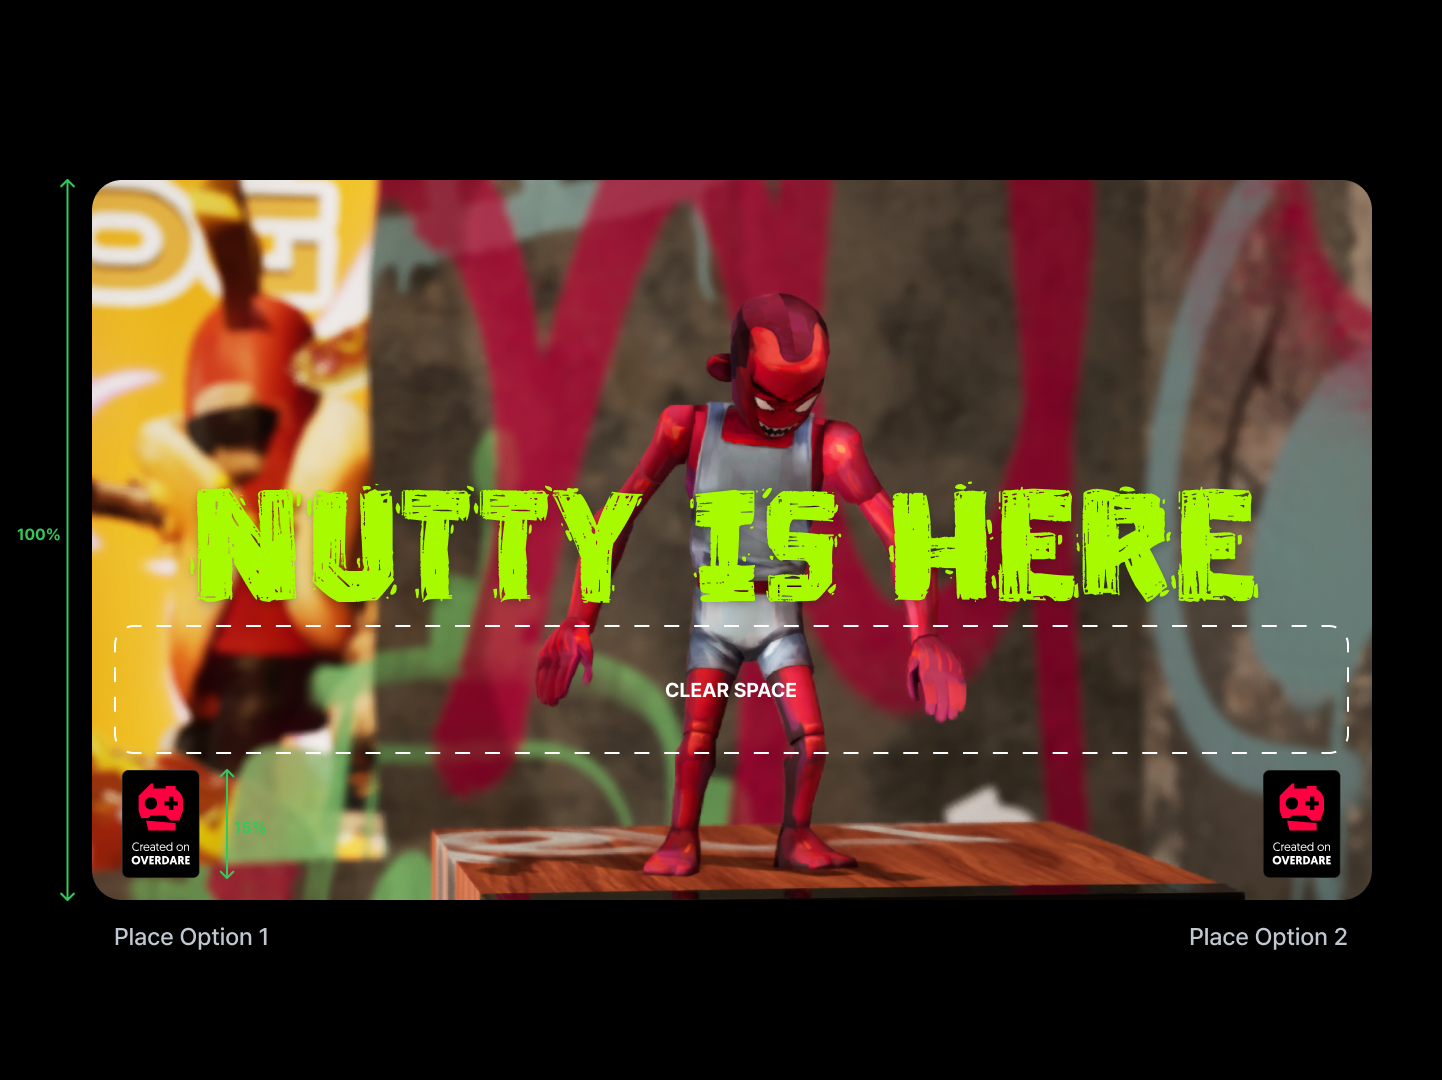
* The "Created on OVERDARE" badge must always be placed at the bottom left or right corner.
* The size of the badge should be fixed at 15% of the content's height.
* The clear space around the badge should be 20% of the badge's height, which equals 3% of the content's height.
* Ensure there is sufficient space between the content title and the badge to prevent the badge from being perceived as a main feature of the content.

<figure><img src="/files/pJSuUbg3Z8q0E3z3BGVU" alt=""><figcaption></figcaption></figure>

### Incorrect Usage

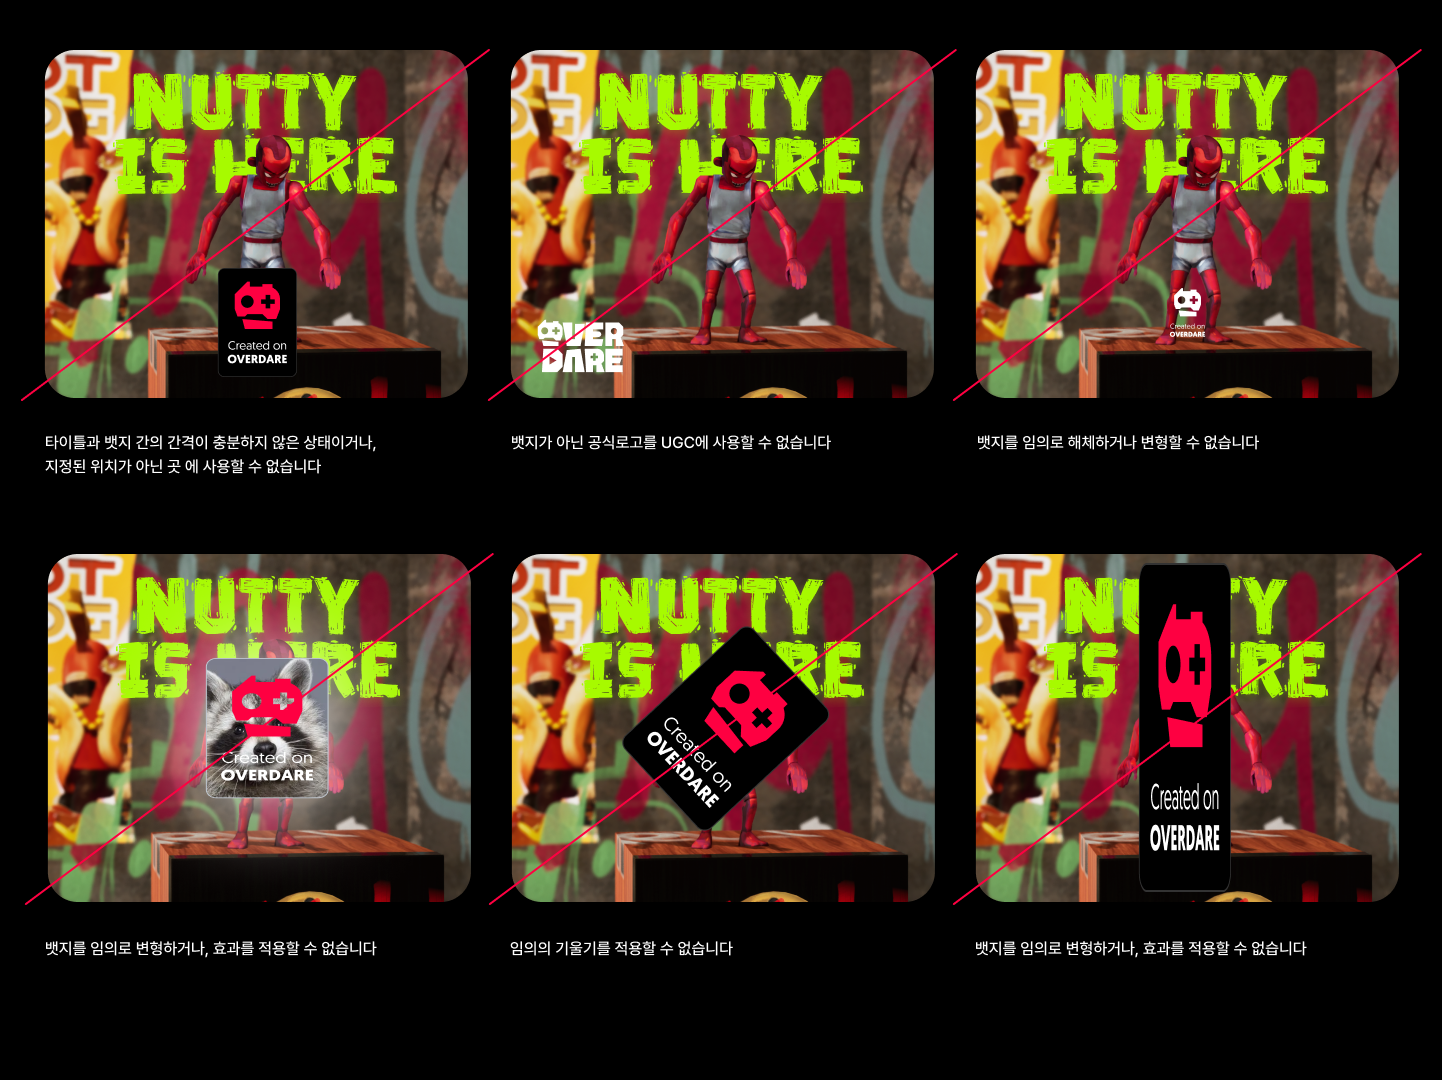
The “Created on OVERDARE” badge must be applied as supplied by OVERDARE without any edits.

Additionally, please note that the official OVERDARE logo should not be used independently on UGC (User Generated Content) to differentiate it from OVERDARE's original content.

<figure><img src="/files/KhSNNGN4OUFzYWDyDpRI" alt=""><figcaption></figcaption></figure>


# Intellectual Property Rights Policy

OVERDARE is a Mobile Interactive UGC Platform for users and creators to freely create, trade, and play.

Users are required to observe the [Creator Terms of Use](https://terms.overdare.com/creator) and [Community Guidelines](https://docs.overdare.com/policy/overdare-community-guidelines) when using OVERDARE.

The OVERDARE admin performs constant supervision and management to prevent the infringement of intellectual property rights to provide users and creators with an environment where they have the freedom to create and enjoy the creations.

In OVERDARE, the display, trade, sharing, or transmission of creations that constitutes infringement of another party’s copyrights, trademarks, or other intellectual property rights is strictly prohibited.

This policy serves as a guide on the use of OVERDARE services in the creation of content, and in no way constitutes legal advice or recommendations.

If you have questions related to your situation or rights, we recommend consulting with a legal expert.

## Instances of Infringement of Intellectual Property Rights <a href="#instances-of-infringement-of-intellectual-property-rights" id="instances-of-infringement-of-intellectual-property-rights"></a>

* Acts of infringing on intellectual property rights such as copyright, trademark, patent, and design rights.
* Acts of replicating, editing, producing, publishing (distributing), or transmitting the content of intellectual property rights owners without permission.
* Acts of promoting illegal reproduction of the content of intellectual property rights owners or providing illegal download links.
* Acts of sharing bugs or hacking programs that disable the technical protection measures of intellectual property rights owners.

## **Reporting Infringements of Intellectual Property Rights**

Intellectual property right holders have the right to prohibit other parties from copying and distributing their creations without permission.

If you find an instance of infringement of your intellectual property rights in OVERDARE, please contact Customer Service to have the infringement addressed.

However, the making of false or unsubstantiated reports can result in service restrictions being imposed on the reporting party. Only make a report when there is indisputable evidence, by following the instructions hereunder.

## **Requesting the Cessation of the Display of Content Constituting an Infringement of Intellectual Property Rights**

Intellectual property right holders in OVERDARE can request the cessation of the display of content constituting an infringement of intellectual property rights by way of removing such content.

Please ensure you review and attach the following documents when submitting your application.

* Screenshot of the content in infringement of intellectual property rights.
* Copy of the intellectual property right registration certificate or another proof.
* Copy of a work or trademark bearing your name or known alias, or another material corresponding in validity.

Any materials for submission prepared in a language other than English must be notarized in English.

|                                                                                                                                                                                                                                                                                                                                                                                                                                                                                                                                                                                                                                                                                                                                                                                                                                                                                                                                                                                                                                                                                                                                                                                                                                                                                                                                                                                                                                                                                                                                                                                                                                                                                                                                                                               |
| ----------------------------------------------------------------------------------------------------------------------------------------------------------------------------------------------------------------------------------------------------------------------------------------------------------------------------------------------------------------------------------------------------------------------------------------------------------------------------------------------------------------------------------------------------------------------------------------------------------------------------------------------------------------------------------------------------------------------------------------------------------------------------------------------------------------------------------------------------------------------------------------------------------------------------------------------------------------------------------------------------------------------------------------------------------------------------------------------------------------------------------------------------------------------------------------------------------------------------------------------------------------------------------------------------------------------------------------------------------------------------------------------------------------------------------------------------------------------------------------------------------------------------------------------------------------------------------------------------------------------------------------------------------------------------------------------------------------------------------------------------------------------------- |
| <p>To request the cessation of the display of content constituting an infringement of intellectual property rights, please complete the below request form in English. Your request may not be fulfilled if it is in any language other than English.</p><ol><li>Name (company name) of intellectual property right holder:</li><li>Date of birth (business registration certificate):</li><li>Phone:</li><li>Email:</li><li>Address:</li><li>Intellectual property right registration number:</li><li>The country where intellectual property right is registered:</li><li>Name (title) of intellectual property right:</li><li>Valid period of intellectual property right:</li><li>ID of the content to be removed:</li><li>Username of the user in infringement of intellectual property rights:</li><li><p>Essential consent:</p><ol><li>I confirm that the content which I am requesting the cessation of display of constitutes an unlawful use of copyrighted materials without the obtainment of permission to use said copyrighted materials from the copyright holder or as required by law.</li><li>I confirm that the information provided in this request form is true and accurate, and that I am the holder of the rights infringed as outlined hereinabove or empowered to act on behalf of said holder of the rights.</li><li>I confirm that the information provided in this request form is true and accurate, and that I am subject to penalties and/or liable to pay damages if any information supplied is found to have been falsified.</li><li>I have reviewed all the contents and understand and agree to all conditions. Yes/No.</li></ol></li><li>Requesting party’s name:</li><li>Requesting party’s signature:</li><li>Request date:</li></ol> |

[**Submit a Request to Block Content Publishing Here**](https://www.overdare.com/support/inquiry)**.**

## **Opening a Case to Dispute the Cessation of the Display of Content on the Grounds of Intellectual Property Rights Infringement**

If your content was removed on the grounds of intellectual property rights infringement, but you believe no infringement of intellectual property rights had taken place, please follow the instructions hereunder and open an intellectual property rights dispute with Customer Service within 45 days of the content removal.

Please ensure you review and attach the following documents when submitting your application.

1. Copy of the intellectual property right registration certificate or another proof.
2. Copy of a work or trademark bearing your name or known alias, or another material corresponding in validity.
3. Copy of an agreement confirming that permission to copy or transmit the intellectual property was obtained legally from the intellectual property right holder, or another material corresponding in validity.
4. Material confirming the expiration of the period of protection on intellectual property rights.

Any materials for submission prepared in a language other than English must be notarized in English.

| <p>Complete the below request form in English to open a dispute regarding content removed for intellectual property rights infringement. Your request may not be fulfilled if it is in any language other than English.</p><ol><li>OVERDARE Username</li><li>OVERDARE User ID</li><li>OVERDARE account ID (email address):</li><li>Phone number:(For communication purposes)</li><li>Type of the content removed</li><li>Content ID</li><li>Removal date:</li><li>Reason for removal:</li><li>Reason for opening a dispute:</li><li>Your relation to the intellectual property right holder</li><li><p>Essential consent:</p><ul><li>I confirm that the information provided in this request form is true and accurate, and that I am subject to penalties and/or liable to pay damages if any information supplied is found to have been falsified.</li></ul></li><li>Requesting party’s name:</li><li>Requesting party’s signature:</li><li>Request date:</li></ol> |
| --------------------------------------------------------------------------------------------------------------------------------------------------------------------------------------------------------------------------------------------------------------------------------------------------------------------------------------------------------------------------------------------------------------------------------------------------------------------------------------------------------------------------------------------------------------------------------------------------------------------------------------------------------------------------------------------------------------------------------------------------------------------------------------------------------------------------------------------------------------------------------------------------------------------------------------------------------------------- |

[**Submit Your Appeal Here**.](https://www.overdare.com/support/inquiry)

#### **Important:**

These guidelines can be revised to align with any changes or additions made to OVERDARE services. The final interpretation of these guidelines is at the discretion of OVERDARE.


# Reporting Guidelines

In OVERDARE, users can report their concerns. This allows OVERDARE to be a healthy, creative, and free community.

If you ever come across content or users in violation of the [Terms of Use](https://termsofservice.cdn.ovdr.io/) or the [Community Guidelines,](/overdare/policy/overdare-community-guidelines) please make a report to let us know.

Taking the initiative to report concerns not only contributes to making the OVERDARE user experience positive and enjoyable but also helps create a safer Mobile Interactive UGC Platform.

All of the reports are forwarded to the OVERDARE admin for the appropriate actions to be taken. The identities of reporters are kept confidential.

However, users who make false or unfounded reports can face suspension. We recommend that you supply adequate evidence with the reports that you make.

## **How to Report a Concern**

<table data-header-hidden><thead><tr><th width="152.33333333333331"></th><th width="306"></th><th></th></tr></thead><tbody><tr><td><strong>Classification</strong></td><td><strong>Concern</strong></td><td><strong>How to report</strong></td></tr><tr><td><p><br></p><p>User profile</p></td><td><ul><li>Sexual/ Obscene Content</li><li>Profanity/ Slang/ Slander</li><li>Violence</li><li>Spam/ Ads</li><li>Illegal activity</li><li>Invasion of privacy</li><li>Impersonation/ Spreading rumor</li><li>Intellectual property infringement</li><li>Etc</li></ul></td><td><p>1.Click the profile of the user to report.</p><p>2.Click the ellipsis button on the right, enter a message describing why you’re making the report, and submit the report.</p></td></tr><tr><td>Costume</td><td><ul><li>Sexual/ Obscene Content</li><li>Profanity/ Slang/ Slander</li><li>Violence</li><li>Spam/ Ads</li><li>Illegal activity</li><li>Invasion of privacy</li><li>Impersonation/ Spreading rumor</li><li>Intellectual property infringement</li><li>Etc</li></ul></td><td><p>1.Click the costume to report.</p><p>2.Click the information icon on the left.</p><p>3.Click the ellipsis button on the right, enter a message describing why you’re making the report, and submit the report.</p></td></tr><tr><td>World</td><td><ul><li>Sexual/ Obscene Content</li><li>Profanity/ Slang/ Slander</li><li>Violence</li><li>Spam/ Ads</li><li>Illegal activity</li><li>Invasion of privacy</li><li>Impersonation/ Spreading rumor</li><li>Intellectual property infringement</li><li>Etc</li></ul></td><td><p>1.Click the world to report.</p><p>2. Click the ellipsis button on the right, enter a message describing why you’re making the report, and submit the report.</p></td></tr><tr><td>Other</td><td><ul><li>Events</li><li>Policies</li><li>Admin</li><li>Fake social media accounts</li><li>Bugs</li><li>Abuse of app bugs</li></ul></td><td><a href="https://www.overdare.com/support/inquiry">Customer Service</a></td></tr></tbody></table>

## Others

To apply for an intellectual property declaration, please refer to the [Intellectual Property Policy](/overdare/policy/intellectual-property-rights-policy).

## Important

Accounts of users found to be repeatedly making false or unfounded reports can be suspended or banned. Exercise good judgment in reporting concerns and always provide evidence.

If you disagree with an account suspension/ban, please go to the[ Guidelines on Disputing Suspensions/Bans and open a dispute.](/overdare/policy/guidelines-on-disputing-suspensions-and-bans)


# Guidelines on Disputing Suspensions and Bans

To maintain a healthy and pleasant environment for users, the OVERDARE admin can suspend or ban accounts or content found to be in violation of the Community Guidelines.

If your account or content was suspended/banned when the Community Guidelines had not been breached, or if you feel that a suspension/ban is unfair, you can open a case to dispute the suspension/ban as instructed below.

Once a dispute is opened, the OVERDARE admin will conduct a review. However, it is not guaranteed that the suspension/ban of an account or content will be overturned.

\
[**Open a Dispute: Link**](https://www.overdare.com/support/inquiry)

## **Requirements for Opening a Dispute**

* You must be the owner of the OVERDARE account that you are opening the dispute from.
* Open the dispute from the verified email address used for OVERDARE login.
* Do not submit any government-issued ID or proof of residence.
* Complete the request form in English. Your request may not be fulfilled if it is in any language other than English.
* If you wish to open a dispute, you must do so within 45 days from the date of the sanction.

## **Information to be Included**

1. OVERDARE Username:
2. OVERDARE User ID:
3. OVERDARE account ID (email address):
4. Suspended/banned content ID:
5. Suspension/ban date:
6. Reason for opening a dispute:
7. Enter the text “I confirm that all of the information supplied is true and accurate.”
8. Request date:

To open a dispute regarding content suspended/banned on the grounds of intellectual property rights infringement, please read the [Intellectual Property Rights Policy](/overdare/policy/intellectual-property-rights-policy) and proceed accordingly.

### **Important:**

These guidelines can be revised to align with changes or additions made to OVERDARE services. The final interpretation of these guidelines is at the discretion of OVERDARE.


# Creator Payout Policy

OVERDARE offers payout service to OVERDARE creators, allowing them to convert "Earned BLUC" into actual cash. In order to use this service, you must accept the [OVERDARE Creator Terms of Use](https://www.overdare.com/legal/creator) and comply with the Creator Payout Policy.

For the purposes of anti-money laundering (AML) compliance and adherence to applicable laws, the only eligible currency for payout is "Earned BLUC."

## **1. Eligibility Requirements**

Eligibility for any payout from earnings is solely determined by OVERDARE, and OVERDARE may update or modify these Creator Payout Policy requirements at any time.

To request a payout from OVERDARE Creator’s earnings, all of the following minimum requirements must be met:

* **Compliance with Terms and Guidelines**: The creator must comply with both the Creator Terms of Use and the Community Guidelines. Creators must not have any actioned reports or confirmed policy violations that result in account suspension or enforcement measures at the time of payout request.
* **Age Requirement**: Only creators aged 13 and over can participate. Creators under 19 could be required to submit additional documents through payout processes done by OVERDARE or 3rd parties.
* **Minimum Balance:** The creator’s OVERDARE account must contain at least 5,000 "Earned BLUC" eligible for payout.
* **Account Requirement**: Creators must have a third-party payout platform account, specifically a Stripe (OVERDARE-stripe) account, which is directly linked 1:1 with their OVERDARE account.
  * When creating a Stripe Connect account (OVERDARE-stripe), it is essential to review the [Stripe Services Agreement](https://stripe.com/legal/ssa) and the [Stripe Connected Account Agreement](https://stripe.com/legal/connect-account).

## **2. Earned BLUC**

"Earned BLUC" is the digital currency creators earn through creative activities on the OVERDARE Creator Hub. These activities include, for example, selling or managing user-generated content (UGC) such as items or world assets within the OVERDARE service. Creators can use their earned "Earned BLUC" to exchange for real-world currency.

"Earned BLUC" must be obtained in a legitimate manner, adhering to the OVERDARE [Creator Terms](https://www.overdare.com/legal/creator) and [Community Guidelines](https://docs.overdare.com/policy/overdare-community-guidelines). The "Earned BLUC" obtained by creators cannot be transferred, and must not be acquired or distributed in any manner not specified in the OVERDARE terms and guidelines. Additionally, any "Earned BLUC" obtained through illegitimate means will be invalidated, and such actions may result in the immediate suspension or termination of the creator’s account. These regulations ensure that transactions within the OVERDARE platform are conducted fairly and securely.

{% hint style="warning" %}
**I have earnings in my analytics page but cannot see it in Earned BLUC**

⇒ Due to refund policies of payment processors and the law of our service countries, we are obliged to provide enough buffer time until the payment is finalized to become eligible for payout(Earned BLUC).

It takes 2 weeks for the payment to be finalized and can be seen in your wallet as Earned BLUC.
{% endhint %}

## **3. Payout-able Earned BLUC**

Payout-able "Earned BLUC" refers to the net amount of "Earned BLUC" available after deducting any previously used or cashed out "Earned BLUC", earned by the creator while active on the OVERDARE platform.

## **4. Payout Exchange Rate**

The payout exchange rate for "Earned BLUC" is determined by OVERDARE. This rate is applied when Creators convert "Earned BLUC" into real currency (USD).

The current rate is 0.002 USD per "Earned BLUC", subject to change based on OVERDARE’s operational conditions and market circumstances.

## **5. Payout Details**

* **Minimum Amount for Payout**: 5,000 "Earned BLUC"
* **Maximum Amount for Payout**: 1,000,000 "Earned BLUC"
* **Minimum Unit for Payout**: 10 "Earned BLUC" (e.g., 5010 "Earned BLUC" can be paid out, 6005 "Earned BLUC" cannot)
* **Payout Application Limit**: Once a day
* **Payout Exchange Rate**: 1 "Earned BLUC" = 0.002 USD (rate may change occasionally)
* **Payout Currencies**: USD
* **Payout Fees**: All transaction fees incurred during the payout process(such as Stripe fees, bank transfer fees, etc.) are the responsibility of the creator and will be automatically deducted from the payout amount.

## **6. Payout Processing**

### **Processing Time (OVERDARE)**

* OVERDARE generally processes payout requests within 3 business days from the date of application.
* If there is suspected abuse, a content-related report, or any other special circumstance, the payout may be temporarily on hold until the issue is resolved.

### **Processing Time (Stripe)**

* Stripe processing typically requires an additional 3 business days. In certain countries, it may take up to 30 calendar days.
* For the first payout, in accordance with Stripe’s service, it may take 7 to 30 calendar days.
* Please refer to:
  * [Payout speed by country](https://docs.stripe.com/payouts#standard-payout-timing)
  * [Waiting on your first Stripe payout?](https://support.stripe.com/questions/waiting-on-your-first-stripe-payout-what-you-need-to-know)

### **Exclusions from Earnings**

Earnings from items or world assets that are reclaimed or removed due to intellectual property infringement, or violations of Community Guidelines (and similar reasons) are excluded from payouts.

## **7. Regulations for Minors**

Creators aged 13 to under 19 must obtain parental consent and proceed under parental supervision.

The parents or legal guardians of the minor creators must report the payout amount to the relevant tax authorities.

## **8. Tax Reporting**

Creator is responsible for reporting and paying any taxes arising from the conversion of "Earned BLUC" to cash to the relevant tax authority in their jurisdiction.

Tax obligations vary by country, and, in the case of minors, a parent or legal guardian may handle the tax filing.

OVERDARE may request taxpayer information (IRS Form W-9 or W-8) from Creators through system prompts or emails. If a creator does not submit the requested information by the specified date, they may face disadvantages such as payout denial.

## **9. Acknowledgment**

* By using the Creator Payout service, you agree that OVERDARE may share your information and information related to your platform with third-party providers (e.g., Stripe) and their service partners (financial institutions, payment method providers).
* Creators acknowledge that submitting a payout request does not guarantee automatic approval or payment. All requests undergo review in accordance with OVERDARE’s internal policies and procedures, and final approval is at OVERDARE’s sole discretion.
* Creators acknowledge that they must comply with OVERDARE’s Payout Policy, Terms of Use, and Community Guidelines. Any breach of these policies may result in the loss of payout eligibility.
* Creators must understand and agree to all transaction fees and payment terms that may arise during the payout process, including those charged by OVERDARE’s own systems and any third-party service providers (e.g., Stripe).\
  Such fees may vary depending on the Creator’s country of residence and chosen payout method.
* The OVERDARE account is linked 1:1 with a Stripe account. Violation of Stripe's Services Agreement may lead to permanent account blockage.
  * [Stripe Services Agreement](https://stripe.com/legal/ssa)
  * [Stripe Connected Account Agreement](https://stripe.com/legal/connect-account)
  * If your Stripe account is blocked and you cannot proceed with a payout, please contact, please contact [Stripe: Help & Support](https://support.stripe.com/contact/login).
* Due to legal or other considerations, OVERDARE’s payout service may be restricted for certain countries, regions, institutions, or individuals.
  * To review the list of high-risk regions and persons restricted due to AML concerns, refer to the link below:
    * [Stripe Prohibited and Restricted Businesses](https://stripe.com/legal/restricted-businesses)
  * To check if OVERDARE’s payout service is available in your country, refer to:
    * Stripe Payout [Supported countries](https://docs.stripe.com/connect/payouts-connected-accounts#supported-settlement)
* All tax responsibilities arising from the payout rest solely with the Creator, who must report and pay any taxes to the relevant authority.\
  Minors may have a parent or guardian manage their tax filing.\
  Request for Taxpayer Information
  * For residents in the United States, Stripe will handle withholding taxes.

## **10. Policy Modifications and Volatility**

OVERDARE reserves the right to amend, modify, or cancel its payout policy at any time. Additionally, OVERDARE may add, remove, or change eligibility requirements for payouts or adjust the applicable exchange rate.

OVERDARE also states that the payout system is subject to change based on service conditions or the content provided. These changes may occur in response to platform needs or external factors.

By proceeding with any payout request, you acknowledge that you have reviewed and understood this OVERDARE Payout Policy and agree to abide by all related terms and guidelines. If you have any questions or concerns regarding this policy, please contact [OVERDARE Customer Support](https://www.overdare.com/support/inquiry) for assistance.


# Monetization Guidelines

OVERDARE is a platform that supports creative and innovative content creators in generating revenue from their work. These guidelines have been prepared to ensure fair and transparent revenue sharing between creators and OVERDARE.

## **Monetization**

* The main current revenue model involves creating and selling Avatar items within the OVERDARE App.
* Items created and registered by creators in the Creator Hub undergo a review by the operations team. Once approved, they are granted permission to be sold.
* Creators can check their earnings in the “Payout” section of the Creator Hub, and the amount that can be settled is shown as “Earned BLUC.”

## **Revenue Sharing Structure**

### Avatar items

OVERDARE distributes revenue from Avatar item sales between the creator and the platform at the following rates:

* Creator Revenue: 30% of the sale price.
* Platform Fee: 70% of the sale price (includes platform operating and investment costs)
* Example:\
  If a creator sells an item for 100 BLUC, the creator receives 30 Earned BLUC, and OVERDARE collects 70 BLUC as the platform fee.

### World Products and Assets

OVERDARE distributes revenue from World Products sales between the creator and the platform at the following rates (this doesn't include Asset sales) :

* Creator Revenue: 70% of the sales price.
* Platform Fee: 30% of the sales price (includes platform operating and investment costs)
* Example:\
  If a creator sells a world product for 100 BLUC, the creator receives 70 Earned BLUC, and OVERDARE collects 30 BLUC as the platform fee.

{% content-ref url="/pages/sh7aSCa7yBWAfmjtp7Wv" %}
[World Product Guidelines](/overdare/policy/world-product-guidelines)
{% endcontent-ref %}

## **How to Generate Revenue**

### Selling Content

After review is completed, creators can set or change the price and quantity of items in “My contents” within the Creator Hub, and they can choose to display or hide the items for sale.

## **Payout Procedures**

Please refer to :

{% content-ref url="/pages/vr6ch6YtxNR1LTThGpf2" %}
[Creator Payout Policy](/overdare/policy/creator-payout-policy)
{% endcontent-ref %}

## **Changes and Updates**

OVERDARE may revise its monetization policy in response to market conditions or policy changes. Any revisions will be announced in advance via the platform’s notices.


# Forum Guidelines

The Creators’ Forum at `forum.overdare.com` is a space where verified creators can collaborate, share feedback, and troubleshoot together. These rules supplement the **OVERDARE Community Guidelines** and the **Creator Terms of Service**. All platform‑wide content restrictions continue to apply in the Forum.

***

### Purpose and Scope

* Foster constructive, creator‑centric discussion about worlds, assets, payouts, and technical workflows in OVERDARE.
* Apply to everything you post or attach in the Forum—threads, replies, reactions, profile images, and links.

### Eligibility

* Only creators who have agreed to the Creator Terms may sign in.
* Each person may hold only one Forum account. Impersonation or alternate (“sock‑puppet”) accounts are prohibited.

### Respectful Conduct

* **No harassment or personal attacks.** Disagree with ideas, never with people.
* **No hate, bigotry, or discriminatory language** on the basis of race, nationality, religion, gender, orientation, disability, or any protected class.
* **No NSFW or shocking content.** Keep discussion safe for work and minors.
* Follow thread topics; moderators may move or close off‑topic posts.

### Spam and Self‑Promotion

* Do not repost the same content, bump threads, or flood with emoji reactions.
* Advertising outside services, NFT drops, referral codes, or paid surveys is forbidden.

### Confidentiality & Privacy

* Treat the Forum as a public venue: search engines may index posts.
* Never share personal data, private business information, or unreleased OVERDARE materials.
* Internal roadmaps and staff‑only discussions belong in gated channels, not public boards.

### Intellectual Property

* You own the assets you post, but by uploading you grant OVERDARE the licence described in the Creator Terms.
* Do not share third‑party assets unless you hold the rights or the asset is openly licensed.

### Moderation and Enforcement

Violations escalate through these tiers; moderators may skip steps for severe issues.

* **Notice** – public or private reminder; post may be edited or merged.
* **Warning**
  * First warning; suspension of 1 day
  * Second warning; suspension of 5 days
  * Third warning; permanent ban
* **Permanent Ban** – account removal for child‑safety issues, doxxing, severe IP theft, or continued abuse after prior suspensions.

### Reporting Content

Use the flag button beneath any post. False or abusive reports may themselves lead to penalties.

### Appeals

If you believe a moderation action was in error, email `ovdr_support@overdare.com` within seven (7) days and include relevant links and context. Generic “unban me” requests will be dismissed.

### Updates to These Guidelines

These rules may evolve as the community grows. Changes take effect upon posting; we’ll announce material updates in the Notice category within the Forum. The final interpretation of these Guidelines rests with OVERDARE.

***

For broader content rules, read the full [Community Guidelines](/overdare/policy/overdare-community-guidelines).\
Thank you for helping keep the Forum productive and welcoming!


# OVERDARE Glossary

## Overview

The **OVERDARE Glossary** is a document that organizes and explains the terms and concepts used in OVERDARE.

This document aims to clarify the meanings of key terms and expressions used in the OVERDARE App and OVERDARE Studio, helping players and creators easily understand the content.

## Glossary

<table data-full-width="true"><thead><tr><th width="228">Term</th><th width="176">Usage</th><th>Description</th></tr></thead><tbody><tr><td>AngularVelocity</td><td>OVERDARE Studio</td><td>A physics object that generates rotational motion</td></tr><tr><td>Animation</td><td>OVERDARE Studio</td><td>An object that defines character animations</td></tr><tr><td>Animator</td><td>OVERDARE Studio</td><td>An object that executes and manages animations</td></tr><tr><td>Atmosphere</td><td>OVERDARE Studio</td><td>An object that adds atmosphere effects to the game</td></tr><tr><td>Attachment</td><td>OVERDARE Studio</td><td>A point object that can be attached to other objects</td></tr><tr><td>Backpack</td><td>OVERDARE Studio</td><td>An object that stores the items owned by the player</td></tr><tr><td>BindableEvent</td><td>OVERDARE Studio</td><td>An object for event communication between scripts</td></tr><tr><td>Bone</td><td>OVERDARE Studio</td><td>An object that represents the skeleton of a model</td></tr><tr><td>Camera</td><td>OVERDARE Studio</td><td>An object that controls the player's camera</td></tr><tr><td>Character</td><td>공통</td><td>The object that the player controls or observes in the game</td></tr><tr><td>CharacterMesh</td><td>OVERDARE Studio</td><td>The object representing the mesh structure of a character</td></tr><tr><td>Client</td><td>공통</td><td>The local environment running on the device of an individual player</td></tr><tr><td>CollectionService</td><td>OVERDARE Studio</td><td>An object used to group and manage objects by using tags</td></tr><tr><td>Folder</td><td>OVERDARE Studio</td><td>A container object used to organize objects</td></tr><tr><td>Frame</td><td>OVERDARE Studio</td><td>A GUI container object</td></tr><tr><td>GuiButton</td><td>OVERDARE Studio</td><td>A clickable GUI button object</td></tr><tr><td>Humanoid</td><td>OVERDARE Studio</td><td>An object that defines the character's behavior</td></tr><tr><td>HumanoidDescription</td><td>OVERDARE Studio</td><td>An object that defines the character's appearance</td></tr><tr><td>ImageButton</td><td>OVERDARE Studio</td><td>A clickable button object with an image</td></tr><tr><td>ImageLabel</td><td>OVERDARE Studio</td><td>A GUI object that displays an image</td></tr><tr><td>Lua Script</td><td>OVERDARE Studio</td><td>The programming language used in OVERDARE Studio</td></tr><tr><td>Lighting</td><td>OVERDARE Studio</td><td>An object that manages the game's lighting and time settings</td></tr><tr><td>LinearVelocity</td><td>OVERDARE Studio</td><td>A physics object that generates linear motion</td></tr><tr><td>LocalScript</td><td>OVERDARE Studio</td><td>A script object that runs on the client</td></tr><tr><td>MaterialService</td><td>OVERDARE Studio</td><td>An object that manages materials used in the game</td></tr><tr><td>MaterialVariant</td><td>OVERDARE Studio</td><td>An object that defines custom modifications to materials</td></tr><tr><td>MeshPart</td><td>OVERDARE Studio</td><td>A part object with a custom mesh</td></tr><tr><td>Model</td><td>OVERDARE Studio</td><td>An object that groups multiple parts</td></tr><tr><td>ModuleScript</td><td>OVERDARE Studio</td><td>A reusable code module script object</td></tr><tr><td>OVERDARE App</td><td>공통</td><td>A next-generation User Generated Content (UGC) platform for creating and sharing unique and innovative games and experiences</td></tr><tr><td>OVERDARE Studio</td><td>공통</td><td>A game development tool for bringing creative ideas to life</td></tr><tr><td>Player</td><td>공통</td><td>A person (user) who plays the game</td></tr><tr><td>Part</td><td>OVERDARE Studio</td><td>A basic 3D physics object</td></tr><tr><td>ParticleEmitter</td><td>OVERDARE Studio</td><td>An object that generates particle effects</td></tr><tr><td>PlayerGui</td><td>OVERDARE Studio</td><td>A container object that holds the player's GUI elements</td></tr><tr><td>Players</td><td>OVERDARE Studio</td><td>An object displaying the list of players who have entered the game</td></tr><tr><td>PlayerScripts</td><td>OVERDARE Studio</td><td>A container object for storing scripts connected to the player</td></tr><tr><td>PointLight</td><td>OVERDARE Studio</td><td>A light object that shines light from a point source</td></tr><tr><td>RemoteEvent</td><td>OVERDARE Studio</td><td>An object for event communication between the client and server</td></tr><tr><td>ReplicatedStorage</td><td>OVERDARE Studio</td><td>A storage object for data and objects shared between the client and server</td></tr><tr><td>ScreenGui</td><td>OVERDARE Studio</td><td>A container object for GUI displayed on the screen</td></tr><tr><td>Script</td><td>OVERDARE Studio</td><td>A script object executed on the server</td></tr><tr><td>Server</td><td>공통</td><td>A central system managing the global state of the game and handling communication with all clients (players)</td></tr><tr><td>ServerScriptService</td><td>OVERDARE Studio</td><td>A script storage object for scripts executed on the server</td></tr><tr><td>ServerStorage</td><td>OVERDARE Studio</td><td>A storage object for objects that are only accessible from the server</td></tr><tr><td>Skeleton</td><td>OVERDARE Studio</td><td>An object representing the full skeletal structure of a character</td></tr><tr><td>Sound</td><td>OVERDARE Studio</td><td>An object that plays sound within the game</td></tr><tr><td>SoundGroup</td><td>OVERDARE Studio</td><td>An object for grouping sounds and setting group-level properties</td></tr><tr><td>SpawnLocation</td><td>OVERDARE Studio</td><td>An object defining where a player will spawn in the game</td></tr><tr><td>SpotLight</td><td>OVERDARE Studio</td><td>A light object that shines in a specific direction</td></tr><tr><td>StarterCharacterScripts</td><td>OVERDARE Studio</td><td>A storage object for scripts that will be loaded into the player's character</td></tr><tr><td>StarterGui</td><td>OVERDARE Studio</td><td>A container object defining the initial state of the player's GUI</td></tr><tr><td>StarterPlayer</td><td>OVERDARE Studio</td><td>A container object for the initial settings related to the player (includes child objects StarterCharacterScripts and StarterPlayerScripts)</td></tr><tr><td>StarterPlayerScripts</td><td>OVERDARE Studio</td><td>A storage object for scripts that will be loaded into the player</td></tr><tr><td>SurfaceGui</td><td>OVERDARE Studio</td><td>A GUI object displayed on the surface of a part</td></tr><tr><td>SurfaceGuiBase</td><td>OVERDARE Studio</td><td>The base class object for all SurfaceGui objects</td></tr><tr><td>Team</td><td>OVERDARE Studio</td><td>An object for managing the player's team</td></tr><tr><td>TextButton</td><td>OVERDARE Studio</td><td>A clickable button object containing text</td></tr><tr><td>TextLabel</td><td>OVERDARE Studio</td><td>A GUI element object that displays text</td></tr><tr><td>Tool</td><td>OVERDARE Studio</td><td>An object that represents a tool (e.g., sword, shield) that the character can use</td></tr><tr><td>Tween</td><td>OVERDARE Studio</td><td>An object that smoothly transitions values</td></tr><tr><td>UIAspectRatioConstraint</td><td>OVERDARE Studio</td><td>An object that maintains the aspect ratio of a GUI element</td></tr><tr><td>VectorForce</td><td>OVERDARE Studio</td><td>A physics object that applies force in a specific direction</td></tr><tr><td>Workspace</td><td>OVERDARE Studio</td><td>A container object for objects displayed in the game world</td></tr><tr><td>WrapLayer</td><td>OVERDARE Studio</td><td>An object representing character skins such as clothing or accessories</td></tr><tr><td>WrapTarget</td><td>OVERDARE Studio</td><td>An object used for seamlessly combining skins or accessories with a character or object's mesh</td></tr></tbody></table>


# Studio Manual


# Get Started


# Studio Interface

## Overview <a href="#overview" id="overview"></a>

Creators can use OVERDARE Studio to design in-game objects (world assets), build game maps (worlds), and craft **their own unique gaming environments**. Designed for accessibility, it enables both beginners and experts to create engaging and creative games with ease.

## OVERDARE Studio Basic Layout <a href="#overdare-studio-basic-layout" id="overdare-studio-basic-layout"></a>

### Viewport <a href="#viewport" id="viewport"></a>

Located in the Workspace, the Viewport displays objects placed in the world. It allows users to manipulate the position, rotation, and scale of selected objects.

<figure><img src="/files/mLLKBNJpd7fBZJz9cwkV" alt=""><figcaption></figcaption></figure>

#### **Camera Controls**

<table><thead><tr><th width="196">Keys</th><th>Action</th></tr></thead><tbody><tr><td>W, A, S, D</td><td><strong>Click on the Viewport</strong> and press W/A/S/D, or <strong>hold the right mouse button</strong> while pressing W/A/S/D to move the camera forward, left, backward, or right.</td></tr><tr><td>Q, E</td><td><strong>Click on the Viewport</strong> and press Q/E, or <strong>hold the right mouse button</strong> while pressing Q/E to move the camera down or up.</td></tr><tr><td>Shift</td><td>Hold Shift along with movement keys (W, A, S, D) to adjust the camera movement speed.</td></tr><tr><td>F</td><td>Focus the camera on the selected object.</td></tr><tr><td>Right Mouse Button</td><td><strong>Hold the right mouse button</strong> and move the mouse to rotate the camera.</td></tr><tr><td>Mouse Wheel Up/Down</td><td>Zoom in and out by moving the <strong>mouse wheel up or down</strong>.</td></tr><tr><td>Mouse Wheel Button</td><td><strong>Hold the mouse wheel button</strong> and move the mouse to pan the camera.</td></tr></tbody></table>

#### **Selecting Objects**

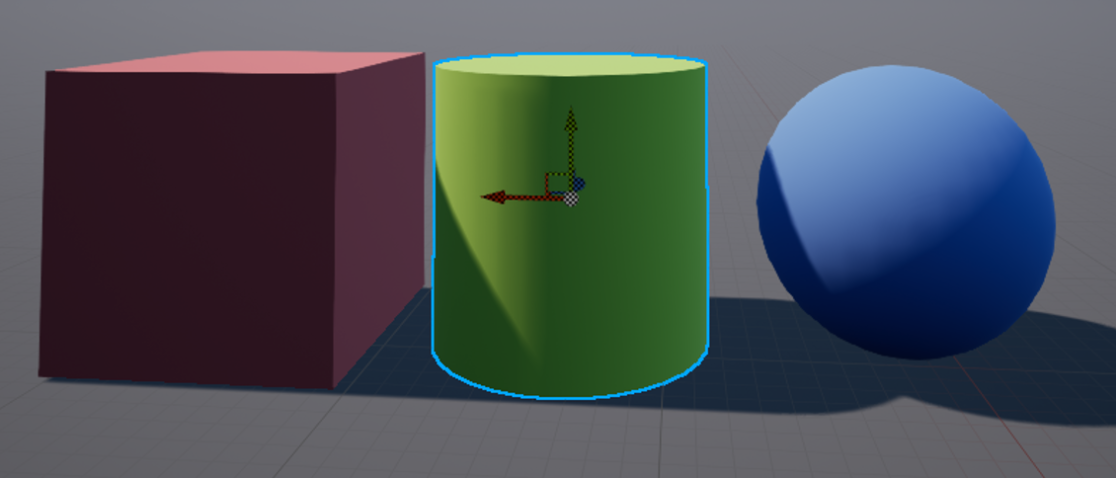
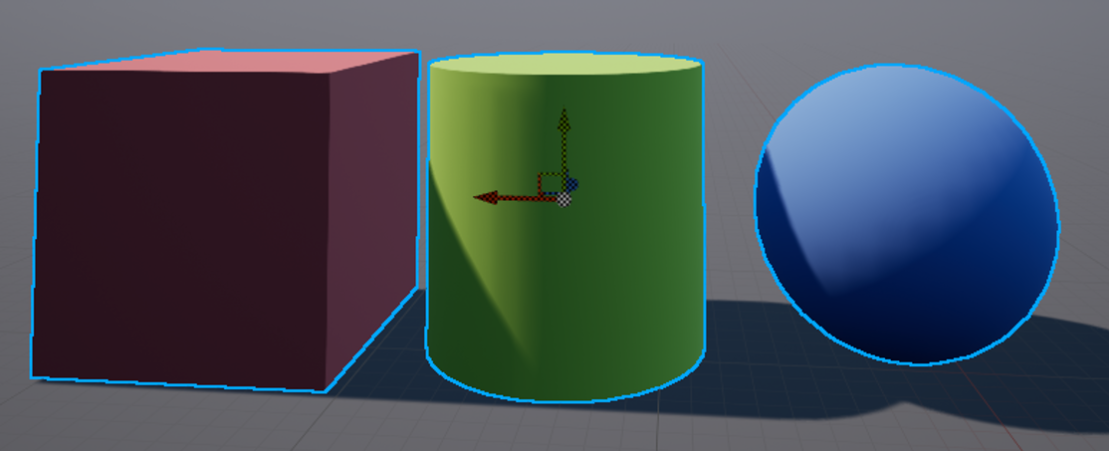
Hover over an object in the Viewport to highlight it with a blue outline. Click the highlighted object to select it.

<figure><img src="/files/aMrqzN8LQNSk2Id4I7p6" alt=""><figcaption></figcaption></figure>

<figure><img src="/files/7VjZy9r92GfFrKOqSY9h" alt=""><figcaption></figcaption></figure>

Hold Shift while clicking to select multiple objects. Hold Ctrl + Shift while clicking to deselect objects.

### Level Browser <a href="#level-browser" id="level-browser"></a>

The Level Browser displays objects placed in the world, such as Parts, Models, and Scripts, and allows you to add or delete objects.

<figure><img src="/files/mgdUDaVF8zixvKlYDuAR" alt=""><figcaption></figcaption></figure>

#### **Adding Objects**

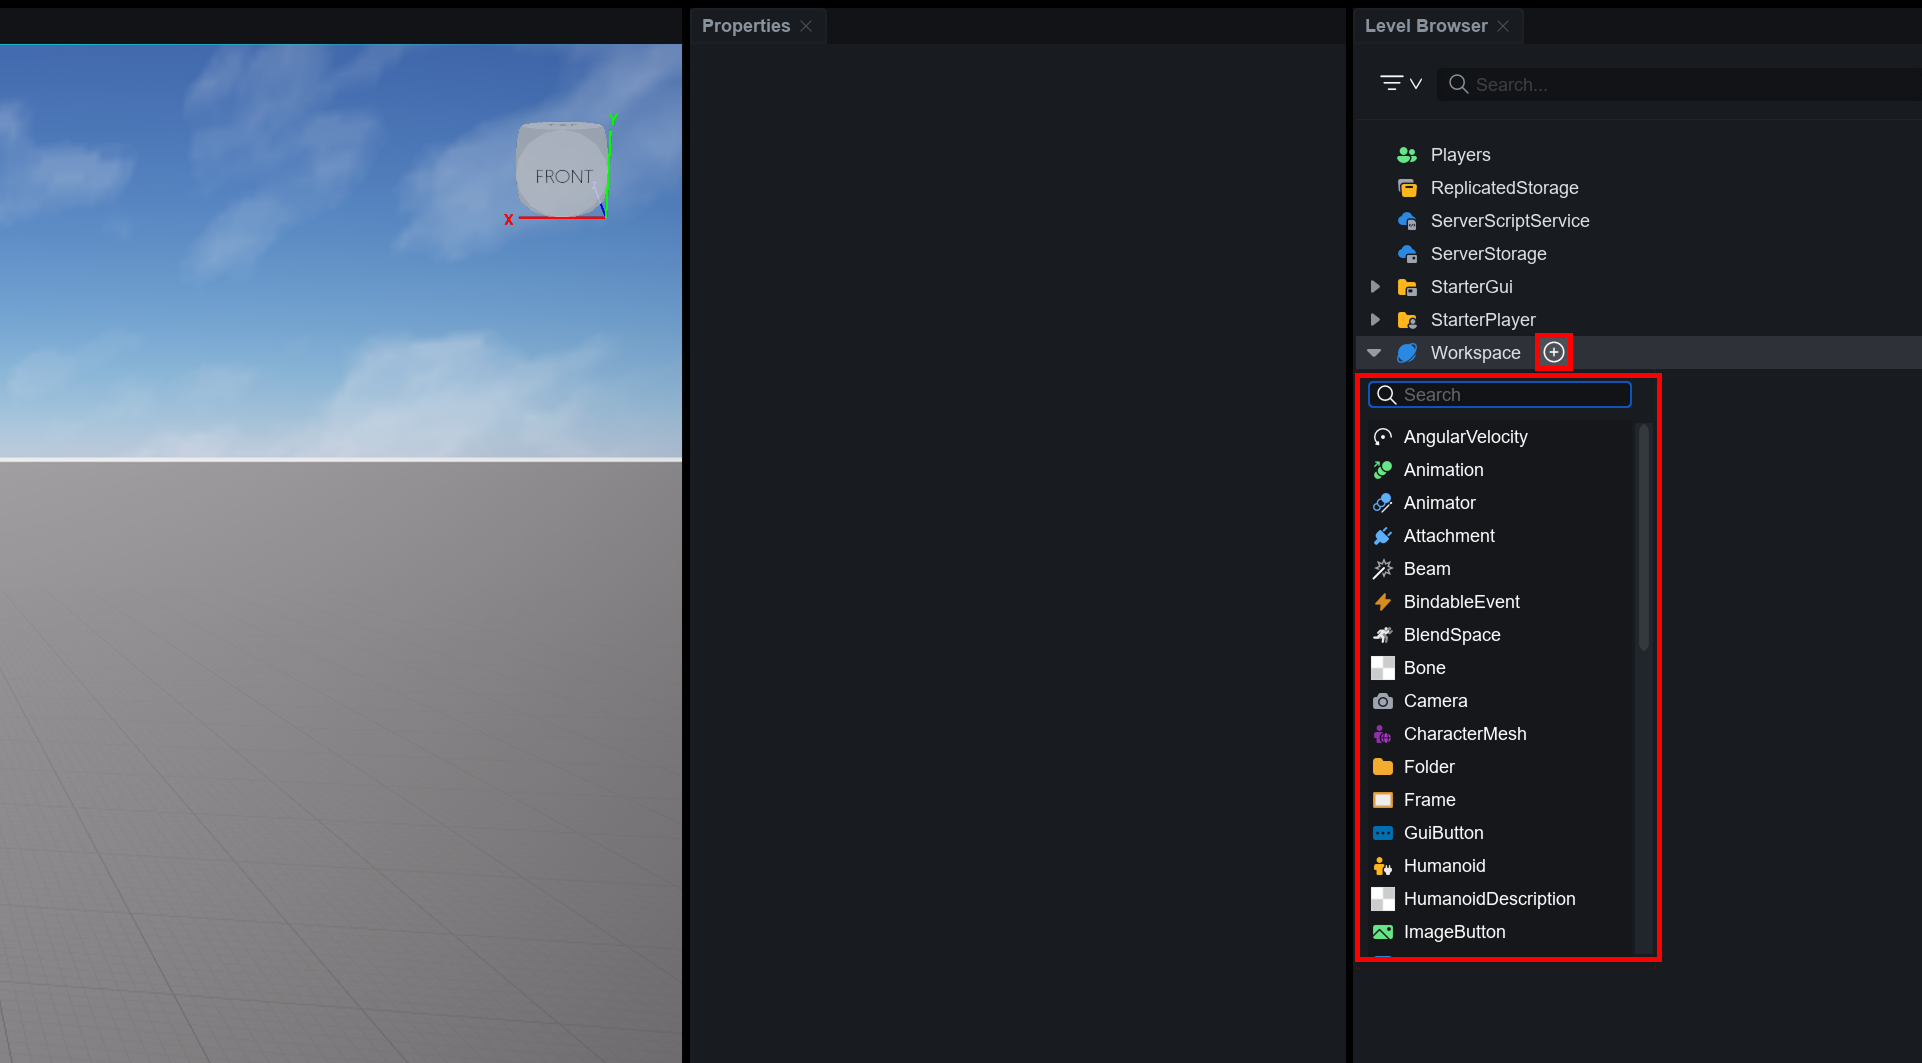
Hover over the location in the Level Browser where you want to add an object, then click the **+ button** to add a new object.

<figure><img src="/files/Ii7yLr6OknuWq56VoFYX" alt=""><figcaption></figcaption></figure>

#### **Editing Objects**

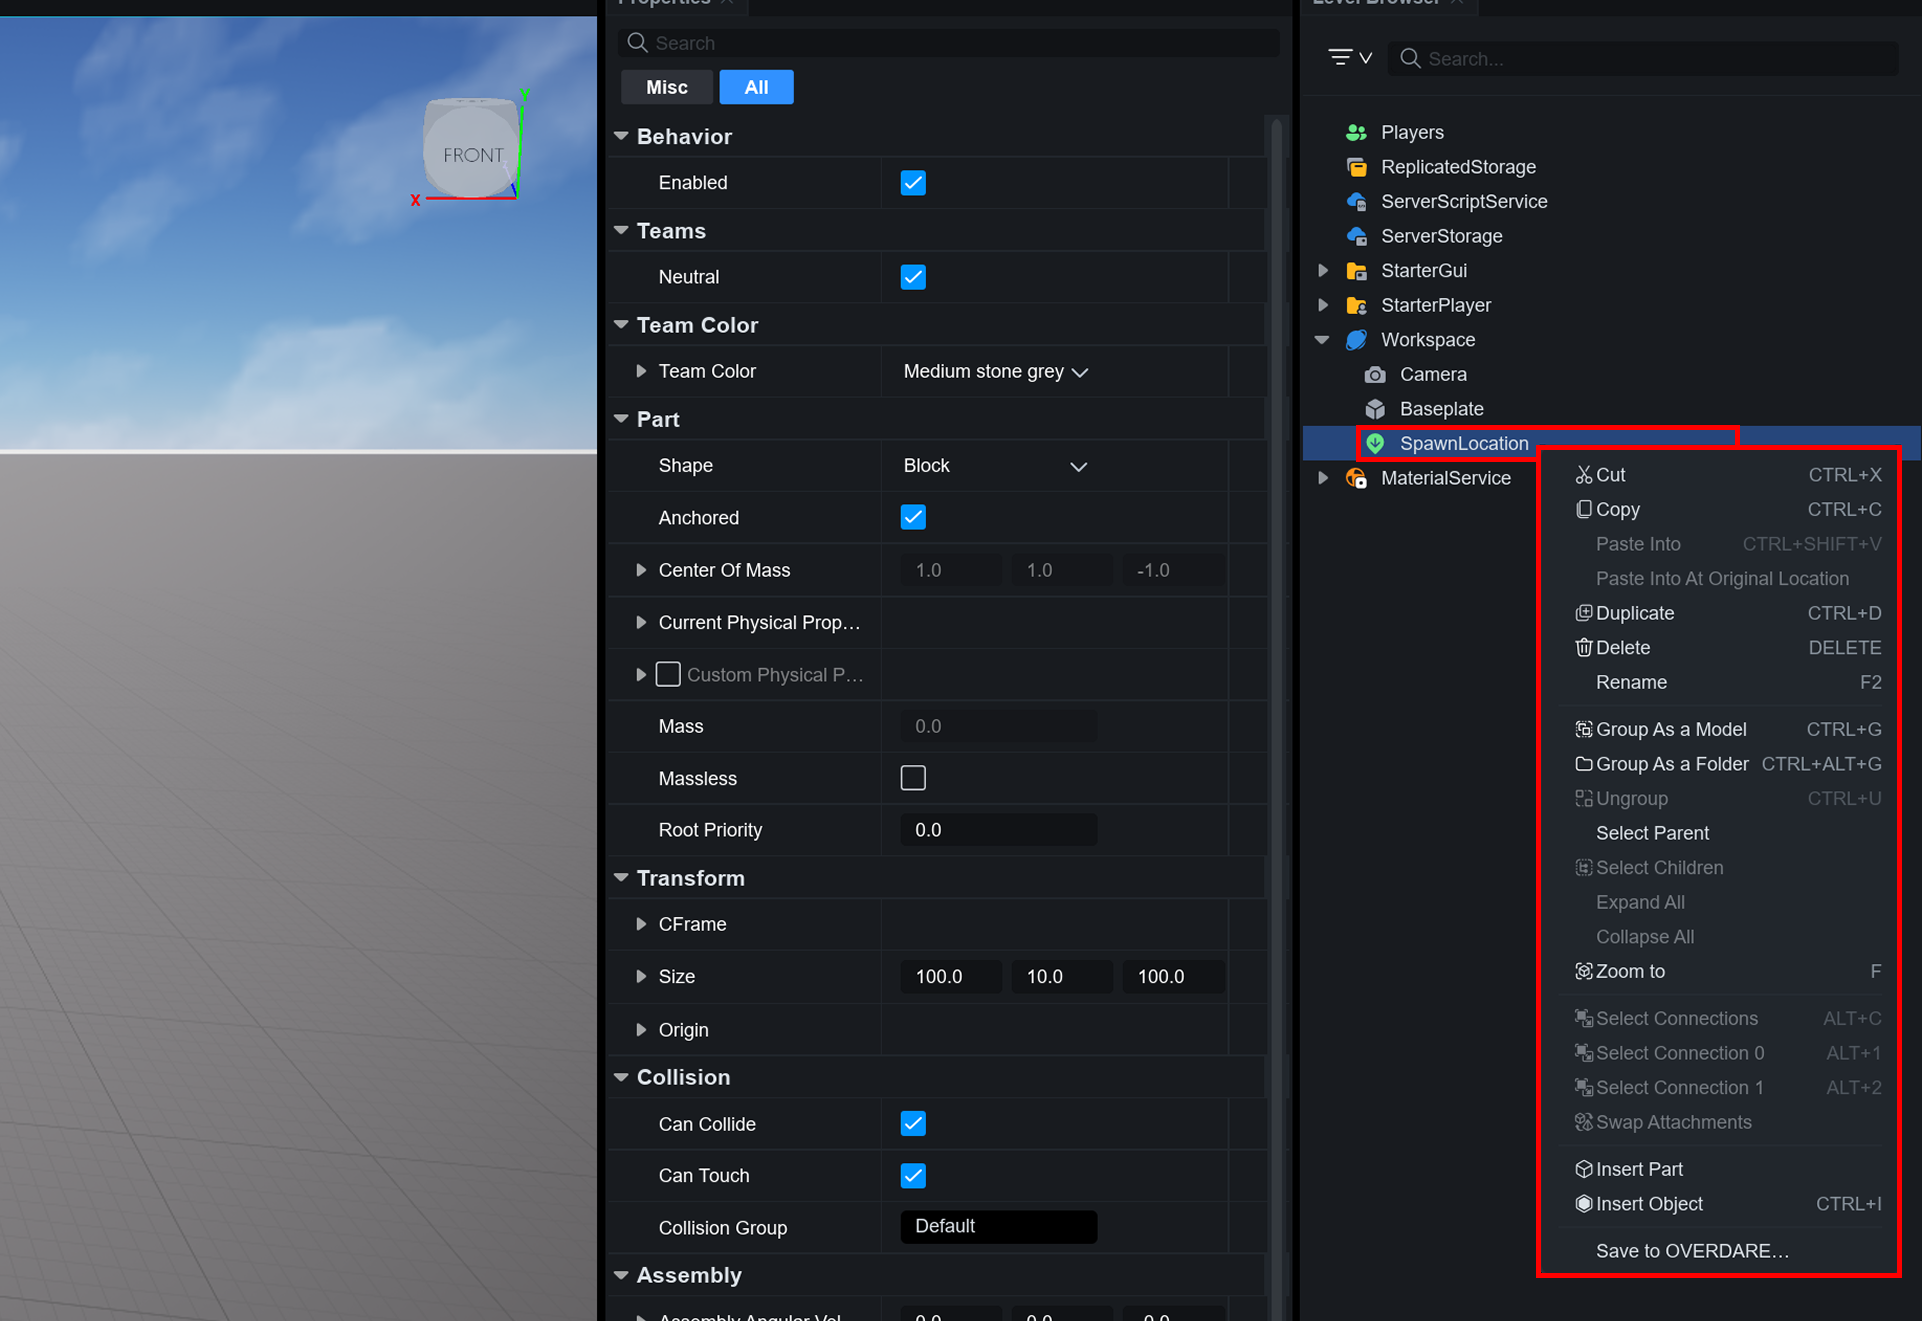
Right-click an object to access options like copy, paste, and delete.

<figure><img src="/files/CypDMRgjA2HVyEF1a0pC" alt=""><figcaption></figcaption></figure>

### Properties <a href="#properties" id="properties"></a>

Select an object in the Level Browser or Viewport to view or edit its properties in the Properties window.

<figure><img src="/files/LwBthcFkjSoSgZB7xTWR" alt=""><figcaption></figcaption></figure>

#### **Copying/Editing Properties**

Right-clicking a property value brings up a menu with options to copy or paste values.

<figure><img src="/files/3rPWBFlDxt0h4a5dYHR4" alt=""><figcaption></figcaption></figure>

### Asset Store <a href="#asset-drawer" id="asset-drawer"></a>

Use assets like models, images, meshes, and audio registered by other creators.

<figure><img src="/files/StEWOjdGGTVkNCiZr2QW" alt=""><figcaption></figcaption></figure>

#### Asset Manager <a href="#asset-manager" id="asset-manager"></a>

Import assets like models, images, meshes, and audio into the world, view the list of imported assets, and insert them into the world.

<figure><img src="/files/VoK9Bov1UFAyVWgPK9fo" alt=""><figcaption></figcaption></figure>

For more details on importing assets, refer to the manual below:

{% content-ref url="/pages/bS79pIBVkO3rjcUR9Zhi" %}
[Asset Import](/manual/studio-manual/asset-and-resource-creation/asset-import)
{% endcontent-ref %}

### Toolbar <a href="#toolbar" id="toolbar"></a>

The Toolbar is located at the top of OVERDARE Studio and consists of the Home, Model, Script, and View tabs.

<figure><img src="/files/s2ry36wbVSpOeKTqyUiq" alt=""><figcaption></figcaption></figure>

* Home tab: Provides basic tools for manipulating 3D objects and testing the created world.
* Model tab: Offers tools for manipulating 3D objects in the workspace, setting detailed materials and colors for objects, and adjusting Parts and collision settings.
* Script tab: Provides various features for controlling, testing, and debugging scripts within the project.
* View tab: Allows you to configure multiple windows and display settings within OVERDARE Studio.

## Toolbar <a href="#toolbar-1" id="toolbar-1"></a>

### Home Tab <a href="#home-tab" id="home-tab"></a>

<figure><img src="/files/rhVyhoaIA53SSJdPVp8o" alt=""><figcaption></figcaption></figure>

* Select, move, resize, and rotate objects in the Viewport.\
  ![](/files/QmQtUgQv9oog9FJbvmkf)

| Select Tool (Ctrl+1)                                                | Move Tool (Ctrl+2)                                                  | Scale Tool (Ctrl+3)                                                 | Rotate Tool (Ctrl+4)                                                |
| ------------------------------------------------------------------- | ------------------------------------------------------------------- | ------------------------------------------------------------------- | ------------------------------------------------------------------- |
| <img src="/files/6IVlw5jT93rj64C6ugTq" alt="" data-size="original"> | <img src="/files/FjI4sLObIMcRYCoCrnmm" alt="" data-size="original"> | <img src="/files/TfIhjQfP1PrB7OZS86Ct" alt="" data-size="original"> | <img src="/files/1PUba7OJEHsI9B9D6qXn" alt="" data-size="original"> |
| Object selection mode                                               | Position editing mode                                               | Size editing mode                                                   | Rotation editing mode                                               |

* Collision: Set whether objects like Parts or MeshParts collide or pass through other colliders by editing in the Viewport with Move/Scale/Rotate Tools.\ <img src="/files/ZYQHRPL1oTPsNZE92YWz" alt="" data-size="original">
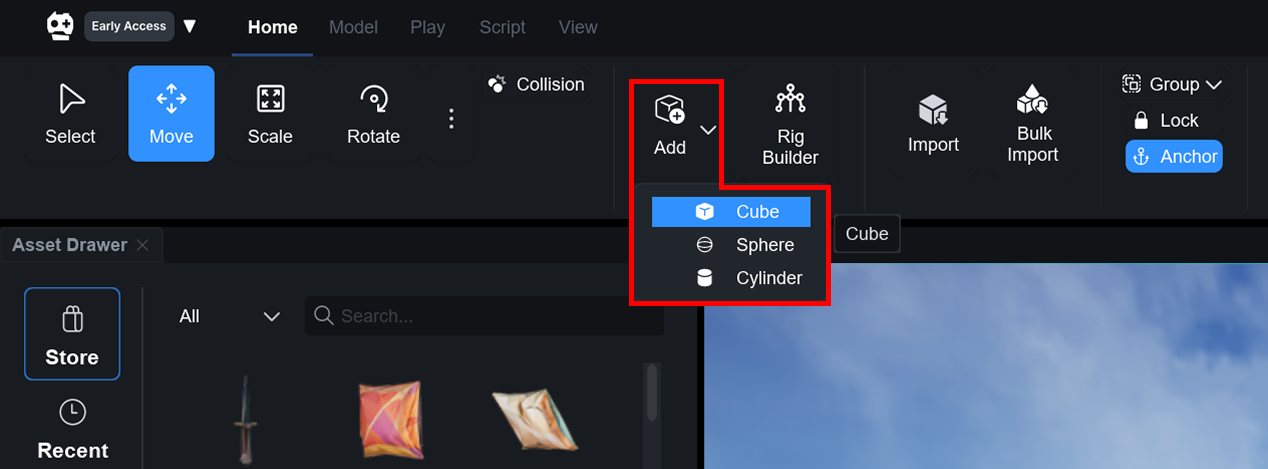
* Create Parts, characters, or Rig Builders.\
  ![](/files/P3SbRY8WCGYZZgaRlMiD)
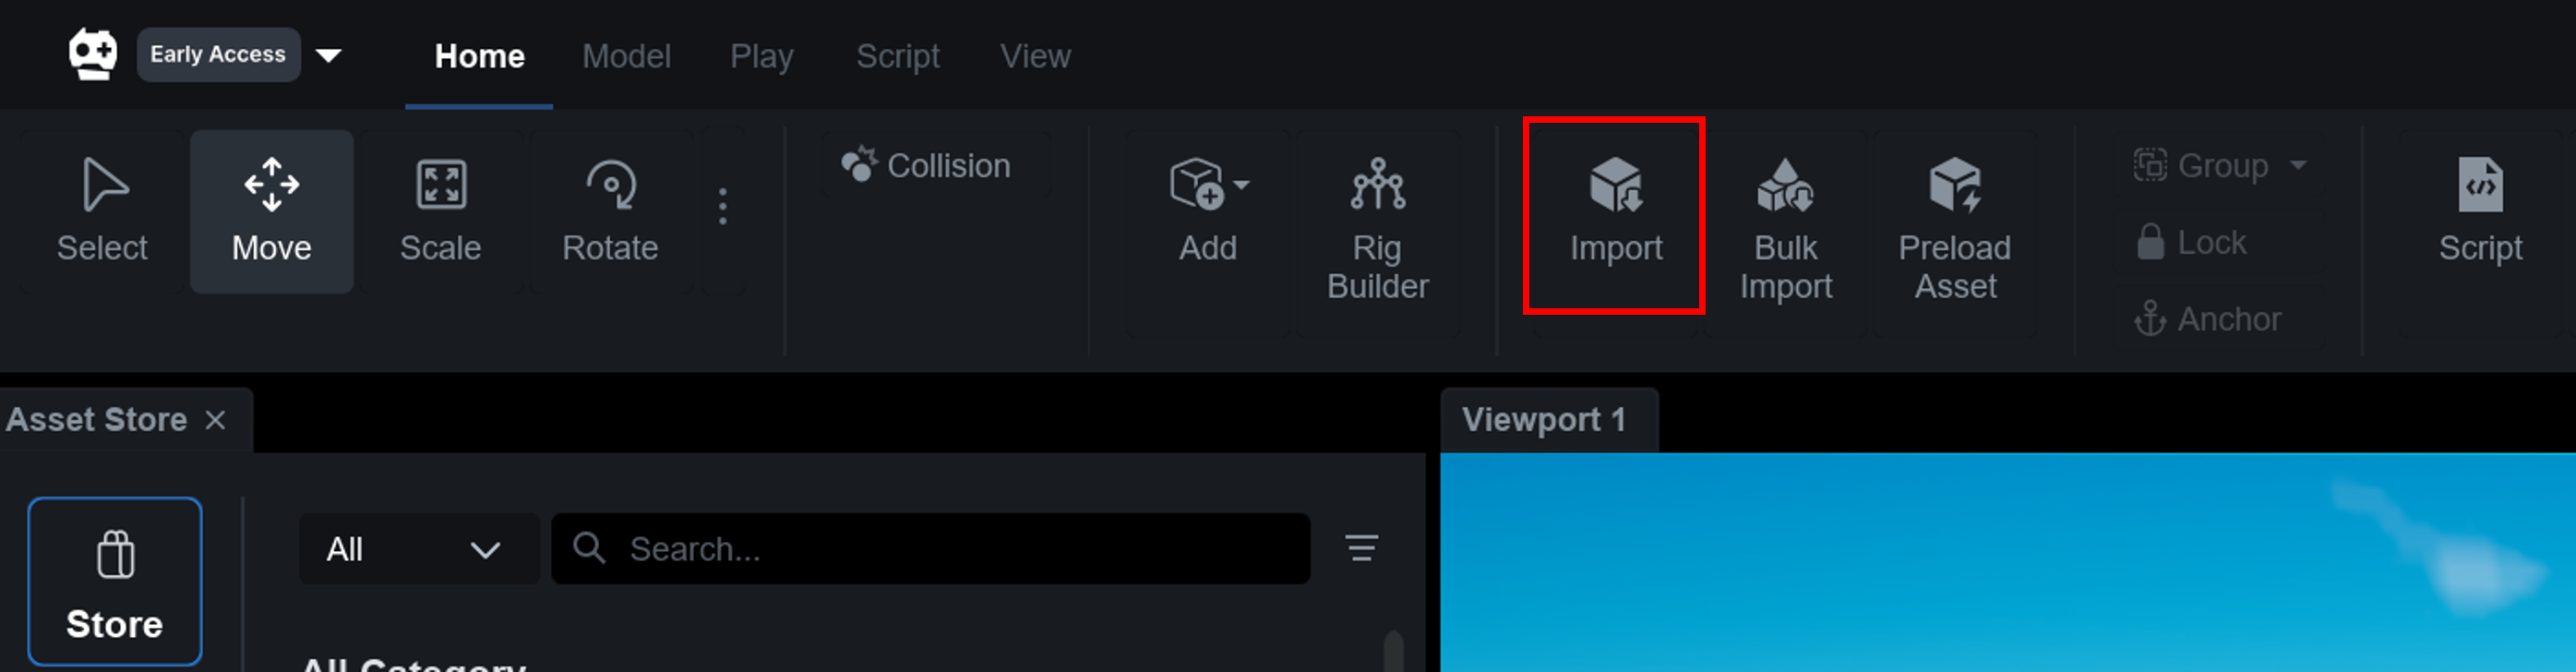
* Import: Insert external assets such as meshes, images, and audio into the world. Use Import to select a single file or Bulk Import to select multiple files.\
  ![](/files/hrY0zMJyRkxk4eWi7zoc)
* Apply Group, Lock, or Anchor to selected objects.\
  ![](/files/1v7KhFcbGHgoaVPbIpRE)
  * Group: Group selected objects into a Model or Folder.
  * Lock: Prevent selected objects from being selected in the Viewport.
  * Anchor: Set whether selected objects are physically anchored.
* Adds a script.\
  ![](/files/M62jfznKSrlJlhGr4MlB)
* Play the world in single or multiplayer test mode.\
  ![](/files/cE5WddFHsPLrJt9SSb2Q)
* Provides UI-related features.\
  ![](/files/A8Arh7f4DtNDYL39jpg3)
  * UI Mode: Displays UI objects placed in StarterGui in the Viewport.
  * Resolution: Change the Viewport resolution.
* Provide a graphics quality setting that matches the visual output of the mobile environment.\
  ![](/files/WYUOvyZRaYL75pipoBRs)

### Model Tab <a href="#model-tab" id="model-tab"></a>

<figure><img src="/files/TelSyRewHzATkyILPv1d" alt=""><figcaption></figcaption></figure>

* Same functionality as the Home Tab.\
  ![](/files/KfyCmuVmoPSVsy5vRJlH)
* Collision: Same functionality as the Collision Section in the Home Tab.\
  ![](/files/ZYQHRPL1oTPsNZE92YWz)
* Set the editing unit for moving, scaling, or rotating objects in the Viewport.\
  ![](/files/tdxq4POwr5KjjRwBJJHS)
* Import external assets, change the color of selected Parts, or manage materials.\
  ![](/files/OZzO8S78t6dhcHhVTYh7)
  * Color: Change the color of selected objects if applicable.
  * Material Manager: Add, edit, or apply materials.
* Same functionality as the Home Tab.\
  ![](/files/1v7KhFcbGHgoaVPbIpRE)
* Align: Align selected objects.\
  ![](/files/qzzDY9LmJcCPmPRloijU)
* Provides the ability to add or configure collision groups.\
  ![](/files/0tXZOfeSp1gepF2wqVlb)

### Play Tab <a href="#play-tab" id="play-tab"></a>

<figure><img src="/files/bR8QsCxr6QjfoJ1SR3l4" alt=""><figcaption></figcaption></figure>

Same functionality as the Play Section in the Home Tab.

### Script Tab <a href="#script-tab" id="script-tab"></a>

<figure><img src="/files/N3IiIhzqQCnmYo4Ds98w" alt=""><figcaption></figcaption></figure>

* Find / Replace: Find and replace text in the script editor. This feature can be used in a single script or across all scripts.\
  ![](/files/4bzdi8nYB8CSPe0QIbq9)
* Same functionality as the Home Tab.\
  ![](/files/lm4DXQSUOQiqtGCxCcTG)
* When a breakpoint is hit, the script executes the code line.\
  ![](/files/n6fpjzwYFtxfpzK9y3mh)
  * Step Into: Enter the **function** on the current line and continue debugging.
  * Step Over: Execute the function on the current line **without entering it, then move to the next line**.
  * Step Out: Execute the rest of the current function and return to the **parent function**.
* Same functionality as the Home Tab.\
  ![](/files/M62jfznKSrlJlhGr4MlB)

### View Tab <a href="#view-tab" id="view-tab"></a>

<figure><img src="/files/NfJiIqmwoDOYXe2XM80S" alt=""><figcaption></figcaption></figure>

* Show or hide specific panels.

  <figure><img src="/files/B3XuDEJCoCStY9Lzjy75" alt=""><figcaption></figcaption></figure>
* Display the Grid, Wireframe, and Collision in the Viewport.\
  ![](/files/AD9jmpxT6VYrsEgowIRl)
* Same functionality as the Home Tab.\
  ![](/files/9kuRA1o2rg79U6jMJkWn)

## Keyboard Shortcuts <a href="#keyboard-shortcuts" id="keyboard-shortcuts"></a>

<table><thead><tr><th width="214">Shortcut</th><th>Function</th></tr></thead><tbody><tr><td>Ctrl + 1</td><td>Select Tool</td></tr><tr><td>Ctrl + 2</td><td>Move Tool</td></tr><tr><td>Ctrl + 3</td><td>Scale Tool</td></tr><tr><td>Ctrl + 4</td><td>Rotate Tool</td></tr><tr><td>Spacebar</td><td>Switch tools in the order of Move - Scale - Rotate.</td></tr><tr><td>Ctrl + C</td><td>Copy the selected object to clipboard.</td></tr><tr><td>Ctrl + V</td><td>Insert the object saved to clipboard.</td></tr><tr><td>Ctrl + Shift + V</td><td>Insert the object saved to clipboard under the selected object.</td></tr><tr><td>Ctrl + X</td><td>Cut the currently selected object to the clipboard.</td></tr><tr><td>Ctrl + D</td><td>Duplicate the currently selected object.</td></tr><tr><td>F1</td><td>Go to the OVERDARE Creator Guide page.</td></tr><tr><td>F2</td><td>Change the name of the selected object.</td></tr><tr><td>F5</td><td>Run the play test.</td></tr><tr><td>Shift + F5</td><td>End the play test.</td></tr><tr><td>Pause</td><td></td></tr><tr><td>F11</td><td>Toggle viewport panel to fullscreen.</td></tr><tr><td>Ctrl + S</td><td>Save in OVERDARE.</td></tr><tr><td>Ctrl + Shift + S</td><td>Save as a new local file.</td></tr><tr><td>Ctrl + N</td><td>Generate a new project.</td></tr><tr><td>Ctrl + O</td><td>Open the project as a local file.</td></tr><tr><td>Ctrl + Shift + O</td><td>Open the project in OVERDARE.</td></tr><tr><td>Alt + P</td><td>Publish the project in OVERDARE.</td></tr><tr><td>Alt + Shift + P</td><td>Newly publish the project in OVERDARE.</td></tr><tr><td>Ctrl + F4</td><td>Close the current project.</td></tr><tr><td>Alt + X</td><td>Switch the display state of the level browser panel.</td></tr><tr><td>Ctrl + Shift + F1</td><td>Switch the display state of the profiler (Stats).</td></tr><tr><td>Alt + L</td><td>Switch the Locked state of the selected Part.</td></tr><tr><td>Alt + A</td><td>Switch the Anchored state of the selected Part.<br>(If Model is selected, switch the Anchored state of every descendant Part.)</td></tr><tr><td>Ctrl + G</td><td>Group the selected objects into a model.</td></tr><tr><td>Ctrl + Alt + G</td><td>Group the selected objects into a folder.</td></tr><tr><td>Ctrl + U</td><td>Ungroup the selected folder/model.</td></tr><tr><td>Ctrl + L</td><td>Switch the Gizmo axis between Local/World.</td></tr><tr><td>Ctrl + R</td><td>Switch the horizontal rotation axis (y-axis).</td></tr><tr><td>Ctrl + T</td><td>Switch the vertical rotation axis (x-axis).</td></tr><tr><td>Ctrl + I</td><td>Show the Add Objects menu.</td></tr><tr><td>Ctrl + Shift + X</td><td>Enter the filter entry mode for level browser panel.</td></tr><tr><td>Ctrl + Shift + P</td><td>Enter the filter entry mode for property panel.</td></tr><tr><td>G</td><td>Switch the display state of the gizmo and grid.</td></tr></tbody></table>

## Output Panel <a href="#output-panel" id="output-panel"></a>

### Output Log <a href="#output-log" id="output-log"></a>

Displays information, warnings, and errors occurring in the world and scripts.

![](/files/8WP3NNcimZPUf8TAqyuZ)

Right-click the Output Log panel and select **Clear Log** to remove all printed logs.

<figure><img src="/files/s3amKaSmtq3f1D9IugtH" alt=""><figcaption></figcaption></figure>

### Problems <a href="#problems" id="problems"></a>

Displays error information in the script in real time.

![](/files/6Tu1CZiRzDxBRckvyoqX)

## Breakpoint Management Panel <a href="#breakpoint-management-panel" id="breakpoint-management-panel"></a>

### Breakpoints <a href="#breakpoints" id="breakpoints"></a>

You can view the list of breakpoints set in the script. Breakpoints can be enabled or disabled from the list, and double-clicking the Script or Line column will navigate to the corresponding code line.

![](/files/cvupP8RvDgoQfwHjYb3S)

### Watch <a href="#watch" id="watch"></a>

You can check the state of variables when a breakpoint is hit.

<figure><img src="/files/j9AbOnn0RHoyaiNLaIRJ" alt=""><figcaption></figcaption></figure>

#### Call Stack <a href="#call-stack" id="call-stack"></a>

You can track the order of function calls when a breakpoint is hit.

<figure><img src="/files/xB5QWfpfOjz2zA4vmcDF" alt=""><figcaption></figcaption></figure>

For more details on breakpoints, you can refer to the manual below.

{% content-ref url="/pages/8a3SWMphK7WE7Q4GpCoD" %}
[Breakpoint](/manual/script-manual/debugging-and-optimization/breakpoint)
{% endcontent-ref %}


# World Template

## Overview

By using world templates that come with key features pre-included, you can easily create a game without writing additional scripts. For example, using the TPS template provides essential features like character control, TPS camera view, and gun systems, allowing you to test and develop immediately without the need for further implementation.

## How to Use

World templates are displayed in the **Start with Template** section on the first screen of OVERDARE Studio. By clicking on the desired template, you can duplicate it and create a new project.

<figure><img src="/files/4yf268JsgKfBYprxWDCf" alt=""><figcaption></figcaption></figure>

## Template Type

<table><thead><tr><th width="158.4736328125">Template</th><th width="352.9473876953125">Description</th><th>Use</th></tr></thead><tbody><tr><td>Island</td><td>An island map where you can experience seasonal changes and basic terrain. You can explore various seasonal styles by following signs and learn about the asset store and object swapping | Tutorial, Basic Learning, Social Map</td><td>Tutorial, Basic Learning, Social Map</td></tr><tr><td>Lobby</td><td>A lobby with modules like shops and scoreboards. Can be used as the starting point of a game without additional implementation</td><td>Waiting Room, Game Hub, Community Space</td></tr><tr><td>TPS</td><td>A third-person shooting game template with weapon systems and module scripts for shooting, aiming, and camera control. Suitable for prototype creation</td><td>TPS Shooting Games, Combat-Based Games</td></tr><tr><td>Potion Factory</td><td>A complete potion factory background. Can be used for various genres like crafting and fantasy</td><td>Background Set, Crafting, Fantasy/Factory Simulation</td></tr><tr><td>Jungle</td><td>A survival map set in a dense forest, featuring custom props and animation for exploration, hunting, and resource gathering.</td><td>Survival, Exploration, Hunting</td></tr><tr><td>Obby</td><td>An Obby map that contains various dynamic obstacles such as moving pillars, rotating discs, and swinging pendulums. You can adjust difficulty and achieve a specific style by freely changing speed and placement.</td><td>Obby, race, obstacle, parkour, module</td></tr><tr><td>TPA</td><td>A template for third-person action game development.<br>Includes ActionSequence-based combat systems with melee and ranged actions.<br>Suitable for rapid prototyping and scalable expansion.</td><td>TPA, Action, Combat, Adventure</td></tr></tbody></table>

## Key Features Included in the Template Island

### Island

<table><thead><tr><th width="463.24560546875">Feature</th><th width="279.87725830078125">Related Script</th></tr></thead><tbody><tr><td>Chair</td><td>ChairManager<br>SittingSystem</td></tr><tr><td>Campfire</td><td>CampfireTrigger</td></tr><tr><td>Fishing</td><td>FishingAreaTrigger<br>FishingSystem</td></tr><tr><td>Time Change</td><td>TimeSetSwitch<br>TimeFlowSwitchTrigger<br>TimeResetTrigger</td></tr></tbody></table>

### Lobby

<table><thead><tr><th width="463.24560546875">Feature</th><th width="279.87725830078125">Related Script</th></tr></thead><tbody><tr><td>Climbing</td><td>ClimbDisabler</td></tr><tr><td>Chair</td><td>ChairManager<br>SittingSystem</td></tr><tr><td>Scoreboard</td><td>ScorePart<br>Scoreboard<br>ScoreboardUI</td></tr><tr><td>Shop UI</td><td>ShopOpenTrigger<br>ShopUI<br>Shop</td></tr></tbody></table>

### TPS

<table><thead><tr><th width="463.24560546875">Feature</th><th width="279.87725830078125">Related Script</th></tr></thead><tbody><tr><td>Sets UI position, size, and image settings for fire/reload buttons</td><td>Config</td></tr><tr><td>Third-person camera setup</td><td>OSSy_TPS_Camera</td></tr><tr><td>A combat network event handler that manages bullet replication, damage processing, effects, and broadcasts related events to all clients</td><td>BulletReplicate</td></tr><tr><td>Locally controls the TPS combat system, including weapon equip, firing, reloading, aiming, recoil, and GUI updates</td><td>OSSy_Client</td></tr><tr><td>An event handler that receives combat-related client events such as shooting, damage, and effects from other locals, and synchronizes bullet creation and visual/audio effects locally</td><td>OSSy_EventHandler</td></tr><tr><td>Sets weapon data setup, including fire rate, recoil, ammo count, and bullet spread</td><td>WeaponData</td></tr><tr><td>Animation setup modules</td><td>BasicAnimantionData<br>AnimantionData<br>MotionSyncModule</td></tr><tr><td>Animation synchronization</td><td>LocomotionSync<br>OSSy_MotionSync</td></tr><tr><td>Animation controller</td><td>CharacterAnimationManager</td></tr><tr><td>Weapon respawn</td><td>Spawner</td></tr></tbody></table>

### Potion Factory

<table><thead><tr><th width="463.24560546875">Feature</th><th width="279.87725830078125">Related Script</th></tr></thead><tbody><tr><td>Climbing</td><td>ClimbDisabler</td></tr></tbody></table>

### Jungle

This map does not include script feature.

### Obby

<table><thead><tr><th width="463.24560546875">Feature</th><th width="279.87725830078125">Related Script</th></tr></thead><tbody><tr><td>Processes initialization when player enters, sets respawn time, and specifies checkpoint location</td><td>GameSetting</td></tr><tr><td>Processes Timer and Goal UI</td><td>HUDScript</td></tr><tr><td>Measures elapsed game time</td><td>Stopwatch</td></tr><tr><td>Kills the character touched by the Part</td><td>KillPart</td></tr><tr><td>Sets the checkpoint information for the character touched by the Part</td><td>Checkpoint</td></tr><tr><td>Processes the start and end of run</td><td>StartLine / GoalLine</td></tr><tr><td>Processes Part movement</td><td>MovePart</td></tr><tr><td>Processes Part rotation</td><td>SpinPart / RotaryHammer / SwingPart</td></tr><tr><td>Applies a knockback effect that knocks back the character touched by the Part</td><td>ImpactPart</td></tr><tr><td>Processes obstacles that fall sequentially from above</td><td>FallingBalls</td></tr><tr><td>Disappears when the Part touches the character and then respawns after a certain time</td><td>DisappearPart</td></tr></tbody></table>

### TPA

The TPA template is designed with a **modular structure** where the Character, Combat, and UI systems are separated, allowing each system to be independently extended and maintained. To help you better understand this structure, the project **includes a guide document that** explains the overall flow and architecture, and it is recommended to use this as the primary reference.

A **guide document (Docs/Beginner Guide.html)** is also provided within the project folder to help you understand the template as a whole, and it is strongly recommended to review this document first.

<figure><img src="/files/Gmq6HUwjVnMmglbtoscn" alt=""><figcaption></figcaption></figure>

```
Docs/
├── Beginner Guide.html                  Beginner tutorial for creating a TPA game
├── Beginner Guide.md                    Markdown source of the above content
└── Reference/
    ├── 00_Project_Overview.md           Overview of the TPA template, including content and tech stack (MVC, data-driven, etc.)
    ├── 01_Character_Guide.md            Specifications and explanation of playable characters (Punch, Gun, etc.) based on CharDB
    ├── 02_Weapon_Skill_Guide.md         Data guide for weapons, skill slots, combos, etc., based on WeaponDB and SkillDB
    ├── 03_UI_Controls_Guide.md          UI and control guide including skill button layout, input, and icons (AssetDB)
    ├── 04_Level_Browser_Structure.md    Service structure and ReplicatedStorage folder layout as seen in the level browser
    ├── 05_Action_Sequence_Guide.md      Explanation of included ActionSequence assets and track types (Animation, Hit, Camera, etc.)
    ├── 06_Extension_Guide.md            Summary of how to extend characters, weapons, and skills using data and plugins
    └── Reference Guide.html             Compiled guide for Reference series (00–06)
```

Additionally, the same guide (Workspace/Docs) is included within the map, allowing you to conveniently reference it directly in the studio environment when needed.

<div align="left"><figure><img src="/files/6UaUrEfNruFfJV4nbdVj" alt=""><figcaption></figcaption></figure></div>


# Coordinate System

Coordinate systems in OVERDARE Studio consist of a 3D coordinate system for representing the position, size, and rotation of objects in 3D space, and a 2D coordinate system (UDim2) for defining the scale and offset of GUI elements in 2D space.

## 3D Coordinate System <a href="#d-coordinate-system" id="d-coordinate-system"></a>

In OVERDARE Studio, the 3D coordinate system uses the right-handed coordinate system, and the default unit for position and size is **centimeters (cm)**.

<figure><img src="/files/uLJtPBc2UrZlaYLHM0N3" alt=""><figcaption></figcaption></figure>

The **Position** or **Orientation** of an object can be set individually using **Vector3**, but using the **CFrame** data type allows you to set both at once.

```lua
-- Position
Part.Position = Vector3.new(0, 50, -300)

-- Orientation
Part.Orientation = Vector3.new(0, 0, 30)

-- CFrame
local targetPosition = Vector3.new(0, 30, 0)
local upVector = Vector3.new(0, 1, 0)
Part.CFrame = CFrame.lookAt(Part.Position, targetPosition, upVector)
```

CFrame, short for **Coordinate Frame**, is a data type that contains both the Position and Orientation information of an object.

Learn More

{% content-ref url="/pages/cTJPwBvAKmDBrcMGAPRb" %}
[CFrame](/development/api-reference/datatype/cframe)
{% endcontent-ref %}

## 2D Coordinate System <a href="#d-coordinate-system-1" id="d-coordinate-system-1"></a>

In OVERDARE Studio, the 2D space uses the UDim2 format. In UDim2, Scale represents a percentage (%) of the parent object’s size, and Offset represents the position or size in pixels.

<figure><img src="/files/xhjNQJGNowCV9AoAVGaP" alt=""><figcaption></figcaption></figure>

```lua
local TextLabel = script.Parent

TextLabel.AnchorPoint = Vector2.new(0.5, 0.5)
TextLabel.Position = UDim2.new(0.5, 0, 0.5, 0)
TextLabel.Size = UDim2.new(0.5, 0, 0, 200)

local TextPos = TextLabel.Position
print(TextPos.X.Scale, TextPos.X.Offset, TextPos.Y.Scale, TextPos.Y.Offset)
```


# Studio Play Test

## Overview <a href="#overview" id="overview"></a>

In OVERDARE Studio, you can test and verify the functionality of placed objects or scripts using the **Play** feature. This allows you to check your work in real-time and quickly identify any necessary adjustments.

## Important Notes <a href="#important-notes" id="important-notes"></a>

The environment in which users play published games is **mobile**, not the PC used for OVERDARE Studio. Therefore, elements related to mobile devices, such as controls and UI, must be **tested and finalized on a mobile device**. For mobile testing, refer to **Item #5** in the Publishing Worlds Manual.

{% content-ref url="/pages/jBqSrXOXHMpi1tJFzwk8" %}
[World Publish](/manual/studio-manual/get-started/world-publish)
{% endcontent-ref %}

## How to Use

### Play Feature Location <a href="#play-feature-location" id="play-feature-location"></a>

The Play feature is available in the **Home tab** in the top tab area of OVERDARE Studio.

<figure><img src="/files/cxSzNWPP4ZQhwL43x0Y1" alt=""><figcaption></figcaption></figure>

By selecting the **Play tab** in the tab area, you can display features only related to Play.

<figure><img src="/files/2effGwP54usm0deENayA" alt=""><figcaption></figcaption></figure>

### Play, Pause, and Stop <a href="#play-pause-and-stop" id="play-pause-and-stop"></a>

Click the **Play button (or press F5)** to start the game.

While in Play mode, click the **Pause button** to temporarily pause the game. Click the **Stop button (or press Shift+F5)** to end the game and return to the editing screen.

<figure><img src="/files/zUwRGYdmgiPCS1UoIbzo" alt=""><figcaption></figcaption></figure>

### Test Option Settings <a href="#test-option-settings" id="test-option-settings"></a>

In the **Play tab**, click the arrow (🔽) next to the Stop button to configure test options.

<figure><img src="/files/gppu94KvNI9zNiysd5Ht" alt=""><figcaption></figcaption></figure>

<table><thead><tr><th width="240">Option</th><th>Description</th></tr></thead><tbody><tr><td>Number of Players</td><td>Sets the number of players that will join when the game is launched<br>(For testing multiplayer environments).</td></tr></tbody></table>

### Add a Client

Press the **Add a Client button** during a play test to add a new player.

<figure><img src="/files/oMNxPvl9V6EEGj2B1ALh" alt=""><figcaption></figcaption></figure>

When you click the Close (X) button on the client window, only the corresponding client process is terminated, while the server and other clients continue running. This allows you to test player disconnection scenarios without restarting the entire session.

### Enter Spectator Mode

You can switch to Spectator Mode by pressing the Spectator View button while in Play mode.

In the spectator mode, you can detach from the player character and observe the game **from a free camera perspective**. Press the Player View button again to return to the player’s perspective.

(However, spectator mode cannot be used during multi-test.)

<figure><img src="/files/eADEHiJLJwXW9MV5KUzX" alt=""><figcaption></figcaption></figure>

## Virtual Emulation Test of Mobile Environment

In the Studio, a mobile device environment can be emulated virtually for testing, allowing you to preview how system UI, joysticks, jump buttons, and GUIs appear in an actual mobile environment.

### Function Location

The Device Emulation function can be enabled or disabled by clicking **Device Emulation** in the **Play tab** on the top tab area of ​​OVERDARE Studio.

<figure><img src="/files/2KpzbVK2qRMeAWTMhEw0" alt=""><figcaption></figcaption></figure>

### Device Emulation Mode

When Device Emulation is enabled, the viewport automatically adjusts to the resolution of the selected device.

<figure><img src="/files/cwqLbFDlx0yuHDOGCjlg" alt=""><figcaption></figcaption></figure>

* 1️⃣ Select Device: Select the device to simulate. You can choose a predefined device or add a new one.
* 2️⃣ Select Resolution Scaling Method: Set how the viewport screen matches the actual device's size.
  * Physical Scale: Displays the same size as the actual device, reflecting the pixel density (DPI) of the actual device.
  * Actual Resolution: Displays pixels as they are, regardless of dot per inch (DPI).
  * Fit to Window: Displays the current viewport screen to its full size.
* 3️⃣ Show SafeArea Region: If the selected device has a SafeArea such as a notch or punch hole, the region is displayed.

When you run a play test with Device Emulation enabled, the viewport displays the system UI, joystick, and jump button.

In normal play mode, the camera can be rotated with left and right mouse clicks, but in Device Emulation mode, rotation is possible only with **left-click**.

<figure><img src="/files/flBwZQHwmKIzK2scIEJ7" alt=""><figcaption></figcaption></figure>

* 1️⃣ Show System UI Region
* 2️⃣ Show SafeArea Region
* 3️⃣ Joystick Region
* 4️⃣ Jump Button

Unlike the joystick and jump button, the buttons in the System UI region do not work when clicked; they are simply displayed as images only.

### Memory Usage Display and Warning

If the selected device's memory limit exceeds, the memory usage at the top of the viewport is displayed in orange, and a warning is output to the Output Log.

However, the memory usage is not measured from an actual device but is estimated through a simple ratio calculation based on the size of resources (e.g., textures, sounds, meshes) included in the project. Therefore, differences may occur compared to the actual memory consumed on a device due to memory management for each device.

<figure><img src="/files/nfqLXBNJBv7zJ5lU757v" alt=""><figcaption></figcaption></figure>

### Adding a New Device

Click **Manage Devices** in the device selection dropdown menu to open the Emulation Device Manager window, where a new device can be added.

When creating a device, sequential names from newDevice0 to newDevice9 are assigned by default, allowing up to 10 devices. However, **renaming allows unlimited addition** of devices.

<figure><img src="/files/c6OQYNx00yAzIUL1E8qO" alt=""><figcaption></figcaption></figure>

<figure><img src="/files/ek8uRneqSOs3BeB7K2J6" alt=""><figcaption></figcaption></figure>

* 1️⃣ Registered devices are displayed.
* 2️⃣ Can set the device specifications of the selected device.
* 3️⃣ Can add or delete new devices or duplicate registered devices.
  * Name: Name of the device
  * Device Platform: OS type of the device (has no functional impact, used for differentiation)
  * Physical X: Horizontal resolution of the screen (in pixels)
  * Physical Y: Vertical resolution of the screen (in pixels)
  * PPI: Pixel density of the screen (Pixels Per Inch)
  * Memory: Device memory capacity (in MB)
* 4️⃣ Saves the entered device information.

The added device information is saved as a JSON file in the path below:

`C:\Program Files\Epic Games\OverdareStudioPJVXb\Sandbox\EditorResource\Sandbox\DeviceSpecs_Custom`

## Network StressTest

Press the **Network StressTest** button to simulate and test real-world network overload conditions such as packet delay and packet loss.

<figure><img src="/files/Yeryn6XhIRJDu4CyvczD" alt=""><figcaption></figcaption></figure>

* EnableTest : Toggles the network stress testing feature on or off. When enabled, the options below will be applied.
* Packet Lag Minimum : Sets the **minimum packet delay** in milliseconds (ms). Can be used together with Packet Lag Maximum to simulate a random delay range.
* Packet Lah Maximum : Sets the **maximum packet delay** in milliseconds (ms).
* Packet Loss : Sets the **percentage of packet loss** (%). Accepts values between 0 and 100.
* Packet Jitter : Sets the **variation range** (in ms) added to the transmission delay. The actual delay will vary from Packet Lag Minimum to Packet Lag Minimum + Jitter.
* Packet Variance : Sets the **range of variable delay** (in ms) to be used instead of fixed value when Packet Lag (fixed delay) is enabled. (This is only applicable when the Packet Lag option is active.)

## Graphic Quality

Sets the graphic quality. (Provides the same settings options as mobile environment.)

<figure><img src="/files/7G94Zc09t54tRkAJtMd2" alt=""><figcaption></figcaption></figure>

This shows the same scene with graphic quality changed in **Low → Medium → High** order. The animation follows that sequence.

<figure><img src="/files/lUth9ljqLvYOrt0UzXhH" alt=""><figcaption></figcaption></figure>


# World Publish

## Overview <a href="#overview" id="overview"></a>

Publishing a game created in OVERDARE Studio allows other users to access and play it. You can also set the game to private to conduct private tests with your team or individually.

Once your game is complete, share your creativity and passion with the world, creating a unique experience for players globally!

## How to Use <a href="#how-to-use" id="how-to-use"></a>

### 1. Publishing a World <a href="#publishing-a-world" id="publishing-a-world"></a>

Open the world you created in OVERDARE Studio, click the button in the top-right corner, and select **Publish to OVERDARE** to publish the world.

<figure><img src="/files/wdIQC1Bgu16w8hXiQdZ9" alt=""><figcaption></figcaption></figure>

Clicking Publish to OVERDARE initiates the publishing process.

<figure><img src="/files/9VGkZlQ4ybBBBZtzSLFX" alt=""><figcaption></figcaption></figure>

Once the publishing process is complete, you will be **automatically redirected to a web page** to input world information. Enter the world’s name, description, and other details.\
(All information must be filled out to register the world.)

<figure><img src="/files/p8rRELtumt1CpcJOVkdn" alt=""><figcaption></figcaption></figure>

Register a thumbnail image to display in the OVERDARE App’s world list.\
(Only JPEG, JPG, and PNG formats are supported.)

<figure><img src="/files/LpnQIgtMWe1yzeLqrpL8" alt=""><figcaption></figcaption></figure>

Register an image to display on the OVERDARE App’s world introduction page.\
(Only JPEG, JPG, and PNG formats are supported.)

<figure><img src="/files/B2XNEAo0ZhxtatNUJHZM" alt=""><figcaption></figcaption></figure>

Finally, choose **whether to publish** the world and click Next.\
(If the game is incomplete or requires testing, it is recommended to publish it later.)

<figure><img src="/files/1h2v7foCk9Gs01b6ZeAX" alt=""><figcaption></figcaption></figure>

* Publish now (Enabled): Publishes the world as **public**. (It may appear in the app depending on access settings.)
* Publish now (Disabled): Publishes the world as **private**. (It will not appear in the app.)

Review the terms and conditions, agree, and click Complete to finish publishing.

<figure><img src="/files/YUBAjGvIVRs8t0QJMr1n" alt=""><figcaption></figcaption></figure>

{% hint style="warning" %}
Content that violates OVERDARE’s Community Guidelines may result in penalties.
{% endhint %}

Once the world is published, click **Go to My Contents** to navigate to the Dashboard.\
(If you missed this step, you can refer to Item #6 below.)

<figure><img src="/files/eFFyCzplheComW91Fdyn" alt=""><figcaption></figcaption></figure>

In the Dashboard, click the **World tab** to view your registered worlds. Click on a world to configure its information, version, or access status.

<figure><img src="/files/r3RRUWGOAW8SZa6x0E9B" alt=""><figcaption></figcaption></figure>

### 2. Checking Versions and Publishing Status <a href="#checking-versions-and-publishing-status" id="checking-versions-and-publishing-status"></a>

In the **Version tab**, you can check the publishing status and version of the world. “Now Processing” will be displayed during the publishing process, and you’ll need to wait a few moments for the processing to complete.

<figure><img src="/files/G1B41ZY74OrJRfl9zppt" alt=""><figcaption></figcaption></figure>

Once publishing is complete, the screen will read: **“Now version is ready”**.

If you have chosen to **Disable** publishing when you published your world, the Publish now button will be enabled, and you can publish by pressing the **Publish now button**.

<figure><img src="/files/f5RyPlJY1lURyOcfYHss" alt=""><figcaption></figcaption></figure>

Click **Publish now** to update the world’s version to the current one.

<figure><img src="/files/EMn8pUP3RlSpFK54Tm7Z" alt=""><figcaption></figcaption></figure>

Click the Publish button to proceed with the version update.

<figure><img src="/files/uU0b499bg1LHR9QeTqjA" alt=""><figcaption></figcaption></figure>

Once the update is complete, the **Published version** will be displayed.

<figure><img src="/files/fxA8Cp1cRq825Zhh5CLV" alt=""><figcaption></figcaption></figure>

{% hint style="info" %}
Note that it may take some time for the world to appear in the app.
{% endhint %}

### 3. Setting Access Status <a href="#setting-access-status" id="setting-access-status"></a>

In the **Access tab,** you can modify the world’s access status.

<figure><img src="/files/6rzZam96Cs30Yad1HKNm" alt=""><figcaption></figcaption></figure>

<table><thead><tr><th width="120">Status</th><th>Description</th></tr></thead><tbody><tr><td>Public</td><td><ul><li>The world is displayed in the world list within the OVERDARE App.</li><li>Users can join and play the world.</li></ul></td></tr><tr><td>Pause</td><td><ul><li>The world is displayed in the world list within the OVERDARE App.</li><li>Users can view details about the world but cannot join or play it.</li></ul></td></tr><tr><td>Private</td><td><ul><li>The world is not displayed in the world list within the OVERDARE App.</li><li>Users cannot access the world.</li></ul></td></tr></tbody></table>

### 4. Modifying World Information <a href="#modifying-world-information" id="modifying-world-information"></a>

In the **World Info tab**, you can edit the world’s thumbnail, name, description, and other information.\
(After editing, click the Save button at the bottom!)

<figure><img src="/files/Xmkut9A4zuKhvdLrlTRO" alt=""><figcaption></figcaption></figure>

### 5. Conducting Private Tests <a href="#conducting-private-tests" id="conducting-private-tests"></a>

If Publish is set to **Disable**, you can use the **QR code** and **URL** in the **Version tab** to conduct multiplayer tests on mobile devices across different network environments. Share the QR code or URL with users you want to test with.

Note that once **Publish now is activated**, the QR code and URL will no longer be available, and access via these methods will be disabled.

<figure><img src="/files/p3KbWHd3IOa88rJQ4pWm" alt=""><figcaption></figcaption></figure>

{% hint style="info" %}
Mobile testing is not possible in the following cases:

* Sharing/entering a QR code or URL from a previous version instead of the updated current version
* Attempting to access by purposefully changing the URL
  {% endhint %}

### 6. Finding Your World in the Creator Hub <a href="#finding-your-world-in-the-creator-hub" id="finding-your-world-in-the-creator-hub"></a>

Go to the Dashboard by clicking **Dashboard - My Contents** in the top menu area of the [Creator Hub](https://create.overdare.com/).

<figure><img src="/files/7ZfHUVHivG6v9otk157p" alt=""><figcaption></figcaption></figure>

In the Dashboard, click the **World tab** to view all your registered worlds.

<figure><img src="/files/YFj1tXAlmJwKVmNplB9Y" alt=""><figcaption></figcaption></figure>

#### 7. Updating a World in OVERDARE Studio <a href="#updating-a-world-in-overdare-studio" id="updating-a-world-in-overdare-studio"></a>

**Open** a **previously published world** in OVERDARE Studio and click Publish to OVERDARE to update the world.

<figure><img src="/files/iYp1UXuW2EHcK8ED17CT" alt=""><figcaption></figcaption></figure>

Clicking Update will automatically redirect you to a web page to choose whether to publish the world. Choose whether to publish in the web page.\
(The subsequent steps are the same as during the initial registration.)

<figure><img src="/files/ZawKlMZR8XG5eMbZCuUB" alt=""><figcaption></figcaption></figure>

* Publish now: Replaces the published version of the world.
* Publish later: Does not replace the published version of the world.


# Collaboration

## Overview <a href="#overview" id="overview"></a>

Using the Collaboration feature, group members can share and work on a single world.

However, **only one person can work on a world at a time**, and multiple people cannot work on it simultaneously. You cannot access a world that another group member is already working on.

To collaborate on a world using the Collaboration feature, you must **set a group as the Owner Group** when publishing the world.

## Collaborating on Worlds <a href="#collaborating-on-worlds" id="collaborating-on-worlds"></a>

### Setting the World’s Owner Group <a href="#setting-the-worlds-owner-group" id="setting-the-worlds-owner-group"></a>

When publishing a world in OVERDARE Studio, you can set the Owner Group for the world. If the **Owner Group** is **set to a group** instead of Me, you can **collaborate** with other members of the group.

The **Owner Group** of a published world cannot be changed. To make a privately worked-on world available for collaboration, you must republish the world and set the Owner Group to a group.

<figure><img src="/files/cg2Mjpvbu6S7lAMC5lZl" alt=""><figcaption></figcaption></figure>

On the world management page in the Dashboard, click the **drop-down** in the top-right corner to display worlds with the **Group Owner** set as **Me** or worlds belonging to a **specific group**.

The dropdown displays both the **groups you own** and the **groups you have joined**.

<figure><img src="/files/dAYHFi1s8rB0vvMEEpjC" alt=""><figcaption></figcaption></figure>

### List of Worlds Available for Collaboration <a href="#list-of-worlds-available-for-collaboration" id="list-of-worlds-available-for-collaboration"></a>

Worlds available for collaboration can be viewed in the **My Group list** on the OVERDARE Studio home screen.

<figure><img src="/files/mkQ3zOsKWpK8XIebuHlh" alt=""><figcaption></figcaption></figure>

When you first click a world for collaboration, you will be prompted to specify the folder where the world’s map file will be saved. Enter the folder name in Name and the save location in Location.

<figure><img src="/files/bH9Vels2LEK9UxqTupdZ" alt=""><figcaption></figcaption></figure>

### Accessing a World in Progress <a href="#accessing-a-world-in-progress" id="accessing-a-world-in-progress"></a>

Only one person can work on a world at a time. Therefore, you cannot access a world that another group member is already working on.

If you try to access a world that another member is working on, an error popup will appear as shown below.

<figure><img src="/files/lzkkKg5Sg5AfQ4xeLWYk" alt=""><figcaption></figcaption></figure>

Once the member who was working on the world closes it, another member can access the world and continue working.

### Importing Assets <a href="#importing-assets" id="importing-assets"></a>

Members can also import assets or upload imported assets.

### Publishing a World <a href="#publishing-a-world" id="publishing-a-world"></a>

Only the **world owner** or **group owner** can publish worlds or modify world information. If a member attempts to publish a world, a warning message will appear as shown below.

<div align="left"><figure><img src="/files/YpqwuBNTJmmhwxBDlOX3" alt=""><figcaption></figcaption></figure></div>

## Managing a Group <a href="#managing-a-group" id="managing-a-group"></a>

### Creating a Group <a href="#creating-a-group" id="creating-a-group"></a>

In the [Creator Hub](https://create.overdare.com/), click your avatar picture in the top-right corner, then click **My Group** from the menu that appears.

<figure><img src="/files/rq1l356zb8f64zo0E7CP" alt=""><figcaption></figcaption></figure>

On the My Group page, click the **+ Create Group button**.

<figure><img src="/files/tKN8vKxX4dpPV0ayMtwb" alt=""><figcaption></figcaption></figure>

Enter the group’s image, name, and description, then click the **Create button** to create the group.

<figure><img src="/files/InSVpJVaQN5CC6zkrJ0N" alt=""><figcaption></figcaption></figure>

The created group will appear on the My Group page. **Groups you create** will be marked as **Owner**, while groups you **join as a member** will be marked as **Member**.

<figure><img src="/files/blmM26LAo03LzOxjI5Cz" alt=""><figcaption></figcaption></figure>

### Editing a Group <a href="#editing-a-group" id="editing-a-group"></a>

On the My Group page, click a group to go to its settings page.

<figure><img src="/files/bCPecHM6L3gBXsyqSnQl" alt=""><figcaption></figcaption></figure>

In the **Group Info tab**, you can edit the group’s thumbnail, name, description, and other information.\
(After editing, click the Save button at the bottom!)

<figure><img src="/files/J9T5o2b1GCc67CyWIeUj" alt=""><figcaption></figcaption></figure>

### Adding a Member <a href="#adding-a-member" id="adding-a-member"></a>

On the group settings page, go to the **Members tab** to view the group’s members. If you are the group owner, a **+ Add Member** button will appear. Click it to add members.

Group owners can also click the trash bin icon to remove registered members.

<figure><img src="/files/4dV66XsZzKJLSRDyMGmR" alt=""><figcaption></figcaption></figure>

In the Add Member screen that shows up when you click on the Add Member button, **search for the creator’s name** and **click on the creator** that appears.

<figure><img src="/files/QItk43OeBERTwpEQJ5VK" alt=""><figcaption></figcaption></figure>

The selected creator will appear in the addition list. Click the **Save button** to add the creator to the group.

<figure><img src="/files/5mWCTajOpi64fJh32Uot" alt=""><figcaption></figcaption></figure>

Group owners can also click the **Add a Member button** in the top-right corner of OVERDARE Studio to go to the member addition page.

<figure><img src="/files/3UBE2XjHigywjoejF8ne" alt=""><figcaption></figcaption></figure>


# Asset & Resource Creation


# Asset Import

## Overview <a href="#overview" id="overview"></a>

World assets created in OVERDARE Studio can be registered in the [Creator Hub](https://eterno-studio-fgt.ovdr.io/). Depending on the public settings, registered assets can be freely used by anyone in the Asset Store of OVERDARE Studio.

Import 3D models created in external tools like Blender or 3D Max, audio such as background music, or UI images—any assets necessary for world creation.

## Types of Importable Assets <a href="#types-of-importable-assets" id="types-of-importable-assets"></a>

<table><thead><tr><th>Asset Type</th><th width="613">Supported Extensions</th></tr></thead><tbody><tr><td>Texture</td><td>.png / .tga (Max size: 15MB)</td></tr><tr><td>Mesh</td><td>.fbx / .obj (Max triangles: 30,000, Max size: 250MB)</td></tr><tr><td>Audio</td><td>.wav / .mp3 / .ogg (Max size: 20MB)</td></tr></tbody></table>

## Asset Creation Guidelines

### Mesh

* Recommended vertex count per prop for low-spec devices: 700 or less
* Total vertex limit for the screen: 70,000 or less

Learn More (Optimization Guide for Low-End Mobile Device)

{% content-ref url="/pages/Sc8wNc2J3XCVm9PBut6u" %}
[World Performance Optimization](/manual/studio-manual/game-development/world-performance-profiling)
{% endcontent-ref %}

### Texture

* Default recommended resolution: 512 × 512
* For ultra-low-spec devices: A resolution of 256 or lower recommended

## Mesh Creation Guideline <a href="#mesh-creation-guideline" id="mesh-creation-guideline"></a>

### Generating Colliders <a href="#generating-colliders" id="generating-colliders"></a>

When a mesh is imported into OVERDARE Studio, a collider is automatically generated based on the mesh’s structure. If the system determines that the mesh can be enclosed in a convex (outwardly protruding) shape without issues, the collider will be created using the following method.

**Default Creation Method**

* **Up to 32 convexes per mesh**
* Each convex only includes **up to 32 vertices**
* If the mesh structure can be enclosed within a convex shape, **a collider is generated based on 1,024 total vertices** (up to 32 convex shapes x 32 vertices per convex).
  * The maximum number of vertices that are converted into colliders is 1,024. If this limit is exceeded, automatic collision generation may become abnormal.

**While this method is beneficial in terms of performance, it may also lead to the following issues.**

* The collider may appear to **float in the air** due to a mismatch with the mesh structure, or it may become **damaged** or **penetrated**.
* There may be slight inaccuracies, such as the collider floating in the air or penetrating through the mesh.

**Conditions for skipping convex creation and using the mesh as a collider**

* When the mesh has a non-uniform or uneven structure (e.g., irregular shape instead of a flat shape)
* When the mesh requires too many convex shapes (e.g., if the number of convex vertices exceeds the number of mesh vertices)
* When it is beneficial to use the mesh structure directly as a collider

Currently, the automatic collider generation function prioritizes speed over precision to create a general collision area rather than matching the mesh shape exactly. For content or scenarios where collision accuracy is critical, it is recommended to manually define the collider.

**Tips**

* If the collision is complex or requires detailed accuracy, it is recommended to manually create the collider.
* If you choose to use the mesh structure as the collider, be sure not to exceed the maximum vertex limit.
* For more accurate collision detection, manually setting the collider may be preferable to using a convex-based method.

### Using a Collision Mesh (UCX) <a href="#using-a-collision-mesh-ucx" id="using-a-collision-mesh-ucx"></a>

After creating a **mesh for collisions** in a 3D modeling software like Blender or 3ds Max, save the mesh with the name format “**UCX\_meshname**.” Meshes with the “UCX\_” prefix will **automatically be recognized as colliders** when imported into OVERDARE Studio.

Use this function to use separate **collision meshes** independently from complex mesh shapes.

(However, collision meshes must have a fully closed shape. If any side is open, the collision will not be processed correctly.)

<figure><img src="/files/IIM2J95F8NeNOAC0qH6N" alt=""><figcaption></figcaption></figure>

## Importing Assets <a href="#importing-assets-1" id="importing-assets-1"></a>

### How to Import Assets <a href="#how-to-import-assets" id="how-to-import-assets"></a>

In OVERDARE Studio, you can load a world, then import the assets you want to use in that world.

In OVERDARE Studio, select the **Home tab** in the top tab area, then click the **Import button** or **BulkImport button** to import assets.

<figure><img src="/files/PnIEW7m7cWVBfI9l635K" alt=""><figcaption></figcaption></figure>

Alternatively, you can also click the **Import button** in the **Asset Manager** panel.

<figure><img src="/files/WfWcrEb6YJvr4juP9LrW" alt=""><figcaption></figcaption></figure>

* **Import3D Button**: Allows importing a single asset. (Detailed options can be set when importing a mesh.)
* **BulkImport Button** or **Import Button**: Allows importing multiple assets. (Simplified options can be set when importing a mesh.)

{% hint style="info" %}
If you import an FBX file that contains a mesh, skeleton, and animation using the **Import** button, the **Import Settings** window (beta) opens, letting you review the file analysis results and configure import options. See the document below for how to import and use skeletal meshes.
{% endhint %}

{% content-ref url="/pages/MbGFwg7bRE0cELkodA7F" %}
[Skeletal Mesh Import](/manual/studio-manual/asset-and-resource-creation/skeletal-mesh-import)
{% endcontent-ref %}

For importing character animations, refer to the Characters manual.

{% content-ref url="/pages/P7aD7PEJUGDMei1NFhiN" %}
[Character](/manual/studio-manual/character)
{% endcontent-ref %}

### Mesh Import Options <a href="#mesh-import-options" id="mesh-import-options"></a>

<figure><img src="/files/b8yESqrjvrKclb22vgSA" alt=""><figcaption></figcaption></figure>

#### **File General**

<table><thead><tr><th width="145">Category</th><th width="332">Description</th><th>Default</th></tr></thead><tbody><tr><td>Name</td><td>Displays the name of the imported 3D asset. You can change the name to make it visible in the project.</td><td><br></td></tr><tr><td>Import Only as Model</td><td>When enabled, the model is imported as a single asset even if it contains multiple child objects.<br>If disabled, the model and its child meshes are imported as separate assets.</td><td>Enabled by default.</td></tr><tr><td>Insert in Workspace</td><td>When enabled, the imported 3D asset is inserted into the Workspace and Asset Store.<br>If disabled, it is only inserted into the Toolbox and Asset Manager.</td><td>Enabled by default.</td></tr><tr><td>Insert Using Scene Position</td><td>When enabled, the model is inserted into the Workspace using the current scene position.</td><td>Disabled by default.</td></tr><tr><td>Set Model Instance Pivot to Scene Origin</td><td>When enabled, the Pivot point of the entire model is set to the Scene Origin.</td><td>Enabled by default.</td></tr></tbody></table>

#### **File Transform**

<table><thead><tr><th width="145">Category</th><th>Description</th><th>Default</th></tr></thead><tbody><tr><td>World Forward</td><td>Sets the axis that faces forward for the object. Can be set to Front, Back, Left, or Right.</td><td>Front</td></tr><tr><td>World Up</td><td>Sets the axis that faces upward for the object. Can be set to Top, Bottom, Left, or Right.</td><td>Top</td></tr></tbody></table>

#### **File Geometry**

<table><thead><tr><th width="145">Category</th><th>Description</th><th>Default</th></tr></thead><tbody><tr><td>Scale Unit</td><td>Sets the unit used for modeling the file to ensure proper scaling. Options: Stud, Meter, CM, MM, Foot, Inch.</td><td>CM</td></tr><tr><td>Merge Meshes</td><td>If enabled, all MeshParts in the model are merged into a single MeshPart that is not a model.</td><td>Disabled by default.</td></tr><tr><td>Invert Negative Faces</td><td>Reverses the direction of negative faces in the mesh.</td><td>Disabled by default.</td></tr></tbody></table>

#### **Object Geometry**

<table><thead><tr><th width="145">Category</th><th>Description</th><th>Default</th></tr></thead><tbody><tr><td>Make Double Sided</td><td><ul><li>If disabled, vertices are single-sided, meaning they are visible only from one direction.</li><li>If enabled, they are double-sided and visible from both directions.</li></ul></td><td>Disabled by default.</td></tr><tr><td>Ignore Vertex Colors</td><td>When enabled, vertex color data of child objects is ignored.</td><td>Disabled by default.</td></tr></tbody></table>

### Important Notes <a href="#important-notes" id="important-notes"></a>

If imported assets are not registered in OVERDARE, **only the creator who created the world can use them**. When the map file is shared with another creator, it may not function properly for them.

Therefore, **if multiple creators need to work on the same map file**, make sure to register the imported assets in OVERDARE.

### Automatic Texture Linking for Imported Meshes

When you export a **textured mesh** from a 3D modeling program such as 3ds Max or Blender, and then import it using the **Import button** in the Home tab of the top menu in OVERDARE Studio, the model will be imported with linked textures if **Import Only as Model is disabled**.

(Note: When using Bulk Import or the Import button in the Asset Manager, textures will not be linked even if Import Only as Model is disabled.)

## Registering in OVERDARE <a href="#registering-in-overdare" id="registering-in-overdare"></a>

### How to Register <a href="#how-to-register" id="how-to-register"></a>

Select the world asset you want to register in the **Level Browser**, then right-click and choose **Save to OVERDARE** to register the asset in the Creator Hub.

<figure><img src="/files/jKT2050vDZWX7QPYuNRh" alt=""><figcaption></figcaption></figure>

Clicking Save to OVERDARE will **automatically redirect you to a web page** where you can input asset information such as tags and public settings.\
(All information must be filled out to register the asset.)

<figure><img src="/files/RPAYQto4PFcev5KCz2Sy" alt=""><figcaption></figcaption></figure>

Review the terms and conditions, click agree, and click Complete to finish registration.

<figure><img src="/files/YUBAjGvIVRs8t0QJMr1n" alt=""><figcaption></figcaption></figure>

Registered assets can be viewed in the **Asset Store** within OVERDARE Studio. Assets with public settings can be used by other creators.

### Finding My Assets in the Creator Hub <a href="#finding-my-assets-in-the-creator-hub" id="finding-my-assets-in-the-creator-hub"></a>

Go to the Dashboard by clicking Dashboard - My Contents in the top menu area of the [Creator Hub](https://create.overdare.com/).

<figure><img src="/files/7ZfHUVHivG6v9otk157p" alt=""><figcaption></figcaption></figure>

Click the **World Asset tab** in the Dashboard to view all registered assets.

<figure><img src="/files/3w9X9GrWsOXGeUFxhFaH" alt=""><figcaption></figcaption></figure>

### Distribution Settings <a href="#distribution-settings" id="distribution-settings"></a>

On the world asset editing page, use the **Distribute on Asset Store** option to make the asset available in OVERDARE Studio’s Asset Store panel.\
(Enabling Distribute allows other creators to use the asset.)

<figure><img src="/files/UziAJUF8RLnXkW5vC8eU" alt=""><figcaption></figcaption></figure>

## Placing Assets <a href="#placing-assets" id="placing-assets"></a>

In the Asset Manager, select the category of the asset you want to place.

<figure><img src="/files/3QE1HgU21SfZwnQkfOp5" alt=""><figcaption></figcaption></figure>

Locate the asset you want to place.

<figure><img src="/files/bTX850Upi8LItb6QKx50" alt=""><figcaption></figcaption></figure>

Double-click the asset or drag and drop it into the Viewport to place it in the Workspace.

<figure><img src="/files/ObesrgY2HeNs51CwykKO" alt=""><figcaption></figcaption></figure>

## Linking Asset Ids <a href="#linking-asset-ids" id="linking-asset-ids"></a>

Some objects **reference assets** for display. For example, MeshPart objects reference meshes, MeshPart or VFX reference textures, and Sound objects reference audio. In such cases, you must link the **Asset Id of the asset to be displayed** to the object.

### Properties Requiring Asset Ids <a href="#properties-requiring-asset-ids" id="properties-requiring-asset-ids"></a>

<table><thead><tr><th width="182">Field</th><th>Related Object</th></tr></thead><tbody><tr><td>Mesh Id</td><td>MeshPart, CharacterMesh, etc.</td></tr><tr><td>Texture Id</td><td>MeshPart, BackpackItem, VFX, etc.</td></tr><tr><td>Sound Id</td><td>Sound</td></tr><tr><td>Image</td><td>ImageButton, ImageLabel, etc.</td></tr></tbody></table>

### How to Link an Asset Id <a href="#how-to-link-an-asset-id" id="how-to-link-an-asset-id"></a>

Select the object and check the properties window for fields requiring Asset Ids (e.g., Mesh Id, Texture Id).

<figure><img src="/files/6DppetsyNLeJdtYXa3cK" alt=""><figcaption></figcaption></figure>

Copy the Asset Id by right-clicking the asset in the **Asset Manager** and selecting **Copy Asset Id to Clipboard**.

<figure><img src="/files/fWlzYhUQJyn0j03em6Ma" alt=""><figcaption></figcaption></figure>

Alternatively, hover over the asset in the **Asset Store**, click the **magnifying glass button (🔍)**, and click the **copy button** next to the Asset Id.

<figure><img src="/files/kSYDtalLiJStvGLxtd5w" alt=""><figcaption></figcaption></figure>

The copied Asset Id must be set in the format **ovdrassetid://number**.\
(Example: ovdrassetid://**1234**)

<figure><img src="/files/O9secsNrGSEsYxxfueIx" alt=""><figcaption></figcaption></figure>

## Precautions When Using Asset Ids in Scripts

Asset Ids can also be assigned in scripts as shown below:

```lua
local Worksapce = game:GetService("Workspace")
local Sound = Worksapce.Sound

Sound.SoundId = "ovdrassetid://1234"
```

When used as shown, scripts, meshes, textures, sounds, and animations that are **imported directly** can be used without having to be placed in the Level Browser.

However, **assets imported from the Asset Store** must be placed in the Level Browser to be used in the script. (If they are not placed in the Level Browser, **they will not load on mobile**, even though they may load correctly in the Studio.)


# Skeletal Mesh Import

## Overview

Importing a skeletal mesh (an FBX file that contains a mesh, skeleton, and animation) into OVERDARE Studio automatically creates a character structure in the Level Browser that can play animations.

When you select a file, the Import Settings window opens, automatically analyzes the file, and displays errors/warnings in real time if any issues are found. After reviewing the analysis results, you can click the **Import** button to complete the import.

For how to import other assets—such as static meshes, textures, or audio—and their options, see the document below.

{% content-ref url="/pages/bS79pIBVkO3rjcUR9Zhi" %}
[Asset Import](/manual/studio-manual/asset-and-resource-creation/asset-import)
{% endcontent-ref %}

## Skeletal Mesh Import

### Opening the Import Settings Window

In the top tab area of OVERDARE Studio, select the Home tab, then click the Import button and select the FBX file you want to import.

<figure><img src="/files/C6n5QQrKyNPMFXYbrI3f" alt=""><figcaption></figcaption></figure>

If the selected FBX file contains a skeleton (i.e., it is a skeletal mesh), the Import Settings window opens automatically.

In beta, Import Settings can only import FBX files that meet all of the following conditions.

* The file must contain a mesh, skeleton, and animation.
* The mesh must be a single mesh. Files containing multiple meshes will produce an error and cannot be imported. Merge all meshes into one in an external tool and re-export the file.

Static meshes without a skeleton are imported through the existing mesh import options window.

### Layout

The Import Settings window consists of the following areas.

<figure><img src="/files/vGrn4BQLmlWR8ScevvzM" alt=""><figcaption></figcaption></figure>

<table><thead><tr><th width="200">Area</th><th>Description</th></tr></thead><tbody><tr><td>Top bar</td><td>Displays the path of the file being imported. You can select a different file using the Browse button.</td></tr><tr><td>File Structure</td><td>A tree view showing the elements contained in the file in a hierarchical structure. Selecting an item switches the option panel on the right to that item's settings. You can collapse the entire tree using the Collapse All button.</td></tr><tr><td>Issues</td><td>A list of errors/warnings found during file analysis. Always displayed at the bottom left.</td></tr><tr><td>Option panel</td><td>A settings panel whose content changes dynamically based on the item selected in the tree view. Options such as Rig Type and Skeleton are explained in detail in the Rig Type and Skeleton section below.</td></tr><tr><td>Bottom buttons</td><td>Contains the Cancel button and the Import button.</td></tr></tbody></table>

### File Structure (Hierarchy Tree View)

Displays the elements contained in the file (root model, mesh, texture, bones, animation clips, etc.) in a hierarchical structure. Element types are distinguished by icons.

* Clicking an item selects only that single item (single selection); the option panel on the right switches to that item's settings.
* By default, only the root level is expanded and child items are collapsed.

Currently, all elements contained in the file are imported together. Excluding individual elements from the import is not supported.

#### Issue Indicators

Problems found during file analysis are shown as icons on the corresponding item in the tree view.

<table><thead><tr><th width="145">Status</th><th>Display</th></tr></thead><tbody><tr><td>⚠️ Warning</td><td>A yellow warning icon is shown on the right side of the row.</td></tr><tr><td>🔴 Error</td><td>The entire row is displayed with a red background, and a red X icon is shown on the right side of the row.</td></tr></tbody></table>

If a node is collapsed and hides its child items, the parent node displays a single icon representing the most severe issue among its children.

### Rig Type and Skeleton

#### Rig Type Cards

Rig Type is displayed as a card-style UI. One of the three cards is automatically selected based on the file analysis, and in beta it cannot be changed manually.

<table><thead><tr><th width="180">Card</th><th width="240">Auto-Selection Condition</th><th>Description</th></tr></thead><tbody><tr><td>None</td><td>No bone structure in the file</td><td>Imported as a static mesh without bones. (Static mesh, no skeleton)</td></tr><tr><td>Custom Skeleton</td><td>A non-ODA bone structure is detected</td><td>A freely structured rig, such as for NPCs or monsters.</td></tr><tr><td>ODA Rig</td><td>An ODA bone structure is detected</td><td>OVERDARE's default character rig. Handled using the engine's built-in ODA skeleton.</td></tr></tbody></table>

#### Skeleton Field

The Skeleton field displays "Use skeleton from FBX" and uses the skeleton included in the imported FBX file as is. In beta, you cannot specify a different Skeleton asset.

#### ODA Rig Auto-Detection Criteria

The importer determines a file to have an ODA structure when it meets all of the following conditions.

<table><thead><tr><th width="180">Detection Item</th><th>Criteria</th></tr></thead><tbody><tr><td>Skin-influencing bone names</td><td>Must include all 16 of the following: LowerTorso, UpperTorso01, UpperTorso02, Head, LeftUpperArm, LeftLowerArm, LeftHand, RightUpperArm, RightLowerArm, RightHand, LeftUpperLeg, LeftLowerLeg, LeftFoot, RightUpperLeg, RightLowerLeg, RightFoot.</td></tr><tr><td>Control bone names</td><td>Must include at least one of the following: Root, IKHandRoot, IKHandGun, IKLeftHand, IKRightHand, IKFootRoot, IKLeftFoot, IKRightFoot, ThirdPersonCamera.</td></tr><tr><td>Bone hierarchy</td><td>LowerTorso must be the spine root and must be located under Root.</td></tr></tbody></table>

> If the above conditions are only partially met, the file is detected as Custom Skeleton. Since Rig Type cannot be changed manually, if you want to import it as ODA Rig, modify the bone structure in an external tool so that it meets all of the conditions above, then import the file again.

### Issues Panel

An area that is always fixed at the bottom left. It remains visible even when there are no issues.

#### Status Display

<table><thead><tr><th width="200">Status</th><th>Display</th></tr></thead><tbody><tr><td>✅ No issues</td><td>A message indicating there are no issues is displayed.</td></tr><tr><td>⚠️ Warnings only</td><td>A warning count badge is shown in the header, and the list of warning items is shown in the body.</td></tr><tr><td>🔴 Errors + warnings</td><td>Error count and warning count badges are shown side by side in the header; error items are listed first, followed by warning items, in the body.</td></tr></tbody></table>

<figure><img src="/files/lQJNn5lwbImojrdZgFWH" alt=""><figcaption></figcaption></figure>

Each issue item shows a description of the problem along with how to resolve it. Clicking the element name button shown in an issue item moves the focus to that item in the tree view. Conversely, clicking an item with an issue in the tree view also selects that item in the Issues panel.

> ⚠️ **Warnings** do not block the import. You can review the details and proceed with the import as is.\
> 🔴 **Errors** must be resolved before you can import.

#### Common Errors and Warnings

<table><thead><tr><th width="88">Type</th><th width="300">Message</th><th>Details and Resolution</th></tr></thead><tbody><tr><td>🔴 Error</td><td>Multiple mesh objects were detected in this file.</td><td>The file contains more than one mesh. Only a single mesh is currently supported, so merge all meshes into one in an external tool and re-export the file.</td></tr><tr><td>⚠️ Warning</td><td>Bones with no skin weights were found.</td><td>Bones with no skin weights were found. These bones do not deform the mesh. If they are unnecessary, remove them in an external tool and re-export the file.</td></tr><tr><td>⚠️ Warning</td><td>The file's axis orientation does not match OVERDARE's coordinate system.</td><td>The file's axis orientation does not match OVERDARE's coordinate system. The object may face an unexpected direction after import. Check the World forward / World up values in the option panel.</td></tr><tr><td>⚠️ Warning</td><td>One or more objects have unapplied transforms (rotation or scale).</td><td>One or more objects have unapplied rotation or scale transforms. The object's size or orientation may look different than expected after import, so apply the transforms in an external tool and re-export the file.</td></tr><tr><td>⚠️ Warning</td><td>Some vertices are influenced by more than 4 bones.</td><td>Some vertices are influenced by more than 4 bones. On import, only the top 4 most influential bones are kept automatically, so the mesh deformation may differ from the original.</td></tr></tbody></table>

### Automatic Detection and Real-Time Validation

When the Import Settings window opens, it automatically analyzes the file and sets the main options. Changes to options are re-validated in real time.

<table><thead><tr><th width="240">Detection Item</th><th>Automatic Handling</th></tr></thead><tbody><tr><td>Bone structure</td><td>Automatically sets the Rig Type. (None / Custom Skeleton / ODA Rig)</td></tr><tr><td>Animation data</td><td>Displays the list of animation clips in the tree view.</td></tr><tr><td>Non-triangulated polygons</td><td>Shows a warning and automatically triangulates them.</td></tr><tr><td>Bone skin weights/influence count</td><td>Detects bones with no skin weights, vertices influenced by more than 4 bones, and so on, and shows a warning.</td></tr><tr><td>Axis orientation/transform</td><td>Detects coordinate system mismatches and unapplied transforms (rotation/scale), and shows a warning.</td></tr><tr><td>Joint naming rule violations</td><td>Shows an error on the corresponding item in the tree view and provides a suggested fix.</td></tr></tbody></table>

## Level Browser Placement

When you import a skeletal mesh with Import Settings, a character structure that can play animations is automatically created in the Level Browser.

<figure><img src="/files/IY7GiYEA2wGsP73zErPG" alt=""><figcaption></figcaption></figure>

<table><thead><tr><th width="200">Sub-Object</th><th>Description</th></tr></thead><tbody><tr><td>Skeleton</td><td>The imported skeleton.</td></tr><tr><td>Animation clip</td><td>The animation clip included in the file. (e.g., Fly)</td></tr><tr><td>Mesh</td><td>The mesh responsible for the character's visual appearance. (e.g., dragon)</td></tr><tr><td>HumanoidRootPart</td><td>The root part responsible for the character's movement and physics.</td></tr><tr><td>Humanoid</td><td>The Humanoid object that controls the character's state and animation.</td></tr></tbody></table>

This structure behaves the same as an existing Humanoid-based character. This means you can use existing APIs that rely on Humanoid and HumanoidRootPart (movement, animation playback, etc.) as-is.

## Usage Example

Imported animation clips can be played through the Humanoid's Animator, the same way as existing character animations.

<figure><img src="/files/Zuhzb0B7n4pAzEfWyLLr" alt=""><figcaption></figcaption></figure>

## Notes

* Currently, only a single mesh is supported in beta. If a file contains multiple meshes, merge them into one in an external tool and re-export the file.
* If errors (🔴) remain, the Import button is disabled and the file cannot be imported. Refer to the resolutions shown in the Issues panel, fix the file in an external tool, and import it again.
* The maximum importable polygon count is 30,000. You can check the current polygon count and limit in the Polygon count field of the option panel.
* If a bone (joint) name does not follow the naming rules (for example, if it contains non-Latin characters), it may be flagged as an error. Bone names cannot be changed in Studio, so you must edit them in an external tool such as Blender.
* Import Settings is a beta feature, and its UI and behavior may change in future updates.


# Asset Upload / Download

## Overview

You can upload objects configured in the Level Browser and **register them as assets in the Asset Store.** Registered assets can be shared with other creators, contributing to the expansion of the OVERDARE creator ecosystem.

Objects intended for personal use can be **uploaded as private** assets. Private assets are accessible in the **Owned tab** of the Asset Store.

## Features

A single functional system is typically distributed across multiple services such as Workspace, StarterGui, ServerScriptService, and StarterPlayer.

With the Multi Upload feature, these distributed objects can be **consolidated into a single asset** without manually relocating them. The **parent hierarchy structure and positional data at the time of upload are preserved**. When downloaded, each object is automatically placed under its corresponding service based on the saved structure.

This allows complex functional systems—such as Inventory, CheckPoint, or CombatSystem—to be **distributed and reused without structural loss**.

## Upload Types

<table><thead><tr><th width="137">Category</th><th width="354">Description</th><th>Example</th></tr></thead><tbody><tr><td><strong>Single Upload</strong></td><td><p>Uploads only <strong>one selected object (including its descendants).</strong><br></p><p>The <strong>top-level parent hierarchy information</strong> of the selected object is saved together.</p></td><td><p><strong>Asset 1</strong></p><ul><li>Workspace.Part</li></ul><p><strong>Asset 2</strong></p><ul><li>StarterGui.PlayerHUD</li></ul></td></tr><tr><td><strong>Multi Upload</strong></td><td><p>Uploads <strong>multiple selected</strong> objects at once (including objects under the same parent or different parent hierarchies).<br></p><p>The <strong>top-level parent hierarchy information and positional data</strong> of each selected object are saved together.</p></td><td><p><strong>Asset 3</strong></p><ul><li><p>ServerScriptService</p><ul><li>CheckPointManager</li></ul></li><li><p>StarterGui</p><ul><li>CheckPointUI</li></ul></li><li><p>Workspace</p><ul><li>CheckPoint1</li><li>CheckPoint2</li></ul></li></ul></td></tr></tbody></table>

## How to Use

In the Level Browser, **select** the object you want to upload, **right-click** it, and click **Save to OVERDARE** to upload the selected object to the Asset Store.

<figure><img src="/files/fmMRDGC1OKxWvpKawyIQ" alt=""><figcaption></figcaption></figure>

### Single Upload

1. Select a **single object** in the Level Browser and run Save to OVERDARE.
2. In the upload type selection popup, choose **Single Upload**.

   <div align="left"><figure><img src="/files/rOBL0BmSPAonzW1JzKJh" alt="" width="563"><figcaption></figcaption></figure></div>

When using Single Upload, the **top-level parent hierarchy information** of the selected object is saved together.

For example, if you upload ShopUI under StarterGui, the StarterGui hierarchy information is also saved. When downloaded, it will be automatically inserted under the StarterGui.ShopUI path.

<div align="left"><figure><img src="/files/YP0zPh8TADWSr5Xyw53p" alt=""><figcaption></figcaption></figure></div>

### Multi Upload

1. **Select multiple** objects in the Level Browser and run Save to OVERDARE.\
   (A Multi Upload popup appears automatically when multiple objects are selected.)

   <figure><img src="/files/8ZYIb2NAX1CiP7wPShow" alt=""><figcaption></figcaption></figure>
2. While the Multi Upload popup is open, **clicking objects in the Level Browser** immediately updates their inclusion status.

   <figure><img src="/files/DK0Xd2y36NT2kMzdrGkA" alt=""><figcaption></figcaption></figure>

   1. Clicking an unselected object adds it to the upload list.
   2. Clicking a selected object removes it from the upload list.
3. After reviewing the object structure displayed in the popup, click the **Upload button.**

When using Multi Upload, the **top-level parent hierarchy information and positional data** of each selected object are saved together.

For example, if you multi-upload an item spawn system composed of multiple spawners, the position of each spawner is saved. When downloaded, each spawner is automatically placed at its saved position.

### Private Upload

When proceeding with Single or Multi Upload, you will be redirected to a web page.\
If you disable the **Distribute on Asset Store option**, the asset will only be visible to the target specified in the Owner field (individual or group).

<figure><img src="/files/E0uDrCiSVJKeGoxfBWhq" alt=""><figcaption></figcaption></figure>

### Download

In the Asset Store panel, you can browse and use publicly uploaded assets in the **Store** **tab.**

Privately registered assets can be accessed in the **Owned tab.**

<figure><img src="/files/l4Z1d1MyJeoOeAwAiuBm" alt=""><figcaption></figcaption></figure>

## Notes

* A single Animation instance cannot currently be uploaded directly.
* To upload an Animation, it must be placed under a Model instance and **uploaded as a Model.**


# Animation Editor

## Overview <a href="#overview" id="overview"></a>

<figure><img src="/files/7eN7UmbjTtb3dDly2xtL" alt=""><figcaption></figcaption></figure>

The **Animation Editor** is a powerful tool that allows you to create and edit animations based on the ODA (OVERDARE Deformable Avatar) standard for avatars.

## Features

Through the built-in Animation Editor in the Studio, you can create animations directly within the Studio workflow without the need for external programs. Additionally, you can easily import and edit FBX animation files created externally.

* You can precisely edit animations on a keyframe basis in the **timeline**, and make real-time edits and previews of the animation in the **preview panel**.
* You can import **FBX** animation files created externally.
* You can **register the created animation on the server** and load animation files stored on the server for use.
* You can set **animation events** to integrate with the necessary processing in scripts.

## Displaying Animation Editor <a href="#how-to-use" id="how-to-use"></a>

The Animation Editor can be displayed by clicking the **Animation Editor** **button** that appears when you select the **Model tab** in the top-most tab area of OVERDARE Studio.

<figure><img src="/files/DOc880bG728BGbd5SYiu" alt=""><figcaption></figcaption></figure>

## Screen Layout

The Animation Editor screen is structured as follows:

<figure><img src="/files/tfJezaQ8iH5Y07m1UrJZ" alt=""><figcaption></figcaption></figure>

* **Toolbar**: Allows you to save or load animations and change the editing mode of the preview panel.
* **Rig Hierarchy**: Displays the avatar’s bone structure.
* **Preview Panel**: Shows the animation corresponding to the current position on the timeline.
* **Keyframe Editor**: Enables precise editing of animations based on the timeline.

## How to Use

### Toolbar Functions <a href="#toolbar-functions" id="toolbar-functions"></a>

<figure><img src="/files/RRmwdKpqJOCnFWvFxV51" alt=""><figcaption></figcaption></figure>

<table><thead><tr><th width="221.017578125">Function</th><th>Description</th></tr></thead><tbody><tr><td><strong>Save</strong></td><td>Saves the current animation being worked on.<br>(Internally saved in the current PC's Studio, not on the map.)</td></tr><tr><td><strong>Save As</strong></td><td>Saves the current animation under a different name.</td></tr><tr><td><strong>Load</strong></td><td>Loads a previously saved animation.</td></tr><tr><td><strong>Import</strong></td><td><ul><li><strong>Import from OVERDARE:</strong> Loads your animation registered on the server.</li><li><strong>Import from FBX:</strong> Imports an animation from an FBX file.</li></ul></td></tr><tr><td><strong>Get Asset Id</strong></td><td><strong>Registers the current animation on the server</strong> and generates an Asset Id.</td></tr><tr><td><strong>Create New</strong></td><td>Creates a new animation.</td></tr><tr><td><strong>Select</strong></td><td>Changes the preview panel's editing mode to <strong>Select Mode</strong>.</td></tr><tr><td><strong>Move</strong></td><td>Changes the preview panel's editing mode to <strong>Move Mode</strong>.<br>(Click on the bones in the preview panel to move them.)</td></tr><tr><td><strong>Rotate</strong></td><td>Changes the preview panel's editing mode to <strong>Rotate Mode</strong>.<br>(Click on the bones in the preview panel to rotate them.)</td></tr></tbody></table>

By pressing the displayed button, you can change the reference point for editing coordinate axis of the selected bone to either World or Local.

<div align="left"><figure><img src="/files/3Y8Y7a6iwva0GNjSPk6K" alt=""><figcaption></figcaption></figure></div>

### Rig Hierarchy Panel <a href="#rig-hierarchy-panel" id="rig-hierarchy-panel"></a>

he Rig Hierarchy panel displays the avatar’s skeletal structure. When you click on a bone in the Rig Hierarchy, the corresponding bone is also selected in the Preview Panel.

<div align="left"><figure><img src="/files/QvpjNofjJE8VYJe5wSrM" alt=""><figcaption></figcaption></figure></div>

### Preview Panel <a href="#preview-panel" id="preview-panel"></a>

The **Preview Panel** shows the animation corresponding to the current position on the timeline.

<figure><img src="/files/tY0Aice6FSHNCf2WEF6s" alt=""><figcaption></figcaption></figure>

After selecting a bone in the Preview Panel, set the editing mode to **Move** or **Rotate** to edit the selected bone using the Gizmo axis.\
(If there is no keyframe at the current position on the timeline, a keyframe will be automatically created when manipulating the Gizmo.)

<figure><img src="/files/j2DnDfRr5iXFR0j1wx7M" alt=""><figcaption></figcaption></figure>

You can use the **Show toggle** to control the visibility of the background and floor.

<figure><img src="/files/53ggFwedbY5tlI6jxQtH" alt=""><figcaption></figcaption></figure>

### Keyframe Editor <a href="#keyframe-editor" id="keyframe-editor"></a>

In the Timeline, you can add or remove **tracks** for each bone and precisely edit the position and rotation information of each bone on a keyframe basis.

<figure><img src="/files/ICYD6Uz5Ww0ZiiCzfEqY" alt=""><figcaption></figcaption></figure>

By clicking the **Add Track button**, you can add or remove **tracks** for each bone.

<figure><img src="/files/58nqP8OyPjYqdUnO6zqg" alt=""><figcaption></figcaption></figure>

The **Timeline** is the workspace where you can edit the keyframes of the animation over time.

<figure><img src="/files/9kmWI3fjnVQR5auu0C8r" alt=""><figcaption></figcaption></figure>

You can adjust the range of the timeline workspace by directly entering the desired frame values in the Start/End input fields.

<figure><img src="/files/CtRGC9urIA96HmfrYaDL" alt=""><figcaption></figcaption></figure>

The **Scrubber** is a vertical line on the timeline that allows you to select the time position. You can **drag the timeline ruler** to move the scrubber’s position.

<figure><img src="/files/D5XKNhaWo6LZrhfLvSvg" alt=""><figcaption></figcaption></figure>

By pressing the **Options button**, you can move the scrubber to the beginning or end of the timeline. The Playback Speed option allows you to adjust the playback speed of the animation.

<figure><img src="/files/7ppFs5JBudZUHhaoQSGa" alt=""><figcaption></figcaption></figure>

In the **Playback Control** area, you can use functions such as play, reverse play, jump to a specific frame, and set loop options for the animation.

<figure><img src="/files/cHKoKDZ46SDZu2PYhEDf" alt=""><figcaption></figcaption></figure>

**Right-clicking a keyframe** on the timeline opens a menu where you can reset or delete animation information. Additionally, you can set the **Interpolation** to Linear, Constant, or Cubic to control how the keyframes are interpolated.

<figure><img src="/files/sS1FHRXn0KlaOBoT2K7L" alt=""><figcaption></figcaption></figure>

* **Reset Keyframes:** Resets the animation information of the keyframe.
* **Delete Keyframes:** Deletes the selected keyframe.
* **Copy Keyframes**: Copies the keyframe.
* **Set Interpolation:** Sets the interpolation method for the keyframe.

**Right-clicking on an empty screen** in the timeline with no keyframes opens a menu that allows you to delete frames from specific sections or add new frames at your desired position.

<figure><img src="/files/xjNov8kE02GbyYlcMvYh" alt=""><figcaption></figcaption></figure>

* **Remove frame n to n**: Deletes keyframes between frames n to n.
* **Insert frame before n**: Adds a keyframe before frame n.
* **Insert frame after n**: Adds a keyframe after frame n.
* **Append at Beginning**: Adds a keyframe before the specified frame.
* **Append at End**: Adds a keyframe after the specified frame.
* **Add All Keyframe Here**: Adds the same keyframe as the previous one at the current position.
* **Add Reset Keyframe Here**: Adds a keyframe with reset animation information at the specified position.
* **Paste Keyframes:** Pastes the copied keyframe at the current position.

### Animation Events <a href="#animation-events" id="animation-events"></a>

By clicking the **Add Events button**, you can add animation events, allowing **interaction with scripts** at specific frames of the animation.

<figure><img src="/files/ZJ1W0655sNbEDQjYkdub" alt=""><figcaption></figcaption></figure>

* The registered events are displayed as markers on the **Animation Event Bar** in the timeline.
* By right-clicking the registered event, you can **Rename Event, Copy, or Delete** it.

The added animation events can be handled as follows:

<pre class="language-lua"><code class="lang-lua">local Players = game:GetService("Players")
<strong>local LocalPlayer = Players.LocalPlayer
</strong>
local character = LocalPlayer.Character
local humanoid = character:WaitForChild("Humanoid")

local animation = Instance.new("Animation")
animation.AnimationId = "ovdrassetid://1234"

local animator = humanoid:FindFirstChild("Animator")
local animationTrack = animator:LoadAnimation(animation)

local function OnAnimationEvent()
    print("OnAnimationEvent")
end
animationTrack:GetMarkerReachedSignal("SomeKeyName"):connect(OnAnimationEvent)

animationTrack:Play()
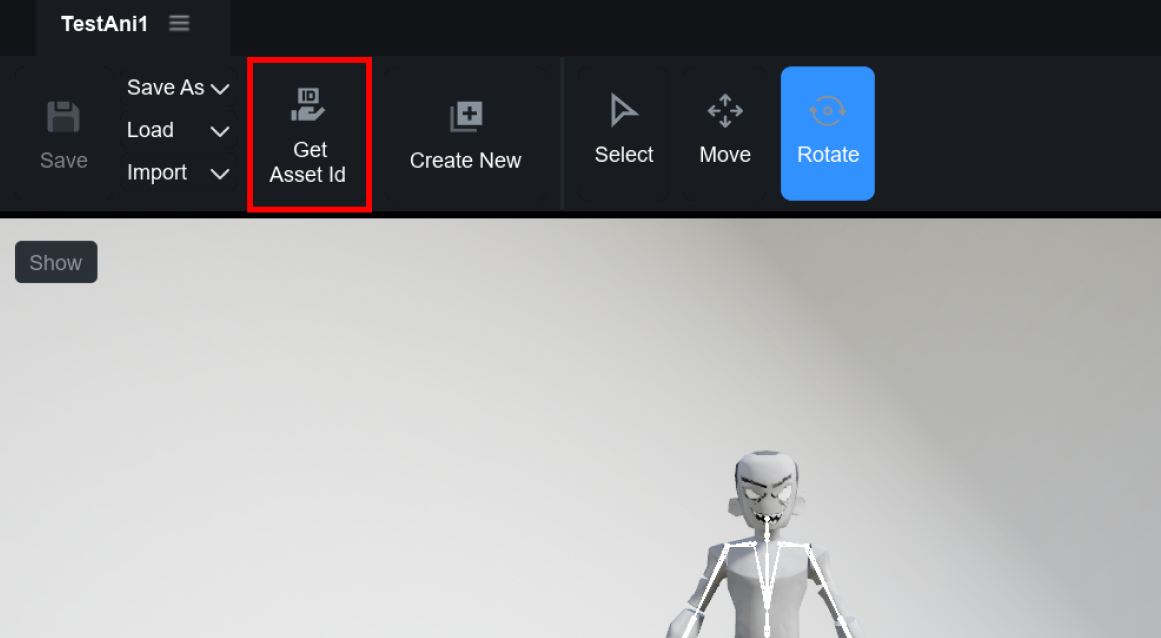
</code></pre>

## Keyboard Shortcuts <a href="#keyboard-shortcuts" id="keyboard-shortcuts"></a>

| Shortcut                                               | Action                                        |
| ------------------------------------------------------ | --------------------------------------------- |
| **(When clicking the preview panel) Arrow keys**       | Move the camera                               |
| **(When a bone is selected) F**                        | Move the camera to focus on the selected bone |
| **Shift+Click on Bone**                                | Multi-select bones                            |
| **Ctrl+1**                                             | Select Tool                                   |
| **Ctrl+2**                                             | Move Tool                                     |
| **Ctrl+3**                                             | Rotate Tool                                   |
| **Ctrl+S**                                             | Save animation                                |
| **Spacebar**                                           | Play / Pause animation                        |
| **Ctrl+Z / Ctrl+Y**                                    | Undo / Redo                                   |
| **(When a keyframe is selected) Ctrl+C / Ctrl+V**      | Copy / Paste keyframe                         |
| **(When a keyframe is selected) Delete**               | Delete the keyframe                           |
| **(When a keyframe is selected) Shift + Click + Drag** | Duplicate the keyframe                        |
| **Ctrl+Mouse Wheel Up/Down**                           | Zoom in/out of the timeline area              |

## How to Register and Use Animations

To register the created animation, click the **Get Asset Id button** to register it on the server.

<figure><img src="/files/vhXQYbTR2CfkoCHCEtoI" alt=""><figcaption></figcaption></figure>

Once the animation is successfully registered on the server, an **Asset Id** will be generated. Click the button indicated in the image to **copy the Asset Id**.

<figure><img src="/files/THUuD8jta13cysNXIKlV" alt=""><figcaption></figcaption></figure>

To use the animation, it **must be placed** in the Level Browser. Add the **animation** to ServerStorage.

<div align="left"><figure><img src="/files/0C19AmFwpWCQD02KKnKV" alt=""><figcaption></figcaption></figure></div>

Select the added animation and paste the copied **Asset Id** into the **Animation Id** field in the Properties window.

<figure><img src="/files/xhGW5rNRTgT0RGKcknve" alt=""><figcaption></figcaption></figure>

## Important Notes

* When you **Save** the animation you’re working on, it is **saved in OVERDARE Studio**, not the map.
* Therefore, if you open the map on a different PC, the animation you’re working on will not be visible.
* Animations registered in OVERDARE can be imported back using the **Import from OVERDARE** option.
* If any data is modified **after the animation is registered**, you must **re-register it, generate a new Asset Id, and link it** to reflect the changes.


# Setting Shadow Detail

## Overview

The **Shadow Detail Level** is an optimization technique that adjusts the complexity of shadow calculations. For more distant objects, a simplified mesh (Low-Detail Mesh) is used to calculate shadows, thus reducing rendering load and improving overall game performance.

## How to Use

### Setting Global Shadow

To enable shadows, first select the Lighting service. Then, in the Property panel, enable either Sun Cast Shadows or Moon Cast Shadows, depending on the time of day used in your game.

<figure><img src="/files/P2ZlNDb9V0dmX7lYsYfE" alt=""><figcaption></figcaption></figure>

### Individual Shadow Settings

After selecting a mesh, enabling **Enable Mesh Shadow Details** in the Properties panel allows you to specify the **Mesh Shadow Detail Level** for each mesh. In this case, the mesh’s settings take precedence over the global settings of the Lighting service.

(If a mesh’s shadow is not visible, check if **Cast Shadow** is enabled in the mesh’s Properties panel.)

<figure><img src="/files/FazhDj0Ok3yODw5TLHge" alt=""><figcaption></figcaption></figure>

### Shadow Representation Based on Shadow Detail Level

Setting the Shadow Detail Level to Original results in detailed shadows based on the original mesh shape, while Medium or Low settings produce simpler shadow forms.

<figure><img src="/files/mDmTxTybwf3IssQoZHE1" alt=""><figcaption><p>From left to right: Original, Medium, Low</p></figcaption></figure>

## Note

To display shadows, go to the Settings menu on your mobile device that runs the OVERDARE app, and set the Graphics option to **Prioritize Quality**.

<figure><img src="/files/9FZVqK8H9e30Xdf4wkOq" alt=""><figcaption></figcaption></figure>

## Usage Example

Since shadow complexity significantly impacts game performance, it's recommended to set global shadow complexity as low as possible and apply highly complex shadows only to specific meshes of high importance.


# Mobility Settings

## Overview

The Mobility option categorizes instances placed in the world as either **Static** or **Movable** to support performance optimization.

The rendering and update methods vary depending on the changeable nature of each instance, reducing unnecessary computations to achieve stable performance.

## Comparison of Options

### **Static**

* Ideal for objects that do not change in position, rotation, or scale
* Processes with minimal computation by utilizing precomputed data (e.g., lightmaps).
* Cannot be moved, rotated, or scaled at runtime.

### **Movable**

* Ideal for objects that need translation, rotation, animation, or player interaction
* Computes state changes every frame to provide dynamic presentation and interactivity
* Recommended for core gameplay elements or objects where expression is important, as it comes with performance costs

## How to Use

After **placing an instance in the Workspace**, in the `Property > Mobility` option, select either Static or Movable.

<figure><img src="/files/aHKsYFe4cYtqucia9W0V" alt=""><figcaption></figcaption></figure>

Mobility can only be changed for the **highest level (direct child) instances in the Workspace**.

### Static Recommended For

* **Recommended Examples**: Buildings, terrain, interior structures, rocks, trees, background props, etc.
* **Reason for Recommendation**:
  * Since their position or scale never changes during gameplay, setting these to Static allows for the **precalculation of lighting and computations**, minimizing unnecessary waste of resource.
  * Since static objects place a lower burden on GPU/CPU, stable performance can be maintained even in large maps or with many objects.
* **Important Notes**:
  * As objects set to Static cannot be moved or controlled at runtime, they should only be used for **background elements not directly associated with gameplay**.

### Movable Recommended For

* **Recommended Examples**: Characters, equipment items, vehicles, moving platforms, movable objects, gimmick objects directly interacted with by players, etc.
* **Reason for Recommendation**:
  * Movable seamlessly works with movement, rotation, and animation, making it ideal for expression of **core dynamic elements of gameplay**.
  * Objects that are directly manipulated by players or that need to physically react must be set to Movable to show dynamic changes.
* **Important Notes**:
  * Since Movable calculates changes at each frame, it incurs higher performance costs than Static, and setting too many objects as Movable in one scene may cause performance degradation.
  * Therefore, it is recommended to limit Movable to **key interactive objects** and avoid using it for unnecessary elements.

## Important Notes When Using It

### Restrictions on Hierarchy of Static Instances

* Since Static is defined as non-movable instances, **they cannot be placed as children of a Movable instance.**
* OVERDARE Studio has a structure where child instances follow the movement of their parent. Therefore, if a Static instance follows its parent’s movement, it causes a problem of violating its own definition.
* To prevent this issue, the editor **restricts placing Static under Movable**.
* At runtime, if you attempt to place a Static instance under a Movable instance, it will **trigger an error**.

### Restrictions on Changes and Creation

* The Mobility of instances outside the Workspace cannot be changed.
* The Mobility option cannot be changed at runtime.
* Static instances cannot be dynamically created or duplicated at runtime.
* Static instances do not support direct or indirect position changes, such as changing `CFrame` or disabling the `Anchored` property.


# VFXPreset Performance Optimization

## Overview

To use VFX Presets more efficiently, various performance types are automatically determined by combining **Importance** and **Infinite Loop** settings. This allows creators to optimize according to the characteristics of each effect type.

Additionally, by managing VFX Presets based on a fixed budget, creators can not only save resources but also **maintain balanced quality and performance** for each effect type. This approach makes it easier and more efficient for creators to handle VFX presets during development.

## VFX Preset Budgeting

VFX Presets consume significant device performance. The more they are used, the higher the quality, but this can degrade the play experience due to performance drops. To ensure performance, VFX usage must be minimized, but this reduces the game's visual appeal.

To address this, OVERDARE Studio automatically classifies Performance Types based on the Importance and Infinite Loop settings, and allocates resources for each type, providing creators with the ability to easily use VFX while ensuring performance.\\

### Restrictions

<table><thead><tr><th width="219.3333740234375">Classification</th><th>Restrictions</th></tr></thead><tbody><tr><td><strong>Budget Update Cycle</strong></td><td><ul><li>Spawn: Updates budget when placed in the world or enabled</li><li>Tick: Updates budget by calculating priority at regular intervals</li></ul></td></tr><tr><td><strong>How ​​to prioritize within a budget</strong></td><td><ul><li>Distance: Prioritizes display based on proximity to the camera</li><li>Age: Prioritizes display based on the order of recent spawning</li></ul></td></tr><tr><td><strong>How ​​to handle budget overruns</strong></td><td><ul><li>Kill: Disables rendering (cannot be reactivated)</li><li>Asleep: Temporarily disabled; can be reactivated when resources are available</li></ul></td></tr><tr><td><strong>Expression Maximum Distance</strong></td><td>Exclude from budget if the maximum distance from the camera is exceeded</td></tr><tr><td><strong>Maximum Instance Count</strong></td><td>Maximum allowed instances per performance type</td></tr><tr><td><strong>Maximum Number of Identical Effects</strong></td><td>Maximum number of identical effects within the same performance type</td></tr></tbody></table>

### Importance and Performance Type Mapping

The Performance Type is automatically determined internally based on the combination of the VFXPreset's **Importance** and **Infinite Loop** settings, as shown below.

<table data-full-width="true"><thead><tr><th width="200">Importance</th><th width="180">Infinite Loop</th><th width="280">Performance Type</th><th>Description</th><th>Usage Examples</th></tr></thead><tbody><tr><td><strong>Default</strong></td><td>False</td><td>Default Burst</td><td>One-shot VFX that must be played regardless of performance</td><td>Essential visual effects</td></tr><tr><td><strong>Default</strong></td><td>True</td><td>Default Looping</td><td>Looping VFX that must be played regardless of performance</td><td>Essential looping visual effects</td></tr><tr><td><strong>Background</strong></td><td>False</td><td>Background Burst</td><td>VFX that plays at a specific point in the background</td><td>Sparks, smoke effects</td></tr><tr><td><strong>Background</strong></td><td>True</td><td>Background Looping</td><td>VFX that continuously plays in the background</td><td>Torch, rain effects</td></tr><tr><td><strong>Gameplay</strong></td><td>False</td><td>Gameplay Burst</td><td>VFX that briefly plays at certain points during gameplay</td><td>Hit effects, level-up/item acquisition effects</td></tr><tr><td><strong>Gameplay</strong></td><td>True</td><td>Gameplay Looping</td><td>Gameplay VFX that loops continuously</td><td>Shield, buff aura effects</td></tr><tr><td><strong>Critical</strong></td><td>-</td><td>Critical</td><td>VFX that must be expressed in gameplay</td><td>Scoring effects, start/end conditional effects</td></tr></tbody></table>

## Resource Limits by Performance Type

### Resource Limits in General Specifications Options

<table data-full-width="true"><thead><tr><th width="239.8333740234375">Limitation</th><th align="center">Background Looping</th><th align="center">Background Burst</th><th align="center">Gameplay Looping</th><th align="center">Gameplay Burst</th><th align="center">Critical</th><th align="center">Default</th></tr></thead><tbody><tr><td><strong>Update Cycle</strong></td><td align="center">Tick (Medium)</td><td align="center">Spawn</td><td align="center">Tick (High)</td><td align="center">Spawn</td><td align="center">Spawn</td><td align="center">Spawn / Tick (Low)</td></tr><tr><td><strong>Priority Determination Criteria</strong></td><td align="center">Distance</td><td align="center">Distance</td><td align="center">Distance</td><td align="center">Age</td><td align="center">Age</td><td align="center">Distance</td></tr><tr><td><strong>How to handle exceeding budget</strong></td><td align="center">Asleep</td><td align="center">Kill</td><td align="center">Asleep</td><td align="center">Kill</td><td align="center">Kill</td><td align="center">Kill / Asleep</td></tr><tr><td><strong>Maximum expressible distance</strong></td><td align="center">10000</td><td align="center">5000</td><td align="center">10000</td><td align="center">12500</td><td align="center">No restrictions</td><td align="center">No restrictions</td></tr><tr><td><strong>Maximum number of instances for that budget</strong></td><td align="center">8</td><td align="center">8</td><td align="center">40</td><td align="center">60</td><td align="center">20</td><td align="center">88 / 48</td></tr><tr><td><strong>Limit the number of identical effects</strong></td><td align="center">4</td><td align="center">4</td><td align="center">10</td><td align="center">30</td><td align="center">20</td><td align="center">88 / 48</td></tr></tbody></table>

### Resource limits in low-spec options

<table data-full-width="true"><thead><tr><th width="239.833251953125">Limitation</th><th align="center">Background Looping</th><th align="center">Background Burst</th><th align="center">Gameplay Looping</th><th align="center">Gameplay Burst</th><th align="center">Critical</th><th align="center">Default</th></tr></thead><tbody><tr><td><strong>Update Cycle</strong></td><td align="center">Tick (Medium)</td><td align="center">Spawn</td><td align="center">Tick (High)</td><td align="center">Spawn</td><td align="center">Spawn</td><td align="center">Spawn / Tick (Low)</td></tr><tr><td><strong>Priority Determination Criteria</strong></td><td align="center">Distance</td><td align="center">Distance</td><td align="center">Distance</td><td align="center">Age</td><td align="center">Age</td><td align="center">Distance</td></tr><tr><td><strong>How to handle exceeding budget</strong></td><td align="center">Asleep</td><td align="center">Kill</td><td align="center">Asleep</td><td align="center">Kill</td><td align="center">Kill</td><td align="center">Kill / Asleep</td></tr><tr><td><strong>Maximum expressible distance</strong></td><td align="center">1250</td><td align="center">450</td><td align="center">2500</td><td align="center">1000</td><td align="center">No restrictions</td><td align="center">No restrictions</td></tr><tr><td><strong>Maximum number of instances for that budget</strong></td><td align="center">6</td><td align="center">6</td><td align="center">6</td><td align="center">25</td><td align="center">4</td><td align="center">32 / 12</td></tr><tr><td><strong>Limit the number of identical effects</strong></td><td align="center">3</td><td align="center">4</td><td align="center">4</td><td align="center">4</td><td align="center">2</td><td align="center">32 / 12</td></tr></tbody></table>

## How to Use

### Creating a VFX Preset

Create a VFX Preset in the Level Browser and adjust the desired effects, color, size, and more.

<figure><img src="/files/A8aVj6Pj7TDpABpoDi4y" alt=""><figcaption></figcaption></figure>

Learn More

{% content-ref url="/pages/UHaO21fVTwrimnAJr3x3" %}
[VFX](/manual/studio-manual/object/vfx)
{% endcontent-ref %}

### Specifying Importance

Set the Importance of the effect. Decide based on the intended use and importance of the effect you are using. The internal Performance Type is automatically determined based on the combination of Importance and Infinite Loop settings.

<figure><img src="/files/Fw5iKBoERGHWktUkD0kO" alt=""><figcaption></figcaption></figure>

### World Layout

Place the VFX Preset in the location or area where the effect should appear. If it does not need to be pre-placed in the world but dynamically placed during the game, store it in ReplicatedStorage or ServerStorage and place it in the world using Clone or Parent assignment.

```lua
local ReplicatedStorage = game:GetService("ReplicatedStorage")
local VFXPreset = ReplicatedStorage:WaitForChild("VFXPreset")

local Workspace = game:GetService("Workspace")
local Part = Workspace:WaitForChild("Part")

local NewVFX = VFXPreset:Clone()
VFXPreset.Parent = Part
```

## Note

The Importance of a VFX Preset cannot be changed at runtime. When creating and placing a VFX Preset during runtime, create it in ReplicatedStorage or ServerStorage in advance and dynamically place it using Clone or similar methods.


# Using Mixamo to Create Studio Animations

## Overview

<figure><img src="/files/4zc8XXk41wG97lmWf5ZR" alt=""><figcaption></figcaption></figure>

**Mixamo** is a **web-based 3D character rigging and animation platform** operated by Adobe.

With only a 3D character model, it can automatically generate a skeleton and animate the character in just a few minutes, eliminating what is traditionally a complex and time-consuming workflow. As a result, Mixamo is widely used for game development, metaverse UGC, and 3D animation projects, significantly accelerating the prototyping process. It is currently available **free of charge** with an Adobe account.

## Key Features

### 1. Auto-Rigger <a href="#id-1.-auto-rigger" id="id-1.-auto-rigger"></a>

The Auto-Rigger is Mixamo's most powerful feature. Traditionally, rigging a 3D character—creating a skeleton and painting skin weights—requires specialized knowledge and considerable effort.

* Upload a 3D character model in a T-pose (or A-pose) without an existing skeleton (such as an FBX or OBJ file).
* Place guide markers on key joints, including the chin, wrists, elbows, knees, and pelvis.
* Mixamo analyzes the character's geometry, automatically generates a complete bone hierarchy, and applies accurate skin weighting to produce a fully rigged character.

### 2. Extensive Animation Library <a href="#id-2" id="id-2"></a>

Mixamo provides thousands of high-quality motion capture (mocap) animations.

* **Wide variety of categories:** Choose from a broad selection of animations, including basic locomotion (walking, running, and jumping), combat (such as boxing and taekwondo), dance, idle poses, adventure, thriller-style motions, and more.
* **Real-time customization:** Adjust animation properties directly in the browser using intuitive sliders. Parameters such as animation speed, arm spacing, stride length, and motion intensity can be modified in real time to better match your character.

### 3. Flexible Export Options <a href="#id-3.-export" id="id-3.-export"></a>

Completed characters and animations can be exported in widely supported 3D formats, including FBX, OBJ, and Collada (DAE).

* Assets are fully compatible with major game engines such as Unreal Engine and Unity, as well as popular 3D DCC applications including 3ds Max, Blender, and Maya.
* Depending on your workflow, you can export either the character mesh with its skin (With Skin) or only the animation data (Without Skin) for retargeting onto another character.

## Using Mixamo in OVERDARE Studio

{% file src="/files/xTYgE33NXErAnkV0jWSF" %}

1. Go to [mixamo.com](http://mixamo.com/) and sign in with your Adobe account. ([If you do not have an Adobe account, create one first.](https://auth.services.adobe.com/en_US/deeplink.html?deeplink=signup\&callback=https%3A%2F%2Fims-na1.adobelogin.com%2Fims%2Fadobeid%2Fmixamo1%2FAdobeID%2Fcode%3Fredirect_uri%3Dhttps%253A%252F%252Fwww.mixamo.com%252F%2523%252Fimsauth%26code_challenge_method%3Dplain%26use_ms_for_expiry%3Dtrue\&client_id=mixamo1\&scope=openid%2CAdobeID\&relay=d1564e2f-d492-4076-9827-37e6a8c0e320\&locale=en_US\&flow_type=code\&idp_flow_type=create_account\&el=true\&ab_test=mfa-enroll-C%2Cmfa-promo-C%7Cmfa-enroll-C%2Cmfa-promo-C%7Cmfa-enroll-C%2Cmfa-promo-C%7Cmfa-enroll-C%2Cmfa-promo-C%7Cmfa-enroll-C%2Cmfa-promo-C%7Cmfa-enroll-C%2Cmfa-promo-C%7Cmfa-enroll-C%2Cmfa-promo-C%7Cmfa-enroll-ref%2Cmfa-promo-ref\&s_p=google%2Ckakao%2Capple%2Cmicrosoft%2Cfacebook%2Cline\&response_type=code\&code_challenge_method=plain\&redirect_uri=https%3A%2F%2Fwww.mixamo.com%2F%23%2Fimsauth\&use_ms_for_expiry=true#/signup))
2. Drag and drop the Mixamo\_For\_OVDR.fbx file into the **UPLOAD CHARACTER** section.<br>

   <figure><img src="/files/kujzolGBg0pomt8BmdLA" alt=""><figcaption></figcaption></figure>
3. Once the OVERDARE character appears, click **Next**.<br>

   <figure><img src="/files/jCq57Rum6x6oxJgGvpqL" alt=""><figcaption></figcaption></figure>
4. After the character has been loaded, select the animation you want to preview. The selected animation will play automatically. When you find the animation you want, click **Download**.<br>

   <figure><img src="/files/dCIHjLcZYbHdCoYUB0L8" alt=""><figcaption></figcaption></figure>
5. Configure the export settings as shown below, then click **Download**.<br>

   <figure><img src="/files/WCN8ns1CuoslRYK1pgRa" alt=""><figcaption></figcaption></figure>
6. **Import the downloaded file into OVERDARE Studio**, and it is ready to use.

Related Documentation

{% content-ref url="/pages/bS79pIBVkO3rjcUR9Zhi" %}
[Asset Import](/manual/studio-manual/asset-and-resource-creation/asset-import)
{% endcontent-ref %}

{% content-ref url="/pages/YK5NZVV1FAIHbrQSOuHF" %}
[Character Animation](/manual/studio-manual/character/character-animation)
{% endcontent-ref %}


# Game Development


# Game Settings

## Overview <a href="#overview" id="overview"></a>

In Game Settings, creators can configure the options needed to create their game. Customize various options such as the game’s physical environment and character movement speed to create your own unique game environment!

## How to Use <a href="#how-to-use" id="how-to-use"></a>

Open a world created in OVERDARE Studio, click the button in the top-right corner, then select **Game Settings** from the menu that appears.

<figure><img src="/files/RQt9gYxbmHaIL3pZR6x0" alt=""><figcaption></figcaption></figure>

In Game Settings, you can configure options related to the **game** or **security**.

<figure><img src="/files/QduNtOTmT9KayeYE81NL" alt=""><figcaption></figcaption></figure>

## Option Configuration <a href="#option-configuration" id="option-configuration"></a>

### World <a href="#world" id="world"></a>

<table><thead><tr><th width="206">Option</th><th width="342">Description</th><th>Notes</th></tr></thead><tbody><tr><td>Max Player</td><td>Sets the maximum number of players that can join the game.</td><td></td></tr><tr><td>Gravity</td><td>Defines the world's gravity in meters per second squared.</td><td>n meter/second^2</td></tr><tr><td>Jump Height</td><td>Determines the character's jump height.</td><td><p>n meter</p><p>(Min: 0, Max: Unlimited)</p></td></tr><tr><td>Jump Power</td><td>Controls the force of a character's jump.</td><td></td></tr><tr><td>Walk Speed</td><td>Sets the character's walking speed in meters per second.</td><td>n meters/second</td></tr><tr><td>Max Jump Distance</td><td>Calculated based on the configured Gravity and Jump settings.</td><td>n meters</td></tr><tr><td>Max Slope Angle</td><td>Sets the maximum slope angle the character can walk on.</td><td></td></tr></tbody></table>

### Security <a href="#security" id="security"></a>

<table><thead><tr><th width="206">Option</th><th width="342">Description</th><th>Notes</th></tr></thead><tbody><tr><td>Allow HTTP Requests</td><td><p>Allows the server to make requests to remote servers via HttpService.</p><p>(Disabled by default)</p></td><td></td></tr></tbody></table>


# Script Editor

## Overview <a href="#overview" id="overview"></a>

The Script Editor in OVERDARE Studio is an essential tool for writing scripts, designed to facilitate easy code writing. It helps manage the development process efficiently and significantly reduce working time.

## Features <a href="#features" id="features"></a>

* The editor formats and highlights syntax in code.
* It provides an autocomplete function that suggests code phrases as you type.
* It allows you to search and replace code within an open script or across all scripts.
* It provides real-time feedback on code quality and compliance.
* It offers robust debugging capabilities using breakpoints, allowing precise tracking of code execution flow and effective issue analysis.

## How to Use <a href="#how-to-use" id="how-to-use"></a>

### Opening a Script <a href="#opening-a-script" id="opening-a-script"></a>

Double-clicking a script in the Level Browser opens the Script Editor.

<figure><img src="/files/xsWbIpSRDfb98l0fLjjX" alt=""><figcaption></figcaption></figure>

### Keyboard Shortcuts <a href="#keyboard-shortcuts" id="keyboard-shortcuts"></a>

| Shortcut              | Description                                                           |
| --------------------- | --------------------------------------------------------------------- |
| Ctrl+S                | Save                                                                  |
| Ctrl+A                | Select All                                                            |
| Ctrl+C / Ctrl+V       | Copy/Paste                                                            |
| Ctrl+X                | Cut                                                                   |
| Ctrl+Z / Ctrl+Shift+Z | Undo/Redo                                                             |
| Ctrl+Wheel            | Increase or decrease the size of fonts                                |
| Alt+↑ / Alt+↓         | Swap the current line that the cursor is on with the line above/below |
| Ctrl+↑ / Ctrl+↓       | Scroll by one line                                                    |
| Ctrl+Home / Ctrl+End  | Move to the first/last line                                           |
| Ctrl+F                | Find code in the current script                                       |
| Ctrl+H                | Replace code in the current script                                    |
| Ctrl+Shift+F          | Find/Replace across all scripts                                       |
| Ctrl+G                | Go to a specific line                                                 |
| Ctrl+W                | Close Script Tab                                                      |
| Ctrl+/                | Comment/Uncomment Selected Area                                       |

### Autocomplete <a href="#autocomplete" id="autocomplete"></a>

While entering code, the editor suggests relevant functions, variables, and syntax, improving writing speed and productivity.

<figure><img src="/files/MbY6Y3fnalSV6ibZ9oRC" alt=""><figcaption></figcaption></figure>

When autocomplete suggestions appear, you can navigate the list using the up and down arrow keys, then press **Tab** or **Enter** to insert the selected suggestion into the script.

If autocomplete is not needed, press **Esc** to close the suggestions.

### Find and Replace <a href="#find-and-replace" id="find-and-replace"></a>

Using the **Find (Ctrl+F)** or **Replace (Ctrl+H)** functions, you can search and replace code within the current script. If multiple matches are found, you can navigate through them using the **Enter key**.

<figure><img src="/files/J52FaJMAPAxPph3oWrVK" alt=""><figcaption></figcaption></figure>

* 1️⃣ Match case
* 2️⃣ Match whole word
* 3️⃣ Use regular expressions
* 4️⃣ Next match
* 5️⃣ Previous match
* 6️⃣ Close
* 7️⃣ Replace selected word
* 8️⃣ Replace all

### Find All and Replace All <a href="#find-all-and-replace-all" id="find-all-and-replace-all"></a>

By using the **Find/Replace All function (Ctrl+Shift+F)**, you can search and replace code across all scripts. **Double-clicking** a result in the output panel moves the cursor to the corresponding line.

<figure><img src="/files/aKqLXhBBF6vzwjdMX1OM" alt=""><figcaption></figcaption></figure>

* 1️⃣ Match case
* 2️⃣ Match whole word
* 3️⃣ Use regular expressions
* 4️⃣ Next match
* 5️⃣ Previous match
* 6️⃣ Script filter
* 7️⃣ Close
* 8️⃣ Replace selected word
* 9️⃣️ Replace all

## Problem <a href="#problem" id="problem"></a>

The **Problem panel** analyzes the script being written and highlights active errors and warnings. Errors are also underlined in red within the Script Editor.

**Double-clicking** a log entry in the Problem panel moves the cursor to the corresponding line.

<figure><img src="/files/1fgIeooLM8yXZumCa688" alt=""><figcaption></figcaption></figure>

## Breakpoint <a href="#breakpoint" id="breakpoint"></a>

The **Breakpoint** function is a script debugging tool that allows you to pause the execution of a script at a specific point to examine the state of that point or analyze any issues during the script’s execution.

{% content-ref url="/pages/8a3SWMphK7WE7Q4GpCoD" %}
[Breakpoint](/manual/script-manual/debugging-and-optimization/breakpoint)
{% endcontent-ref %}


# Align Tool

## Overview <a href="#overview" id="overview"></a>

The Align feature allows you to easily align objects along the X, Y, and Z axes.

## Displaying the **Align Tool** Panel <a href="#displaying-the-align-tool-panel" id="displaying-the-align-tool-panel"></a>

The Align Tool can be displayed by clicking the **Align button** which appears when you select the **Model tab** in the top tab area of OVERDARE Studio.

<figure><img src="/files/5H1hGttgecNrDGjvDCrA" alt=""><figcaption></figcaption></figure>

## How to Use <a href="#how-to-use" id="how-to-use"></a>

Select the objects you want to align, configure the various **alignment options** in the Align Tool panel, and click the **Align button** to complete the alignment.

<figure><img src="/files/3wSzfVT9g7mxafipa20Y" alt=""><figcaption></figcaption></figure>

<figure><img src="/files/w3Q2np12a91UIsZPJygL" alt=""><figcaption></figcaption></figure>

## Alignment Options <a href="#alignment-options" id="alignment-options"></a>

### Space <a href="#space" id="space"></a>

Select the reference space for alignment.

<table><thead><tr><th width="211">Category</th><th>Description</th></tr></thead><tbody><tr><td>World</td><td>The alignment axes are based on the World coordinates.</td></tr><tr><td>Local</td><td>The alignment axes are based on the Local Asset coordinates.</td></tr></tbody></table>

### Relative To <a href="#relative-to" id="relative-to"></a>

Select the reference point for alignment.

<table><thead><tr><th width="211">Category</th><th>Description</th></tr></thead><tbody><tr><td>Selection Bounds</td><td>The alignment is based on the Bounding Box that encompasses all selected objects.</td></tr><tr><td>Active Object</td><td>The alignment is based on the active object among the selected objects.</td></tr></tbody></table>

### Align In <a href="#align-in" id="align-in"></a>

Select the axis (or axes) for alignment. You can choose one or more of the X, Y, and Z axes.

### Mode <a href="#mode" id="mode"></a>

Choose one of the alignment values: Min, Center, or Max.

| Min                                                                     | Center                                                                     | Max                                                                     |
| ----------------------------------------------------------------------- | -------------------------------------------------------------------------- | ----------------------------------------------------------------------- |
| <img src="/files/EGhysOpH8MONE0T5YKEm" alt="" data-size="original">     | <img src="/files/HW4ZUPOfioBZidTKNgqp" alt="" data-size="original">        | <img src="/files/79Fb1urEQ2L2EW8dmq2l" alt="" data-size="original">     |
| <p>Relative To : Active Object</p><p>Align in : Z축</p><p>Mode : Min</p> | <p>Relative To : Active Object</p><p>Align in : Z축</p><p>Mode : Center</p> | <p>Relative To : Active Object</p><p>Align in : Z축</p><p>Mode : Max</p> |


# Material Manager

## Overview <a href="#overview" id="overview"></a>

Using the Material Manager, you can manage various materials and apply them to objects to enhance visual quality.

## Displaying the Material Manager Panel <a href="#displaying-the-material-manager-panel" id="displaying-the-material-manager-panel"></a>

The Material Manager panel can be displayed by clicking the **Material Manager button** in the **Model tab**, which appears in the top tab area of OVERDARE Studio.

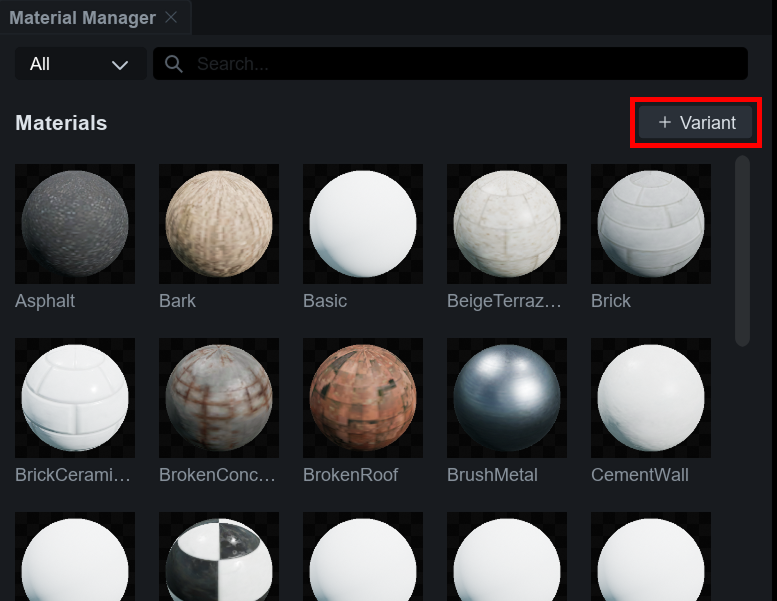
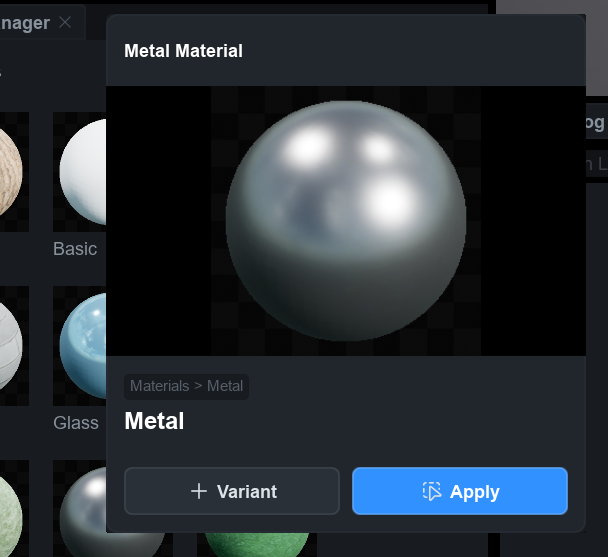
<figure><img src="/files/44XV145re3wVBHNvq5Qz" alt=""><figcaption></figcaption></figure>

## How to Use <a href="#how-to-use" id="how-to-use"></a>

### Adding a MaterialVariant <a href="#adding-a-materialvariant" id="adding-a-materialvariant"></a>

You can create a MaterialVariant by clicking the **+ Variant button** in the top-right corner of the Material Manager panel.

<figure><img src="/files/nrAdQry5yKOHW231rdH4" alt=""><figcaption></figcaption></figure>

Alternatively, you can **click on a Material** to open the Material Panel, then click the **+ Variant button** to create a MaterialVariant.

<div align="left"><figure><img src="/files/jyY5aBlADn3peLFTQbyc" alt=""><figcaption></figcaption></figure></div>

### Editing a MaterialVariant <a href="#editing-a-materialvariant" id="editing-a-materialvariant"></a>

Click on a created MaterialVariant to display its panel, where you can modify its properties or delete the variant.

<figure><img src="/files/DvtWUb68RjkOEYifkEf5" alt=""><figcaption></figcaption></figure>

### Material Variant Properties <a href="#material-variant-properties" id="material-variant-properties"></a>

| Category      | Description                                                                                                                                     |
| ------------- | ----------------------------------------------------------------------------------------------------------------------------------------------- |
| Name          | Allows you to rename the MaterialVariant.                                                                                                       |
| Base Material | <p>Specifies the Base Material that the MaterialVariant references.</p><p>You can choose from Basic, Plastic, Brick, Rock, Metal, or Unlit.</p> |

#### **Texture Maps**

<table><thead><tr><th>Category</th><th width="254">Description</th><th>Notes</th></tr></thead><tbody><tr><td>Color</td><td>Changes the material's color.</td><td>-</td></tr><tr><td>Metalness</td><td>Defines the metallic appearance of the model's surface.</td><td>You can import a file or adjust the value.<br>*Value range: 0.0 ~ 1.0</td></tr><tr><td>Normal</td><td>Provides surface height details to create a more complex texture.</td><td>You can import a file or adjust the value.<br>*Value range: 0.0 ~ 1.0</td></tr><tr><td>Roughness</td><td>Defines the roughness of the model's surface.</td><td>You can import a file or adjust the value.<br>*Value range: 0.0 ~ 1.0</td></tr></tbody></table>

#### **Tiling**

<table><thead><tr><th>Category</th><th width="254">Description</th><th>Default</th></tr></thead><tbody><tr><td>Unit Per Tile</td><td>Defines how many Studs the material's tile texture repeats over.</td><td>Default is 1.</td></tr></tbody></table>

#### **Physics**

<table><thead><tr><th>Category</th><th width="254">Description</th><th>Value Range</th></tr></thead><tbody><tr><td>Density</td><td>Adjusts the density of the MaterialVariant.</td><td>0.01~100</td></tr><tr><td>Friction</td><td>Adjusts the friction of the MaterialVariant.</td><td>0~2.0</td></tr><tr><td>Elasticity</td><td>Adjusts the elasticity of the MaterialVariant.</td><td>0~1.0</td></tr></tbody></table>

### Applying a Material to a Part <a href="#applying-a-material-to-a-part" id="applying-a-material-to-a-part"></a>

To apply a Material or MaterialVariant to a Part, select the Part, hover over the Material or MaterialVariant, and click the **button** shown in the image below.

<figure><img src="/files/BRYkiRYUGh22DLkz40xt" alt=""><figcaption></figcaption></figure>

Alternatively, select the Part you want to apply the Material or MaterialVariant to, click the Material or MaterialVariant, and then click the **Apply button** in the displayed panel.

<figure><img src="/files/Shy9umGptgGhm1gB30Wd" alt=""><figcaption></figcaption></figure>

You can also apply a MaterialVariant by directly entering its name in the properties window.

<figure><img src="/files/PwIDqbNDsL3W10AWz4MI" alt=""><figcaption></figcaption></figure>


# Collision Profile

## Overview

The **Collision Profile** is a system that defines an object's collision properties in detail. Each profile specifies which **Collision Channel** the object belongs to and how it interacts with other channels. This allows you to manage complex collision rules in a structured way. For example, you can set up a variety of gameplay situations such as players colliding with walls while projectiles pass through.

The collision system in OVERDARE Studio consists of **Collision Channels** and **Collision Profiles**. Understanding the role of each and how they relate to one another will help you design your collision system more effectively.

## Collision System Components

### Collision Channel

A Collision Channel is used to group objects or to filter queries such as Raycasts.

* For an Object Type channel
  * Provides functionality similar to the legacy Collision Group.
  * Unlike Collision Groups, the interaction between channels is not configured on the channel itself.
  * The channel simply groups objects, while the actual collision relationships are defined by the **Collision Profile**.

<figure><img src="/files/GjOjrrue7L0ZBpV5EymR" alt=""><figcaption></figcaption></figure>

* For a Trace Type channel
  * Used as an argument in queries such as `RaycastSingleByChannel` and `SpherecastSingleByChannel`.
  * You can configure whether each target object's Collision Profile is detected by the trace.

<figure><img src="/files/9pcycoyzqjixHn2FFJt0" alt=""><figcaption></figcaption></figure>

#### Collision Channel Limits

* You can create up to **32 Collision Channels** in total, of which **18** can be defined directly by the creator.
* A Collision Channel can be added as either a **Trace Type channel** or an **Object Type channel**. Both types share the same pool of 32 channels.
  * There is no limit on the number of Profiles, so you can extend functionality sufficiently without adding more channels.
  * In most cases, adding Profiles alone, without adding new Object Type channels, is enough.

### Collision Profile

A **Collision Profile** is a structure that comprehensively defines the collision-related properties of an object. It is similar in concept to Unreal Engine's Collision Preset and lets you predefine and reuse frequently used collision settings.

Each profile defines the following two items:

<figure><img src="/files/NjgpNV2TSsyA50kHeNpK" alt=""><figcaption></figcaption></figure>

1. **Object Type (Collision Channel):** The Collision Channel that objects using this profile belong to.
2. **Collision Response (interaction rules against other channels):** How the object specifically interacts with each Collision Channel (Block, Overlap, Ignore).

For example, you can define a profile such as: "Objects using this profile belong to the 'Humanoid' channel, Block against the 'WorldStatic' channel, Overlap with the 'Projectile' channel, and Ignore the 'Trigger' channel."

#### Built-in Collision Profiles

OVERDARE Studio provides built-in profiles that predefine commonly used collision settings:

| **Profile Name**      | **Object Type** | **Typical Use**                                               |
| --------------------- | --------------- | ------------------------------------------------------------- |
| **NoCollision**       | WorldStatic     | Objects that do not need collision (e.g., effects, particles) |
| **BlockAll**          | WorldStatic     | Objects that block all channels                               |
| **OverlapAll**        | WorldStatic     | Objects that only overlap with all channels                   |
| **BlockAllDynamic**   | WorldDynamic    | Block-all behavior for dynamic objects                        |
| **OverlapAllDynamic** | WorldDynamic    | Overlap-all behavior for dynamic objects                      |

You can use these built-in profiles as-is, or create custom profiles when needed.

## How to Use Collision Profiles

### Displaying the Collision Profile Panel

The Collision Profile panel can be displayed by clicking the **Collision Profile button** in the **Model tab**, which appears in the top tab area of OVERDARE Studio.
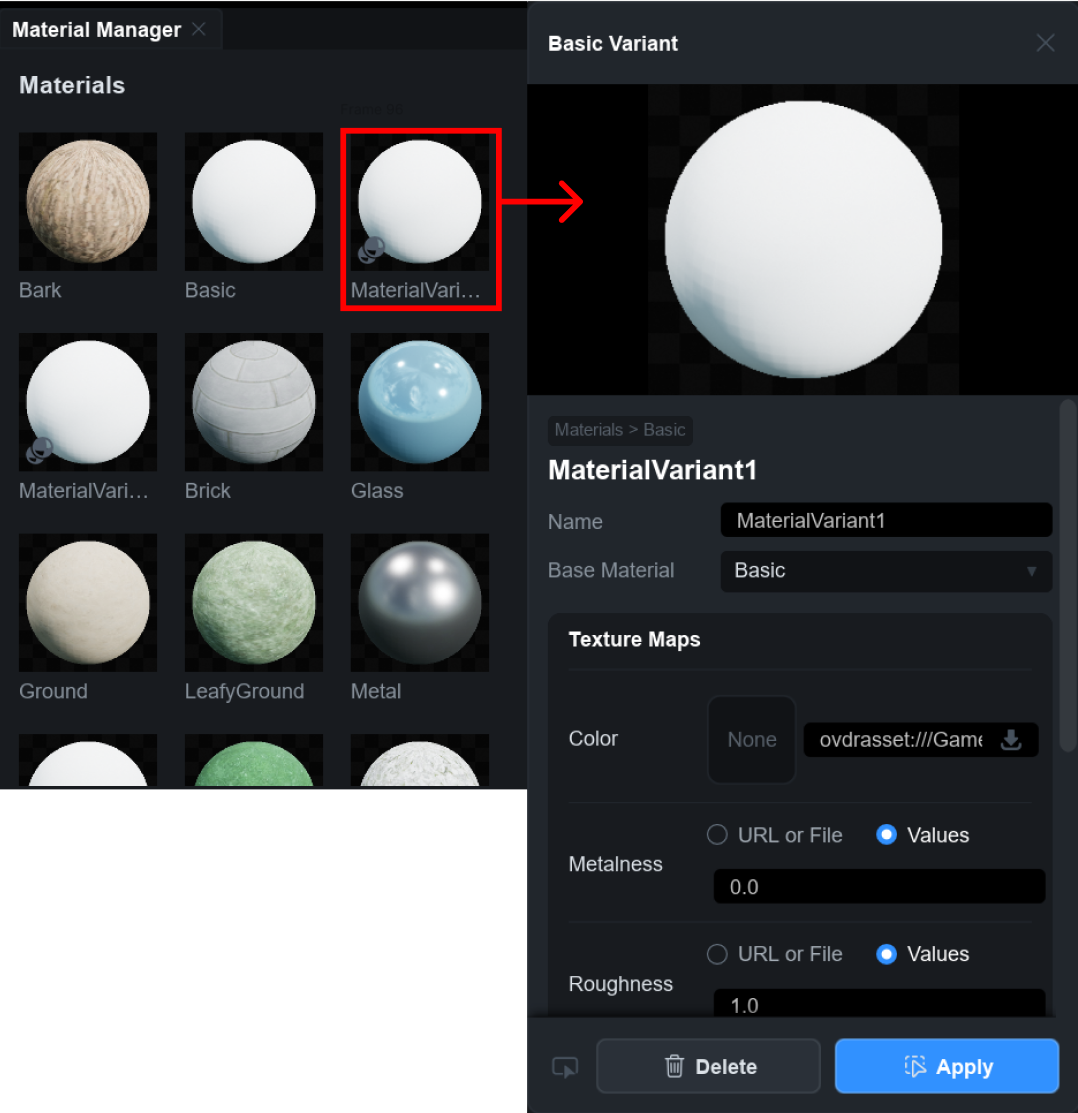
<figure><img src="/files/EfUfT9CgdO5wX9BapBme" alt=""><figcaption></figcaption></figure>

### Creating and Managing Collision Channels

#### Adding a Collision Channel

In the Collision Profile window, you can rename an Empty Channel in the **Collision Channel** section to use it as a new channel.

{% hint style="info" %}
The built-in Default Channel cannot be renamed or deleted. Channel names can be up to 50 characters long.
{% endhint %}

<figure><img src="/files/cnVBkMZafhsHEEOYUDPs" alt=""><figcaption></figcaption></figure>

#### Managing Collision Channels

You can double-click a channel name to rename it, and use **Delete** to remove the channel.

{% hint style="info" %}
You cannot rename a channel to a name that already exists. Deleting a channel may affect profiles that use it, so proceed with caution.
{% endhint %}

#### Editing Collision Channel Information

**ObjectType**

Sets the channel as an Object Type and defines the default Response for that Object Type.

If no specific Profile is assigned, all objects of that Object Type will use this default Response.

**TraceType**

When set as a TraceType, it determines how that Trace Channel responds to each Collision Profile.

For example, if the TraceResponse for the Pawn profile is set to Ignore, Raycasts using this channel will not detect Parts or MeshParts that use the Pawn Profile.

{% hint style="info" %}
**Common Use Case**

Setting the Wall Collision Profile to Ignore on the CameraChannel ensures that walls with the Wall Profile placed between the character and the camera do not cause the camera to move in front of the wall to keep the character visible.
{% endhint %}

{% embed url="<https://files.gitbook.com/v0/b/gitbook-x-prod.appspot.com/o/spaces%2FhRPi87oM9ttlk5nyu7L7%2Fuploads%2Fln65WmRyxJsAO30XwBd2%2Fvideo_1280.mp4?alt=media&token=edda8dd1-71cf-43c1-9594-a7ea09806830>" %}

### Creating and Managing Collision Profiles

#### Adding a Collision Profile

In the Collision Profile window, click the **+ New Profile button** to create a new profile. New profiles are created with the name **New Profile**, and you can rename them to create and manage multiple profiles.

<figure><img src="/files/qneiWFPfxVzmV5OnVeDR" alt=""><figcaption></figcaption></figure>

#### Configuring a Collision Profile

When you select a profile, the right-hand panel lets you configure the following items:

**Object Type Setting**

Select the **Collision Channel** that objects using this profile will belong to from the **Object Type** dropdown menu.

For example, for a player character profile you might select the "Player" channel, while for static objects such as walls or floors you would select the "WorldStatic" channel.

**Per-Channel Interaction Settings**

In the **Collision Responses** section, you can configure how the profile specifically interacts with each Collision Channel.

For each channel, you can choose one of the following options:

| Option      | Description                                                                                                     |
| ----------- | --------------------------------------------------------------------------------------------------------------- |
| **Block**   | Collides with objects in this channel. If the channel is a Trace Type channel, the object is detected as a Hit. |
| **Overlap** | Overlaps with objects in this channel without producing a physical collision.                                   |
| **Ignore**  | Does not interact with objects in this channel.                                                                 |

{% hint style="warning" %}
**Collision Response Priority**:

Collision Responses are prioritized in the order **Ignore > Overlap > Block**. When two objects have different Responses for each other, the higher-priority Response wins.

* Block vs Overlap is treated as Overlap.
* Block vs Ignore is treated as Ignore.
* A collision occurs only when both objects are set to Block.
  {% endhint %}

{% hint style="info" %}
**Collision Between Objects in the Same Channel**: Collisions between objects in the same channel (e.g., Pawn vs Pawn) can be configured differently per profile. For example, you can set the RootPart profile to Overlap with other Pawns and the BodyPart profile to Block other Pawns, so that RootParts are ignored and only BodyParts produce Hits.
{% endhint %}

<figure><img src="/files/CxMslddjPk4Nc2hXUWfD" alt=""><figcaption></figcaption></figure>

#### Managing Collision Profiles

You can double-click a profile name to rename it, and use **Delete** to remove the profile.

{% hint style="info" %}
You cannot rename a profile to one of the built-in profile names. Deleting a profile may affect objects that use it, so proceed with caution.
{% endhint %}

### Applying a Collision Profile to an Object

Select the object (Part, MeshPart, etc.) you want to configure, and then enter the profile name in the **Collision Profile** property in the Properties window.

Each object can have **only one** Collision Profile.

<figure><img src="/files/qIZmzsVRSi1sXC5MdrZI" alt=""><figcaption></figcaption></figure>

## Collision Profile Usage Examples

### Example 1: Player and Projectile System

You can set things up so that the player character collides with walls, while projectiles pass through the player and only collide with walls.

1. **Create Collision Channels**

* Create the "Humanoid" channel (or use a built-in channel).
* Create the "Projectile" channel.
* Create the "WorldStatic" channel (built-in, renamed from WorldStatic).

2. **Create Collision Profiles**

**PlayerProfile**:

* Object Type: Humanoid
* Collision Response
  * WorldStatic: Block
  * Projectile: Overlap
  * Humanoid: Block

**ProjectileProfile**:

* Object Type: Projectile
* Collision Response
  * WorldStatic: Block
  * Humanoid: Overlap
  * Projectile: Ignore

3. **Apply Profiles to Objects**

* Apply PlayerProfile to the child Parts of the player character.
* Apply ProjectileProfile to projectile objects.
* Apply a profile using the WorldStatic channel to walls and floors.

### Example 2: Trigger Volume

You can create a trigger volume that fires an event when a specific area is entered.

1. **Create Collision Channels**

* Create the "Trigger" channel (or use a built-in channel).

2. **Create Collision Profiles**

**TriggerProfile**:

* Object Type: Trigger
* Collision Response
  * Humanoid: Overlap
  * WorldStatic: Ignore
  * Projectile: Ignore

3. **Apply Profiles to Objects**

* Apply TriggerProfile to the trigger volume Part.
* Use the `Touched` event to detect when the player enters.

### Example 3: Using Built-in Profiles

You can quickly apply collision settings by leveraging the built-in profiles.

1. **NoCollision profile**: Apply to objects that do not need collision, such as effects and particles.
2. **BlockAll profile**: Apply to walls, floors, and other objects that must collide with everything.
3. **OverlapAll profile**: Apply to trigger volumes that only overlap with everything.

You can also duplicate and customize a built-in profile, or create entirely new profiles as needed.

## Built-in Collision Channels

OVERDARE Studio provides a set of Collision Channels commonly used in game development out of the box.

| **Channel Name** | **Description**                                                  | **Typical Use**                                             |
| ---------------- | ---------------------------------------------------------------- | ----------------------------------------------------------- |
| **WorldStatic**  | <p>Static objects<br>(Anchored, no physics simulation)</p>       | Rocks, fences, walls fixed to the map                       |
| **WorldDynamic** | <p>Dynamic objects<br>(!Anchored, with physics simulation)</p>   | Moving platforms, doors, etc.                               |
| **PhysicsBody**  | <p>Physically simulated objects<br>(CanCollide && !Anchored)</p> | Objects that are physically simulated and handle collisions |
| **Pawn**         | Characters that a player can possess                             | Player characters, NPCs, etc.                               |

## Using Trace Channels

A **Trace Channel** is a channel used in query operations such as Raycasts. When you use a Trace Channel with the `RaycastByChannel()` API, you can detect Hits or Overlaps on a per-profile basis.

### Relationship Between Trace Channels and Object Type Channels

* Trace Channels and Object Type Channels **share the pool of 32 channels**.
* Trace Channels are used in query operations such as Raycast and LineTrace.
* Object Type Channels are used to group objects for collision.
* The same channel can be used as both a Trace Channel and an Object Type Channel.

### Trace Channel Usage Examples

When you perform a Raycast using a specific Trace Channel, results are determined by each profile's Collision Response for that channel:

* **Block**: Detected as a Hit. The `Hit` property of `RaycastResult` is `true`.
* **Overlap**: Detected as an Overlap. The `Hit` property of `RaycastResult` is `false` and the `Overlap` property is `true`.
* **Ignore**: Not detected.

For example, if you create a Trace Channel called "WeaponTrace" and set the player profile's response to WeaponTrace to Block, weapon Raycasts will detect only players as Hits and ignore other objects.

## Migrating from Collision Group to Collision Profile

```panel
**Collision Group is scheduled for deprecation.** We recommend using **Collision Profile** for new projects.
```

For creators who have been using **Collision Group**, the following compares the two systems and outlines what to consider when migrating.

### Differences Between Collision Group and Collision Profile

| **Item**                         | **Collision Group**                                      | **Collision Profile**                                 |
| -------------------------------- | -------------------------------------------------------- | ----------------------------------------------------- |
| **Grouping**                     | Groups and relationship definitions are handled together | Channels provide grouping only                        |
| **Collision Relationship Setup** | Set directly between groups                              | Configured per channel on each profile                |
| **Direction of Relationships**   | Always bidirectional                                     | Configured independently per profile                  |
| **Flexibility**                  | Simple collide/no-collide between groups                 | Fine-grained Block/Overlap/Ignore control per channel |
| **Intended Use**                 | Simple collision filtering                               | Managing complex collision rules                      |

### Advantages of Collision Profile

**Collision Profile** offers more granular and flexible collision control than **Collision Group**:

* **Fine-grained per-channel control**: You can configure Block, Overlap, and Ignore independently for each channel.
* **Profile-based exception management**: Without redefining inter-group relationships each time, you can efficiently apply collision rules that fit specific scenarios (e.g., projectile pass-through) using only the independence of each profile.
* **Scalability**: It is easy to add new channels or profiles without affecting existing settings.

## References


# Tag Editor

## Overview <a href="#overview" id="overview"></a>

The Tag Editor allows you to assign tags to objects, making it easier and more efficient to manage and categorize them.

## Displaying the **Tag Editor** Panel <a href="#displaying-the-tag-editor-panel" id="displaying-the-tag-editor-panel"></a>

The Tag Editor panel can be displayed by clicking the **Tag Editor button** in the **View tab**, which appears in the top tab area of OVERDARE Studio.

<figure><img src="/files/ukhntr2YOqjSWS7CLqJU" alt=""><figcaption></figcaption></figure>

## How to Use <a href="#how-to-use" id="how-to-use"></a>

### Adding tags <a href="#adding-tags" id="adding-tags"></a>

Click the **+ button** in the top-right corner of the Tag Editor to create a new tag.

<div align="left"><figure><img src="/files/20wrtfs07XQQhlvCA29r" alt=""><figcaption></figcaption></figure></div>

Click the **folder icon** in the top-right corner of the Tag Editor to create a new folder.

<figure><img src="/files/6HUoO6oJpl4OJkD9j6Bu" alt=""><figcaption></figcaption></figure>

### Managing Tags <a href="#managing-tags" id="managing-tags"></a>

You can organize a Tag inside a folder by selecting it, then **dragging & dropping** it into a **folder**.

<div align="left"><figure><img src="/files/VpBJbmw8YNUDX5lTIHJb" alt=""><figcaption></figcaption></figure></div>

Right-click on a Tag or folder to rename it with **Rename** or delete it with **Delete**. You can also duplicate them with **Duplicate**, put them in a folder with Group Section, or remove them from a folder with Group Section.

<div align="left"><figure><img src="/files/WqvXmqTN2kKNhRtkJwOA" alt=""><figcaption></figcaption></figure></div>

Alternatively, you can hover over a tag and click the **button** shown in the image below to display the **Tag Options window** where you can set the tag’s name or group.

In the Tag Option window, you can click the **Select In Level Browser button** to select the objects with the specified tag.

<figure><img src="/files/4H90ftVmzVvcwWgIsZ1F" alt=""><figcaption></figcaption></figure>

### Adding Tags to Parts <a href="#adding-tags-to-parts" id="adding-tags-to-parts"></a>

You can **assign/remove** a tag to a Part by selecting the Part you want to tag and clicking the **check box** in the Tag Editor.

<figure><img src="/files/tgpMkwrwV3M3yW59RPAL" alt=""><figcaption></figcaption></figure>

Alternatively, you can select the Part you want to tag, find Tags in the properties window, press the **+ button** to **Add**, and enter the name of the tag you want to set.\
(If the tag name does not exist in the Tag Editor, it will be automatically added and assigned.)

<div align="left"><figure><img src="/files/pTIDd1SpUrZds5WTmQYI" alt=""><figcaption></figcaption></figure></div>

### Finding Objects with Tags <a href="#finding-objects-with-tags" id="finding-objects-with-tags"></a>

Hover over a tag and click the **button** shown in the image below to select all objects with that tag.

<figure><img src="/files/pNLM0zAAAhhJ1C6j7Ogx" alt=""><figcaption></figcaption></figure>


# World Performance Optimization

## Performance Guide

### Overview

Through the Performance Guide feature, key performance indicators such as FPS, Draw Call, and memory usage can be **monitored in real-time within the Studio.**

This allows creators to identify performance degradation factors such as frame drops and rendering delays in advance, enabling effective optimization. Ultimately, this ensures overall stability, providing users with a smoother and more enjoyable gameplay experience.

### How to Use

To use the Performance Guide, click the Stat button that appears when you select the Play tab in the top-most tab area of OVERDARE Studio.

<figure><img src="/files/DhZ4WvU9GHFS7XY47JKr" alt=""><figcaption></figcaption></figure>

The Performance Guide is displayed on the Studio’s viewport, allowing you to monitor the real-time changes in performance metrics during test play. This helps you intuitively assess performance changes in various game scenarios, such as player movement, object creation, and effect activation, and use this information for situational optimization.

<figure><img src="/files/QHrnWo8veMMnbq1pbtGT" alt=""><figcaption></figcaption></figure>

<table><thead><tr><th>Item</th><th width="311.4560546875">Description</th><th>Recommended Value</th></tr></thead><tbody><tr><td>FPS (Frames Per Second)</td><td>The number of frames rendered per second.<br>Higher values provide smoother visuals.</td><td>30 or higher</td></tr><tr><td>CPU Usage</td><td>The percentage of CPU usage.<br>High usage can affect other processes</td><td>70% or lower</td></tr><tr><td>GPU Usage</td><td>The percentage of GPU usage.<br>Affects rendering and graphics processing.</td><td>85% or lower</td></tr><tr><td>Memory Usage</td><td>Total memory usage.<br>Exceeding memory can cause game crashes or performance degradation.</td><td>3GB or lower</td></tr><tr><td>Texture Memory</td><td>The amount of memory used for texture data.<br>Too much can overload the GPU.</td><td>150MB or lower</td></tr><tr><td>Texture Count</td><td>The number of textures in use.<br>More textures increase memory and rendering load.</td><td>200개 or lower</td></tr><tr><td>Mesh Tri Count</td><td>The number of triangles in meshes displayed on screen.<br>Too many can decrease rendering speed.</td><td>300,000 or fewer</td></tr><tr><td>Draw Calls</td><td>The number of commands sent from the CPU to the GPU for rendering.<br>Higher values increase the risk of performance degradation.</td><td>200 or fewe</td></tr><tr><td>Network</td><td>Network traffic and latency.<br>Greatly affects communication responsiveness</td><td>Less than 20KB/s, under 80ms</td></tr></tbody></table>

### Important Notes

* Resources used by the Studio itself are included in the measurements, which may cause a difference in performance compared to actual mobile devices. (In particular, memory usage and rendering performance metrics may appear higher than in mobile environments.)
* When using the multi-test play feature, performance metrics such as CPU, memory, and network usage may be higher compared to single-player. (While this is useful for simulating a multiplayer environment, it should be interpreted separately from single-client performance.)
* GPU usage and FPS values may be affected depending on the viewport resolution settings.
* Performance metrics may also vary due to other background programs running on the PC where the Studio is executed, so it is recommended to keep the testing environment as controlled as possible.

### Usage Examples

* Check to ensure stable FPS, and if frame drops occur in specific areas, examine the calculations, effects, scripts, etc., at those locations to optimize them.
* Monitor CPU and GPU usage to ensure they remain within a certain level. If there is a sudden spike in specific situations, identify the computational load and bottlenecks at those points and improve the processing logic.
* Check if memory usage consistently increases during long test plays. Verify if there are memory leaks or unnecessary objects being retained, and implement cleanup routines (e.g., Destroy(), setting reference variables to nil) to stabilize performance.
* Excessive texture usage can lead to GPU overload or loading delays, so use high-resolution textures only within the necessary range and adjust asset resolutions for optimization.
* If the mesh triangle count for characters or environments is high, the GPU rendering load increases. Simplify meshes that are unnecessarily complex to improve performance.
* If there are too many draw calls, the cost of calls between the CPU and GPU increases. Minimize draw calls by combining object placements or standardizing materials and shaders.
* If network traffic spikes within a short period, it can cause server processing delays or increased latency. Control events that cause excessive packet transmission (e.g., repeated updates, high-frequency position sending) and adjust transmission intervals as needed to optimize traffic.

## World Performance Analytics

### Overview

OVERDARE App allows you to analyze the execution performance of worlds published on the app in **mobile environments**. It helps diagnose performance bottlenecks that occur during gameplay based on key performance indicators such as FPS stability, draw call count, rendering time, and memory usage. You can use this information to optimize your world so that it **runs smoothly even on low-end devices**.

This feature is currently available as an **experimental feature (Experimental)** and will be continuously updated to help creators set more precise performance improvement directions in the future.

### How to Use

After entering the world in the OVERDARE app, tap the **chat activation button** in the upper left corner of the screen, then tap the **chat input area (Tap here to chat)**.

<figure><img src="/files/nW3YA2EuJ8Cxg4Dxkg1R" alt=""><figcaption></figcaption></figure>

Type **profile on** and send the message.

<figure><img src="/files/6SodgGgXhUwsiEtS0uuc" alt=""><figcaption></figcaption></figure>

Now, performance information for the world will be displayed in the upper left corner of the screen.

<figure><img src="/files/4TY6hlth1qX6yaUigWdK" alt=""><figcaption></figcaption></figure>

<table><thead><tr><th width="234">Item</th><th>Description</th></tr></thead><tbody><tr><td>FPS (Frames Per Second)</td><td>The number of frames rendered per second.<br>Higher values indicate smoother visuals.</td></tr><tr><td>Frame</td><td>Time it takes to process a single frame (33.33ms = about 30FPS)</td></tr><tr><td>Game</td><td>Time taken to process game logic</td></tr><tr><td>Draw</td><td>Time spent performing draw calls (GPU rendering requests)</td></tr><tr><td>RH</td><td>Time spent on RHI (Render Hardware Interface) tasks</td></tr><tr><td>Draw Calls</td><td>The number of commands sent from the CPU to the GPU for rendering.<br>Higher values may degrade performance.</td></tr><tr><td>Primitives</td><td>Number of basic shapes (triangles, etc.) rendered</td></tr><tr><td>Device Temp</td><td>Current device temperature (for AOS devices)</td></tr><tr><td>Temp Status</td><td>Current device temperature (for iOS devices)</td></tr><tr><td>[OS API] Memory</td><td>To be supported in the future</td></tr><tr><td>[UE] Memory</td><td>Total memory usage</td></tr></tbody></table>

### Usage Examples

By using the world performance analysis feature in the OVERDARE app along with the **Performance Guide**, you can perform more systematic optimization work in the Studio environment.

Based on the performance data collected during world execution such as FPS, draw calls, and RHI processing time, you can identify performance drop-off areas and refer to the recommended values in the Performance Guide to improve the overall content structure, including model composition, lighting usage, and script design.

## Optimization Guide for Low-End Mobile Device

Optimizing for low-end mobile devices is essential to **ensure smooth gameplay across a wide range of hardware performance**. This helps reduce user churn, **expand the potential user base**, and maintain overall stability and consistency in the gameplay experience.

By following the guidelines below, you can ensure a **fair and stable gameplay experience** for 99.9% of OVERDARE users.

### Definition of Low-End Device

In OVERDARE, low-end devices are defined as those equipped with entry-level GPUs such as the PowerVR Rogue GE8320, exemplified by models like the **Galaxy A04e (SM-A042F/DS)**.

If you have a device with a low-end GPU such as the GE8320, we **recommend testing on that device**. It will help verify the game's stability in low-spec environments.

### Optimization Guideline for Low-End Devices

For **static background elements** pre-placed in the world, it is recommended to configure the resource budget as follows:

* Maximum visible vertex count on screen: 70,000 or fewer
  * Prioritize vertex optimization on low-end devices, since **managing vertex count is more critical** than managing tris or primitives.
  * Ideally, **each mesh should be constructed with 700 vertices or fewer**, if possible.
* Maximum visible draw calls on screen: 70 or fewer
* Textures: 100 or fewer (512x512)

Refer to the following criteria for **VFX** such as ParticleEmitter:\\

* Maximum visible vertices on screen: 15,000 or fewer
* Maximum visible draw calls on screen: 30 or fewer


# PreloadAsset Manager

## Overview <a href="#overview" id="overview"></a>

Preload Asset is a feature that preloads specific assets before the game starts. In OVERDARE, if assets are not loaded into memory at the start of the game, characters may fall through the ground. By using Preload Asset, terrain and major colliders can be preloaded before the game starts to prevent such issues.

## Recommended Use Cases <a href="#recommended-use-cases" id="recommended-use-cases"></a>

It is recommended to use it mainly for Mesh assets that must be ready at the start of the game.

* Mesh assets used in the terrain where characters spawn
* Objects that require collision processing at the start of the game
* Major structures that must be displayed immediately at the start of the game

In addition to Mesh, you can register various asset types such as Texture, Sound, and VFX. Consider registering any asset that needs to be used immediately at the start of the game, regardless of type.

## How to Use <a href="#how-to-use" id="how-to-use"></a>

### Open Preload Asset Manager <a href="#open-preload-asset-manager" id="open-preload-asset-manager"></a>

Click **Preload Asset Manager** in the top menu of the editor to open the panel. The panel can be docked and undocked from the editor, allowing you to check it frequently during work.

<div align="left"><figure><img src="/files/GpCGjvHns8HzRVvP86H2" alt="" width="563"><figcaption></figcaption></figure></div>

### Adding Assets <a href="#adding-assets" id="adding-assets"></a>

Click the **Add** button at the top of the panel to open the **Add Assets to Preload** window. There are two ways to add assets.

<figure><img src="/files/VxSd9maC2LD4EChNKt9m" alt=""><figcaption></figcaption></figure>

**Method 1. Add by Asset Id**

* Enter the Asset Id of the asset you want to add in the input field at the top and press Enter.
* Assets not in the level browser, such as those uploaded to the cloud, can also be added via Asset Id.

**Method 2. Add by Drag and Drop**

* Drag and drop the asset you want to add from the level browser to the list area.
* You can drop multiple assets at once.

Once the addition is complete, click the **Save** button to confirm the registration.

### Removing Assets <a href="#removing-assets" id="removing-assets"></a>

There are two ways to remove registered assets.

<figure><img src="/files/QbvCwpag0fkhKVERoCz9" alt=""><figcaption></figcaption></figure>

**Remove Individually**

* Click the **X button** on the right of each asset row to remove it immediately.

**Remove in Bulk**

* Select the checkbox of the assets you want to remove and click the **Remove** button at the bottom.
* Click **Remove** in the confirmation dialog to remove the selected assets.

> Asset removal is automatically saved immediately.

### Search Registered Assets <a href="#search-registered-assets" id="search-registered-assets"></a>

Enter the Asset Id in the search box at the top of the panel to filter registered assets in real-time.

## Caution <a href="#caution" id="caution"></a>

* You can register up to **20** Preload Assets. The more assets registered, the longer the game entry time.
* If the number of registrable assets is exceeded, the Add button will be disabled.
* A warning message will be displayed if an invalid Asset Id is entered or if an invalid asset is dropped.
* It is recommended to register only essential assets.


# Place & Teleport

## Overview

A Place is a unit used to compose a **single World into multiple spaces.**

A World consists of a **Start Place** and **multiple Sub Places**, and players can freely move between Places through TeleportService.

This structure allows you to **seamlessly connect various experiences within a single World**, such as lobbies, game stages, shops, and personal spaces.

## Place Structure Examples

Using Places, you can build structures such as:

* Separating lobby and gameplay spaces
* Creating independent spaces for different game modes
* Distributing server load by server instance
* Building long-session gameplay content
* Implementing match-based game structures

## World and Place Structure

A World represents a single game experience, while a Place is an individual space contained within that World.

```
[World A]
 ├─ Place : Lobby
 ├─ Place : Battle (A Mode)
 ├─ Place : Battle (B Mode)
 └─ Place : MyHome
```

* A single World can contain multiple Places.
* A single Place can belong to only one World.
* The Start Place is the default Place players enter first when joining a World.
* Sub Places can be organized into functional spaces such as lobbies, battle areas, and result screens.

## Managing Places

### Registering and Connecting Places

When publishing a project for the first time in OVERDARE Studio, you can connect it as a Sub Place of an existing World.

To register the project as a Place connected to an existing World, enable **Add to Existing World** on the World information page.\
(You must set the **Owner** before this option becomes available.)

<figure><img src="/files/8ydtDGvZePHKkT6Wm2rv" alt=""><figcaption></figcaption></figure>

Click the **Connect button** for the World you want to connect to.

<figure><img src="/files/5vZ2KUjQFCVFae12Ucc3" alt=""><figcaption></figcaption></figure>

After entering the required details, select the **Next button**.

<figure><img src="/files/yAehBAmZT2GpwXd5qRCs" alt=""><figcaption></figcaption></figure>

### Viewing Connected Places

You can view the list of Places connected to the current World in Studio or Creator Hub.

In Studio Home, open the **My Worlds tab** to view the Places connected to each World.

<figure><img src="/files/jwgf92t3ngydXjqUQVHT" alt=""><figcaption></figcaption></figure>

In Studio, open the project and select **Places** in the **Asset Manager** panel to view the connected Places in the current World and identify the Place currently being edited.\
(You can right-click a Place to copy its PlaceId from the context menu.)

<figure><img src="/files/m4lAOSOgQ6Hruq8nhAwt" alt=""><figcaption></figcaption></figure>

In Creator Hub, click a World in the Dashboard, then open the **Place tab** to view the connected Places.

<figure><img src="/files/Wfa9idSVzBfImvmNMlvA" alt=""><figcaption></figcaption></figure>

### Disconnecting Places

In Studio Home, open the options menu for a Place connected to a World, then select **Remove from World** to disconnect the Place from the World.

<figure><img src="/files/eljMlhBouuzsgLsVW025" alt=""><figcaption></figcaption></figure>

In Creator Hub, open the **Place tab** for a World in the Dashboard, then select **Remove from World** from the Place options menu to disconnect the Place from the World.

<figure><img src="/files/ztve3MAN49CBQQKCO0qa" alt=""><figcaption></figcaption></figure>

### Viewing and Reconnecting Detached Places

In Studio Home, you can view Places that are not connected to any World in the **Detached Places** **section**.

<figure><img src="/files/XXXA2ANQB3udLD319MKg" alt=""><figcaption></figcaption></figure>

In Creator Hub, open the **Place tab** for a World in the Dashboard, then click the **Add Place button** to view Places that are not connected to a World.

Select the **Add button** for the Place you want to connect to add it to the current World.

<figure><img src="/files/EEXzV22QvttYVucUMtrs" alt=""><figcaption></figcaption></figure>

### Updating Sub Place Information

Unlike Creator Hub, **Place connection information displayed in Studio is refreshed every minute.**

To immediately reflect the latest state, sign in again or reopen Studio Home or the project.

## Scripting Features

### Notes

* Teleport features can only be used from **server-side scripts**.
* Place teleportation through TeleportService is **only supported between Places connected to the same World**.
* It is recommended to handle teleport failure cases with proper exception handling logic.

### Teleporting to a Public Session Place (TeleportAsync)

Use this to move players to another Place through a public server session.

```lua
local TeleportService = game:GetService("TeleportService")

-- Execute teleport
local success, errorOrResult = pcall(function()
    local targetPlaceId = 1234 -- PlaceId of a Place connected to the current World
    local players = { player } -- Players to teleport
		
    local teleportResult = TeleportService:TeleportAsync(targetPlaceId, players)     
    return teleportResult
end)
```

* When teleporting to the currently joined PlaceId, players may enter a different server session.
  * In other words, teleporting again to the current PlaceId does not guarantee rejoining the same server session.

### Teleporting to a Private Session Place (TeleportAsync)

#### Creating a Private Session (ShouldReserveServer Option)

Use this to create a new private server session when teleporting players.

```lua
local TeleportService = game:GetService("TeleportService")

-- Configure TeleportOptions
local options = Instance.new("TeleportOptions")	
options.ShouldReserveServer = true -- Whether to create a new reserved server session

-- Execute teleport
local success, errorOrResult = pcall(function()
    local targetPlaceId = 1234 -- PlaceId of a Place connected to the current World
    local players = { player } -- Players to teleport
		
    local teleportResult = TeleportService:TeleportAsync(targetPlaceId, players, options)     
    return teleportResult
end)
```

#### Teleporting to a Specific Server Instance (ServerInstanceId Option)

Use this to move players to a specific running server instance.

```lua
local TeleportService = game:GetService("TeleportService")
local DataStoreService = game:GetService("DataStoreService") 
local SessionStore = DataStoreService:GetDataStore("PlayerPrevSessionId")

-- Load the previously saved session Id
local jobId = nil
local success, errorOrLoadValue = pcall(function()
    return SessionStore:GetAsync(player.UserId)
end) 

if not success or errorOrLoadValue == nil then
    return
end
jobId = errorOrLoadValue 

-- Configure TeleportOptions
local options = Instance.new("TeleportOptions")	
options.ServerInstanceId = jobId    -- Join a specific public server (pass a game.JobId value)
options.ShouldReserveServer = false -- Whether to create a new reserved server session (must be false when using ServerInstanceId)

-- Execute teleport
local success, errorOrResult = pcall(function()
    local targetPlaceId = 1234 -- PlaceId of a Place connected to the current World
    local players = { player } -- Players to teleport
		
    local teleportResult = TeleportService:TeleportAsync(targetPlaceId, players, options)     
    return teleportResult
end)
```

* ServerInstanceId can only be used with public server sessions, and players cannot join sessions that have already ended.

### Creating and Teleporting to a Reserved Server (ReserveServerAsync)

Use this to create an isolated server session and move players to that server.

```lua
local TeleportService = game:GetService("TeleportService")

local targetPlaceId = 1234 -- PlaceId of a Place connected to the current World

-- Create a reserved server
local success, errorOrAccessCode = pcall(function()
    return TeleportService:ReserveServerAsync(targetPlaceId)
end)

-- In the QR publish environment, AccessCode may be returned as an empty string ("").
if not success or errorOrAccessCode == nil then
    return
end

-- Configure TeleportOptions
local options = Instance.new("TeleportOptions")	
options.ReservedServerAccessCode = errorOrAccessCode -- Reserved server access code
options.ShouldReserveServer = false                  -- Whether to create a new reserved server session (must be false when using ReservedServerAccessCode)

-- Execute teleport
local success, errorOrResult = pcall(function()
    local players = { player } -- Players to teleport
		
    local teleportResult = TeleportService:TeleportAsync(targetPlaceId, players, options)     
    return teleportResult
end)

print("TeleportAsyncResult.ReservedServerAccessCode : ", errorOrResult.ReservedServerAccessCode)
```

* The same PlaceId must be used when creating and joining a reserved server session.
* Once a reserved server session ends, the associated access code can no longer be used.

### Teleport Initialization Failure Event (TeleportInitFailed)

Use this to implement exception handling and retry logic when teleporting fails.

You can reuse the same teleportOptions to retry the teleport with the same configuration.

```lua
local TeleportService = game:GetService("TeleportService")

local function OnTeleportInitFailed(player, teleportResult, errorMessage, placeId, teleportOptions)
    print("[TeleportInitFailed] playerName : ", player.Name)		  
    print("[TeleportInitFailed] Result : ", teleportResult)
    print("[TeleportInitFailed] Error : ", errorMessage)
    print("[TeleportInitFailed] Target Place : ", placeId)       
end
TeleportService.TeleportInitFailed:Connect(OnTeleportInitFailed)	
```

### Getting the Server Session ID (game.JobId)

game.JobId is a unique ID that identifies the currently running server session.

Use this to identify the current server session or to move players to a specific session through ServerInstanceId.

```lua
local DataStoreService = game:GetService("DataStoreService") 
local SessionStore = DataStoreService:GetDataStore("PlayerPrevSessionId")

local success, errorOrLoadValue = pcall(function()
    local saveValue = game.JobId    		
    SessionStore:SetAsync(player.UserId, saveValue) 
        
     print("Save Prev Session Id : ", saveValue)
end)
```

### Getting the Place ID (game.PlaceId)

Use this to identify the current Place or implement Place-based logic.

```lua
local placeId = game.PlaceId

local PLACE_DATA =
{
	["Lobby"] = 1234,
	["Stage1"] = 1235,	
	["Stage2"] = 1236,	
	-- ...
}

if placeId == PLACE_DATA.Lobby then
    print("Lobby")
end
```

### Unsupported Features

* TeleportOptions:SetTeleportData and GetTeleportData
* PrivateId and PrivateServerId properties

## Use Cases

* Separate lobby and gameplay spaces, then move matched players to a battle Place.
* Move party members to a reserved server to create a private session.
* Split Places by game mode to independently operate PvP, PvE, tutorial, and event spaces.
* Configure separate Places for different difficulty levels such as Easy, Normal, and Hard.
* Store JobId values to support session rejoin or return-to-session systems.
* Divide content into multiple Places so each server runs only the required space and logic, reducing server load.
* Separate large-scale Worlds into functional Places to reduce loading overhead and simplify management.


# Localization

## Overview

Localization is a feature designed to provide a consistent experience for players using different languages.

It allows you to translate and display not only out-of-game texts such as **world names and descriptions**, but also **in-game texts** including UI, interaction messages, and system prompts.

By leveraging this feature, you can deliver a more natural experience to players from various countries, improve world accessibility, **increase user acquisition**, and **maximize revenue**.

## Features

This system provides the following features:

* Automatically collects text displayed in UI and ProximityPrompt and registers it in the Creator Hub
* Translation data is centrally managed in the Creator Hub
* Automatically applies translations based on the player's language settings using the registered translation data
* Supports translation of dynamic text via scripts

## Supported Languages

Currently, OVERDARE supports **English, Hindi, and Portuguese (Brazil)**.

Similar languages are automatically mapped to supported languages. For example, British English is mapped to English, and European Portuguese is mapped to Brazilian Portuguese.

Unsupported languages may be displayed in the original text.

| Language            | Language Code | Similar Language Variants |
| ------------------- | ------------- | ------------------------- |
| English             | `en`          | `en-us`, `en-gb`, etc.    |
| Hindi               | `hi`          | `hi-in`, etc.             |
| Portuguese (Brazil) | `pt-br`       | `pt`, `pt-pt`, etc.       |

If translation text is not provided for a language, the content may be displayed in the default language (source text). To ensure proper world activation and a consistent user experience, **it is recommended to provide translations for all supported languages**.

## How to Use

1. The Localization feature is **available after publishing** your world.\
   (If your world has not been published, you must publish it first.)

   <figure><img src="/files/h2GquEsJeerpchGepWUM" alt=""><figcaption></figcaption></figure>
2. In Studio, go to **Game Settings > Localization** and enable **Automatic Text Collection (ATC)** and **Use Translated Content**.\
   (Clicking the Edit in Hub button will take you to the Localization management page in the Creator Hub.)

   <figure><img src="/files/EUPoYmVlO7oEuAyryQD3" alt=""><figcaption></figcaption></figure>
3. Run a **play test**.
4. During the test, when text appears in UI or ProximityPrompt, it is **automatically registered for collection**.\
   (The collection process is handled internally, and there is a limit to the number of texts that can be collected in a single play test. If this limit is exceeded, additional texts will not be collected and a warning log will be generated.)
5. **When the play test ends**, the collected texts are **automatically adde**d to the translation table in the Creator Hub, and translation entries are created for all supported languages.

   <figure><img src="/files/2PYgB8zEdHlSkXeUti9w" alt=""><figcaption></figcaption></figure>
6. You can review the registered texts in the Creator Hub and **enter/manage translations for each language**.\
   (Be sure to click the **Save button** after entering translations.)

   <figure><img src="/files/50kM5JeEEq5rvYmiKnFl" alt=""><figcaption></figcaption></figure>
7. Low-frequency or conditional texts that are difficult to collect via ATC can be manually added via CSV in the **Table Management tab** of the Creator Hub.

   <figure><img src="/files/Rtx9iS3GZyZP2bewArqJ" alt=""><figcaption></figcaption></figure>
8. World metadata such as the world name and description is provided by default.

   <figure><img src="/files/7Y2nBoV4gKzOO5IetecN" alt=""><figcaption></figcaption></figure>

## Translation Testing

You can preview translations by selecting a language in **Localization Preview**, and you can also change the language during gameplay.

<figure><img src="/files/5klibLff78N9Bs0HPe1k" alt=""><figcaption></figcaption></figure>

## 상세

### Automatic Text Collection (ATC)

During play tests in the Studio environment, when text is displayed in UI or ProximityPrompt, it is automatically collected. The collected text is then registered in the Creator Hub’s translation table **when the play session ends**.

#### Collection Targets

* Text properties of TextLabel and TextButton (Text)
* Interaction text properties of ProximityPrompt (ActionText, ObjectText)

#### Collection Conditions

Text is collected only when the following conditions are met:

* **Automatic Text Collection (ATC) is enabled**
* **The environment is a Studio play test** (not supported in mobile environments)
* The **AutoLocalize property is enabled** for UI or ProximityPrompt
  * For UI, AutoLocalize must be enabled on both parent and child UI elements

#### How It Works

* Text displayed on the screen is collected **in real time during gameplay**
  * In the Hub, the Location field records the path where the text was collected\
    (e.g., StarterGui.ScreenGui.TextButton)
* **Text dynamically assigned** via scripts is also included in the collection
* Text that is already registered in the Hub will not be duplicated
* Collected text is sent to the Hub **when the play session ends**

#### Collection Limits

* There is a limit to the number of texts that can be collected in a single play test
* If the limit is exceeded, additional texts will not be collected and a **warning log** will be generated
* If excessive text generation occurs (e.g., repeatedly assigning text in a loop), review the structure and rerun the play test
* **For texts that should not be collected, make sure to disable the AutoLocalize property**

### Applying Translated Text

During a play test, when text is displayed in UI or ProximityPrompt, if that text is registered in the Creator Hub and a translated version exists, the translation is automatically applied.

#### Translation Targets

* Text in TextLabel and TextButton
* Interaction text in ProximityPrompt

#### Conditions for Applying Translation

* **Use Translated Content is enabled**
* The translation is applied when **running a play test in Studio** or when the **world is accessed from a mobile environment**
* The **AutoLocalize option is enabled** for UI or ProximityPrompt
  * For UI, translation is applied only when AutoLocalize is enabled on both parent and child UI elements

#### When Changes Are Applied

* Changes to translation data are applied after **restarting the play test** or **rejoining the world**
* In mobile environments, changes may not appear immediately and can take up to **about 5 minutes to be reflected**

#### Context-Based Translation Rules

Translations are applied based on the **Context value** and the **location** of the UI or ProximityPrompt, as follows:\
(This rule also applies when using the Translate method.)

For example, if the following entries are registered in the Hub:

<table><thead><tr><th width="107.666748046875">Source</th><th width="117.3333740234375">Translated Text</th><th width="387.9998779296875">Context</th><th>Notes</th></tr></thead><tbody><tr><td>강화</td><td>Enhance</td><td></td><td>Default translation</td></tr><tr><td>강화</td><td>Item Enhance</td><td>PlayerGui.ScreenGui.ItemPopup.EnhanceButton</td><td>UI-specific</td></tr><tr><td>강화</td><td>Enhance Monster</td><td>ServerStorage.Monster.NameTag.GradeLabel</td><td></td></tr></tbody></table>

* If the **Context matches**, the corresponding translation is applied
  * For example, if the path of the UI or ProximityPrompt is PlayerGui.ScreenGui.ItemPopup.EnhanceButton,\
    → **Item Enhance** is applied
* If the **Context does not match**, the translation with only the Source (default translation) is applied
  * If the UI or ProximityPrompt path does not match any Context above,\
    → The default translation **("강화")** is applied
* If there is **no default translation**, a Context-based translation may be applied instead
  * For example, if there is no default translation for “강화” but only Context-based translations exist,\
    → **Item Enhance** or **Enhance Monster** may be applied

## Managing Translation Data

### Localization Page

In Studio, go to Game Settings > Localization and click the **Edit in Hub button** to navigate to the Localization management page in the Creator Hub.

<figure><img src="/files/NdPd4sFDFUzoaz48uiPL" alt=""><figcaption></figcaption></figure>

Alternatively, you can access it from the **Localization tab** by selecting your world in the Dashboard of the Creator Hub.

<figure><img src="/files/M2xMi8vH8qsSOkGd5jf6" alt=""><figcaption></figcaption></figure>

### Managing Translation Text

In the **Languages tab**, selecting a language will take you to a page where you can manage translations for both **world information** and **in-game text** for that language.

Alternatively, you can navigate to the **Translation Workspace tab**.

<figure><img src="/files/eBWa3zLjGxHFxZ6tgHbs" alt=""><figcaption></figcaption></figure>

#### Managing World Information

In the **Information tab**, you can enter translated text for the **World Name** and **Description** for each supported language. All changes are recorded in the Translation History.

<figure><img src="/files/eohiOTk37eTO99zg2pKk" alt=""><figcaption></figcaption></figure>

#### Managing In-Game Text

In the **Strings tab**, you can enter translated text for in-game data for each supported language.\
All changes are recorded in the Translation History.

By selecting an entry, you can edit or delete the registered translation data.

<figure><img src="/files/iZ8Opgp6yr5tU8HWciFU" alt=""><figcaption></figcaption></figure>

By default, texts collected during play tests via ATC are automatically registered. You can also manually add entries using the **Add Entry button**.

<figure><img src="/files/mNBjpCfGCyPBplUMSAQg" alt=""><figcaption></figcaption></figure>

When adding entries manually, the input fields are structured as follows. After entering the required information, click the **Add button** to register the translation entry.

Texts with the same source can only be registered multiple times if their **Context** values are different.

<table><thead><tr><th width="167">Name</th><th width="364.6666259765625">Description</th><th>Example</th></tr></thead><tbody><tr><td>Text to translate</td><td>Source text used as the basis for translation</td><td>Level</td></tr><tr><td>Key</td><td>Unique identifier for the translation entry (optional)</td><td>UI_Text_Level</td></tr><tr><td>Context</td><td>UI location where the text is used (optional)</td><td>PlayerGui.PlayerHUD.TopFrame.Lv</td></tr><tr><td>Example</td><td>Additional description for translation reference (optional)</td><td>Text displayed for player level UI</td></tr></tbody></table>

### Managing Settings

In the **Settings tab**, you can enable or disable options for Automatic Text Collection and Use Translated Content.

These settings are synchronized with Studio, and any changes made in Studio are also reflected in the Hub.

<figure><img src="/files/olgRaa9oP45afL4QcK8n" alt=""><figcaption></figcaption></figure>

### Table Management

In the **Table Management** **tab**, you can download translation data as a CSV file or upload a CSV file to modify it.

For low-frequency UI or conditional UI, it may be difficult to collect text using ATC alone. In such cases, it is recommended to define the required data in advance in a CSV file and upload it, rather than relying solely on ATC.

<figure><img src="/files/muoFx9YqK3zu3w76TU5V" alt=""><figcaption></figcaption></figure>

* **Upload CSV**: Upload a CSV file to add or modify in-game text and translation data. Only changes based on existing data are applied.
* **Download CSV**: Download the current translation table as a CSV file. You can review the translation status or modify the file and upload it again.
* **Delete Table**: Deletes all in-game data registered in the translation table. This action cannot be undone, so use it with caution.

## Script Features

### Checking Locale Information

You can use LocalizationService to retrieve language-related information for both the player and the system.

This allows you to handle logic differently based on the player’s language settings or region.

```lua
local LocalizationService = game:GetService("LocalizationService")

local PlayerLocaleId = Player.LocaleId -- Language set in the player’s account
local ClientLocaleId = LocalizationService.ClientLocaleId -- Language currently used by the client
local SystemLocaleId = LocalizationService.SystemLocaleId -- OS language of the player’s device
local CountryRegion = LocalizationService:GetCountryRegionForPlayerAsync(Player) -- Player’s region (country code) based on their connection location
```

ClientLocaleId and SystemLocaleId return the locale of the execution environment. While they reflect the player's locale on the client, they return the server's locale when used on the server.

Therefore, they are not recommended for use on the server when player-specific locale handling is required.

### Getting a Translator

A Translator is an object used to perform translations based on a specific language. It is used to retrieve translated text.

```lua
-- You can obtain a Translator based on the player’s language settings
local Translator1 = LocalizationService:GetTranslatorForPlayerAsync(Player)
print(Translator1.LocaleId)

-- You can also obtain a Translator for a specific locale using a language code
local Translator2 = LocalizationService:GetTranslatorForLocaleAsync("en")
print(Translator2.LocaleId)
```

### Handling Translation via Script

When text varies depending on variables (such as item names or levels), or when the same source text requires different translations depending on context, you can handle translation through scripts.

#### Key-Based Translation (FormatByKey)

FormatByKey retrieves translated text based on a Key. Values that need to be substituted within the sentence (such as item name, level, etc.) are passed through Args.

This method is suitable for handling text where the sentence structure changes depending on context, such as item names, levels, or quantities.

<pre class="language-lua"><code class="lang-lua"><strong>local Translator = LocalizationService:GetTranslatorForPlayerAsync(Player)
</strong>
local Key = "ITEM_LEVEL_UP" -- The Key is used to look up translation data
local Args = { ItemName = "Sword", PrevLv = 1, NextLv = 2 } -- Args contains values to be substituted into the translated sentence
local TranslatedText = Translator:FormatByKey(Key, Args)

SomeUI.Text = TranslatedText
</code></pre>

The names and number of values passed in Args must exactly match those defined in the translation data in the Hub.

<figure><img src="/files/uzhJttOINfQHPCz9xgJ4" alt=""><figcaption></figcaption></figure>

The following data types can be passed to Args.

* number
* string
* bool
* instance (name)
* CFrame
* Vector3
* Vector2
* Color3
* BrickColor
* MenuItem

#### Context-Based Translation (Translate)

```lua
local Translator = LocalizationService:GetTranslatorForPlayerAsync(Player)

local Context = PlayerGui.ScreenGui.ItemPopup.EnhanceButton -- Path where the text is used (Context)
local Source = "강화" -- Source text used as the basis for translation
local TranslatedText = Translator:Translate(Context, Source)

SomeUI.Text = TranslatedText
```

In general, the source text used as the basis for translation must be unique. However, if the Context differs, multiple entries can be registered as separate translation data.

This allows the same source text “강화” to be translated differently depending on the situation, such as item enhancement (Enhance), skill enhancement (Upgrade), or enchanted enemies (Enchanted), with Context used to distinguish between them.

<figure><img src="/files/AN9AWC6kS4NNLfC1ToTr" alt=""><figcaption></figcaption></figure>

### Retrieving Translated Text with LocalizedText

LocalizedText is a property that returns the translated text based on the current language.

It can be used to verify the actual translated text displayed in the UI.\
(It is not available for ProximityPrompt.)

```lua
print(SomeUI.LocalizedText .. "(Source: " .. SomeUI.Text .. ")")
```

## Use Cases

* Providing world names and descriptions in multiple languages helps effectively expose your world to global users and increase user acquisition.
* Providing UI, buttons, and guidance messages in the player’s language improves game understanding and reduces churn.
* Even in multilingual environments where sentence structures differ, using FormatByKey allows you to construct natural sentences for each language.
* Applying context-based translations (Context) to identical text enables more natural expressions and improves user experience.


# ActionSequence

## Overview

<figure><img src="/files/sxitGi2xatDxDe7BxX7z" alt=""><figcaption></figcaption></figure>

ActionSequence is **OVERDARE’s core direction system** that allows you to compose animation, effects, cameras, and more into a single action in an integrated timeline. Frequently used in-game effects and script execution timing can be **visually structured** within a timeline-based editing environment.

Within a single sequence, you can control the following elements together:

* Play hit effects in sync with attack animations
* Play sounds at specific timings
* Apply camera shake at the moment of impact
* Apply damage to targets within the attack range
* Trigger script events at specific frames
* Set movement restrictions or parry windows during attacks

ActionSequence provides an editing environment where these effects and script execution timings can be **precisely controlled over time**. This allows you to, for example, play an effect after a delay following an attack, or add camera direction afterward—**all without relying on scripts, but instead directly reviewing and editing them on the timeline**.

This approach enables you to build **action direction** intuitively and instantly verify the results, providing an **efficient production workflow**.

## Key Features

### Timeline-based visual editing

<figure><img src="/files/JXqgf5Vv6SL1CjpHdlqf" alt=""><figcaption></figcaption></figure>

ActionSequence provides a **timeline-based editing environment** where animations, effects, sounds, and camera directions can be visually arranged and adjusted in chronological order.

This allows you to **edit direction timing intuitively without using scripts**.

### Support for various direction elements

<figure><img src="/files/wsvnoIiuV6DnhNW4JGg9" alt=""><figcaption></figcaption></figure>

ActionSequence supports not only animations, sounds, camera direction, and effects, but also **collision shapes for attack detection**, allowing both **direction and gameplay logic** to be composed within a single timeline.

### Integration with gameplay logic

<figure><img src="/files/mcE6vae8pFDG7OgqwArw" alt=""><figcaption></figcaption></figure>

ActionSequence provides **event tracks** and **trigger tracks**, enabling script logic to be executed at specific points on the timeline. This allows direction and gameplay logic to be naturally connected.

### Optimized for multiplayer environments

<figure><img src="/files/AY6dy4x2MdhlWaD41deE" alt=""><figcaption></figcaption></figure>

ActionSequence is designed to **operate reliably in networked environments**.

**Sequence execution begins on the server**, while the **actual direction is played on each client**. The server synchronizes the overall progression based on the sequence execution timing, and any **time differences between clients are automatically corrected**.

Additionally, to ensure gameplay consistency, **core logic such as attack collision detection is processed on the server**.

## ActionSequence Creation Workflow

<table><thead><tr><th width="82.3333740234375">Step</th><th width="336.6666259765625">Process</th><th>Image</th></tr></thead><tbody><tr><td>1</td><td>Create an ActionSequence instance</td><td><img src="/files/mYGVl0rSg9MY67IMEogC" alt="" data-size="original"></td></tr><tr><td>2</td><td>Open the ActionSequence editor</td><td><img src="/files/6PRWeISuzlnxjU5Gukia" alt="" data-size="original"></td></tr><tr><td>3</td><td>Add tracks</td><td><img src="/files/xwRpU9Z07u3kCaoChfGh" alt="" data-size="original"></td></tr><tr><td>4</td><td>Edit the timeline</td><td><img src="/files/Li20F2bV3TkrguhuDwQe" alt="" data-size="original"></td></tr><tr><td>5</td><td>Preview the direction</td><td><img src="/files/RzNJq0XON0M3j1qqgNVp" alt="" data-size="original"></td></tr><tr><td>7</td><td>Connect script events</td><td><img src="/files/mcE6vae8pFDG7OgqwArw" alt="" data-size="original"></td></tr><tr><td>8</td><td>Run in-game</td><td><img src="/files/vG2WjZQRw19CmjBAWGyn" alt=""></td></tr></tbody></table>

## Get Started

{% content-ref url="/pages/kjBNUL1BzxE9UzHmmynu" %}
[Creating ActionSequences](/manual/studio-manual/game-development/actionsequence/creating-actionsequences)
{% endcontent-ref %}

## Learn More

{% content-ref url="/pages/3qMWSU0xlVP6sJtvhNNE" %}
[Interface](/manual/studio-manual/game-development/actionsequence/actionsequence-interface)
{% endcontent-ref %}

{% content-ref url="/pages/JmG0yyoruaZcroZ2XWRC" %}
[Preset](/manual/studio-manual/game-development/actionsequence/actionsequence-preset)
{% endcontent-ref %}

{% content-ref url="/pages/RPRPR3s5FTaz7vkVpbsV" %}
[Principle of Operation](/manual/studio-manual/game-development/actionsequence/actionsequence-mechanism)
{% endcontent-ref %}

{% content-ref url="/pages/6dU7S750HQmRZYGyP8Rz" %}
[Track Types](/manual/studio-manual/game-development/actionsequence/actionsequence-track-types)
{% endcontent-ref %}

{% content-ref url="/pages/gnogIOuaAA9t0jRSmVYE" %}
[Running ActionSequences](/manual/studio-manual/game-development/actionsequence/running-actionsequences)
{% endcontent-ref %}


# Interface

## Overview

<figure><img src="/files/6G7mpSvwRolsC25TrinP" alt=""><figcaption></figcaption></figure>

The ActionSequence editor can be opened by clicking the **Open button** that appears when hovering over an ActionSequence instance.

Multiple ActionSequences can be opened and edited simultaneously, with **each one displayed in a separate tab**. This allows you to quickly switch **between actions** and review or compare them while working.

## Notes

Changes made during play testing are not applied immediately and will take effect after restarting.

## UI

<figure><img src="/files/ahVumiHV41857hbSZg5Z" alt=""><figcaption></figcaption></figure>

<table><thead><tr><th width="195.3333740234375">UI</th><th>Description</th></tr></thead><tbody><tr><td>ActionSequence Toolbar</td><td>Allows you to save your work or import/export in JSON format, and configure the visibility of each panel.</td></tr><tr><td>Viewport</td><td>A preview screen where you can check the results of the ActionSequence. You can review animations and direction results through timeline playback.</td></tr><tr><td>Timeline Toolbar</td><td>Provides key functions for timeline editing. You can add tracks, set playback duration, lock editing, toggle camera possession, switch between time/frame units, and fit the timeline to the screen.</td></tr><tr><td>Playback Controls</td><td>Controls timeline playback and navigation. Includes scrubbing (range start/end), keyframe/section navigation, frame-by-frame movement, play/reverse playback, playback duration settings, and loop functionality.</td></tr><tr><td>Track List</td><td>An area for managing tracks included in the ActionSequence.</td></tr><tr><td>Timeline</td><td>Displays track sections and keyframes.</td></tr><tr><td>Scrubber</td><td>A reference line indicating the current playback position on the timeline, which can be dragged to move to a desired point.</td></tr><tr><td>Track Properties</td><td>An area for editing the properties of the selected track.</td></tr></tbody></table>

### ActionSequence Toolbar

<figure><img src="/files/S2PIdhJdJW7g39HFWAEd" alt=""><figcaption></figcaption></figure>

<table><thead><tr><th width="134.6666259765625">Button</th><th>Description</th></tr></thead><tbody><tr><td><img src="/files/u1pFgxWuRyz0J9veRxmU" alt=""></td><td>Saves the ActionSequence.<br>(Even if the ActionSequence is saved, data may be lost if the map is not saved.)</td></tr><tr><td><img src="/files/zTfU9R0HIeq6W3HbDr0B" alt=""></td><td>Applies ActionSequence JSON data</td></tr><tr><td><img src="/files/Q1CPlMoaI93tUL7cb5Ej" alt=""></td><td>Extracts ActionSequence JSON data</td></tr><tr><td><img src="/files/yrwoqLpOAiNixhNDv3Fk" alt="" data-size="original"></td><td>Control Track Gizmo Edit Modes (Select / Move / Scale / Rotate)</td></tr><tr><td><img src="/files/ETb7AsTxAerFQ6c4ucbS" alt=""></td><td>Displays the preset selection popup</td></tr><tr><td><img src="/files/P2srNeYoIDbW2Ra6V5Zs" alt=""></td><td>Shows the timeline</td></tr><tr><td><img src="/files/TmKeg16AuumKiHDhCyRH" alt=""></td><td>Shows the track property panel</td></tr></tbody></table>

Learn more about Presets

{% content-ref url="/pages/JmG0yyoruaZcroZ2XWRC" %}
[Preset](/manual/studio-manual/game-development/actionsequence/actionsequence-preset)
{% endcontent-ref %}

### Viewport

<figure><img src="/files/n4nhYoW5K7H7sPvDIEXN" alt=""><figcaption></figcaption></figure>

The Viewport is an area where you can preview ActionSequence direction and control the camera. You can move, rotate, and zoom in/out using the keyboard and mouse.

<table><thead><tr><th width="195.3333740234375">Control</th><th>Description</th></tr></thead><tbody><tr><td>W / A / S / D</td><td><strong>After clicking the Viewport</strong>, press W/A/S/D, or <strong>hold right mouse click</strong> and press W/A/S/D to move the camera forward/left/backward/right.</td></tr><tr><td>Q / E</td><td><strong>After clicking the Viewport</strong>, press Q/E, or <strong>hold right mouse click</strong> and press Q/E to move the camera down/up.</td></tr><tr><td>Shift</td><td>Hold Shift together with movement keys (W, A, S, D) to change the camera movement speed.</td></tr><tr><td>Right Mouse Button</td><td><strong>Hold the right mouse button</strong> and move the mouse to rotate the camera.</td></tr><tr><td>Mouse Wheel Up/Down</td><td>Use the <strong>mouse wheel up/down</strong> to zoom the camera in/out.</td></tr><tr><td>Mouse Wheel Button</td><td><strong>Hold the mouse wheel button</strong> and move the mouse to pan the camera.</td></tr></tbody></table>

<figure><img src="/files/Kwg6uFtqOkqFUBTX7R5N" alt=""><figcaption></figcaption></figure>

When a Control Track references an object that inherits from PVInstance (such as a Part or Model), you can select the object in the viewport and use gizmos to edit keyframes for its position, rotation, and scale.

For more information, refer to the Control Track section in the guide below.

{% content-ref url="/pages/6dU7S750HQmRZYGyP8Rz" %}
[Track Types](/manual/studio-manual/game-development/actionsequence/actionsequence-track-types)
{% endcontent-ref %}

### Timeline Toolbar

<figure><img src="/files/P5ETvsVMYz3uDLi7N15f" alt=""><figcaption></figcaption></figure>

<table><thead><tr><th width="134.6666259765625">Button</th><th>Description</th></tr></thead><tbody><tr><td><img src="/files/gn6AMtEKqo7bU9GMKK6X" alt=""></td><td>Adds a track<br>(you can add multiple tracks of the same type).</td></tr><tr><td><img src="/files/3QfoLuBzSvxJe5iTOyWw" alt=""></td><td>Playback Duration Setting Field</td></tr><tr><td><img src="/files/LvD5VXh2Ksu6C6cYFtFn" alt=""></td><td>Locks editing for all tracks</td></tr><tr><td><img src="/files/RNKBwBtgwwxiZlezkJ7t" alt=""></td><td>Record Mode<br>(When enabled, editing an object referenced by a Control Track using gizmos will create or update keyframes.)</td></tr><tr><td><img src="/files/KJttSG3QmIVw580XBXyx" alt=""></td><td>Switches between editor camera and character camera view<br>(used when previewing Camera Shake, Camera FOV, and Camera Zoom tracks).</td></tr><tr><td><img src="/files/lw1Rdg8u6mEuHqKnHur5" alt=""></td><td>Sets the snap interval used when editing the timeline. Click the magnet icon to enable or disable snapping. The default value is 0.0333 seconds.</td></tr><tr><td><img src="/files/O2pP2JF8omjP21zFTOBM" alt=""></td><td>Adjusts the preview playback speed in the editor. This setting does not affect runtime playback.</td></tr><tr><td><img src="/files/wjIebvwzqKNRpHqrtliK" alt=""></td><td>Provides additional editing options, including whether Control Tracks inherit scale.</td></tr><tr><td><img src="/files/l2HD3YDONKuccjVyUNJo" alt=""></td><td>Switches between time and frame units</td></tr><tr><td><img src="/files/0gGw3pmxwRKS1lfedvBA" alt=""></td><td>Fit the Timeline to the Playback Duration</td></tr></tbody></table>

### Playback Controls

<div align="left"><figure><img src="/files/cfb2EbXovlXPbtLZiLG3" alt=""><figcaption></figcaption></figure></div>

<table><thead><tr><th width="134.6666259765625">Button</th><th>Description</th></tr></thead><tbody><tr><td><img src="/files/dYpgwPpbEU2iQWRxUHqz" alt=""></td><td>Move the Scrubber to the Playback Start Position</td></tr><tr><td><img src="/files/rQ5FbgAyb3QzlghvWC2b" alt=""></td><td>Moves to the previous keyframe or section</td></tr><tr><td><img src="/files/CI2WW983MiZOoWVJr2r8" alt=""></td><td>Moves to the previous frame</td></tr><tr><td><img src="/files/hw86gAJVJ5W6mCJ7Wp0a" alt=""></td><td>Plays in reverse or pauses</td></tr><tr><td><img src="/files/vuEeMEZFrMTgZabjKQPF" alt=""></td><td>Plays or pauses</td></tr><tr><td><img src="/files/pOILBwWgKBON6L1IdL43" alt=""></td><td>Moves to the next frame</td></tr><tr><td><img src="/files/nnX90isK6wwdBnHNIWNh" alt=""></td><td>Moves to the next keyframe or section</td></tr><tr><td><img src="/files/CUdzU8UtDjCj31d5ecWr" alt=""></td><td>Move the Scrubber to the Playback End Position</td></tr><tr><td><img src="/files/Lk1UV6fCTdcXglfER2AY" alt=""></td><td>Set Playback Duration to Current Scrubber Position</td></tr><tr><td><img src="/files/xgDgd5ORP1xarXMs3fFs" alt=""></td><td>Toggles loop playback</td></tr></tbody></table>

### Track List

<div align="left"><figure><img src="/files/bkzHbXDxfdbChXluIxsn" alt=""><figcaption></figcaption></figure></div>

<table><thead><tr><th width="134.6666259765625">Button</th><th>Description</th></tr></thead><tbody><tr><td><img src="/files/TsJPElMvV3xJoGH9mqFU" alt=""></td><td>Toggles whether the track is enabled<br>(when disabled, it will not play in both the editor and runtime environments).</td></tr><tr><td><img src="/files/IAA1k2Jm7K8ajou0huxE" alt=""></td><td>Locks track editing</td></tr></tbody></table>

Press F2 while a track is selected to rename the track.

<div align="left"><figure><img src="/files/Uzm5U64KTz42oZuyvQjn" alt=""><figcaption></figcaption></figure></div>

You can right-click a track to open a menu where you can perform actions such as cut, copy, paste, duplicate, and delete.

<div align="left"><figure><img src="/files/8Oav6WdKQ5M9RYqBrNKJ" alt=""><figcaption></figcaption></figure></div>

### Timeline

<figure><img src="/files/iQsyLIqExKoWWeQbKu52" alt=""><figcaption></figcaption></figure>

The Timeline is an area that visually displays keyframes, sections, and markers placed on tracks in chronological order. You can edit the timing and flow of an action by moving elements or adjusting their duration.

The direction of the section and keyframe at the scrubber position is previewed in the Viewport.

The orange-highlighted area behind the scrubber represents a single frame. When you zoom in on the timeline, the time scale expands, but this area always represents one frame. The scrubber indicates the current position within that frame.

<figure><img src="/files/KnY4mQncONwabay0ZfPi" alt=""><figcaption></figcaption></figure>

To quickly focus on a specific section in the timeline, **hold down the Ctrl key and drag with the left mouse button over the time axis**. The area between the drag start and end points becomes a selected range, allowing you to work within or review that segment. This is especially useful when you want to concentrate on a particular ActionSequence within a long timeline, and you can locate your target more efficiently by starting with a broad selection and gradually narrowing it down.

<figure><img src="/files/6rsPRou2F4V9fTeWvSqF" alt=""><figcaption></figcaption></figure>

Click and drag on an empty area of the timeline to display a selection box. When the drag ends, all sections, keyframes, markers, and other elements within the selection box are selected at once.

<figure><img src="/files/AjETrag9ewXFm8HNzlhZ" alt=""><figcaption></figcaption></figure>

#### Section

<div align="left"><figure><img src="/files/VE18UrXCO2RDI9r6A5sR" alt=""><figcaption></figcaption></figure></div>

A section cannot be added like keyframes or markers, and each track has a fixed single section.

You can drag the center area of the section to move it, and drag the edges to adjust its length.

<div align="left"><figure><img src="/files/c0b2RleNFG3BEg16Opdc" alt=""><figcaption></figcaption></figure></div>

For animation and sound tracks, the Blend In/Out or Fade In/Out values can be adjusted by dragging the left and right **triangular handles** that appear at the top of the section when the mouse cursor hovers over it. The position of each handle determines the duration of the blending or fading interval.

<figure><img src="/files/JzFIeQxPLNYhuzkVoGq5" alt=""><figcaption></figcaption></figure>

Drag the start or end of a section to adjust its length. If the section is shortened beyond the source asset's length, the trimmed portion is cropped. If it is extended beyond the source asset's length, the additional portion is looped.

Sections with an Asset ID are displayed differently depending on the length of the source asset and the current section length. This visualization makes it easy to identify cropped or extended portions of the source asset.

* 1️⃣ : Sections that match the length of the source asset are displayed without any additional indicators.
* 2️⃣ : If the beginning of the source asset is cropped, the cropped area is darkened to indicate the excluded portion.
* 3️⃣ : If the end of the source asset is cropped, the cropped area is darkened to indicate the excluded portion.
* 4️⃣ : If the section is longer than the source asset, vertical lines are displayed at each point where the source asset loops, indicating the repeated sections.

#### Keyframe

<div align="left"><figure><img src="/files/18EmOVTm7NQQcBfNXsS8" alt=""><figcaption></figcaption></figure></div>

In tracks that support keyframes, you can add a keyframe by clicking the mouse wheel button or pressing Ctrl + left click on the timeline.

You can drag keyframes to change their position.

A keyframe provides a key bar area that allows you to adjust the time between adjacent keyframes. By dragging the key bar, you can intuitively adjust the positions and spacing of neighboring keyframes.

#### Marker

<div align="left"><figure><img src="/files/C2bcoDcyrQzzi1M8mys1" alt=""><figcaption></figcaption></figure></div>

In event tracks or collision tracks, you can add a marker by clicking the mouse wheel button or pressing Ctrl + left click on the timeline.

You can drag markers to change their position.

Each added marker has a unique key value, which is used to trigger actions at specific points by connecting to script events.

#### Layer Bar

<div align="left"><figure><img src="/files/1guOasFP3cMQ2nkFOxBS" alt=""><figcaption></figcaption></figure></div>

When keyframes or markers exist, a layer bar is displayed. The layer bar is generated based on the start and end of all keyframes or markers within the layer, visually representing the overall range and duration.

You can drag the center area of the layer bar to move it, and drag the edges to adjust its length.

### Detail (Track Property)

<div align="left"><figure><img src="/files/dW37L3W7SskOFNBqxN2H" alt=""><figcaption></figcaption></figure></div>

Track Property is an area where you can view and edit the properties of the selected element.

The displayed information varies depending on the selected object. Selecting a track shows track settings, while selecting a keyframe shows the properties of that keyframe. (Selecting a section is treated the same as selecting the track.)

## Shortcuts

<table><thead><tr><th width="321.33343505859375">Shortcut</th><th>Function</th></tr></thead><tbody><tr><td>Ctrl + S</td><td>Save</td></tr><tr><td>Ctrl + Z</td><td>Undo</td></tr><tr><td>Ctrl + Y</td><td>Redo</td></tr><tr><td>Ctrl + 1</td><td>Select Tool (Control Track Gizmo Edit Modes)</td></tr><tr><td>Ctrl + 2</td><td>Move Tool (Control Track Gizmo Edit Modes)</td></tr><tr><td>Ctrl + 3</td><td>Scale Tool (Control Track Gizmo Edit Modes)</td></tr><tr><td>Ctrl + 4</td><td>Rotate Tool (Control Track Gizmo Edit Modes)</td></tr><tr><td>Spacebar</td><td>Play / Pause</td></tr><tr><td>(In Timeline) Ctrl + Mouse Wheel Up/Down</td><td>Zoom in/out timeline</td></tr><tr><td>(In Timeline) Right Mouse Drag</td><td>Move timeline horizontally</td></tr><tr><td>(On the timeline time axis)<br>Ctrl + Left-click drag</td><td>The timeline zooms in based on the range between the drag start and end points.</td></tr><tr><td>F</td><td>Fit Timeline to Playback Duration</td></tr><tr><td>(With track selected) Ctrl + X</td><td>Cut track</td></tr><tr><td>(With track selected) Ctrl + C</td><td>Copy track</td></tr><tr><td>Ctrl + V</td><td>Paste track</td></tr><tr><td>(With track selected) Ctrl + D</td><td>Duplicate track</td></tr><tr><td>(With a track selected) F2</td><td>Rename track name</td></tr><tr><td>(After selecting track or keyframe) Delete</td><td>Delete</td></tr><tr><td>(On keyframe/marker-type tracks)<br>Mouse Wheel Click or Ctrl + Left Click</td><td>Add keyframe on timeline</td></tr><tr><td>(When a keyframe/marker-type track is selected)<br>Enter</td><td>Add a keyframe at the scrubber position</td></tr><tr><td>(Shift or Ctrl) +<br>(Click keyframe or section)</td><td>Multi-select keyframes or sections on timeline</td></tr><tr><td>(Shift or Ctrl) + (Click track)</td><td>Multi-select tracks</td></tr></tbody></table>


# Preset

## Overview

By using predefined presets, you can easily apply frequently used actions such as attacks, dashes, and guards without creating an ActionSequence from scratch. You can also review the preset configuration as a reference for how to create ActionSequences.

## How to Use

In the ActionSequence editor, click the **Apply Preset button** to open the preset selection popup.

<figure><img src="/files/NHkFoXQE5u1xkLbLoeWJ" alt=""><figcaption></figcaption></figure>

When you select a preset from the popup, the timeline of the currently edited ActionSequence instance is replaced with the selected preset content. Presets include not only track and timeline data, but also instances such as Parts and script content. When a preset is applied, these elements are also reconstructed.

<figure><img src="/files/7p5SIwNf55q3Dl2KI3Sf" alt=""><figcaption></figcaption></figure>

If there is existing content in the timeline, a warning dialog will appear before replacement, and once replaced, it cannot be undone.

<div align="left" data-full-width="false"><figure><img src="/files/lzXElhxY7WAMkE8jvUPF" alt=""><figcaption></figcaption></figure></div>

## Preset Types

<table><thead><tr><th width="119.0001220703125">Category</th><th width="203.33349609375">Name</th><th>Description</th></tr></thead><tbody><tr><td>Fist</td><td>FistLightAttackA</td><td>Quick forward punch for basic attack</td></tr><tr><td>Fist</td><td>FistLightAttackB</td><td>Follow-up punch for combo attack</td></tr><tr><td>Fist</td><td>FistSkill</td><td>Jump slam for area attack</td></tr><tr><td>Fist</td><td>FistUltimate</td><td>Powerful forward strike for heavy damage</td></tr><tr><td>Spear</td><td>SpearLightAttack</td><td>Wide spear swing for melee attack</td></tr><tr><td>Spear</td><td>SpearSkill</td><td>Jump slam for area attack</td></tr><tr><td>Spear</td><td>SpearUltimate</td><td>Multi-hit spear attack for area damage</td></tr><tr><td>One-Handed Sword</td><td>SwordLightAttackA</td><td>Forward slash for basic attack</td></tr><tr><td>One-Handed Sword</td><td>SwordLightAttackB</td><td>Follow-up slash for combo attack</td></tr><tr><td>One-Handed Sword</td><td>SwordSkill</td><td>Continuous spinning slash for area attack</td></tr><tr><td>One-Handed Sword</td><td>SwordUltimate</td><td>Heavy strike for high damage</td></tr><tr><td>One-Handed Sword</td><td>SwordBlock</td><td>Block incoming attacks from front</td></tr><tr><td>Two-Handed Sword</td><td>DualBladesLightAttack</td><td>Single slash for basic attack</td></tr><tr><td>Two-Handed Sword</td><td>DualBladesSkill</td><td>Thrust attack for melee</td></tr><tr><td>Bow</td><td>BowSkillA</td><td>Fast arrow shot for quick attack</td></tr><tr><td>Bow</td><td>BowSkillB</td><td>Empowered arrow for strong damage</td></tr><tr><td>Gun</td><td>GunFire</td><td>Standard ranged shot for basic attack</td></tr><tr><td>Gun</td><td>GunSkillA</td><td>Enhanced shot for high damage</td></tr><tr><td>Gun</td><td>GunSkillB</td><td>Charged shot for burst damage</td></tr><tr><td>Other</td><td>Two-HandBlock</td><td>Two-hand block for defense</td></tr><tr><td>Utility</td><td>Buff</td><td>Apply buff to enhance abilities</td></tr><tr><td>Utility</td><td>HealA</td><td>Stationary heal for recovery</td></tr><tr><td>Utility</td><td>HealB</td><td>Heal while moving</td></tr><tr><td>Hit / Status</td><td>HitReaction</td><td>Reaction when taking damage</td></tr><tr><td>Hit / Status</td><td>Stun</td><td>Stun state disabling movement</td></tr><tr><td>Hit / Status</td><td>Downed</td><td>Downed state after heavy hit</td></tr><tr><td>Interaction</td><td>Push</td><td>Push target forward</td></tr><tr><td>Interaction</td><td>KnockbackA</td><td>Knocked backward on hit</td></tr><tr><td>Interaction</td><td>KnockbackB</td><td>Knocked forward on hit</td></tr><tr><td>Movement</td><td>SpinRoll</td><td>Rolling forward while spinning the body</td></tr><tr><td>Movement</td><td>DodgeRoll</td><td>Forward dodge roll for evasion</td></tr></tbody></table>

## Usage

* You can analyze the track configuration and timeline structure included in presets as learning material for creating ActionSequences.
* By applying various presets, you can quickly understand direction flow and composition.
* You can use presets for prototyping in the early planning stage to quickly validate the overall feel of an action.
* You can also modify and extend existing presets to create custom actions suited to your project.

## Advanced Usage

You can define custom presets tailored to your project by directly modifying the **ActionSequencerPresetTable.csv** included in OVERDARE Studio. By entering the preset name, description, thumbnail path, and data path in the CSV file, the preset will immediately appear in the editor’s preset list.

<figure><img src="/files/5GpabzPEbWD2S3HpKYAS" alt=""><figcaption></figcaption></figure>

The CSV file can be found in the OVERDARE Studio installation directory, typically located at:

`C:\Program Files\Epic Games\OverdareStudioPJVXb\Sandbox\Content\CreatorPlatform\_Master\ActionSequencer\ActionSequencerPresetTable.csv`

Thumbnail images must use the `ActionSequencer\Thumbnail` path relative to the Content directory. The recommended resolution is 560×260 (aspect ratio 2.15:1), and the format must be PNG to display correctly.

Preset data must use the `ActionSequencer\PresetData` path relative to the Content directory and be saved as a text (.txt) file. The data inside the text file should be the clipboard text generated by selecting an ActionSequence in the Level Browser and copying it with Ctrl + C.

By registering your own ActionSequences as presets in this way, you can standardize frequently used actions for reuse and quickly share and apply consistent-quality actions across your team.


# Principle of Operation

## Overview

Before explaining the detailed features of ActionSequence, this section first covers how ActionSequence works internally. This helps you understand how it operates at runtime and identify technical considerations when using its features.

## Runtime Behavior

ActionSequence is an object **defined based on static data** and cannot be directly created at runtime using Instance.new or Clone.

When execution is requested through the Play method, the original instance is **duplicated under Humanoid.ActionRunner**, and the action is executed based on this duplicated instance.

<div align="left"><figure><img src="/files/F8Y8Lyz4LVoNssYFafaJ" alt="" width="343"><figcaption></figcaption></figure></div>

Due to this structure, when c**onnecting events within ActionSequence scripts**, you must reference the runtime duplicated instance rather than the original instance. Therefore, instead of using absolute paths, you should **reference based on script.Parent**.

```lua
local ActionSequence = script.Parent

ActionSequence:Hit("Hit"):Connect(function(self, other)
    local caster = self.Humanoid
    local target = other.Humanoid
    -- ...
end)
```

## Execution Flow

```mermaid
flowchart TD
    A["Play method is called<br>(Client or Server)"] --> B["Processed on the server"]

    B --> C["Sequence execution starts (Server)"]

    C --> D1["Client 1"]
    C --> D2["Client 2"]
    C --> D3["Client 3"]

    D1 --> E1["Direction is executed on each client (Client)"]
    D2 --> E2["Direction is executed on each client (Client)"]
    D3 --> E3["Direction is executed on each client (Client)"]
```

When an action execution request occurs, the sequence execution always s**tarts on the server**, regardless of whether it was called from the Client or Server. **Script events within the ActionSequence are then connected**, and the sequence along with its child objects is **replicated to all clients**.

Once replication is complete, **the timeline is played on each client**, and direction elements such as animations, effects, and sounds are executed.

In other words, ActionSequence does not operate by being dynamically created or directly cloned via scripts at runtime. Instead, **it runs by duplicating predefined data at execution time** to perform the direction.

The server synchronizes the overall progression based on the sequence execution timing, and any **time differences between clients are automatically corrected**. Additionally, to maintain gameplay consistency, **core logic such as attack collision detection is handled on the serve**r.

## Creation and Destruction Flow

```mermaid
flowchart TD
    A["Action execution request"]
    B["Script events are connected"]
    C["ActionSequence is replicated<br>(Server → Client)"]
    D["Timeline is executed<br>(animation, sound, etc.)"]
    E["Direction ends"]
    F["Replicated ActionSequence instance is removed"]

    A --> B
    B --> C
    C --> D
    D --> E
    E --> F
```

ActionSequence runs until the defined playback duration is completed.

**Once playback ends, the duplicated ActionSequence instance used for execution is automatically removed**, and any events connected to the ActionSequence, as well as child objects configured under it such as Parts, VFX, and scripts, are also cleaned up.

### Notes on Playback Duration

To clearly define the creation and destruction timing of duplicated instances generated during ActionSequence execution, it is recommended to also clean up the playback duration when the action ends. **If the playback duration is unnecessarily long, the removal of instances may be delayed.**

* Bad Example

  <figure><img src="/files/zZmIBOe9iFYtD4Vppel3" alt=""><figcaption></figcaption></figure>
* Good Example

  <figure><img src="/files/Ei6xzzpxFF3jEDSFXcDw" alt=""><figcaption></figcaption></figure>

The playback duration can be adjusted by enterin

<figure><img src="/files/ODkxqP3aCVSaRdNhdEXs" alt=""><figcaption></figcaption></figure>

g values in the **start/end time fields** at the top of the timeline, or by moving the scrubber to the desired position and using the **set end position button**.

<figure><img src="/files/ODkxqP3aCVSaRdNhdEXs" alt=""><figcaption></figcaption></figure>


# Track Types

## Overview

ActionSequence composes an action by combining multiple tracks based on a timeline. Each track is responsible for a specific type of direction. This document describes the structure of tracks, their common properties, and the functionality of each track type.

## Basic Concepts

<table><thead><tr><th width="177.3333740234375">Image</th><th width="183.0001220703125">Concept</th><th>Description</th></tr></thead><tbody><tr><td><img src="/files/e7mA1be6ri1vhsbaJnx6" alt="" data-size="original"></td><td>Track</td><td>A unit that <strong>defines a single function</strong> on the timeline. It consists of elements such as animation tracks, sound tracks, and event tracks.</td></tr><tr><td><img src="/files/VE18UrXCO2RDI9r6A5sR" alt="" data-size="original"></td><td>Section</td><td><strong>Data applied over a specific duration</strong> on the timeline. It has a start and end time and defines the direction or behavior executed within that range.</td></tr><tr><td><img src="/files/18EmOVTm7NQQcBfNXsS8" alt="" data-size="original"></td><td>Keyframe</td><td>A value set at a <strong>specific point in time</strong> on the timeline. It is used when <strong>changing property values</strong> at a specific time.</td></tr><tr><td><img src="/files/C2bcoDcyrQzzi1M8mys1" alt=""></td><td>Marker</td><td>A value set at a <strong>specific point in time</strong> on the timeline. Each marker has a unique key value, which is used to <strong>trigger actions</strong> <strong>at specific moments</strong> by connecting to script events.</td></tr></tbody></table>

## Common Track Properties

<table><thead><tr><th width="183.6666259765625">Property</th><th>Description</th></tr></thead><tbody><tr><td>Start Time</td><td>Indicates the <strong>start time</strong> of a section or the entire keyframe range. Sections can be edited, but keyframes are displayed as read-only and cannot be edited.<br>(Keyframe timing must be adjusted by selecting individual keyframes.)</td></tr><tr><td>End Time</td><td>Indicates the <strong>end time</strong> of a section or the entire keyframe range. Sections can be edited, but keyframes are displayed as read-only and cannot be edited.<br>(Keyframe timing must be adjusted by selecting individual keyframes.)</td></tr><tr><td>Is Enable</td><td>Indicates whether the track is <strong>enabled</strong>. The setting is applied to both the ActionSequence editor (editing stage) and runtime.</td></tr></tbody></table>

## Track Types

<table><thead><tr><th width="193.6666259765625">Track</th><th width="294.3333740234375">Function</th><th>Notes</th></tr></thead><tbody><tr><td>Animation Track</td><td>A track that plays animations</td><td>Requires specifying an Animation Id</td></tr><tr><td>Sound Track</td><td>A track that plays sounds</td><td>Requires specifying a Sound Id</td></tr><tr><td>CameraShake Track</td><td>A track that applies camera shake</td><td>For preview, you must switch to the character camera view</td></tr><tr><td>Camera FOV Track</td><td>A track that controls camera FOV</td><td>For preview, you must switch to the character camera view</td></tr><tr><td>Camera Zoom Track</td><td>A track that controls camera zoom</td><td>For preview, you must switch to the character camera view</td></tr><tr><td>Control Track</td><td>A track that references objects under the ActionSequence to control properties such as position, rotation, and transparency</td><td>Target objects must be specified under the ActionSequence</td></tr><tr><td>Collision Track</td><td>A track that generates collision detection</td><td>Can consist of multiple markers, and each key is connected to a script event</td></tr><tr><td>Event Track</td><td>A track that triggers events at specific frames</td><td>Can consist of multiple markers, and each key is connected to a script event</td></tr><tr><td>Trigger Track</td><td>A track that triggers events with a start and end duration</td><td>Composed based on sections and connected to script events</td></tr></tbody></table>

### Animation Track

A track that plays animations.

#### Track Properties

<table><thead><tr><th width="187.6666259765625">Property</th><th>Description</th></tr></thead><tbody><tr><td>Ovdr Asset Id</td><td>Specifies the animation asset to play (<code>ovdrassetid://</code> format). When an asset is assigned, the section length is automatically updated to match the animation length.</td></tr><tr><td>Blend in Time</td><td>Sets the blend duration based on the section start time for a smooth transition when switching animations.</td></tr><tr><td>Blend Out Time</td><td>Sets the blend duration based on the section end time for a smooth transition when switching animations.</td></tr><tr><td>Slot Type</td><td><p>Specifies the body region where the animation is applied.</p><ul><li>Full Body: Applies the animation to the entire body.</li><li>Upper Body: Applies the animation only to the upper body.</li><li>Lower Body: Applies the animation only to the lower body.</li></ul></td></tr></tbody></table>

#### Blend

Blend is a feature that ensures smooth transitions between animations by gradually fading out the previous animation and blending in the next animation.

* **Blend In**: The transition range from the previous animation to the current animation
* **Blend Out**: The transition range from the current animation to the next animation

Within the blend range, both the previous and next animations are applied simultaneously, and the weight changes over time to create a smooth transition. During this period, **the original animation is not played at 100% as-is**; instead, a **blended result** with another animation is applied.

As the blend duration increases, the portion where the original animation is fully expressed becomes shorter. Therefore, you should **adjust the section length as needed to ensure the intended motion is properly represented**.\
(Example: If a 3-second animation has Blend In/Out set to 1 second each, the portion where the original motion appears unchanged is about 1 second.)

<div align="left"><figure><img src="/files/c0b2RleNFG3BEg16Opdc" alt=""><figcaption></figcaption></figure></div>

The Blend In/Out values can be adjusted by dragging the left and right **triangular handles** that appear at the top of the section when the mouse cursor hovers over it. The position of each handle determines the duration of the blending interval.

Blending is applied only between the **same SlotType** (UpperBody ↔ UpperBody, LowerBody ↔ LowerBody). However, Full Body animations can blend with all SlotTypes.

### Sound Track

A track that plays sounds.

#### Track Properties

<table><thead><tr><th width="187.6666259765625">Property</th><th>Description</th></tr></thead><tbody><tr><td>Ovdr Asset Id</td><td>Specifies the sound asset to play (<code>ovdrassetid://</code> format). When an asset is assigned, the section length is automatically updated to match the sound length.</td></tr><tr><td>Is 2DSound</td><td><p>Specifies how the sound is played.</p><ul><li>false (2D): Plays at a constant volume regardless of position.</li><li>true (3D): Plays based on position, attached to the character.</li></ul></td></tr><tr><td>(Attachment Offset)<br>Is Attach</td><td><p>When Is 2DSound is true, determines whether the sound follows the character.</p><ul><li>true: The sound is attached to the character and moves with it.</li><li>false: The sound plays at the character’s position at the time the ActionSequence starts.</li></ul></td></tr><tr><td>(Attachment Offset)<br>Relative Location</td><td>When Is 2DSound is true, sets the relative position of the sound based on the character.</td></tr><tr><td>(Attachment Offset)<br>Relative Rotation</td><td>When Is 2DSound is true, sets the relative rotation of the sound based on the character.</td></tr><tr><td>Roll Off Max Distance</td><td>Sets the maximum distance at which the sound can be heard.</td></tr><tr><td>Roll Off Min Distance</td><td>Sets the minimum distance at which sound attenuation begins.</td></tr><tr><td>Roll Off Mode</td><td><p>Sets how sound attenuates over distance.</p><ul><li>Inverse: Decreases inversely with distance.</li><li>Linear: Decreases linearly with distance.</li><li>Linear Square: Decreases proportional to the square of the distance.</li><li>Inverse Tapered: Reduces attenuation at close distances.</li></ul></td></tr><tr><td>Fade in Time</td><td>Sets the fade-in time of the sound.</td></tr><tr><td>Fade Out Time</td><td>Sets the fade-out time of the sound.</td></tr></tbody></table>

#### Fade

Fade is a feature that smoothly transitions between sounds by gradually decreasing the volume of the current sound while increasing the volume of the next sound.

<div align="left"><figure><img src="/files/c0b2RleNFG3BEg16Opdc" alt=""><figcaption></figcaption></figure></div>

The Fade In/Out values can be adjusted by dragging the left and right triangular handles that appear at the top of the section when the mouse cursor hovers over it. The position of each handle determines the duration of the blending interval.

Fade is **applied only between the same playback types (2D ↔ 2D, 3D ↔ 3D)**, and is not applied between different types.

#### Roll Off Mode

Each type of Roll Off Mode can be used as follows:

* Inverse: Explosion sounds (the farther the player is, the more the sound gradually decreases)
* Linear: Background music from a radio (sound decreases consistently with distance)
* Linear Square: Gunfire (strong at close range, rapidly decreases at long distance)
* Inverse Tapered: Wind sounds (sound decreases gradually at close range)

### CameraShake Track

A track that applies camera shake.

#### Track Properties

<table><thead><tr><th width="187.6666259765625">Property</th><th>Description</th></tr></thead><tbody><tr><td>Shake Type</td><td><p>Selects the type of camera shake. Each preset provides direction suited for specific situations.</p><ul><li>Impact: Impact-based shake (used for general attacks, melee hits, explosions)</li><li>Recoil: Rotation-based shake from recoil (used for gunfire, hit reactions, combo attacks)</li><li>Horizontal Shake: Side-to-side shake (used for large monster movement, strong shockwaves)</li><li>Vertical Shake: Up-and-down shake (used for jump landings, falls, heavy object impacts)</li><li>Light: Short and subtle shake (used for weak attacks, quick hits)</li><li>Heavy: Strong and weighty shake (used for powerful attacks, heavy impacts)</li><li>Stab: Directional, thrust-like shake (used for stabbing attacks, instant impact effects)</li><li>Ultimate: Extremely strong explosive shake (used for ultimate skills, large-scale explosions, destruction effects)</li><li>Dizzy: Continuous disorienting shake (used for stun, debuff, or drunken states)</li></ul></td></tr><tr><td>Scale</td><td>Adjusts the overall intensity of the camera shake. Higher values result in stronger shake effects.</td></tr></tbody></table>

#### Camera Preview

<div align="left"><figure><img src="/files/agKmVlrBNIlg3z8UcnDi" alt=""><figcaption></figcaption></figure></div>

To preview camera-related tracks (Camera Shake, Camera FOV, Camera Zoom, etc.), you need to switch the view using the **editor camera / character camera toggle button**.

#### Reference

* Camera effects at runtime are applied only to the Player who executed the ActionSequence.
* If you change the Shake Type without modifying the section length, the section length is automatically updated to match the default duration of the selected preset.
* The **Light / Heavy / Stab / Ultimate / Dizzy presets vary significantly in intensity depending on the Duration value**. To avoid unintended results, it is recommended to use them while keeping the section length at its default value.

### Camera FOV Track

A track that controls the camera FOV.

#### Track Properties

<table><thead><tr><th width="187.6666259765625">Property</th><th>Description</th></tr></thead><tbody><tr><td>Blend In</td><td>The time it takes for the camera value to smoothly transition from the player’s current camera setting (FOV) to the value set in the track when the track starts. The larger the value, the slower the transition.</td></tr><tr><td>Blend Out</td><td>The time it takes for the camera value to smoothly return from the track-applied value to the player’s default camera setting (FOV) when the track ends. The larger the value, the slower the return.</td></tr></tbody></table>

#### Keyframe Properties

In the Camera FOV Track, the Value field of a keyframe represents the camera’s FOV value.

#### Camera Preview

<div align="left"><figure><img src="/files/agKmVlrBNIlg3z8UcnDi" alt=""><figcaption></figcaption></figure></div>

To preview camera-related tracks (Camera Shake, Camera FOV, Camera Zoom, etc.), you need to switch the view using the **editor camera / character camera toggle button**.

#### Notes

* Unlike the Control Track, camera-related tracks do not retain their values after the last keyframe and are reset.
* During camera direction, changing the camera FOV via scripts may be restricted.

#### Reference

* At runtime, camera effects are applied only to the Player who executed the ActionSequence.

### Camera Zoom Track

A track that controls the camera Zoom.

#### Track Properties

<table><thead><tr><th width="187.6666259765625">Property</th><th>Description</th></tr></thead><tbody><tr><td>Blend In</td><td>The time it takes for the camera value to smoothly transition from the player’s current camera setting (Zoom) to the value set in the track when the track starts. The larger the value, the slower the transition.</td></tr><tr><td>Blend Out</td><td>The time it takes for the camera value to smoothly return from the track-applied value to the player’s default camera setting (Zoom) when the track ends. The larger the value, the slower the return.</td></tr></tbody></table>

#### Keyframe Properties

In the Camera Zoom Track, the Value field of a keyframe represents the camera’s Zoom value.

#### Camera Preview

<div align="left"><figure><img src="/files/agKmVlrBNIlg3z8UcnDi" alt=""><figcaption></figcaption></figure></div>

To preview camera-related tracks (Camera Shake, Camera FOV, Camera Zoom, etc.), you need to switch the view using the **editor camera / character camera toggle button**.

#### Notes

* Unlike the Control Track, camera-related tracks do not retain their values after the last keyframe and are reset.
* During camera direction, changing the camera Zoom via scripts may be restricted.

#### Reference

* At runtime, camera effects are applied only to the Player who executed the ActionSequence.

### Control Track

A track that references objects under the ActionSequence to control properties such as position, rotation, and transparency.

#### Track Properties

<table><thead><tr><th width="187.6666259765625">Property</th><th>Description</th></tr></thead><tbody><tr><td>(Attachment Offset)<br>Socket Name</td><td>Specifies the socket name to use when attaching an object to a specific socket. If no socket is specified, it is attached to the default reference position. Available sockets can be found in the Rig Hierarchy shown in the Animation Editor.</td></tr><tr><td>(Attachment Offset)<br>Is Attach</td><td><p>Determines whether the referenced object follows the character.</p><ul><li>true: The referenced object is attached to the character and moves together with it.</li><li>false: The object is displayed at the character’s position at the time the ActionSequence is executed.</li></ul></td></tr><tr><td>(Attachment Offset)<br>Relative Location</td><td>Sets the relative position offset based on the referenced object or socket.</td></tr><tr><td>(Attachment Offset)<br>Relative Rotation</td><td>Sets the relative rotation offset based on the referenced object or socket.</td></tr><tr><td>Ref Object</td><td>Specifies the target object to be controlled by the track. The properties of the selected object can be controlled using keyframes.</td></tr></tbody></table>

#### Referencing Objects

<figure><img src="/files/RbLs8Zm75UhFYZOfhOIo" alt=""><figcaption></figcaption></figure>

You can use the **selection button** in the Ref Object field to select an object under the ActionSequence from the Level Browser and assign it as a reference.

It is recommended to specify the **top-level parent object** as the reference target, rather than selecting individual child objects. For example, if a VFXPreset is structured under a Part, you should reference the Part instead of the VFXPreset.

If the referenced object is **not displayed correctly in the Viewport after assignment**, it will be properly updated after playing once or moving the scrubber. (This behavior is planned to be improved for immediate updates in the future.)

**Notes**

* When adding objects under the ActionSequence, **include only the objects that need to be controlled and make sure they are referenced in the Control Track**. It is recommended to disable or remove collision settings for unused objects.
* **If objects are placed under the ActionSequence but are not referenced in the Control Track**, they may be displayed incorrectly in the Viewport.

#### Reference Object Hierarchy Display

<figure><img src="/files/08OhpYKlwFGG1XYJM7Hz" alt=""><figcaption></figcaption></figure>

When a reference object is assigned, its **hierarchical structure is displayed in the track based on that object**. For example, if a Part object is referenced, its child objects such as VFXPreset are also displayed together.

This allows you to view and control the properties of multiple child elements simultaneously through a single reference.

#### Control Track Gizmo Editing

<figure><img src="/files/NWs5zTBEmE6EEAKX98hj" alt=""><figcaption></figcaption></figure>

When a Control Track references an object that inherits from PVInstance (such as a Part or Model), you can select the referenced object—or any of its descendants that inherit from PVInstance—in the viewport and use gizmos to edit keyframes for its position, rotation, and scale.

Since ActionSequences are played relative to a character, **the position and rotation of the referenced root object are evaluated relative to the character's origin within the ActionSequence.**

**The relative position and rotation of child objects within the referenced object are preserved.** This allows complex objects, such as Models composed of multiple Parts, to maintain their intended structure during editing and playback.

**Selecting Objects in the Viewport**

* You can select objects that inherit from **PVInstance**, such as Parts, MeshParts, and Models.
* When a Model is selected, it can be edited as a single object.
  * If a Model has a **PrimaryPart** assigned, the gizmo is displayed relative to that object. Otherwise, the gizmo is displayed relative to the Model's center.
  * To select an individual object within a Model, hold **Alt and click** the object.

**Keyframe Editing**

<figure><img src="/files/g2W97RSjR4UxzgxWBtDv" alt=""><figcaption></figcaption></figure>

Edits made using gizmos are saved as keyframe data **only when the corresponding property already contains at least one keyframe.**

* If the Position, Rotation, or Scale property **contains one or more keyframes**, manipulating a gizmo while **Record Mode** is enabled will create a new keyframe or update an existing one at the current scrubber position.
* **When Record Mode is disabled**, manipulating a gizmo does not create or modify any keyframes.

<div align="left"><figure><img src="/files/8Hp8XVYOgID9gJSysr7o" alt=""><figcaption></figcaption></figure></div>

You can use gizmos to edit keyframes for the Size, RelativePosition, and RelativeRotation properties.

**Gizmo Edit Mode**

| Shortcut | Function    |
| -------- | ----------- |
| Ctrl + 1 | Select Tool |
| Ctrl + 2 | Move Tool   |
| Ctrl + 3 | Scale Tool  |
| Ctrl + 4 | Rotate Tool |

#### Configure Scale Inheritance

<figure><img src="/files/kVyZRfW7EkJH4RES3umc" alt=""><figcaption></figcaption></figure>

Right-click a Control Track and enable or disable Scale Inheritance from the context menu. When enabled, the track inherits the character's scale. The default value is True.

When enabled, the BasePart objects under the Control Track are scaled according to the character's size. When disabled, they retain their original size regardless of the character's scale.

<figure><img src="/files/UH2YM2zaFDkQ5glai9qd" alt=""><figcaption></figcaption></figure>

Use Scale Inheritance in the More Options menu to enable or disable Scale Inheritance for all Control Tracks at once.

#### Keyframe Properties

The properties that can be controlled in keyframes vary depending on the **type of the referenced object**.

<table><thead><tr><th width="200">Instance Type</th><th>Supported Properties</th></tr></thead><tbody><tr><td>Model</td><td><ul><li>OriginPosition: Sets the position</li><li>OriginRotation: Sets the rotation</li></ul></td></tr><tr><td>Part</td><td><ul><li>Shape: Sets the shape of the part</li><li>Transparency: Sets transparency</li><li>CanCollide: Sets whether collision is enabled</li><li>CanTouch: Sets whether touch events are enabled</li><li>Size: Sets the size</li><li>OriginPosition: Sets the position</li><li>OriginRotation: Sets the rotation</li></ul></td></tr><tr><td>MeshPart</td><td><ul><li>Transparency: Sets transparency</li><li>CanCollide: Sets whether collision is enabled</li><li>CanTouch: Sets whether touch events are enabled</li><li>Size: Sets the size</li><li>OriginPosition: Sets the position</li><li>OriginRotation: Sets the rotation</li></ul></td></tr><tr><td>ParticleEmitter</td><td><ul><li>Enabled: Sets whether the effect is active</li><li>Rate: Sets the number of particles generated per second</li><li>Emit: Emits a specified number of particles</li></ul></td></tr><tr><td>VFXPreset</td><td><ul><li>Enable: Sets whether the effect is active</li></ul></td></tr></tbody></table>

**Notes**

For objects referenced in the Control Track, the baseline for property values changes depending on whether keyframes are inserted.

Before inserting keyframes, the object’s current property values are used as the initial values. However, after inserting keyframes, the value of the first keyframe is applied as the default value regardless of the keyframe position.

### Collision Track

A track that generates collision detection.

#### Marker Properties

<table><thead><tr><th width="187.6666259765625">Property</th><th>Description</th></tr></thead><tbody><tr><td>Collision Event Name</td><td>Specifies the name of the event to be triggered when a collision occurs. The defined name can be used to identify collision events in scripts.</td></tr><tr><td>Collider Type</td><td><p>Specifies the type of collision shape to use.</p><ul><li>Box: Uses a box-shaped collision area</li><li>Sphere: Uses a spherical collision area</li><li>Capsule: Uses a capsule-shaped collision area</li><li>Frustum: Uses a collision area that expands in a specific direction from a point</li><li>Raycast: Performs collision detection using a ray</li></ul></td></tr><tr><td>Collider</td><td>A field for configuring detailed parameters such as size, radius, and length of the collision area based on the selected Collider Type</td></tr><tr><td>(Attachment Offset)<br>Socket Name</td><td>Specifies the socket name to use when attaching the collider to a specific socket. Available sockets can be found in the Rig Hierarchy shown in the Animation Editor.</td></tr><tr><td>(Attachment Offset)<br>Is Attach</td><td><p>Specifies whether to use a socket.</p><ul><li>true: The Socket Name field is enabled</li><li>false: The Socket Name field is disabled</li></ul></td></tr><tr><td>(Attachment Offset)<br>Relative Location</td><td>Sets the relative position offset based on the referenced object or socket</td></tr><tr><td>(Attachment Offset)<br>Relative Rotation</td><td>Sets the relative rotation offset based on the referenced object or socket</td></tr><tr><td>Collision Channel</td><td>Sets the Collision Channel used for collision filtering. The objects to detect are determined by the collision responses defined for the selected Trace Type channel.</td></tr></tbody></table>

#### Displaying Collision Areas in Play Test

In the Studio toolbar, enable **Show Collision** in the **View tab** to visualize collision areas in the Viewport when collision detection occurs during play. This allows you to more intuitively verify the actual collision range and behavior.

<figure><img src="/files/2gIBLFpQTbxiM4jgHK37" alt=""><figcaption></figcaption></figure>

### Event Track

A track that triggers events at specific frames.

#### Marker Properties

In the Event Track, the Value field of a marker specifies the name of the event to be triggered. The defined name can be used to identify the event in scripts.

### Trigger Track

A track that triggers events with a defined start and end duration.

#### Track Properties

<table><thead><tr><th width="187.6666259765625">Property</th><th>Description</th></tr></thead><tbody><tr><td>Trigger Name</td><td>You can set names to identify the events triggered when entering and exiting the trigger range. These names can be used in scripts or systems to handle the trigger.</td></tr></tbody></table>

## Learn More: Script API

For ActionSequence execution and control, as well as Collision Track, Event Track, and Trigger Track related Script APIs, refer to the document below.

{% content-ref url="/pages/gnogIOuaAA9t0jRSmVYE" %}
[Running ActionSequences](/manual/studio-manual/game-development/actionsequence/running-actionsequences)
{% endcontent-ref %}


# Running ActionSequences

## Overview

This section explains how to execute and control created ActionSequences at runtime.

You can also handle various situations that occur during playback by connecting scripts to Collision, Event, and Trigger tracks, and manage execution states through ActionRunner.

## Controlling ActionSequence Execution

### Play

```lua
local ActionRunner = Humanoid:GetActionRunner()
local ActionSequenceKey = "AttackAction"

ActionRunner:Play(ActionSequenceKey)
```

The Play method can only be called when the **character is not dead**, and the **Key value passed must match the name of the ActionSequence instance**.

#### How It Works

When the Play method is called, the original ActionSequence instance is **duplicated under Humanoid.ActionRunner**, and the action is executed based on the duplicated instance. Understanding how ActionSequence works allows you to create and control various directions through scripts. For more details, refer to the runtime behavior section below.

{% content-ref url="/pages/RPRPR3s5FTaz7vkVpbsV" %}
[Principle of Operation](/manual/studio-manual/game-development/actionsequence/actionsequence-mechanism)
{% endcontent-ref %}

### Transition Playback

```lua
local ActionRunner = Humanoid:GetActionRunner()
local ActionSequenceKey = "AttackAction"
local TransitionTime = 0.5 -- If greater than 0, it is processed as transition playback.

ActionRunner:Play(ActionSequenceKey, TransitionTime)
```

If the **TransitionTime value passed to the Play method is greater than 0**, ActionSequence plays with a smooth transition (blending) from the current action to the new action.\
(If TransitionTime is 0 or omitted, the current action A ends immediately without transition, and action B starts playing right away.)

When transition playback occurs, if action B is executed while action A is already playing, both actions are played **simultaneously for a certain period and gradually transition**. During the TransitionTime, blending occurs from A to B, after which A ends and only B remains.

<figure><img src="/files/i2kXh9hPfrBNkj7RXCEx" alt=""><figcaption></figcaption></figure>

TransitionTime represents the **maximum duration** in which a transition can occur. The actual blending time may vary depending on the remaining playback time of A at the moment the transition starts and the total duration of B. In this case, the transition time is clamped to the shorter duration between the remaining time of A and the total duration of B.

This approach helps prevent abrupt transitions between actions and enables more natural direction.

#### Per-Track Transition Behavior

When TransitionTime is greater than 0, transitions are handled differently depending on the track type.

<table><thead><tr><th width="207.3333740234375">Track</th><th>Behavior</th></tr></thead><tbody><tr><td>Animation Track</td><td>Blending between A → B is performed based on TransitionTime. If multiple animations exist at the same time, the last animation is applied based on playback timing and track structure.</td></tr><tr><td>Sound Track</td><td>The existing sound (A) fades out based on TransitionTime.</td></tr><tr><td>CameraShake Track</td><td>The existing track (A) ends immediately, and the new track (B) starts.</td></tr><tr><td>Camera FOV Track</td><td>The existing track (A) ends immediately, and the new track (B) starts.</td></tr><tr><td>Camera Zoom Track</td><td>The existing track (A) ends immediately, and the new track (B) starts.</td></tr><tr><td>Control Track</td><td>The existing track (A) ends immediately, and the new track (B) starts.</td></tr><tr><td>Collision Track</td><td>The existing track (A) ends immediately, and the new track (B) starts.</td></tr><tr><td>Event Track</td><td>The existing track (A) ends immediately, and the new track (B) starts.</td></tr><tr><td>Trigger Track</td><td>The existing track (A) ends immediately, and the new track (B) starts. However, for triggers that have already been entered but not exited, the exit event is called immediately.</td></tr></tbody></table>

#### Notes

* **A maximum of two** ActionSequences can be played simultaneously.
* If a new action is executed while two ActionSequences are already playing, the oldest currently playing action will be terminated.

### Execution Speed Control

```lua
local ActionRunner = Humanoid:GetActionRunner()
local ActionSequenceKey = "AttackAction"
local TransitionTime = 0
local SpeedRate = 2 -- Can be set within the range of 0.1 to 5

ActionRunner:Play(ActionSequenceKey, TransitionTime, SpeedRate)
```

You can change the playback speed of a currently playing ActionSequence using the ChangeSpeedRate method.

```lua
local SpeedRate = 2 -- Can be set within the range of 0.1 to 5
ActionRunner:ChangeSpeedRate(ActionSequenceKey, SpeedRate)
```

### Get Playing ActionSequences

```lua
local ActionRunner = Humanoid:GetActionRunner()
local Actions = ActionRunner:GetActionSequences() 
```

Retrieves the **currently playing** ActionSequences set in the ActionRunner.

Depending on the transition state, multiple ActionSequences may exist simultaneously, so the result is returned as an array.

The returned array is **ordered from previously played ActionSequences to those that will be played next**, and completed entries are automatically removed.

The GetActionSequences method **can only be called on the server**.

### Stop

```lua
local ActionRunner = Humanoid:GetActionRunner()

ActionRunner:Stop("SomeActionName") -- Stop a specific ActionSequence
ActionRunner:StopAll() -- Stop all currently playing ActionSequences
```

You can stop a specific ActionSequence or stop all ActionSequences at once.

During a transition, both the previous action (A) and the next action (B) may exist simultaneously. In this state, if B is stopped, the transition target is removed, which may also cause A to be stopped.

If a transition occurs between ActionSequences with the same name (A → A), Stop behaves the same as StopAll.

For Trigger Tracks, if the ActionSequence is stopped after entering a section but before exiting it, the exit event is triggered immediately.

### Retrieving ActionSequence Track Information

Track information can only be retrieved while the ActionSequence is running.

When an ActionSequence is played, a runtime instance is created under Humanoid.ActionRunner. Since completed or stopped ActionSequences may be removed, the returned information should only be used while the ActionSequence remains valid.

```lua
local ActionSequence = script.Parent
local TrackInfos = ActionSequence:GetAllTrackInfos() -- Retrieve all track information

for i = 1, #TrackInfos do
    local trackInfo = TrackInfos[i] 
  
    print(trackInfo.TrackName) 
    print(trackInfo.TrackType) 
    print(trackInfo.IsEnable) 
    print(trackInfo.TrackData) 
end
```

You can retrieve information for a specific track using the GetTrackInfo method.

```lua
local ActionSequence = script.Parent
local TrackName = "SomeColTrackName_1"
local TrackType = Enum.ActionSequenceTrackType.CollisionTrack
local TrackInfo = ActionSequence:GetTrackInfo(TrackName, TrackType) -- Retrieve specific track information

if TrackInfo ~= nil then
    print(TrackInfo.TrackName)
    print(TrackInfo.TrackType)
    print(TrackInfo.IsEnable) 
    print(TrackInfo.TrackData) 
end
```

## ActionRunner Events

The execution state of an ActionSequence can be checked through events provided by the ActionRunner.

```lua
local ActionRunner = Humanoid:GetActionRunner()

-- self : The character model that executed the ActionSequence is passed.
-- key : The Key (name) of the finished ActionSequence is passed.
local function OnEnded(self, key)
    -- ...
end
ActionRunner.Ended:Connect(OnEnded) 

-- self : The character model that executed the ActionSequence is passed.
-- key : The Key (name) of the finished ActionSequence is passed.
local function OnStopped(self, key)
    -- ...
end
ActionRunner.Stopped:Connect(OnStopped) 
```

* **Ended event**: Called when the ActionSequence **finishes playing normally.**
* **Stopped event**: Called when the ActionSequence is **interrupted before completion**. It is also triggered when ended via Stop or StopAll methods, and regardless of whether a transition is used, it is called immediately for the existing action when a new action starts playing.

## Connecting ActionSequence Events

You can execute required logic during playback by connecting scripts to Collision, Event, and Trigger tracks.

**Event connection scripts must be children of the ActionSequence instance** and should be referenced using **relative paths** such as `script.Parent`. Since ActionSequence operates as a duplicated instance at runtime, using non-relative references will not apply to the actual runtime instance (the clone).

```lua
-- Good
local ActionSequence = script.Parent
ActionSequence:Hit("CollisionEventName"):Connect(function(self, other)
    -- ...
end)

-- Bad (Not Work)
local ActionSequence = game.ActionSequenceService.SomeActionSequence
ActionSequence:Hit("CollisionEventName"):Connect(function(self, other)
    -- ...
end)
```

Events can be connected in both server and client environments. However, **server-side Scripts are recommended to be placed directly under the ActionSequence**, as they may not function properly when placed deeper in the hierarchy.

**If events are connected in a LocalScript under the ActionSequence, the logic will be executed on all clients**. Therefore, you should filter based on the executor (self) of the ActionSequence when necessary.

### Collision Track Integration

```lua
local ActionSequence = script.Parent

-- self : The character model that executed the ActionSequence is passed.
-- other : The target object detected by the collision check (character model or Part) is passed.
ActionSequence:Hit("CollisionEventName"):Connect(function(self, other)
    -- ...
end)
```

The target object (`other`) passed through a collision event may **include the executor (**`self`**) of the ActionSequence**. Therefore, you should filter out the executor when necessary.

This is used for **target-based interaction logic** such as applying damage or healing to objects hit by the collider.

### Event Track Integration

```lua
local ActionSequence = script.Parent

-- self : The character model that executed the ActionSequence is passed.
ActionSequence:GetMarkerReachedSignal("EventName"):Connect(function(self)
    -- ...
end)
```

This is used when you need to execute a script at a specific point during action playback.

For example, it can be used for **timing-based logic** such as handling jump start/landing timing or skill preparation/casting timing.

### Trigger Track Integration

```lua
local ActionSequence = script.Parent

-- self : The character model that executed the ActionSequence is passed.
ActionSequence:TriggerStarted("TriggerName"):Connect(function(self)
    -- ...
end)

-- self : The character model that executed the ActionSequence is passed.
ActionSequence:TriggerEnded("TriggerName"):Connect(function(self)
    -- ...
end) 
```

This is used for logic that enables or disables a state during a specific duration.

For example, it can be used for **duration-based state control** such as parrying, invincibility, or hit detection.


# Creating ActionSequences

## Overview

This guide explains the full creation process step by step, from creating an ActionSequence and configuring its tracks to completing the presentation and verifying the result through execution.

In this document, you will create an ActionSequence directly while learning the basic workflow and how to use it.

## 3-Hit Combo Action

### Learning Outcomes

<figure><img src="/files/gYOpU0JSr2E70aY6F7T5" alt=""><figcaption></figcaption></figure>

By completing this tutorial, you will be able to create the following setup:

* A chained attack animation sequence consisting of 3 stages (1st, 2nd, and 3rd hits)
* Collision detection and script-based damage processing timed to each hit
* Hit effects that play in sync with the impact timing
* Camera shake applied during the 3rd hit phase
* Player input disabled while the 3rd hit is in progress
* Execution of the ActionSequence via button input

### Asset List

<table><thead><tr><th width="140.9998779296875">Asset Type</th><th width="229">Asset ID</th><th>Description</th></tr></thead><tbody><tr><td>Animation</td><td>ovdrassetid://18169100</td><td>1st Hit</td></tr><tr><td>Animation</td><td>ovdrassetid://18171100</td><td>2nd Hit</td></tr><tr><td>Animation</td><td>ovdrassetid://18173300</td><td>3rd Hit</td></tr></tbody></table>

### Tutorial

<table data-full-width="true"><thead><tr><th width="233.33331298828125">Step</th><th width="590">Task</th><th>Notes</th></tr></thead><tbody><tr><td><ol><li>Create ActionSequence</li></ol></td><td><ul><li>Add an ActionSequence instance under the ActionSequenceService.<img src="/files/Z6xSqRO80gQgQiv41RiT" alt=""></li><li>Rename it to 3-HitCombo.<br><img src="/files/vNHB4LASErsXrVLbYSOw" alt=""></li></ul></td><td><ul><li>The ActionSequence name must be unique.</li></ul></td></tr><tr><td><ol start="2"><li>Open ActionSequence Editor</li></ol></td><td><ul><li>Hover the mouse over the ActionSequence instance, then click the Open button that appears.<br><img src="/files/x36mXFjJn8c2btAkARnX" alt=""></li></ul></td><td><ul><li>Changes made during play mode are not reflected immediately and are applied when you run it again.</li></ul></td></tr><tr><td><ol start="3"><li>Animation Track<br>(1st Hit)</li></ol></td><td><ul><li>Click the Add Track button to add an Animation Track.<br><img src="/files/R80Op1SFokn22s9yXXqT" alt=""></li><li>Select the track, then specify the animation ID for the 1st hit in Ovdr Asset Id in the Track Property panel.<br>(ovdrassetid://18169100)<br><img src="/files/BN3fpWjn6H7YrzXMZkPo" alt=""></li><li>Set Blend in / Out Time to 0.<br><img src="/files/SLnDRvDFtWZOiTbMgdUs" alt=""></li></ul></td><td></td></tr><tr><td><ol start="4"><li>Preview</li></ol></td><td><ul><li>Press the Play button or Spacebar to play the timeline and check the animation.<br><img src="/files/OsxMWNAYYbF0FwwCXvAR" alt=""></li></ul></td><td></td></tr><tr><td><ol start="5"><li>Animation Track<br>(2nd Hit)</li></ol></td><td><ul><li>Add a new Animation Track.<br><img src="/files/Cw3fovN0J5EoC3M1bUyV" alt=""></li><li>Select the track and specify the animation ID for the 2nd hit in Ovdr Asset Id.<br>(ovdrassetid://18171100)<br><img src="/files/MQc68To8OnxHDfVdQvAQ" alt=""></li><li>Set Blend in / Out Time to 0.<br><img src="/files/SLnDRvDFtWZOiTbMgdUs" alt=""></li><li>Adjust the section position so that it comes after the 1st hit.<br><img src="/files/7s2BAkHBKfDIibXCfFCJ" alt=""></li></ul></td><td></td></tr><tr><td><ol start="6"><li>Animation Track<br>(3rd Hit)</li></ol></td><td><ul><li>Add a new Animation Track.<br><img src="/files/wjGGmKd9FLaYW9HEMtkU" alt=""></li><li>Select the track and specify the animation ID for the 2nd hit in Ovdr Asset Id.<br>(ovdrassetid://18173300)</li><li>Set Blend in / Out Time to 0.</li><li>Adjust the section position so that it comes after the 2nd hit.<br><img src="/files/1ghT32VKDEMDaTYJuxD9" alt=""></li><li>Play it back and check the animation.<br><img src="/files/A6uS0gMYumlaEgcsRxsT" alt=""></li></ul></td><td></td></tr><tr><td><ol start="7"><li>Animation Blend</li></ol></td><td><ul><li>To prevent the animation from breaking during transitions, set the Blend In / Out Time of each animation to 0.25.<br><img src="/files/PENQbuqiVFn5Tr4vigab" alt=""></li><li>Arrange them so that the start and end of each animation overlap.<br><img src="/files/AWfRg2HgoWTFag1X49il" alt=""></li><li>Play the timeline and check the animation.</li><li>To prevent the original length of the animation from not being fully represented by 0.25 seconds due to the blend time, extend the section length beyond the original length.<br><img src="/files/uLa0R6tOW8ghSsnbjaMm" alt=""></li><li>Play the timeline while checking whether the animation transition looks natural, and adjust the section lengths.</li></ul></td><td><ul><li>In the blend section, the previous animation and the next animation are both applied at the same time, and the weight values change so that the transition occurs smoothly.<br>In this section, <strong>the original animation is not played back 100% exactly as-is</strong>; instead, the <strong>result blended</strong> with the other animation is applied.</li></ul></td></tr><tr><td><ol start="8"><li>Save</li></ol></td><td><ul><li>Press Save or Ctrl + S to save your work.<br>(When the save is complete, the message Sequence Changes Saved is displayed.)<br><img src="/files/JVBcuVuW2DQRY7gXxs1g" alt=""></li></ul></td><td><ul><li>Save frequently so that your work is not lost.</li><li>If there are changes, an asterisk (*) is displayed next to the ActionSequence name and the Save button.<br><img src="/files/4ehtqT9wJsAHW89UROis" alt=""></li></ul></td></tr><tr><td><ol start="9"><li>Apply Upper Body Animation</li></ol></td><td><ul><li>Change the Slot Type of the 1st/2nd hit animation tracks to Upper Body.<br><img src="/files/OHXuig75t94p3cPuHPVV" alt=""></li></ul></td><td><ul><li>The body region to which the animation is applied is determined by the Slot Type.</li></ul></td></tr><tr><td><ol start="10"><li>Control Viewport Camera</li></ol></td><td><ul><li>After clicking Viewport, use the WASD keys to move the camera and right-click the mouse to adjust the camera position so the animation is clearly visible from the side of the character being attacked.<br><img src="/files/FKcAoBs0nVvAojw5XPpH" alt=""></li></ul></td><td></td></tr><tr><td><ol start="11"><li>Collision Track</li></ol></td><td><ul><li>Add a Collision Track.<br><img src="/files/eq4npZM2BUU9cJJ0PgjI" alt=""></li><li>Expand the collision track in the track list so that the Value field of the Collision Track is visible.<br><img src="/files/RWG34u5EDj7uwG8NHl5E" alt=""></li><li>In the Value area of the timeline, add 3 markers at appropriate positions according to the animation track count by clicking the mouse wheel button or using Ctrl + left-click.<br><img src="/files/Cs2DLBBMWJDwOXpnwjEz" alt=""></li><li>Move the scrubber and adjust the positions of the 3 keyframes to match the animation timing.<br>(Do not worry about the collision position yet!)<br><img src="/files/QZnOZN7gTgyDbLgxvZ8U" alt=""></li></ul></td><td><ul><li>The horizontal axis of the timeline can be zoomed in/out with Ctrl + mouse wheel up/down.</li></ul></td></tr><tr><td><ol start="12"><li>Collision Detailed Settings</li></ol></td><td><ul><li>Select each keyframe and change the Collider Type to Box.<br><img src="/files/tWG7AOQ3THpaD35PyCTm" alt=""></li><li>Expand all Collider fields so they are visible, then change the Box Extent of each keyframe to (100, 150, 100).<br><img src="/files/AAPo2BzrbeMjuCW4jNRi" alt=""></li><li>Expand all Attachment Offset fields so they are visible, then change the Relative Location of each keyframe to (0, 0, -100).<br><img src="/files/WksOpFRK3uXzdSWkPN30" alt=""></li><li>Change the Collision Event Name of each keyframe to Hit1, Hit2, Hit3.<br><img src="/files/Y1lya24b3ZY0XPzcOyyO" alt=""></li><li>Move the scrubber to check whether the collision position looks natural and adjust it.<br><img src="/files/fTCDA8z4w3kfWpWspatt" alt=""></li><li>Save your work.</li></ul></td><td><ul><li>The Collision Event Name is used for script event connections.</li></ul></td></tr><tr><td><ol start="13"><li>Run ActionSequence</li></ol></td><td><ul><li>Add a Script under the ActionSequence and rename it to CollisionTrackScript.<br><img src="/files/ZQsMHGlMFsE1kVYb45lN" alt=""></li><li><p>Open the script and write the following to handle collisions:</p><pre class="language-lua"><code class="lang-lua">local Sequence = script.Parent
for i = 1, 3 do
Sequence:Hit("Hit" .. i):Connect(function(self, other)
if self == other then
return
end
    print("Hit" .. i, self, other)    local caster = self:FindFirstChild("Humanoid")    local target = other:FindFirstChild("Humanoid")    if caster and target then	      target.Health -= 40	      print("Health : ", target.Health, " / ", target.MaxHealth)    endend)
end
</code></pre></li><li><p>Under StarterPlayer.StarterCharacterScripts, add a LocalScript and write the following content.<br><img src="/files/GnCz3Q46WAlL1hoqfefy" alt=""></p><pre class="language-lua"><code class="lang-lua">local Players = game:GetService("Players")
local LocalPlayer = Players.LocalPlayer
local PlayerGui = LocalPlayer:WaitForChild("PlayerGui")
local ScreenGui = PlayerGui:WaitForChild("ScreenGui")
local PlayButton1 = Instance.new("TextButton")
PlayButton1.Position = UDim2.new(0.5, 0, 0.1, 0)
PlayButton1.Text = "Play 3-Hit Combo"
PlayButton1.TextScaled = true
PlayButton1.Parent = ScreenGui
PlayButton1.Activated:Connect(function()
local character = LocalPlayer.Character
local humanoid = character:WaitForChild("Humanoid")
local actionRunner = humanoid:GetActionRunner()
local key = "3-HitCombo"local transitionTime = 0actionRunner:Play(key, transitionTime)print("Play : " .. key)	
end)
</code></pre></li></ul></td><td><ul><li>Executing ActionSequence and connecting events can be done in both server-side Scripts and LocalScripts.</li></ul></td></tr><tr><td><ol start="14"><li>Verify Collision Detection</li></ol></td><td><ul><li>Set the number of players to 2 and run a play test.<br><img src="/files/yygvJKH7S0wbUZ7oH8Cj" alt=""></li><li>Move Player1’s character in front of Player2’s character, then press the Play 3-Hit Combo button to execute the ActionSequence and verify that the character dies when all attacks hit successfully.<br><img src="/files/ZAFIAi8bnWltKGWYa0f6" alt=""></li><li>End the play test.</li></ul></td><td><ul><li>If you enable <strong>Show Collision</strong> in the <strong>View</strong> <strong>tab</strong> of the Studio toolbar, the collision areas will be visually displayed in the viewport when collision track detection occurs during play.<br><img src="/files/mMOq5sXVqKTiutmj2Pdk" alt=""></li></ul></td></tr><tr><td><ol start="15"><li>Control Track</li></ol></td><td><ul><li>Add a Part under the ActionSequence, then add a VFXPreset under the Part.<br><img src="/files/3tF50l8mJXE9mWz469XJ" alt=""></li><li>Rename the Part to HitFXPart, and the VFXPreset to HitFX1.<br><img src="/files/UEfpjb9dz3t0smizkY9B" alt=""></li><li>Set CanCollide of HitFXPart to false, and Transparency to 1.<br><img src="/files/fPUmJFEriBvkaXFQV70l" alt=""></li><li>Change the appearance of HitFX1 to Simple Hit, and set Enabled to false.<br><img src="/files/fxipnum0uA6Jaq5ecVF6" alt=""></li><li>Add a Control Track.<br><img src="/files/kjevVJBbLK2K84zuq9XW" alt=""></li><li>Select the track, then click the reference link button in the Ref Object field and select HitFXPart in the Level Browser.<br><img src="/files/1PLMfoNBfng0c6JFqmMk" alt=""></li></ul></td><td><ul><li>To avoid confusion when structuring objects under ActionSequence, it is <strong>recommended not to use identical names for objects</strong>.</li></ul></td></tr><tr><td><ol start="16"><li>Effect Settings<br>(1st Hit)</li></ol></td><td><ul><li>Expand all Control Tracks so that the Value field of HitFX1 under HitFXPart is visible.<br><img src="/files/czbR0XnI8M6cjsI9fFXY" alt=""></li><li>In the Value area of the timeline, click the mouse wheel or use Ctrl + left-click to add a keyframe.<br><img src="/files/0TsucslWuiVaBNKEy1H2" alt=""></li><li>Select the keyframe and set the Time field to 0.<br>(If the Value field is not false, set it to false.)<br><img src="/files/BySX6nfg1Hk3vwqLgJvB" alt=""></li><li>Insert a keyframe at the timing of the 1st hit collision, and set the Value field to true.<br><img src="/files/DvNvrqjaYLLaHi3Milw2" alt=""></li></ul></td><td></td></tr><tr><td><ol start="17"><li>Control Track Fine Adjustment</li></ol></td><td><ul><li>Click the Control Track, expand all Attachment Offset fields, and change the Relative Location field to (100, 100, 0).<br><img src="/files/CPOMdjN7fxR2pYmnoGQG" alt=""></li><li>Move the scrubber to check whether the effect position looks natural and adjust it.<br><img src="/files/bPkJ8XZ3AuN4SbpK70MY" alt=""></li></ul></td><td></td></tr><tr><td><ol start="18"><li>Effect Settings<br>(2nd Hit)</li></ol></td><td><ul><li>To reuse the same effect as the 1st hit, insert a keyframe right before the 2nd hit collision timing and set the Value field to false.<br><img src="/files/WO61ebzJj4GTQW4r3qlN" alt=""></li><li>Then, insert a keyframe at the collision timing and set the Value field to true.<br><img src="/files/ONDAUK6jRpkQ4sHhEBuP" alt=""></li><li>Save your work.</li></ul></td><td></td></tr><tr><td><ol start="19"><li>Effect Settings<br>(3rd Hit)</li></ol></td><td><ul><li>To use a new effect, add a VFXPreset under the Part.</li><li>Rename the VFXPreset to HitFX2.<br><img src="/files/pB5LNdbNKiI9154Si5Hq" alt=""></li><li>Change the appearance of HitFX2 to Explosion, and set Enabled to false.<br><img src="/files/4lwntyhxSSLBqLPYH68z" alt=""></li><li>Expand all Control Tracks so that the Value field of HitFX2 is visible in the track list.<br><img src="/files/tuwnP1mPiPZWnsYZKpjN" alt=""></li><li>In the Value area of the timeline, click the mouse wheel or use Ctrl + left-click to add a keyframe.</li><li>Select the keyframe and set the Time field to 0.<br>(If the Value field is not false, set it to false.)<br><img src="/files/BySX6nfg1Hk3vwqLgJvB" alt=""></li><li>Insert a keyframe at the 3rd hit collision timing and set the Value field to true.<br><img src="/files/voz154KFp6thOTuNqdgD" alt=""></li><li>To ensure the 3rd hit effect appears on the ground, add a keyframe to the Y value of OriginPosition in the Control Track and set the Value field to -100.<br><img src="/files/ahKwtNSNZf7R2sE9h7jX" alt=""></li><li>Adjust the keyframe position so that the position changes before the effect is played, placing it before the 3rd hit effect timing.<br><img src="/files/fBPemOMTjtusArATlBks" alt=""></li><li>Play the timeline and check the effect positions for the 1st to 3rd hits.<br><img src="/files/sXDgj75ckGaXjpLvE2eI" alt=""></li><li>To prevent the 1st and 2nd hit effects from being affected, add a keyframe for the Y value of OriginPosition at the start of the timeline, set the Time field to 0, and the Value field to 0.<br><img src="/files/ykAq6y4tEMyDYleTHlSb" alt=""></li><li>To prevent the position from gradually changing between the 1st and 3rd hits, add a keyframe between the 2nd and 3rd hits and set the Value field to 0.<br>(This ensures that after the 2nd hit, while the effect is not visible, the position changes, and the updated position is applied only at the 3rd hit.)<br><img src="/files/xTl8UbUrqMbTtDm1eKTJ" alt=""></li><li>Move the scrubber to check whether the effect position looks natural and adjust it.<br><img src="/files/lWDfsL1iJKqtJlxuOLa5" alt=""></li></ul></td><td></td></tr><tr><td><ol start="20"><li>Socket Attachment Effect Settings</li></ol></td><td><ul><li>Add a Part under the ActionSequence, then add a VFXPreset under the Part.<br><img src="/files/RphCGXZ1wNMyXlMcYapA" alt=""></li><li>Rename the Part to HandFXPart, and the VFXPreset to HandFX.<br><img src="/files/fC19RNG0xulKTlxx7mLx" alt=""></li><li>Set CanCollide of HandFXPart to false, and Transparency to 1.</li><li>Change the appearance of HandFX to Energy Pulse, and set Enabled to false.<br><img src="/files/sxnAitaZOtX5uk2M4IxB" alt=""></li><li>Add a Control Track.<br><img src="/files/yF9J0g65Gnvfl6XH7Ddn" alt=""></li><li>In the Ref Object field, click the reference link button, then select HandFXPart in the Level Browser.<br><img src="/files/VnjUNbhJEa1fPvOH3DKe" alt=""></li><li>Change the Socket Name to LeftHand.<br><img src="/files/HRk81AxQE89tGPCU4LXi" alt=""></li><li>Expand all Control Tracks so that the Value field of HandFX under HandFXPart is visible.</li><li>In the Value area of the timeline, click the mouse wheel or use Ctrl + left-click to add a keyframe.</li><li>Select the keyframe and set the Time field to 0.<br>(If the Value field is not false, set it to false.)<br><img src="/files/ur57r9jzduyL8GQIDpBX" alt=""></li><li>Insert a keyframe at the timing when the 2nd hit animation ends, and set the Value field to true.<br><img src="/files/ALqREmBvWroIpcsFm6OE" alt=""></li><li>Insert a keyframe at the timing when the 3rd hit effect plays, and set the Value field to false.<br><img src="/files/tGavtApvgv1yzPotv96n" alt=""></li><li>Move the scrubber to check whether the creation and disappearance timing of HandFX looks natural and adjust it.<br><img src="/files/gUQ18Q99lvTlfbfwEkBw" alt=""></li><li>Save your work.</li></ul></td><td></td></tr><tr><td><ol start="21"><li>Camera Shake Track</li></ol></td><td><ul><li>Add a CameraShake Track.<br><img src="/files/sSPo2mkvj4dgMWc90aJW" alt=""></li><li>Click the Edit Camera / Character Camera View Toggle button.<br><img src="/files/NnMv1FrqhJEJimiDV8Q2" alt=""></li><li>Change the Shake Type of the CameraShake Track to Ultimate.<br><img src="/files/UO5gRB3Ya2J3CeZ0wGIy" alt=""></li><li>Move the scrubber and adjust the section position to match the timing when the 3rd hit effect is played.<br><img src="/files/t84qg9px8NZBU8IlUefQ" alt=""></li><li>Play the timeline to check whether the camera shake looks natural, and adjust the section position and length.</li><li>Click the Edit Camera / Character Camera View Toggle again to return to the default camera.</li><li>Save your work.</li></ul></td><td><ul><li>To preview camera-related tracks (Camera Shake, Camera FOV, Camera Zoom, etc.), you must switch the view using the <strong>Edit Camera / Character Camera View Toggle</strong> button.</li><li>At runtime, camera effects are applied only to the player who executes the ActionSequence.</li></ul></td></tr><tr><td><ol start="22"><li>Trigger Track</li></ol></td><td><ul><li>Add a Trigger Track.<br><img src="/files/bPuSHc3bTPb8jCsO7y2V" alt=""></li><li>Adjust the section position and length to match the duration of the 3rd hit animation.<br><img src="/files/UNn0GqEkRCrafIQZqe5R" alt=""></li><li>Change the Trigger Name field to MovementStateControl.<br><img src="/files/F1vMfevX22dzl0koXtLJ" alt=""></li><li>Add a LocalScript under the ActionSequence and rename it to TriggerTrackScript.<br><img src="/files/DcnZW79us7EdxGTdtC8f" alt=""></li><li><p>Open the script and write the following to control the player state:</p><pre class="language-lua"><code class="lang-lua">local Sequence = script.Parent
local Players = game:GetService("Players")
local StarterGui = game:GetService("StarterGui")
local LocalPlayer = Players.LocalPlayer
local InitWalkSpeed = nil
local InitJumpHeight = nil
local function SetMovementState(humanoid, state)
local toWalkSpeed = state == false and 0 or InitWalkSpeed
local toJumpHeight = state == false and 0 or InitJumpHeight
humanoid.WalkSpeed = toWalkSpeedhumanoid.JumpHeight = toJumpHeightStarterGui:SetCoreGuiEnabled(Enum.CoreGuiType.Joystick, state)StarterGui:SetCoreGuiEnabled(Enum.CoreGuiType.JumpButton, state)print("SetMovementState : ", state)
end
Sequence:TriggerStarted("MovementStateControl"):Connect(function(self)
if self ~= LocalPlayer.Character then
return
end
local humanoid = self:WaitForChild("Humanoid")if InitWalkSpeed == nil or InitJumpHeight == nil then    InitWalkSpeed = humanoid.WalkSpeed    InitJumpHeight = humanoid.JumpHeightendSetMovementState(humanoid, false)
end)
Sequence:TriggerEnded("MovementStateControl"):Connect(function(self)
if self ~= LocalPlayer.Character then
return
end
local humanoid = self:WaitForChild("Humanoid")SetMovementState(humanoid, true)
end)
</code></pre></li></ul></td><td></td></tr><tr><td><ol start="23"><li>Clean Up Playback Duration</li></ol></td><td><ul><li>Move the scrubber to the point where the 3rd hit animation ends.<br><img src="/files/hG2ptwFqGn3LpjYHggdw" alt=""></li><li>Click the playback duration setting button to adjust the playback end position to match the actual action length.<br><img src="/files/XkPk3NV5MASrVWQQVCeZ" alt=""></li><li>Save your work.</li></ul></td><td><ul><li>To clearly define the creation and destruction timing of duplicated instances generated during ActionSequence execution, it is recommended to also clean up the playback duration when the action ends. <strong>If the playback duration is unnecessarily long, the removal of instances may be delayed.</strong></li></ul></td></tr><tr><td><ol start="24"><li>Verify Result</li></ol></td><td><ul><li>Run a play test and verify the result.<br>(When the 3rd hit animation is executed, check whether movement is disabled until the playback ends.)<br><img src="/files/NpZKsnchOzTPLhWERi95" alt=""></li></ul></td><td></td></tr></tbody></table>

## Hit Reaction

### Learning Outcomes

<figure><img src="/files/m04uqe4bmafw7WatAyxu" alt=""><figcaption></figcaption></figure>

By completing this tutorial, you will be able to create the following setup:

* Play hit reaction upon successful attack
* Hit effect that plays in sync with the impact timing

### Asset List

<table><thead><tr><th width="140.9998779296875">Asset Type</th><th width="229">Asset ID</th><th>Description</th></tr></thead><tbody><tr><td>Animation</td><td>ovdrassetid://18178100</td><td>Hit</td></tr></tbody></table>

### Tutorial

<table data-full-width="true"><thead><tr><th width="233.33331298828125">Step</th><th width="590">Task</th><th>Notes</th></tr></thead><tbody><tr><td><ol><li>Create ActionSequence</li></ol></td><td><ul><li>Add an Action Sequence instance under the ActionSequenceService.</li><li>Rename it to HitReaction.<br><img src="/files/fZMd4ZXuoJKRMJJbAczz" alt=""></li></ul></td><td><ul><li>The Action Sequence name must be unique.</li></ul></td></tr><tr><td><ol start="2"><li>Open ActionSequence Editor</li></ol></td><td><ul><li>Hover over the Action Sequence instance and click the Open button that appears.</li></ul></td><td><ul><li>Changes made during play mode are not applied immediately and will take effect after restarting.</li></ul></td></tr><tr><td><ol start="3"><li>Animation Track</li></ol></td><td><ul><li>Click the Add Track button to add an Animation Track.<br><img src="/files/5vdVYSlu2Q5IFNHSc0it" alt=""></li><li>Set the Ovdr Asset ID to the animation ID for the 1st hit.<br>(ovdrassetid://18178100)</li><li>Set Blend In / Out Time to 0.<br><img src="/files/yTdb2rIecIcn3qJYioOx" alt=""></li><li>Adjust the playback duration to match the actual animation length.<br><img src="/files/yj4NECtCO6jiygtZa5lp" alt=""></li></ul></td><td><ul><li>Press F to fit the timeline to the playback duration.</li></ul></td></tr><tr><td><ol start="4"><li>Preview</li></ol></td><td><ul><li>Press the Play button or Spacebar to play the timeline and check the animation.</li><li>Save your work.</li></ul></td><td></td></tr><tr><td><ol start="5"><li>Run ActionSequence</li></ol></td><td><ul><li><p>In the LocalScript under<br>StarterPlayer.StarterCharacterScripts,<br>add the following code created while making the 3-hit combo action:</p><pre class="language-lua"><code class="lang-lua">-- (continued from previous content)
local PlayButton2 = Instance.new("TextButton")
PlayButton2.Position = UDim2.new(0.5, 0, 0.1, 60)
PlayButton2.Text = "Play HitReaction"
PlayButton2.TextScaled = true
PlayButton2.Parent = ScreenGui
PlayButton2.Activated:Connect(function()
local character = LocalPlayer.Character
local humanoid = character:WaitForChild("Humanoid")
local actionRunner = humanoid:GetActionRunner()
local key = "HitReaction"local transitionTime = 0actionRunner:Play(key, transitionTime)print("Play : " .. key)	
end)
</code></pre></li><li>Run a play test.</li><li>Click the Play HitReaction button to execute the Action Sequence and verify that the action plays.</li><li>End the play test.</li></ul></td><td><ul><li>Action Sequences can also be executed in a LocalScript.</li></ul></td></tr><tr><td><ol start="6"><li>Configure Effects</li></ol></td><td><ul><li>Add a Part under the Action Sequence, then add a VFXPreset under the Part.<br><img src="/files/Vp1RPmRhS0UA60xuQjVk" alt=""></li><li>Rename the Part to ReactionFXPart, and the VFXPreset to BloodFX.<br><img src="/files/ygb5cVif4OOuygKX5p1F" alt=""></li><li>Set CanCollide of ReactionFXPart to false, and Transparency to 1.</li><li>Change the appearance of BloodFX to Blood, and set Enabled to false.<br><img src="/files/548PPnGDhKwM8z6QzU2E" alt=""></li><li>Add a Control Track.<br><img src="/files/YQhR7RyXwbqdUrdHBhCJ" alt=""></li><li>In the Ref Object field, click the reference link button, then select ReactionFXPart in the Level Browser.<br><img src="/files/0fIY22eE2UTPkJZegZuY" alt=""></li><li>Expand all Control Tracks so that the Value field of BloodFX is visible in the track list.</li><li>Add a keyframe in the Value area of the timeline.</li><li>Select the keyframe and set the Time field to 0.<br>(If the Value field is not false, set it to false.)<br><img src="/files/pyfCOCjfMISo49BRPIns" alt=""></li><li>Add another keyframe at the desired timing and set the Value to true.<br><img src="/files/E67oLrnG62Xh9XmFXqEP" alt=""></li><li>Click the Control Track and change the Relative Location field to (0, 100, 0).<br><img src="/files/VpfYITJKx2hNg0svdYmr" alt=""></li><li>Move the scrubber to check and adjust the effect position naturally.<br><img src="/files/9aTqI7clTftk1EPBynuh" alt=""></li><li>Save your work.</li></ul></td><td></td></tr><tr><td><ol start="7"><li>Play Hit Reaction on Attack Hit</li></ol></td><td><ul><li>Open the CollisionTrackScript under the 3-HitCombo Action Sequence.</li><li><p>Add the following code below <code>target.Health -= 40</code>:</p><pre class="language-lua"><code class="lang-lua">target.ActionRunner:Play("HitReaction")
</code></pre></li></ul></td><td></td></tr><tr><td><ol start="8"><li>Verify Result</li></ol></td><td><ul><li>Run a play test.</li><li>Move Player1’s character in front of Player2’s character, then press the Play 3-Hit Combo button to execute the Action Sequence. Verify that the hit reaction plays each time an attack lands.<br><img src="/files/Ad6RBhBKonLvU4Ymar7Z" alt=""></li></ul></td><td></td></tr></tbody></table>

## Healing Action

### Learning Outcomes

<figure><img src="/files/cNfNWRWqLOmeKAcztZi7" alt=""><figcaption></figcaption></figure>

By completing this tutorial, you will be able to create the following setup:

* Healing Effect Presentation
* Handle events at specific timings by using the Event Track.

### Asset List

<table><thead><tr><th width="140.9998779296875">Asset Type</th><th width="229">Asset ID</th><th>Description</th></tr></thead><tbody><tr><td>Animation</td><td>ovdrassetid://18884200</td><td>Spell Casting</td></tr></tbody></table>

### Tutorial

<table data-full-width="true"><thead><tr><th width="233.33331298828125">Step</th><th width="590">Task</th><th>Notes</th></tr></thead><tbody><tr><td><ol><li>Create ActionSequence</li></ol></td><td><ul><li>Add an ActionSequence instance under the ActionSequenceService.</li><li>Rename it to HealSpell.<br><img src="/files/3qxZ675ey4J8A0QjiqXz" alt=""></li></ul></td><td><ul><li>The ActionSequence name must be unique.</li></ul></td></tr><tr><td><ol start="2"><li>Open ActionSequence Editor</li></ol></td><td><ul><li>Hover over the ActionSequence instance and click the Open button that appears.</li></ul></td><td><ul><li>Changes made during play mode are not applied immediately and will take effect after restarting.</li></ul></td></tr><tr><td><ol start="3"><li>Animation Track</li></ol></td><td><ul><li>Click the Add Track button to add an Animation Track.<br><img src="/files/5vdVYSlu2Q5IFNHSc0it" alt=""></li><li>Set the Ovdr Asset ID to the animation ID for the 1st hit.<br>(ovdrassetid://18884200)</li><li>Set Blend In / Out Time to 0.<br><img src="/files/Z3MkRow0vXqII0XptMnz" alt=""></li><li>Change the Slot Type to Upper Body.</li></ul></td><td></td></tr><tr><td><ol start="4"><li>Preview</li></ol></td><td><ul><li>Press the Play button or Spacebar to play the timeline and check the animation.</li><li>Save your work.</li></ul></td><td></td></tr><tr><td><ol start="5"><li>Run ActionSequence</li></ol></td><td><ul><li><p>In the LocalScript under<br>StarterPlayer.StarterCharacterScripts,<br>add the following code created while making the 3-hit combo action:</p><pre class="language-lua"><code class="lang-lua">-- (continued from previous content)
local PlayButton3 = Instance.new("TextButton")
PlayButton3.Position = UDim2.new(0.5, 0, 0.1, 120)
PlayButton3.Text = "Play HealSpell"
PlayButton3.TextScaled = true
PlayButton3.Parent = ScreenGui
PlayButton3.Activated:Connect(function()
local character = LocalPlayer.Character
local humanoid = character:WaitForChild("Humanoid")
local actionRunner = humanoid:GetActionRunner()
local key = "HealSpell"local transitionTime = 0actionRunner:Play(key, transitionTime)print("Play : " .. key)	
end)
</code></pre></li><li>Run a play test.</li><li>Click the Play HealSpell button to execute the ActionSequence and verify that the action plays.<br><img src="/files/7kZhoZiZ4FZDz1iFE5Fd" alt=""></li><li>End the play test.</li></ul></td><td><ul><li>ActionSequence can also be executed in a LocalScript.</li></ul></td></tr><tr><td><ol start="6"><li>Configure Effects</li></ol></td><td><ul><li>Add a Part under the ActionSequence, then add a VFXPreset under the Part.<br><img src="/files/KrIeWgupQea34VZv146x" alt=""></li><li>Rename the Part to HealFXPart, and the VFXPreset to HealFX.<br><img src="/files/5C3tLvHAo2ZlYezQcB9g" alt=""></li><li>Set CanCollide of HealFXPart to false, and Transparency to 1.</li><li>Change the appearance of HealFX to Heal, and set Enabled to false.<br><img src="/files/rpODBZHAzbCrPoJk7RTk" alt=""></li><li>Add a Control Track.<br><img src="/files/Or6DWsRhS8p8AYOPfE71" alt=""></li><li>In the Ref Object field, click the reference link button, then select HealFXPart in the Level Browser.<br><img src="/files/FYf2ZgfxvYmVvngleaPU" alt=""></li><li>Expand all Control Tracks so that the Value field of HealFX is visible.</li><li>Add a keyframe in the Value area of the timeline.</li><li>Select the keyframe and set the Time field to 0.<br>(If the Value field is not false, set it to false.)<br><img src="/files/I86p86jlVzt0lfVd0h3r" alt=""></li><li>Add a keyframe at the timing when the animation ends, and set the Value field to true.<br><img src="/files/ADLzyQSV3V8psJPtDuWs" alt=""></li><li>Move the scrubber to check whether the effect position looks natural and adjust it if necessary.<br><img src="/files/m6Zc1TMKnGKBrI3OZAyp" alt=""></li><li>Save your work.</li></ul></td><td></td></tr><tr><td><ol start="7"><li>Set Playback Duration</li></ol></td><td><ul><li>Place the scrubber at 2 seconds and adjust the playback duration.<br><img src="/files/xAzM9IQH9IgfqAfpMmrQ" alt=""></li></ul></td><td></td></tr><tr><td><ol start="8"><li>Event Track</li></ol></td><td><ul><li>Add an Event Track.<br><img src="/files/XrVZFnYXQpqolbE2op3w" alt=""></li><li>Expand the Event Track so that the Value field is visible.</li><li>Add four keyframes after the last keyframe of the Control Track.<br>(These keyframes will be used in the script for healing processing.)<br><img src="/files/mfDCom3CAPHLoG2y4HyH" alt=""></li><li>Set the Collision Event Name of each keyframe to:<br>Heal1, Heal2, Heal3, Heal4<br><img src="/files/VezZ20HbB4M0RCgohc1H" alt=""></li><li>Save your work.</li><li>Add a Script under the ActionSequence and rename it to EventTrackScript.<br><img src="/files/5HdlCUbMVn5FfAgIgfFY" alt=""></li><li><p>Open the script and write the following to control the behavior:</p><pre class="language-lua"><code class="lang-lua">local ActionSequence = script.Parent
local HealAmount = 20
for i = 1, 5 do
ActionSequence:GetMarkerReachedSignal("Heal" .. i):Connect(function(self)
local humanoid = self:WaitForChild("Humanoid")
humanoid.Health += HealAmount
print("Health : ", humanoid.Health, " / ", humanoid.MaxHealth)
end)
end
</code></pre></li></ul></td><td></td></tr><tr><td><ol start="9"><li>Verify Result</li></ol></td><td><ul><li>Run a play test and verify the result.<br><img src="/files/EMqGJOgoT4eNUD3U39kO" alt=""></li></ul></td><td></td></tr></tbody></table>

## Learning Materials

{% content-ref url="/pages/RPRPR3s5FTaz7vkVpbsV" %}
[Principle of Operation](/manual/studio-manual/game-development/actionsequence/actionsequence-mechanism)
{% endcontent-ref %}

{% content-ref url="/pages/6dU7S750HQmRZYGyP8Rz" %}
[Track Types](/manual/studio-manual/game-development/actionsequence/actionsequence-track-types)
{% endcontent-ref %}

## Useful Resources

{% content-ref url="/pages/YK5NZVV1FAIHbrQSOuHF" %}
[Character Animation](/manual/studio-manual/character/character-animation)
{% endcontent-ref %}

{% content-ref url="/pages/I9x8awpfwVnbMuEAzGkg" %}
[Broken mention](broken://pages/I9x8awpfwVnbMuEAzGkg)
{% endcontent-ref %}


# Object


# Part

## Overview <a href="#overview" id="overview"></a>

<figure><img src="/files/ud47xBuqDMPUqyLGfkyG" alt=""><figcaption></figcaption></figure>

A Part is the most fundamental element that makes up the world of OVERDARE. All visual objects placed in the world consist of **Parts** and **MeshParts**. A Part defines the appearance of an object through various properties such as position, rotation, size, color, and texture, and it can also define physical properties such as gravity, friction, and collision.

Parts are world objects provided in basic shapes such as cubes, spheres, and cylinders. Creators can use these basic shapes to construct and arrange models.

## Properties <a href="#properties" id="properties"></a>

Part properties are broadly categorized into three types.

### Appearance <a href="#appearance" id="appearance"></a>

* CastShadow: Determines whether the Part casts a shadow.
* Shape: Sets the basic shape of the Part (e.g., box, sphere, cylinder).
* Color: Sets the color of the Part.
* Material: Defines the surface texture of the Part (e.g., plastic, metal).
* Transparency: Adjusts the transparency of the Part.

### Transform <a href="#transform" id="transform"></a>

* CFrame
  * Position: Defines the Part’s world coordinates.
  * Orientation: Sets the rotation direction of the Part.
* Size: Adjusts the size of the Part.

### Physical Properties <a href="#physical-properties" id="physical-properties"></a>

* Anchored: Fixes the Part in place to prevent movement.
* CanCollide: Determines whether the Part collides with other objects.
* Massless: Specifies whether the Part’s mass is ignored in physics simulations.

### Other Properties

* CanClimb: Enables Climbing when turned on. When CanClimb is turned on, the character will switch to a Climbing state upon contact, allowing them to scale the wall surface of the Part.

## Relationship Between CFrame, Origin, and Pivot <a href="#relationship-between-cframe-origin-and-pivot" id="relationship-between-cframe-origin-and-pivot"></a>

### CFrame <a href="#cframe" id="cframe"></a>

* CFrame stands for **Coordinate Frame** and is a data type that includes an object’s **position** and **orientation** information.
* CFrame is used to position or rotate objects in 3D space. For example, it can place an object at a specific location while orienting it in a certain direction.
* **CFrame.Position** extracts only the position of an object from CFrame and is represented as a Vector3 data type.
* CFrame has the following characteristics:
  * Can handle both position and orientation simultaneously.
  * Allows an object to face a specific direction.
    * Example: `CFrame.new(startPosition, targetPosition)`
  * Efficient in terms of performance and suitable for various mathematical operations (e.g. applying offsets and linear interpolation.)

### Origin <a href="#origin" id="origin"></a>

* Origin represents the **pivot point** of an object, serving as its default rotation center.
* Origin exists separately from CFrame and is mainly used to adjust or reference the pivot position of a Model or Part.
* The Origin information can be manipulated using the **PivotTo()** function or the **GetPivot()** function. These functions allow adjusting an object’s position and rotation based on its pivot point.
* Origin has the following characteristics:
  * The pivot point may not always be the object’s center (it can be manually set).
  * Useful for moving or rotating all objects under a parent Model.
  * Cannot be directly modified via scripts but can be adjusted indirectly using functions like **PivotTo()**.

## Adding and Modifying Parts <a href="#adding-and-modifying-parts" id="adding-and-modifying-parts"></a>

In OVERDARE Studio, Parts can be added by clicking the **Home - Add button** and selecting the desired shape.

<figure><img src="/files/qHE7TW3RkCEqbTcyfwy1" alt=""><figcaption></figcaption></figure>

A placed Part can have its shape easily changed without being deleted by modifying the **Shape property** in the Properties window.

<figure><img src="/files/jK7FMZ4VhFQqzOgMlts3" alt=""><figcaption></figcaption></figure>

## Part's CanClimb Option <a href="#part-canclimb" id="part-canclimb"></a>

The CanClimb option allows you to explicitly designate a Part as an Object that allows Climbing.

When a character comes into contact with a Part that has CanClimb enabled, they enter a Climbing state and can scale the wall.

However, even if CanClimb is enabled, the character will not enter the Climbing state if the slope of the wall they're facing is less than the MaxSlopeAngle defined in GameSettings. Instead, they'll walk or run along the inclined wall.

If you modify the CanClimb option using a LocalScript, the change only applies to that specific Client and will not Replicate to the server or other players. This can be used to allow only certain players to scale walls.

If the CanClimb option is changed on the server, the updated Climb state is Replicated to all clients, allowing every player to see the change.


# Model

## Overview <a href="#overview" id="overview"></a>

A Model is an object that groups multiple objects together so they can be **affected by physics collectively** and controlled as a single unit. This allows individual objects to be treated as one entity or for specific actions to be applied simultaneously.

## Properties <a href="#properties" id="properties"></a>

### Primary Part <a href="#primary-part" id="primary-part"></a>

This property sets the Part that will act as the center of the Model. For Character Models, the PrimaryPart is the HumanoidRootPart.

### Transform <a href="#transform" id="transform"></a>

* Origin
  * Position: Defines the world coordinates of the Model.
  * Orientation: Sets the rotation direction of the Model.

When the PrimaryPart is not set, the Origin is arbitrary. When the PrimaryPart is set, the Origin is based on the PrimaryPart.

## Grouping Objects into a Model <a href="#grouping-objects-into-a-model" id="grouping-objects-into-a-model"></a>

To group objects, select the objects you want to group, right-click, and click **Group As a Model** (or press Ctrl + G).

![Group As a Model.png](/files/2eqTZtDWbHy2rqYYyW3d)

When objects are grouped into a Model, clicking on a **Part within the Model** in the Viewport will select the entire Model instead of the individual Part. To select only the Part, **hold the Alt key** while clicking. To select multiple Parts within the Model, hold **Alt + Ctrl** while clicking.


# Camera

## Overview

In a game, the camera provides a **virtual viewpoint or perspective** that allows players to observe and interact with the game world. Like a real-world camera, the game camera is a crucial tool that conveys the virtual environment, character actions, and events to the player, significantly influencing the game’s immersion and player enjoyment.

The camera goes beyond simply illuminating a scene; it uses various techniques such as **movement** and **rotation** to deliver a rich experience to the player. By emphasizing visual effects or dramatically showcasing specific events, it maximizes the game’s atmosphere and **immersion**. It is also a **tool for effectively conveying various intended experiences**, as well as interactions between characters and the environment.

The camera’s perspective can completely change the way a game is played. For example, in **shooter games**, the camera perspective can provide entirely different gameplay experiences:

* **Top-Down View (TOP-View)**: Simple aiming and shooting makes it suitable for fast-paced action.
* **TPS (Third-Person Perspective) / FPS (First-Person Perspective)**: Requires more precise vision and tactical play, enhancing immersion in combat.

Thus, the camera’s perspective is not just a visual tool but a critical element that can alter the **core fun and strategy** of a game.

## Properties <a href="#properties" id="properties"></a>

<table><thead><tr><th width="246.6666259765625">속성</th><th>설명</th></tr></thead><tbody><tr><td>CFrame</td><td>The camera’s position and orientation</td></tr><tr><td>Focus</td><td>Currently not supported.</td></tr><tr><td>FieldOfView</td><td>The camera’s field of view (0 &#x3C; FOV &#x3C; 180)</td></tr><tr><td>ViewportSize</td><td>The size of the screen viewed through the camera</td></tr><tr><td>CameraSubject</td><td>The object the camera is focused on</td></tr><tr><td>CameraType</td><td>The type of camera</td></tr></tbody></table>

## How to Use the Camera <a href="#how-to-use-the-camera" id="how-to-use-the-camera"></a>

### Modifying Camera Properties <a href="#modifying-camera-properties" id="modifying-camera-properties"></a>

To directly adjust the camera, you need to edit the settings through **scripting**. While you can temporarily change values using the properties provided in the editor, **actual camera settings must be applied through code (script) to reflect the changes**.

### Specifying Camera Type <a href="#specifying-camera-type" id="specifying-camera-type"></a>

The camera can currently only be manipulated for **Custom** and **Scriptable** types.

* **CFrame** will not be modified unless the camera type is Scriptable, they are automatically determined by the default camera type.
* Using the Scriptable type allows for more detailed adjustments and control.

### Zooming In/Out Using FieldOfView and CFrame <a href="#zooming-inout-using-fieldofview-and-cframe" id="zooming-inout-using-fieldofview-and-cframe"></a>

FieldOfView is a key property for adjusting the camera’s field of view. It can be used to implement various custom camera effects:

* Reducing FOV provides a **Zoom-In** effect.
* Increasing FOV creates a **Wide-Angle** effect, similar to shooting with a wide-angle lens.

There are two ways to implement zooming in/out for your subject (e.g., the player):

* **Camera Position Adjustment:** Moving the camera forward or backward to achieve the zoom effect.
* **FieldOfView Adjustment:** Changing the field of view to implement zooming, which may introduce **screen distortion**.

Each method has its own characteristics, so the choice depends on the implementation goal. For example, to minimize distortion, use camera movement; for a stylish effect, use FOV adjustment.

🎥 Below are examples of zoom effects applied to the same subject using both methods:

* **Camera Movement Method:** Natural zooming in and out.
  * When zooming in/out, objects closer to the camera scale more noticeably, while distant objects show little change in size.
* **FOV Adjustment Method:** Distorted spatial perception when zooming in and out.
  * When zooming in/out, both near and distant objects scale similarly.
  * When zooming in, distant objects appear closer, creating a distorted effect.

<figure><img src="/files/1qC3H3Fl0IesTq7OhwRq" alt=""><figcaption><p>Default Subject Screen</p></figcaption></figure>

<figure><img src="/files/Eo5sKkNuTig45obgbjm1" alt=""><figcaption><p>On the left, the camera is moved closer to the character. On the right, the camera's FOV is set to 30 degrees.</p></figcaption></figure>

* If you look at the zoomed-in state, the size of the trees in the background behind the character doesn’t change much with the camera movement method, whereas with the FOV method, the trees in the background seem much larger and closer.

<figure><img src="/files/QyNYoJgsgj36AXXCIdrf" alt=""><figcaption><p>On the left, the camera is moved far away from the character. On the right, the camera's FOV is set to 120 degrees.</p></figcaption></figure>

* In the zoomed out state, you can see that the size change of the trees is not noticeable when the camera is moved, while the background size seem much smaller when the FOV is changed.

<figure><img src="/files/4fMJawKTvWjXa2tbj1h6" alt=""><figcaption><p>The camera's FOV is set to 160 degrees.</p></figcaption></figure>

* When the field of view is increased to a significant level, the screen exhibits severe distortion at the edges, similar to a fish-eye lens effect.

### Setting CameraSubject <a href="#setting-camerasubject" id="setting-camerasubject"></a>

The **CameraSubject** property specifies the subject the camera focuses on.

* **By default**, this is set to the player character.
* You can assign specific objects as the subject to create various effects.

<figure><img src="/files/jYq4NC7U1uDK2QX0XKI3" alt=""><figcaption><p>By changing the Subject to a red boxed Part, you can get a fixed camera effect at the cube position.</p></figcaption></figure>

{% embed url="<https://files.gitbook.com/v0/b/gitbook-x-prod.appspot.com/o/spaces%2FhRPi87oM9ttlk5nyu7L7%2Fuploads%2FTeVg52BtOt8RLam6NJou%2F2025-03-10%2014-40-24.mp4?alt=media&token=5d829807-2e84-49a0-8983-0af65c4d4de2>" %}

The camera movement that is locked to a Part position. The camera no longer follows the character.

## Usage Examples <a href="#usage-examples" id="usage-examples"></a>

### Top-down View Camera <a href="#top-down-view-camera" id="top-down-view-camera"></a>

{% embed url="<https://files.gitbook.com/v0/b/gitbook-x-prod.appspot.com/o/spaces%2FhRPi87oM9ttlk5nyu7L7%2Fuploads%2FZrhMCxcBDz3fLJO4WH3H%2F2025-03-10%2017-27-23.mp4?alt=media&token=4951133c-2b00-445b-a03f-6f0b3826c01f>" %}

The top-down view camera has the following characteristics:

* Provides a bird’s-eye view, looking down at the character from above.
* The camera follows the character at all times, keeping them centered or at a specific position on the screen.
* The camera does not rotate regardless of the character’s movement, reducing fatigue or motion sickness.
* Offers a wide field of view, suitable for tactical and strategic games.
* However, it can lead to a monotonous game screen, which can be boring.
* Typically, a player positioned higher on the screen can hide their character behind a wall, while it is difficult for a lower-positioned player to spot them.

To implement a top-down view, the following functionalities must be completed:

* Using a Scriptable Camera to always track the player character’s position
* Updating the camera’s position and viewing angle based on the character’s position

```lua
local Workspace = game:GetService("Workspace")
local RunService= game:GetService("RunService")
local Players = game:GetService("Players")

local Camera = Workspace.CurrentCamera
Camera.CameraType = Enum.CameraType.Scriptable

-- Acquiring the player character
local Character = Players.LocalPlayer.Character
Camera.CameraSubject = Character

-- Updating the Camera's CFrame Based on Character Position for each render step of the RunService
RunService.RenderStepped:Connect(function()
    local cameraPos = Character.HumanoidRootPart.Position + (Vector3.new(0, 0.5, 1) * 1200)	
    Camera.CFrame = CFrame.new(cameraPos.X, cameraPos.Y, cameraPos.Z) * CFrame.Angles(math.rad(-30), 0, 0)	
end)
```

### TPS Camera <a href="#tps-camera" id="tps-camera"></a>

{% embed url="<https://files.gitbook.com/v0/b/gitbook-x-prod.appspot.com/o/spaces%2FhRPi87oM9ttlk5nyu7L7%2Fuploads%2FlaNy401W9EPpWtRV3Oqp%2F2025-03-10%2015-07-29.mp4?alt=media&token=7b623c15-5042-4633-813d-f0ceb1bd86da>" %}

* Offers a perspective close to first-person while allowing the player to see their own character.
* The camera’s view remains clear even if the character’s body is blocked by objects, providing an open and unobstructed feel.
* Provides a broader field of view compared to FPS cameras while supporting free camera rotation.
* Provides long-distance visibility, allowing players to see distant objects clearly.

However,

* The camera’s direction (or crosshair) may not align with the character’s direction. In shooting games, this requires additional handling to ensure accurate targeting.
* (For example, while the crosshair may show an enemy clearly, the character’s position might be blocked by walls or objects, making it impossible to hit the target)
* Players can hide behind walls, remaining hidden from their opponent’s view while still being able to see their opponent. This kind of information asymmetry can lead to unfair gameplay in PvP scenarios.

<figure><img src="/files/7ItUyEvPKBIhPV55gaCp" alt=""><figcaption><p>The default Custom type camera will have the character front and center in the camera, with the crosshair covered by the character.</p></figcaption></figure>

<figure><img src="/files/EBWZR680YhRB60Z83hdq" alt=""><figcaption><p>To work as a TPS shooter, the center of the camera must be angled away from the character.</p></figcaption></figure>

TPS cameras can be easily implemented using the **CameraOffset** property of Camera.

```lua
local Workspace = game:GetService("Workspace")
local Camera = Workspace.CurrentCamera

Camera.CameraOffset = Vector3.new(90, 90, -120)
```


# Physics

## Overview <a href="#overview" id="overview"></a>

The Anchored property allows you to enable or disable whether a Part is affected by physics. Additionally, using physics-based objects like LinearVelocity or AngularVelocity allows for more precise control over the physical movement and rotation of Parts.

## Disabling Physics Anchor <a href="#disabling-physics-anchor" id="disabling-physics-anchor"></a>

In OVERDARE Studio, the **Anchored** property determines whether an object is fixed in place. By default, newly added Parts have physics **disabled** for performance optimization.

To apply physics effects, select the Part and disable the **Anchored** property.

<figure><img src="/files/wxEiBBqNLe4IuDZ7nwGo" alt=""><figcaption></figcaption></figure>

When the Anchored property is disabled, the object will be affected by physical forces and gravity.

<figure><img src="/files/S6UMaaAZK0n3kxoYc8el" alt=""><figcaption></figcaption></figure>

## LinearVelocity <a href="#linearvelocity" id="linearvelocity"></a>

**LinearVelocity** is a physics object that applies a constant linear velocity to an object. This allows the object to move continuously in a specific direction, even when influenced by external forces like gravity or collisions.

### How to Use <a href="#how-to-use" id="how-to-use"></a>

To use LinearVelocity, the Part must have an **Attachment**. First, add an Attachment to the Part, and set the Attachment in the LinearVelocity properties window. Next, specify the physical force (direction of movement) in the **Vector Velocity** property, and the Part will move in that direction.

<figure><img src="/files/3xbOQiNEDkk479ag54eJ" alt=""><figcaption></figcaption></figure>

If the physics effect is not applied, ensure the **Anchored** property of the Part is **disabled**!

### Properties <a href="#properties" id="properties"></a>

<table><thead><tr><th width="212">Property</th><th>Description</th></tr></thead><tbody><tr><td>Force Limit Mode</td><td><p>Sets how the applied force is limited.</p><ul><li>Magnitude: Limits force based on the total vector magnitude</li><li>PerAxis: Allows individual force limits for the X, Y, and Z axes</li></ul></td></tr><tr><td>Max Axes Force</td><td>When Force Limit Mode is "PerAxis," sets the maximum force for each axis.</td></tr><tr><td>Max Force</td><td>When Force Limit Mode is "Magnitude," sets the maximum force that LinearVelocity can apply (in newtons).</td></tr><tr><td>Force Limits Enabled</td><td><p>Determines whether Max Axes Force or Max Force limits are enabled.</p><ul><li>true: Applies the set maximum force limits</li><li>false: No force limits (default)</li></ul></td></tr><tr><td>Relative To</td><td><p>Defines the reference coordinate system for the applied velocity.</p><ul><li>Attachment 0: Applies velocity relative to the first attachment (Attachment0)</li><li>Attachment 1: Applies velocity relative to the second attachment (Attachment1)</li><li>World: Applies velocity based on the world coordinates</li></ul></td></tr><tr><td>Velocity Constraint Mode</td><td><p>Determines how velocity is applied.</p><ul><li>Vector: Directly sets a specific vector velocity (default).</li><li>Line: Sets velocity along a specific line direction</li><li>Plane: Sets velocity within a specific plane.</li></ul></td></tr><tr><td>Line Direction</td><td>When Velocity Constraint Mode is set to "Line," defines the vector direction of movement.</td></tr><tr><td>Line Velocity</td><td>When Velocity Constraint Mode is set to "Line," defines the magnitude of velocity along the line direction.</td></tr><tr><td>Plane Velocity</td><td>When Velocity Constraint Mode is set to "Plane," defines velocity within the plane.</td></tr><tr><td>Primary Tangent Axis</td><td>When Velocity Constraint Mode is set to "Plane," defines the primary tangent axis that determines movement within the plane.</td></tr><tr><td>Secondary Tangent Axis</td><td>When Velocity Constraint Mode is set to "Plane," defines the secondary tangent axis, which must be perpendicular to the primary tangent axis.</td></tr><tr><td>Vector Velocity</td><td>When Velocity Constraint Mode is set to "Vector," specifies the velocity vector to be applied to the object.</td></tr><tr><td>Attachment 0</td><td>Sets the attachment point for LinearVelocity.</td></tr><tr><td>Attachment 1</td><td>Sets the attachment point for LinearVelocity.</td></tr></tbody></table>

### Script Feature <a href="#script-feature" id="script-feature"></a>

```lua
local Part = script.Parent
Part.Anchored = false

local Attachment = Instance.new("Attachment")
Attachment.Parent = Part

local LinearVelocity = Instance.new("LinearVelocity")
LinearVelocity.Attachment0 = Attachment
LinearVelocity.RelativeTo = Enum.ActuatorRelativeTo.World 
LinearVelocity.VectorVelocity = Vector3.new(1000, 0, 0) 
LinearVelocity.MaxForce = 10
LinearVelocity.Parent = Part
```

## VectorForce

VectorForce is a physics object that continuously applies force and acceleration to an object, allowing for gradual change of an object's speed, creating natural movement.

### How to Use

To use VectorForce, the Part must have an **Attachment**. First, add an Attachment to the Part, and set the Attachment in the VectorForce properties window. Next, specify the physical force (direction of movement) in the **Force** property, and the Part will move in that direction.

<figure><img src="/files/FYK1liNUz5CLVs8FHMZo" alt=""><figcaption></figcaption></figure>

If the physics effect is not applied, ensure the **Anchored** property of the Part is **disabled**!

### Properties

<table><thead><tr><th width="212">Property</th><th>Description</th></tr></thead><tbody><tr><td>Force</td><td>Sets the magnitude and direction of the force.</td></tr><tr><td>Apply at Center of Mass</td><td><p>Sets where the force is applied.</p><p>When disabled, the force is applied to the Object's center (center of mass). When enabled, the force is applied at Attachment0's position, which may cause rotation if not at the center.</p></td></tr><tr><td>Relative To</td><td><p>Sets the reference coordinate system for applying force.</p><ul><li>Attachment 0: Applies velocity relative to the first attachment (Attachment0)</li><li>Attachment 1: Applies velocity relative to the second attachment (Attachment1)</li><li>World: Applies velocity based on the world coordinates</li></ul></td></tr><tr><td>Attachment 0</td><td>Sets the attachment point to which VectorForce is applied.</td></tr><tr><td>Attachment 1</td><td>Sets the attachment point to which VectorForce is applied.</td></tr></tbody></table>

### Script Feature <a href="#script-feature-1" id="script-feature-1"></a>

```lua
local Part = script.Parent
Part.Anchored = false

local Attachment = Instance.new("Attachment")
Attachment.Parent = Part

local VectorForce = Instance.new("VectorForce")
VectorForce.Attachment0 = Attachment
VectorForce.RelativeTo = Enum.ActuatorRelativeTo.World 
VectorForce.Force = Vector3.new(500000, 0, 0) 
VectorForce.Parent = Part
```

## AngularVelocity <a href="#angularvelocity" id="angularvelocity"></a>

**AngularVelocity** is a physics object that applies rotational velocity to an object, allowing it to rotate at a constant speed.

### How to Use <a href="#how-to-use-1" id="how-to-use-1"></a>

To use AngularVelocity, the Part must have an **Attachment**. First, add an Attachment to the Part, and set the Attachment in the AngularVelocity properties window. Next, specify the physical force (rotation direction) in the **Angular Velocity** property, and the Part will rotate in that direction.

<figure><img src="/files/vWCAFoFc4sRoaDz6FUd9" alt=""><figcaption></figcaption></figure>

If the physics effect is not applied, ensure the **Anchored** property of the Part is **disabled**!

### Properties <a href="#properties-1" id="properties-1"></a>

<table><thead><tr><th width="212">Property</th><th>Description</th></tr></thead><tbody><tr><td>Angular Velocity</td><td>A vector that defines the rotational velocity applied to the object.<br>(You can set the rotational speed for the X, Y, and Z axes in radians per second (rad/s).)</td></tr><tr><td>Max Torque</td><td>Sets the maximum rotational force (torque) that can be applied to the object.<br>(If this value is too small, the object may not reach the desired rotational speed.)</td></tr><tr><td>Relative To</td><td><p>Determines the coordinate system for applying rotational velocity.</p><ul><li>Attachment 0: Applies rotation relative to the first attachment point (Attachment0)</li><li>Attachment 1: Applies rotation relative to the second attachment point (Attachment1)</li><li>World: Applies rotation based on the world coordinates</li></ul></td></tr><tr><td>Attachment 0</td><td>Sets the attachment point to which AngularVelocity is applied.</td></tr><tr><td>Attachment 1</td><td>Sets the attachment point to which AngularVelocity is applied.</td></tr></tbody></table>

### Script Feature <a href="#script-feature-1" id="script-feature-1"></a>

```lua
local Part = script.Parent
Part.Anchored = false

local Attachment = Instance.new("Attachment")
Attachment.Parent = Part

local AngularVelocity = Instance.new("AngularVelocity")
AngularVelocity.Attachment0 = Attachment
AngularVelocity.AngularVelocity = Vector3.new(0, 3, 0) 
AngularVelocity.MaxTorque = math.huge 
AngularVelocity.RelativeTo = Enum.ActuatorRelativeTo.World
AngularVelocity.Parent = Part
```

## Applying Physics to Humanoid <a href="#applying-physics-to-humanoid" id="applying-physics-to-humanoid"></a>

### LinearVelocity

```lua
local Attachment = Instance.new("Attachment")
Attachment.Parent = HumanoidRootPart

local LinearVelocity = Instance.new("LinearVelocity")
LinearVelocity.Attachment0 = Attachment
LinearVelocity.RelativeTo = Enum.ActuatorRelativeTo.World 
LinearVelocity.VectorVelocity = Vector3.new(0, 0, -500) 
LinearVelocity.MaxForce = 10
LinearVelocity.Parent = HumanoidRootPart	
```

### VectorForce

```lua
local Attachment = Instance.new("Attachment")
Attachment.Parent = HumanoidRootPart

local VectorForce = Instance.new("VectorForce")
VectorForce.Attachment0 = Attachment
VectorForce.RelativeTo = Enum.ActuatorRelativeTo.World
VectorForce.Force = Vector3.new(1000, 0, 0) 
VectorForce.Parent = HumanoidRootPart
```

### AngularVelocity

```lua
local Attachment = Instance.new("Attachment")
Attachment.Parent = HumanoidRootPart

local AngularVelocity= Instance.new("AngularVelocity")
AngularVelocity.Attachment0 = Attachment
AngularVelocity.RelativeTo = Enum.ActuatorRelativeTo.World
AngularVelocity.MaxTorque = 1000
AngularVelocity.AngularVelocity = Vector3.new(0, 10, 0) 
AngularVelocity.Parent = HumanoidRootPart
```

### ApplyImpulse

```lua
local LookVector = HumanoidRootPart.CFrame.LookVector
HumanoidRootPart:ApplyImpulse(LookVector * 100000)
```

### AssemblyLinearVelocity

```lua
local LookVector = HumanoidRootPart.CFrame.LookVector
HumanoidRootPart.AssemblyLinearVelocity = LookVector * 1500
```


# Lighting

## Overview <a href="#overview" id="overview"></a>

Lighting plays a crucial role in game design, serving not only as a tool for visual representation but also as a key mechanism that can completely transform the player’s experience. In the early days of game development, the technical implementation of lighting was limited. However, as technology advanced, lighting has become increasingly important not only for visual aesthetics but also for interaction, storytelling, immersion, and guiding player behavior.

OVERDARE Studio provides a variety of lighting solutions to deliver a complete gaming experience. Lighting services are broadly divided into **local lighting** and **global lighting**, each with its own characteristics and uses to meet diverse game design needs.

## **Local Lighting (Point Light** and **Spotlight)** <a href="#local-lighting-point-light-and-spotlight" id="local-lighting-point-light-and-spotlight"></a>

Local lighting operates within specific areas, applying light effects only where necessary. This makes it an effective tool for emphasizing certain elements in gameplay and level design or directing the player’s attention.

* **Point Light**: Emits light in all directions from a single point. It is ideal for illuminating small areas, such as highlighting an item or lighting up a small room.
* **Spotlight**: A light that radiates in a specific direction, providing focused lighting on narrow areas or important parts. Its conical light effect is commonly used for stage lighting or boss enemy introduction scenes.

### Lighting Properties <a href="#lighting-properties" id="lighting-properties"></a>

Local lighting is limited to specific locations and is used to express the atmosphere of particular places or objects. It plays a vital role in creating special sensory effects during gameplay and is often used to guide players to focus on specific areas.

#### **1.1. Point Light**

A point light emits light in all directions from a single point, acting as an omnidirectional light source.

<table><thead><tr><th width="247">Property</th><th>Description</th></tr></thead><tbody><tr><td>Range</td><td>The range the light covers</td></tr><tr><td>Brightness</td><td>The intensity of the light</td></tr><tr><td>Color</td><td>The color of the light</td></tr><tr><td>Shadows</td><td>Whether the light creates shadow effects</td></tr></tbody></table>

#### **1.2. Spotlight**

A spotlight emits light in a specific direction, forming a cone-shaped illumination area for a more precise control over lighting.

<table><thead><tr><th width="247">Property</th><th>Description</th></tr></thead><tbody><tr><td>Angle</td><td>The spread angle of the light</td></tr><tr><td>Face</td><td>The direction the light is cast towards</td></tr><tr><td>Angle</td><td>The range the light covers</td></tr><tr><td>Brightness</td><td>The intensity of the light</td></tr><tr><td>Color</td><td>The color of the light</td></tr><tr><td>Shadows</td><td>Whether the light creates shadow effects</td></tr></tbody></table>

### Placing lights in OVERDARE Studio <a href="#placing-lights-in-overdare-studio" id="placing-lights-in-overdare-studio"></a>

Local lighting is used to highlight specific areas in the game or customize lighting effects. To implement this, **lighting instances** must be placed as children of specific objects (e.g., Part). Follow the steps below to place and adjust lighting.

1. **Preparing for Light Placement**

   To place lighting, first create a **Part** in the Workspace. A Part is a basic object that can have lighting instances like **SpotLight** or **PointLight** as its children.
2. **Adding Lighting Instances**

   Add a SpotLight or PointLight as a child of the created Part. This allows you to set the light’s position, direction, and range relative to the Part.

   <figure><img src="/files/a54JjkHJe2cfLv04a4id" alt=""><figcaption></figcaption></figure>

   <figure><img src="/files/2UfNnsLNXN94njrBqiLr" alt=""><figcaption></figcaption></figure>
3. **Adjusting Light Position and Direction**

   Move or rotate the placed Part to easily adjust the light’s position and angle. Moving the Part changes the light’s center position, and using the Orientation property allows for more precise angle adjustments.\\

   <figure><img src="/files/24r0UlPRUwKdPdmkPiS1" alt=""><figcaption></figcaption></figure>

   <figure><img src="/files/Ei29ouYWYKm5tpMgcjKH" alt=""><figcaption></figcaption></figure>
4. **Setting Light Properties**

   The lighting instance added as a child of the Part can be customized through various attributes:

   * **Direction**: Can be set in 6 directions (up, down, left, right, front, back) relative to the Part.
   * **Color, Range, and Brightness:** Modify the instance’s properties to set the light’s color, range, and brightness in detail.
5. **Verifying Light Placement**

   Move the Part and lighting instance together to ensure proper alignment within the level design. This helps developers achieve the best lighting effects for their environment.

## **Global Lighting** <a href="#global-lighting-lighting-service" id="global-lighting-lighting-service"></a>

Global lighting affects the entire map, playing a crucial role in defining the game’s overall mood and style.

* A dark global lighting creates a sense of tension, encouraging players to explore cautiously.
* Conversely, bright global lighting fosters a festive and vibrant atmosphere, making the world feel open and inviting. OVERDARE provides powerful global lighting solutions, including brightness adjustments, time-of-day settings (day and night), and color control.

### **Lighting Service** Properties

Lighting Services provide functionality to control global lighting. Global lighting is applied evenly across the entire game, adjusting the overall atmosphere of the game map and significantly impacting the game environment.

<table><thead><tr><th width="247">프로퍼티</th><th>설명</th></tr></thead><tbody><tr><td>ClockTime</td><td>Allows for day and night representation by setting the time. The direction and intensity of the global lighting are adjusted according to the time of day.</td></tr><tr><td>Saturation</td><td>Adjusts the saturation level of the global color. Lower values result in a duller look, while higher values produce more vivid and vibrant colors.</td></tr><tr><td>Contrast</td><td>Adjusts the contrast of the sky to enhance the depth of clouds, atmosphere, and colors, thereby increasing visual immersion.</td></tr><tr><td>Night Brightness</td><td>Sets the overall lighting brightness during nighttime. Used to create a dark atmosphere or simulate moonlight effects.</td></tr><tr><td>Auto Time Cycle</td><td>Enables automatic cycling of day and night phases. When activated, time progresses naturally based on the Time Flow Speed. Note that time progression applies only during runtime.</td></tr><tr><td>Time Flow Speed</td><td>Sets the speed at which the day/night cycle progresses. Higher values result in shorter time intervals between changes.</td></tr><tr><td>Real Time Day Duration</td><td>The actual duration of the day/night cycle based on the current Time Flow Speed. <em>(Read-only, e.g., 20 m / 00 s)</em></td></tr><tr><td>Sun Path Angle</td><td>Sets the angle of the sun's path. Used to simulate seasonal sun elevation or the direction of sunlight.</td></tr><tr><td>Sun Max Height</td><td>Sets the maximum elevation (height) the sun can reach.</td></tr><tr><td>Sun Light Color</td><td>Specifies the color of sunlight. Used to recreate the natural lighting of daytime.</td></tr><tr><td>Sun Brightness</td><td>Sets the brightness of the sunlight. Higher values produce stronger daylight effects.</td></tr><tr><td>Sun Cast Shadow</td><td>Determines whether the sunlight casts shadows.</td></tr><tr><td>Moon Path Angle</td><td>Sets the angle of the moon's path. Used to simulate changes in the moon's orbit or position.</td></tr><tr><td>Moon Max Height</td><td>Sets the maximum elevation the moon can reach.</td></tr><tr><td>Moon Cast Shadow</td><td>Determines whether the moonlight casts shadows.</td></tr><tr><td>Moon Brightness</td><td>Adjusts the brightness of the moonlight.</td></tr><tr><td>Moon Light Color</td><td>Specifies the color of moonlight. Used to recreate the natural lighting of nighttime.</td></tr><tr><td>Moon Material Color</td><td>Sets the surface color of the moon and the color of surrounding clouds.</td></tr><tr><td>Moon Phase</td><td>Adjusts the moon's phase (full moon, half moon, crescent, etc.) to change its appearance.</td></tr><tr><td>Star Brightness</td><td>Sets the brightness of stars, determining how visible they appear in the night sky.</td></tr><tr><td>Stars Color</td><td>Specifies the color of starlight.</td></tr><tr><td>Ambient Sky Brightness</td><td>Sets the ambient light brightness for both day and night.</td></tr><tr><td>Ambient Sky Color</td><td>Specifies the sky color for both day and night.</td></tr><tr><td>Ground Reflection Color</td><td>Adjusts the color of light reflected from the ground.</td></tr><tr><td>Sky Color Influence</td><td>Controls how much the fog reflects the sky color.</td></tr></tbody></table>

### Atmosphere Properties

Atmosphere Services provide control over the overall look and feel of the sky and atmosphere. By adjusting in-game elements such as sky color, fog, clouds, and air density, it enhances depth and realism in the sky. Along with lighting, it plays a key role in setting the overall mood of the game environment.

<table><thead><tr><th width="247">프로퍼티</th><th>설명</th></tr></thead><tbody><tr><td>Air Color</td><td>Adjusts the overall tint of the atmosphere.</td></tr><tr><td>Fog Density</td><td>Sets the density of the fog. Higher values result in heavier, more obscured visibility.</td></tr><tr><td>Fog Falloff</td><td>Adjusts how quickly the fog fades over distance. Lower values cause a gradual fade, while higher values make the fog dissipate more abruptly.</td></tr><tr><td>Fog Start</td><td>Specifies the distance from the camera at which the fog begins.</td></tr><tr><td>Fog Color</td><td>Sets the color of the fog. Can be adjusted to match the mood or time of day.</td></tr><tr><td>Fog Horizon</td><td>When enabled, the skybox is excluded from the fog effect.</td></tr><tr><td>Haze Color</td><td>Specifies the color of light scattering caused by particles in the atmosphere.</td></tr><tr><td>Haze Spread</td><td>Adjusts the intensity of light scattering caused by particles in the atmosphere.</td></tr><tr><td>Glare Falloff</td><td>Controls the intensity of sunlight or moonlight scattering in the atmosphere.</td></tr><tr><td>Glare Color</td><td>Specifies the atmospheric scattering color of sunlight or moonlight.</td></tr><tr><td>Cloud Amount</td><td>Adjusts the amount and density of clouds.</td></tr><tr><td>Cloud Texture</td><td>Specifies the cloud texture. Used to define the shape, texture, and density of the clouds.</td></tr><tr><td>Cloud Speed</td><td>Sets the speed at which clouds move. Useful for simulating strong winds or slow drifting skies.</td></tr></tbody></table>

### Vertex Fog – Important Notes

When using **imported low-poly meshes** instead of the default Baseplate or BasePart (which internally apply LOD), **Fog quality may degrade** depending on the mesh’s vertex count.

To avoid this issue, it is recommended to prioritize using the **default Baseplate or BasePart for floors or large surface areas**. If **custom meshes** are used, vertex density and **Fog quality should be thoroughly tested** in advance.

**LOD Behavior of Baseplate and BasePart**

* The LOD for Baseplate and default BasePart operates using three predefined levels: 0 / 1 / 2.
  * For the **Block type**, an additional Extra LOD level is applied to ensure visual quality even when used at very large sizes (Size property of 100,000 or more), similar to the Baseplate.
  * For **non-Block types**, the Extra LOD level is not supported. As a result, Fog quality degradation may occur when these parts are used at sizes exceeding 100,000.

### Adjusting Lighting Service via Scripting <a href="#adjusting-lighting-service-via-scripting" id="adjusting-lighting-service-via-scripting"></a>

Using scripts, you can create dramatic lighting effects. By modifying the game world’s ClockTime, you can transition between day and night or create an effect where time flows quickly.

{% embed url="<https://files.gitbook.com/v0/b/gitbook-x-prod.appspot.com/o/spaces%2FhRPi87oM9ttlk5nyu7L7%2Fuploads%2F0uBlrFUS4Ricppu5EpbO%2F2025-02-03%2016-23-21.mp4?alt=media&token=e0a4ff6d-8b57-4485-b012-e8d59aedb93b>" %}

```lua
local Lighting = game:GetService("Lighting")
local RunService = game:GetService("RunService")

local ClockTime = 0

local function OnHeartbeat(deltaTime)
    ClockTime = ClockTime + (deltaTime * 10)
    Lighting.ClockTime = ClockTime
end
RunService.Heartbeat:Connect(OnHeartbeat)
```

You can also create tension by changing the ambient light color to red during dangerous situations.

## Tips for Expressing Density Effects in Roblox

To achieve a visual effect similar to Roblox’s FogDensity in OVERDARE, multiple environment properties must be adjusted together.

1. Enter an appropriate value for the Fog setting
2. Set the Fog Color to black (0, 0, 0) in the Atmosphere
3. Enable Fog Horizon in Atmosphere
4. Increase the Sky Color Influence value in Lighting

These settings are not dependent on application order, and the higher the Fog value is, the more clearly a Roblox-style Density Fog effect will be expressed.

<div><figure><img src="/files/7ThgRAyFuPQrBOFQmYQK" alt=""><figcaption><p>Density effect disabled</p></figcaption></figure> <figure><img src="/files/ZyhsejiX4uxh8xZLTOKp" alt=""><figcaption><p>Density effect enabled<br><br>Sky Color Influence = 2<br>Fog Color = 0, 0, 0<br>Fog Horizon = true</p></figcaption></figure></div>

## Lighting Applications <a href="#lighting-applications" id="lighting-applications"></a>

### Maximizing Neon Material Effects <a href="#maximizing-neon-material-effects" id="maximizing-neon-material-effects"></a>

OVERDARE provides a default Neon material that makes Parts/MeshParts appear as if they are glowing. However, this effect is limited to the object’s surface and does not illuminate surrounding objects. To create a more dramatic effect, you can place a Point Light within a Neon-material Part and match the light color to the Neon color. This will create a more surreal and visually striking effect.

Highlighting Characters Place an invisible Part near the character and shine a Spotlight on them to make the character stand out brighter than other objects. This can be used to highlight a character’s abnormal state or create a blinking, glowing effect like Super Mario.

Creating a Cyberpunk and Retro Atmosphere with Neon Material Unlike lights, Neon Material does not affect other objects. To make neon objects influence the surfaces of other objects like real neon signs, you can add Point Lights. This creates a more realistic neon sign effect.

<figure><img src="/files/qxqcrJPPVnnmbeVKovvk" alt=""><figcaption></figcaption></figure>

<figure><img src="/files/2EFEGSVmw1QovLXUWwxv" alt=""><figcaption></figcaption></figure>

## Usage Examples <a href="#usage-examples" id="usage-examples"></a>

### 1. **Setting the Overall Atmosphere of the Game** <a href="#setting-the-overall-atmosphere-of-the-game" id="setting-the-overall-atmosphere-of-the-game"></a>

Lighting plays an essential role in creating the game’s atmosphere. Factors like brightness, color, and intensity can significantly change how players perceive and feel about the game world. For example:

* **Warm, soft lighting** provides comfort and is often used in towns or safe areas.
* **Dark and harsh lighting** evokes tension and fear, contributing to an immersive experience in horror games.
* **Vibrant colored lighting, such as neon,** creates a lively, futuristic atmosphere, frequently used in cyberpunk-themed worlds.

Lighting can effectively convey the theme and mood of the game world, allowing players to immerse themselves more deeply in the experience, beyond just viewing the screen.

### 2. **Guiding the Player’s Attention** <a href="#guiding-the-players-attention" id="guiding-the-players-attention"></a>

Lighting is a powerful tool for guiding player focus toward specific objects or areas. Through this, game developers can naturally influence player decisions or highlight story-related objects.

* **Point Light**: Focused lighting at specific locations can draw attention to important items or objects, alerting players to their significance.
* **Spotlight**: By emphasizing characters or monsters, spotlights help players clearly identify the main point of interest at any given moment.
* Combination of **Global and Local Lighting**: In a generally dark map, bright local lighting can pull the player’s attention to a specific location.

This technique of guiding attention is essential for game design, and the proper use of lighting significantly improves the quality of level design.

### 3. **Enhancing Immersion and Eliciting Emotional Responses** <a href="#enhancing-immersion-and-eliciting-emotional-responses" id="enhancing-immersion-and-eliciting-emotional-responses"></a>

Lighting also directly influences the player’s emotional experience. Dark and unsettling lighting before difficult areas or boss battles can amplify tension. Conversely, after achieving a goal or receiving a reward, bright, soft lighting can evoke a sense of accomplishment.

* For example: In horror games, flickering lights or dark shadows are used to create anxiety and maintain a sense of unease throughout the experience.
* Bright and natural lighting in open fields symbolizes freedom of exploration, encouraging players to discover more places in adventure games.

By using lighting as an emotional and psychological tool, players become more immersed in the game world, and the storytelling impact is amplified.

### 4. **Purposefully Creating Discomfort** <a href="#purposefully-creating-discomfort" id="purposefully-creating-discomfort"></a>

Sometimes, developers use lighting to intentionally create a “sense of discomfort or strangeness” for the player. For instance, extremely dark environments, tilted light directions, or unnaturally glowing elements can make the player feel confused or challenged. This approach is particularly effective in horror, puzzle, or exploration genres.


# Tool

## Overview <a href="#overview" id="overview"></a>

A `Tool` is an `Instance` designed to be equipped and used directly by a character. It allows characters to wield weapons or equipment, use items like potions, and interact with the game world. `Tool` interacts with the character through the process of equipping and unequipping, playing a crucial role in various gameplay scenarios.

## How Tools Work <a href="#how-tools-work" id="how-tools-work"></a>

* A `Tool` interacts directly with the character model to implement equipping and unequipping.
* Tools are equipped in the character’s **right hand**, requiring the creation of a **Handle** Part.
* While it is possible to create a Tool without a `Handle`, it can only be equipped via scripting.
* The `Handle` serves as the reference point for positioning MeshParts and other Parts within the Tool.

## Tool Properties <a href="#tool-properties" id="tool-properties"></a>

Below are the key properties and their descriptions:

| Property                 | Description                                                                                                                                                                         |
| ------------------------ | ----------------------------------------------------------------------------------------------------------------------------------------------------------------------------------- |
| **TextureId**            | Specifies the image of the Tool displayed in the Backpack GUI.                                                                                                                      |
| **CanBeDropped**         | Determines whether the `Tool` is automatically dropped in front of the player when the `Tool`'s parent is changed to Workspace.                                                     |
| **Enabled**              | Determines whether the player can use the Tool. If set to false, methods and events related to Tool activation/deactivation are blocked, preventing the player from using the Tool. |
| **Grip**                 | Currently not supported.                                                                                                                                                            |
| **ManualActivationOnly** | Determines whether the Tool.Activated event is only triggered when Tool:Activate() is explicitly called in a script.                                                                |

## How to Use Tools <a href="#how-to-use-tools" id="how-to-use-tools"></a>

### 1. Creating a Tool Instance <a href="#creating-a-tool-instance" id="creating-a-tool-instance"></a>

1. Create a `Tool` instance in the **Level Browser (Workspace)**.

   <div align="left"><figure><img src="/files/z4e4QgwiDo1hHZn4z36x" alt=""><figcaption></figcaption></figure></div>
2. Create a `Part` under `Tool` and rename it to `Handle`.

   <div align="left"><figure><img src="/files/rpEpTElpTb8OIySk3SVh" alt=""><figcaption></figcaption></figure></div>

   <div align="left"><figure><img src="/files/5OivoaY147umz8qkBj6E" alt=""><figcaption></figcaption></figure></div>
3. Place the `MeshPart` or `Part` as the tool to be held under the `Handle` and adjust its `CFrame` relative to the handle to set the correct equipping position.

   <figure><img src="/files/cURmBE0u5zWzRHteT6jN" alt=""><figcaption></figcaption></figure>

   <figure><img src="/files/bTmFkfhjBzj2qf4ZF2YE" alt=""><figcaption></figcaption></figure>

### 2. Testing Tool Equipment <a href="#testing-tool-equipment" id="testing-tool-equipment"></a>

1. Run the game and control the character.
2. Make the character **touch** the `Tool` placed in the `Workspace`.
3. When the `Handle` is touched, the character will equip the corresponding `Tool` in their right hand.
   * If the Tool is not equipped correctly, adjust the position and orientation of the `MeshPart` or `Part` under the `Handle`.

     <figure><img src="/files/zbr4gU7u7X8HhDKG8jGx" alt=""><figcaption></figcaption></figure>

     <figure><img src="/files/PsOBa0z1EqqwNORY6kFY" alt=""><figcaption></figcaption></figure>

## Equipping and Unequipping Tools via Script <a href="#equipping-and-unequipping-tools-via-script" id="equipping-and-unequipping-tools-via-script"></a>

### When Scripting is Required <a href="#when-scripting-is-required" id="when-scripting-is-required"></a>

In some cases, you may want the `Tool` to be equipped only when a specific trigger or condition is met. In such cases, you can programmatically equip or unequip the `Tool` using scripts.

### Methods for Equipping Tools <a href="#methods-for-equipping-tools" id="methods-for-equipping-tools"></a>

You can equip a `Tool` to a character in two ways shown below using scripts:

1. Calling the **Humanoid:EquipTool** Method
   * The following method allows the character to equip the `Tool` directly.
   * Example Code:

```lua
local function Equip(player)
     local character = player.Character
     local humanoid = character:FindFirstChild("Humanoid")
     local myTool = game.Workspace:FindFirstChild("MyTool")

     if humanoid and myTool then
         humanoid:EquipTool(myTool)
     end
end
```

2. Changing the **Tool.Parent**

* You can make characters equip a `Tool` by directly changing its parent object.
* Example Code:

```lua
local function Equip(player)
     local myTool = game.Workspace:FindFirstChild("MyTool")
     local character = player.Character

     if character and myTool then
         myTool.Parent = Character
     end
end
```

### Unequipping Tools <a href="#unequipping-tools" id="unequipping-tools"></a>

There are two main ways to unequip a `Tool`:

1. **Default Unequip**: The `Tool` is unequipped and placed back in the player’s `Backpack`.
2. **Destroy**: You can delete the `Tool` instance if it is no longer needed.
   * Example Code:

```lua
     local myTool = game.Workspace:FindFirstChild("MyTool")
     if myTool then
         myTool:Destroy()
     end
```

3. **Drop**: If CanBeDropped is true, you can drop the Tool in front of the player by setting its parent to Workspace.
   * Example Code:

```lua
     local myTool = game.Workspace:FindFirstChild("MyTool")
     if myTool then
         myTool.Parent = game.Workspace
     end
```

## Using Events for Tool Interactions <a href="#using-events-for-tool-interactions" id="using-events-for-tool-interactions"></a>

A `Tool` has various **events** that are triggered when equipped. These can be used to implement additional **visual effects (VFX)** or actions when the character equips a specific `Tool`.

1. **Create a ParticleEmitter**: Add a `ParticleEmitter` to the `Handle` or any designated part where the effect should appear.

   <figure><img src="https://stackedit.io/.gitbook/assets/Group%208%20(1).png" alt=""><figcaption></figcaption></figure>
2. **Edit ParticleEmitter Properties** : Adjust size, direction, count, and other particle settings.
3. **Disable ParticleEmitter** : Set `ParticleEmitter` Enabled to false so the effect doesn’t appear before equipping.
4. **Write a Script**: Write a script to activate the `ParticleEmitter` only when the weapon is equipped.

```lua
local Tool = script.Parent
local Emitter = Tool.Handle.LightSaber.ParticleEmitter
Tool.Equipped:Connect(function()   
     if Emitter then
         Emitter.Enabled = true
     end
 end)
 
 Tool.Unequipped:Connect(function()   
     if Emitter then
         Emitter.Enabled = false
     end
 end)
```

{% embed url="<https://files.gitbook.com/v0/b/gitbook-x-prod.appspot.com/o/spaces%2FhRPi87oM9ttlk5nyu7L7%2Fuploads%2Fhxyq40FEzff4Dt6vmed4%2F2025-02-17%2021-57-57.mp4?alt=media&token=84dba803-dd83-4e5a-a322-f09d3715f46d>" %}


# VFX

## Overview <a href="#overview" id="overview"></a>

VFX objects enhance a game’s visual elements, adding immersion and excitement. They can be applied to parts, characters, and environments, enriching gameplay experiences.

## Types of VFX <a href="#types-of-vfx" id="types-of-vfx"></a>

<table><thead><tr><th width="194">VFX</th><th>Description</th><th>Examples</th></tr></thead><tbody><tr><td>ParticleEmitter</td><td>Generates particles</td><td>Fire, smoke, explosions, magic, water droplets, etc.</td></tr><tr><td>Beam</td><td>Connects two points</td><td>Lasers, electricity, energy beams, etc.</td></tr><tr><td>Trail</td><td>Trail (trajectory) effect</td><td>Speed boosts, magic trails, bullet traces, etc.</td></tr><tr><td>VFXPreset</td><td>including a total of 27 preconfigured VFX presets</td><td>Fire, Heal, Barrier, Dash, etc.</td></tr></tbody></table>

## ParticleEmitter <a href="#particleemitter" id="particleemitter"></a>

<figure><img src="/files/DmT1RqWw09sP8jctiE7t" alt=""><figcaption></figcaption></figure>

### Properties <a href="#properties" id="properties"></a>

<table><thead><tr><th width="251">Property</th><th>Description</th></tr></thead><tbody><tr><td>Acceleration</td><td>Direction and magnitude of acceleration</td></tr><tr><td>Brightness</td><td>Particle brightness</td></tr><tr><td>Color</td><td>Particle color</td></tr><tr><td>Light Emission</td><td>Determines how much light the particle emits</td></tr><tr><td>Orientation</td><td><p>Defines particle rotation direction</p><ul><li>Facing Camera : Aligns the particle to always face the player's camera (the direction the player is looking)</li><li>Facing Camera World Up : Faces the camera but the particles maintain an upward orientation based on world Y-axis</li><li>Velocity Parallel : Particles align parallel to the velocity vector.</li><li>Velocity Perpendicular : Particles align perpendicular to the velocity vector.</li></ul></td></tr><tr><td>Size</td><td>Particle size</td></tr><tr><td>Texture</td><td>Texture Id for the particle (ovdrassetid://number format)</td></tr><tr><td>Transparency</td><td>Adjusts particle transparency</td></tr><tr><td>Drag</td><td>Air resistance effect</td></tr><tr><td>Enabled</td><td>Toggles particle activation</td></tr><tr><td>Emission Direction</td><td><p>Determines the direction of particle emission</p><ul><li>Top : Emits upwards</li><li>Right : Emits to the right</li><li>Back : Emits backward</li><li>Left : Emits to the left</li><li>Bottom : Emits downward</li><li>Front: Emits forward</li></ul></td></tr><tr><td>Life Time</td><td>Duration before a generated particle disappears</td></tr><tr><td>Rate</td><td>Number of particles generated per second</td></tr><tr><td>Rot Speed</td><td>Rotation speed</td></tr><tr><td>Rotation</td><td>Initial rotation angle</td></tr><tr><td>Speed</td><td>Initial velocity</td></tr><tr><td>Spread Angle</td><td>Angle range for particle emission</td></tr><tr><td>Squash</td><td>Compression effect applied to particles</td></tr><tr><td>Flipbook Layout</td><td><p>Defines the animation texture sheet layout (rows and columns)</p><ul><li>None : No flipbook animation</li><li>Grid 2x2 : Divides the texture into a 2×2 grid</li><li>Grid 4x4 : Divides the texture into a 4×4 grid</li><li>Grid 8x8 : Divides the texture into an 8×8 grid</li></ul></td></tr><tr><td>Flipbook Framerate</td><td>Frame rate of the animated texture</td></tr><tr><td>Flipbook Mode</td><td><p>Animation playback mode</p><ul><li>Loop : Repeats animation from start to finish</li><li>One Shot : Plays animation once</li><li>Ping Pong : Plays forward, then reverses back</li><li>Random : Plays frames in random order</li></ul></td></tr><tr><td>Flipbook Start Random</td><td>Starts animation from a random frame</td></tr><tr><td>Shape</td><td><p>Defines the initial particle emission shape</p><ul><li>Box : Particles spawn within a box-shaped area</li><li>Sphere: Particles spawn within a spherical area</li><li>Cylinder : Particles spawn within a cylindrical area</li><li>Disc : Particles spawn within a disc-shaped area</li></ul></td></tr><tr><td>Shape in Out</td><td><p>Sets the movement pattern of particles during emission and dissipation</p><ul><li>Outward : Particles are emitted outward from the shape area</li><li>One : Particles are emitted inward toward the shape area</li></ul></td></tr><tr><td>Shape Style</td><td><p>Sets the style of particle emission</p><ul><li>Volume : Particles are emitted from random positions within the shape's volume</li><li>Surface : Particles are emitted only from the surface of the shape</li></ul></td></tr><tr><td>LockedToPart</td><td>Whether particles should move along with the object they are attached to</td></tr></tbody></table>

### Script Feature <a href="#script-feature" id="script-feature"></a>

{% content-ref url="/pages/PzdUA1Oi8vUN198oIS2W" %}
[ParticleEmitter](/development/api-reference/classes/particleemitter)
{% endcontent-ref %}

## Beam <a href="#beam" id="beam"></a>

<figure><img src="/files/lwax0QY4DfwJ60VK6iSr" alt=""><figcaption></figcaption></figure>

An object that connects between two Attachments. They are automatically connected when you specify a start and end point, and are used to create effects like lasers, electricity, and energy beams.

### Properties <a href="#properties" id="properties"></a>

<table><thead><tr><th width="251">Property</th><th>Description</th></tr></thead><tbody><tr><td>Color</td><td>Beam color</td></tr><tr><td>Enabled</td><td>Activation status</td></tr><tr><td>Texture</td><td>Beam texture</td></tr><tr><td>Texture Length</td><td>Texture repetition length</td></tr><tr><td>Texture Speed</td><td>Texture movement speed</td></tr><tr><td>Transparency</td><td>Transparency</td></tr><tr><td>Attachment 0</td><td>Beam starting point</td></tr><tr><td>Attachment 1</td><td>Beam ending point</td></tr><tr><td>CurveSize0</td><td>Defines the position of the second control point of the Bézier curve that composes the beam, together with Attachment0.</td></tr><tr><td>CurveSize1</td><td>Defines the position of the third control point of the Bézier curve that composes the beam, together with Attachment1.</td></tr><tr><td>Width 0</td><td>Beam starting width</td></tr><tr><td>Width 1</td><td>Beam ending width</td></tr><tr><td>Face Camera</td><td>Sets the beam to always face the camera.</td></tr></tbody></table>

### Script Feature <a href="#script-feature" id="script-feature"></a>

{% content-ref url="/pages/u6CaP86LgXKTjT1a4DrY" %}
[Beam](/development/api-reference/classes/beam)
{% endcontent-ref %}

## Trail <a href="#trail" id="trail"></a>

<figure><img src="/files/Hknwyt0OywP7GCMeB65R" alt=""><figcaption></figcaption></figure>

An object that creates a trail (trajectory) effect left behind by a moving object. Used to create effects such as sword effects, speed boosts, magic trajectories, and bullet trails.

By setting Trail as a child of a specific object, such as Part, you can display effects trailing the movement of that object.

### Properties <a href="#properties-1" id="properties-1"></a>

<table><thead><tr><th width="251">Property</th><th>Description</th></tr></thead><tbody><tr><td>Color</td><td>Trail color</td></tr><tr><td>Texture</td><td>Trail texture</td></tr><tr><td>Texture Length</td><td>Texture repetition length</td></tr><tr><td>Texture Speed</td><td>Texture movement speed</td></tr><tr><td>Transparency</td><td>Transparency</td></tr><tr><td>Enabled</td><td>Activation status</td></tr><tr><td>Lifetime</td><td>The amount of time that a trail is kept after it is created (in seconds)</td></tr><tr><td>Width</td><td>Default width</td></tr><tr><td>Width Scale</td><td>Defines how width changes over time</td></tr><tr><td>Offset</td><td>Repositions the Trail in the X, Y, and Z directions</td></tr></tbody></table>

### Script Feature <a href="#script-feature-1" id="script-feature-1"></a>

{% content-ref url="/pages/Ox5glgHBtEgjAHbTZXnW" %}
[Trail](/development/api-reference/classes/trail)
{% endcontent-ref %}

## VFXPreset

<figure><img src="/files/ysnmOg9CbLOhk3pLhvO0" alt=""><figcaption></figcaption></figure>

This is an object that allows you to quickly create visual effects commonly used in games (e.g., fire, explosions, barriers, healing) by selecting from a set of predefined effects without the need for additional editing.

### How to Use

Place a VFXPreset in the Level Browser and select it. Then, in the Properties panel, locate the VFX Preset properties and click the displayed button to open the VFX Preset Selection popup.

In the VFX Preset Selection popup, select the desired effect such as Buff Zone, Trail, etc., and the effect will be applied.

<figure><img src="/files/fsaRJYF6s8rpMN4noPRS" alt=""><figcaption></figcaption></figure>

### Properties

<table><thead><tr><th width="251">Properties</th><th>Description</th></tr></thead><tbody><tr><td>VFX Preset</td><td>Selects the VFX to display</td></tr><tr><td>Importance</td><td>Sets the importance of the VFXPreset. The internal Performance Type is determined by combining this with the Infinite Loop setting.</td></tr><tr><td>Color</td><td>Color of VFX Preset</td></tr><tr><td>Size</td><td>Size of VFX Preset</td></tr><tr><td>Transparency</td><td>Transparency of VFX Preset</td></tr><tr><td>Enabled</td><td>Activation status</td></tr><tr><td>Infinite Loop</td><td>Infinite Loop</td></tr><tr><td>Loop Count</td><td>Number of loops to play</td></tr></tbody></table>

#### Importance and Performance Type Mapping

The Performance Type is internally determined based on the combination of the Importance value and the Infinite Loop setting, as shown below.

<table><thead><tr><th width="200">Importance</th><th width="200">Infinite Loop</th><th>Performance Type</th></tr></thead><tbody><tr><td>Default</td><td>False</td><td>Default Burst</td></tr><tr><td>Default</td><td>True</td><td>Default Looping</td></tr><tr><td>Background</td><td>False</td><td>Background Burst</td></tr><tr><td>Background</td><td>True</td><td>Background Looping</td></tr><tr><td>Gameplay</td><td>False</td><td>Gameplay Burst</td></tr><tr><td>Gameplay</td><td>True</td><td>Gameplay Looping</td></tr><tr><td>Critical</td><td>-</td><td>Critical</td></tr></tbody></table>

### Script Feature

{% content-ref url="/pages/IZ34jxd5NS63HmbSGX3y" %}
[VFXPreset](/development/api-reference/classes/vfxpreset)
{% endcontent-ref %}

### VFXPreset Asset List

{% content-ref url="/pages/koFLMDjyZAkPgvxe8xQI" %}
[VFXPreset Asset List](/manual/studio-manual/object/vfx/vfxpreset-asset-list)
{% endcontent-ref %}

### VFXPreset Performance Optimization

{% content-ref url="/pages/S7XdB3glPyTzvaMbQdMt" %}
[VFXPreset Performance Optimization](/manual/studio-manual/asset-and-resource-creation/vfxpreset-budget)
{% endcontent-ref %}

## Properties Supported by the Curve Editor <a href="#properties-supported-by-the-curve-editor" id="properties-supported-by-the-curve-editor"></a>

Properties that can be edited with the Curve Editor are marked with a … button next to them. Clicking this button opens the **Curve Editor**, where you can intuitively plot the change in value of that property in graphical form.

<figure><img src="/files/ELmeYUT7sXdGYxENzcS2" alt=""><figcaption></figcaption></figure>


# VFXPreset Asset List

## **Overview**

This page provides usage examples for the various preset types available in VFXPreset instances. The descriptions of each VFXPreset on this page are not intended to define functional behavior or implementation details, but rather to serve as a reference for understanding their intended visual style and usage context.

Some descriptions may be written in a more expressive and abstract manner, so it is recommended to evaluate and select presets based on their actual visual results. This helps reduce confusion during the selection process and supports more appropriate use of VFX in your content.

Learn More

{% content-ref url="/pages/UHaO21fVTwrimnAJr3x3" %}
[VFX](/manual/studio-manual/object/vfx)
{% endcontent-ref %}

## Combat

<table><thead><tr><th width="170">VFXPreset</th><th width="190.33349609375">Name</th><th>Description</th></tr></thead><tbody><tr><td><img src="/files/zIjuYIHFzYb3jJmyJpAW" alt=""></td><td>Muzzle</td><td>A basic muzzle flash effect that momentarily appears at the gun barrel when firing a weapon.</td></tr><tr><td><img src="/files/BXePCPTKS0NP1s4IXlFq" alt=""></td><td>Electric Muzzle</td><td>A muzzle flash effect styled for energy-type weapon firing.</td></tr><tr><td><img src="/files/tIyLnupFpfZhYnX7rytd" alt=""></td><td>Trail</td><td>A wave-shaped attack trail effect.</td></tr><tr><td><img src="/files/bw0mrjmknb2QyfMlGfBX" alt=""></td><td>Spin Trail</td><td>A cartoon-style trajectory trail effect that appears during fast attack motions.</td></tr><tr><td><img src="/files/0xHwatNIFWd4H87eH6ir" alt=""></td><td>Solar Trail Plus</td><td>An effect where flame energy spreads horizontally in the form of a blade-like slash. It represents a powerful slashing motion of a fire-element melee attack.</td></tr><tr><td><img src="/files/Ockk5aIdCFenZL5YbIsx" alt=""></td><td>Solar Trail Burst</td><td>An effect where flame energy rises vertically in a blade-like form along with spreading particles. It represents a powerful slashing motion of a fire-element attack.</td></tr><tr><td><img src="/files/kox8f4HFK4UK2uDzEooV" alt=""></td><td>Electric Attack</td><td>An effect where electric energy crackles and spreads in all directions. It represents a strong energy discharge of an electric-element attack.</td></tr><tr><td><img src="/files/1ZjwqzeKtG6vshfuxqVe" alt=""></td><td>Electric Kick</td><td>An effect where lightning energy spreads across the ground at the moment of a kick, forming electric cracks extending in all directions. It represents the strong impact of an electric-element attack.</td></tr><tr><td><img src="/files/gRvKInCHgV3PuVzE5JMs" alt=""></td><td>Spear Thurst</td><td>An impact effect emphasizing the moment of a stabbing attack with a spear.</td></tr><tr><td><img src="/files/2lrlVUlcZURhJSaKWyYf" alt=""></td><td>Simple Punch</td><td>A hit effect generated during quick melee attacks.</td></tr><tr><td><img src="/files/O3WyKsz7PwDd3fmIbbi3" alt=""></td><td>Punch</td><td>An impact effect where red flame-like energy surges forward when delivering a strong punch. It emphasizes the impact of a powerful melee attack.</td></tr><tr><td><img src="/files/DpZt04hT2Om0zmkjTcui" alt=""></td><td>Simple Trail</td><td>A cartoon-style trail effect that leaves a trajectory following melee attack motions.</td></tr><tr><td><img src="/files/olsgfwOhvGbHOmthsNdl" alt=""></td><td>Arrow Flash</td><td>A ranged attack effect where sparks and an energy trail appear forward when an arrow is fired.</td></tr><tr><td><img src="/files/8ML4vUfa1zwjhQtwZhWo" alt=""></td><td>Swirl Strike</td><td>An effect where energy rapidly spins in a spiral form and spreads outward. It emphasizes spinning attacks or powerful skill motions.</td></tr><tr><td><img src="/files/E7v1xxA375Z0cnEjZfkN" alt=""></td><td>Kick</td><td>An effect where white smoke briefly spreads at the moment of impact. It represents the collision when an attack hits.</td></tr><tr><td><img src="/files/wCsoIy2ebsXBHLxf7w9s" alt=""></td><td>Hit Object</td><td>An effect where bright sparks and small energy fragments burst when hitting an object. It emphasizes the point of collision.</td></tr><tr><td><img src="/files/dpSaf4MgCIgXKuSqFU8H" alt=""></td><td>Simple Hit</td><td>An effect where small star-shaped sparks briefly burst. It represents a light hit.</td></tr><tr><td><img src="/files/vaBYBvllIrEkem0WEKID" alt=""></td><td>Radial Hit</td><td>An impact effect where small sparks and energy fragments spread from the collision point, representing light hits or basic collision reactions.</td></tr><tr><td><img src="/files/hrdGQUAxGyHMMh0AzuNE" alt=""></td><td>Pulse Hit</td><td>An effect where red energy spreads when an attack hits a target.</td></tr><tr><td><img src="/files/PD5B87DiaQijYRjkIrWh" alt=""></td><td>Flash Hit</td><td>A default hit effect that occurs when an attack hits a target.</td></tr><tr><td><img src="/files/fXZcfgt51Yx2dkBxuqI1" alt=""></td><td>Hit</td><td>A hit effect emphasizing the impact at the moment of collision.</td></tr><tr><td><img src="/files/3ViauE1IFYVeWOXWOIDn" alt=""></td><td>Blood</td><td>A cartoon-style blood splatter effect when hit.</td></tr><tr><td><img src="/files/TUvR2xxTFoCnLEz21NN6" alt=""></td><td>Knockback</td><td>A cartoon-style shockwave effect where a circular wave spreads during knockback.</td></tr><tr><td><img src="/files/EirChtLFvtanfAWXhzs9" alt=""></td><td>Scratch</td><td>An effect where green energy appears in multiple claw-like slashes.</td></tr><tr><td><img src="/files/cjPynOW85FFOZB28SZKF" alt=""></td><td>Spark</td><td>An effect where orange sparks scatter in all directions.</td></tr><tr><td><img src="/files/Ippk9aOEUVRuqxcs99T2" alt=""></td><td>Water Swirl Trail</td><td>An effect where wave-like energy curves in a large circular motion, forming a slash effect.</td></tr><tr><td><img src="/files/qvl4VYXLXSKVuaGWIDgm" alt=""></td><td>Flash Knockback</td><td>A shockwave effect representing a character being pushed back when hit.</td></tr><tr><td><img src="/files/7s86mE0ZZOCnUhixDITP" alt=""></td><td>Light Burst</td><td>An effect where purple light rapidly expands outward from the center along with sparks.</td></tr><tr><td><img src="/files/aFoWVpTu8RoTt6Qe80np" alt=""></td><td>Flash Burst</td><td>An effect where pink light rapidly expands outward from the center along with sparks.</td></tr><tr><td><img src="/files/ENd8FrNABoSEHJ8dSDjj" alt=""></td><td>Impact Link</td><td>An effect where spike-shaped energy bursts outward in all directions. It represents the strong impact when a shooting attack hits.</td></tr><tr><td><img src="/files/ooRbIFU3U8rWoKVeUwsH" alt=""></td><td>Splash Blood</td><td>A cartoon-style blood splash effect.</td></tr><tr><td><img src="/files/HqOYuOKGGuzWJmK6ogX3" alt=""></td><td>Swing</td><td>An effect where a short trail appears as if cutting through the air during an attack. It emphasizes the motion and direction of melee attacks.</td></tr><tr><td><img src="/files/DD4WWNVi1epcmU5hR6VJ" alt=""></td><td>Sword Slash</td><td>An effect where a short trail appears when swinging a sword, emphasizing attack direction and movement.</td></tr><tr><td><img src="/files/XXNa2DI3cro2AKMVTPce" alt=""></td><td>Glass Crack</td><td>An effect where cracks spread like shattered glass and fragments scatter at the moment of impact. It represents strong impact or hits.</td></tr><tr><td><img src="/files/pyYTQ86jNSXUhyDZC61J" alt=""></td><td>Straight Punch</td><td>An effect where small impact particles burst when a punch lands. It represents the moment of a melee punch hit.</td></tr><tr><td><img src="/files/EvjEAJ8cdtC6VVIRLSki" alt=""></td><td>Comic Trail</td><td>An effect where a short trail follows the attack motion, emphasizing movement, direction, and speed.</td></tr></tbody></table>

## Environment

<table><thead><tr><th width="170">VFXPreset</th><th width="190.33349609375">Name</th><th>Description</th></tr></thead><tbody><tr><td><img src="/files/f3aMIjhrz1FkgeM1Funr" alt=""></td><td>Fire</td><td>An effect that represents flames burning and blazing.</td></tr><tr><td><img src="/files/kQ7s3SitOgzLbtNi5PMv" alt=""></td><td>Rain</td><td>An effect where raindrops fall from top to bottom. It represents a rainy environment.</td></tr><tr><td><img src="/files/MrZSzEKV62AOcuzcAjsm" alt=""></td><td>Leaf</td><td>An effect where leaves flutter down from above. It represents a natural environment.</td></tr><tr><td><img src="/files/IOqdqyCjiPv8v4x2VFOZ" alt=""></td><td>Fog</td><td>An effect where fog softly spreads and continuously flows around. It adds atmosphere and depth to the space.</td></tr><tr><td><img src="/files/wDAmkagCxNHPPUci9kQp" alt=""></td><td>Rose Rain</td><td>An effect where rose petals fall from above. It is a decorative effect used to emphasize mood or emotional expression.</td></tr><tr><td><img src="/files/71onQDlpXG87D2V3wbbl" alt=""></td><td>Bird Flock</td><td>An effect where black birds fly in a flock and scatter. It represents dark or horror-themed atmospheres.</td></tr><tr><td><img src="/files/tkFX61ub9WWhKcA9NDWh" alt=""></td><td>Updraft</td><td>An effect where dark smoke trails rise and disperse along the character’s movement path. It represents fast movement or upward drafts.</td></tr></tbody></table>

## Feedback

<table><thead><tr><th width="170">VFXPreset</th><th width="190.33349609375">Name</th><th>Description</th></tr></thead><tbody><tr><td><img src="/files/CrqnUgIN3MLlYxM4jzhB" alt=""></td><td>Warning</td><td>An effect where a red warning icon briefly appears and disappears. It indicates danger or caution.</td></tr><tr><td><img src="/files/rfeovmcZL8OYzi7Ausoo" alt=""></td><td>Game Over</td><td>An effect where a large red explosion occurs. It represents a strong impact at the game over moment.</td></tr><tr><td><img src="/files/jd6ddcGk9seWjlvGlflC" alt=""></td><td>Glory Burst</td><td>An effect where red energy spreads radially from the ground with bursting sparks.</td></tr><tr><td><img src="/files/NJz79cyiQmFbNMGgqFg3" alt=""></td><td>Glory Explosion</td><td>An effect where the ground cracks, yellow energy swirls, and small sparks rise upward. It represents ground-based attacks or energy eruptions.</td></tr><tr><td><img src="/files/n2x0Kid5vs75mTKLhMQW" alt=""></td><td>Glory Spark</td><td>An effect where red energy spreads across the ground.</td></tr><tr><td><img src="/files/qVKF03IpJmUts47BKKqa" alt=""></td><td>World Marker</td><td>An effect where a blue pillar of light rises from the ground with sparkling particles. It marks a destination or target location.</td></tr><tr><td><img src="/files/KsAnWWHXwoYkwv6yrcsR" alt=""></td><td>Glory Flash</td><td>An effect where pink energy and particles burst outward. It represents the explosion moment of an attack or skill.</td></tr></tbody></table>

## Interaction

<table><thead><tr><th width="170">VFXPreset</th><th width="190.33349609375">Name</th><th>Description</th></tr></thead><tbody><tr><td><img src="/files/8o6Nvj2iQD8Ohu6jM9Kc" alt=""></td><td>Get Item</td><td>An effect where blue light and sparkling star particles appear in front of the character. It emphasizes the moment of item acquisition.</td></tr><tr><td><img src="/files/3DGzc24tmLr7qYHdNLl7" alt=""></td><td>Destroy</td><td>An effect where yellow fragments and energy burst outward from the hit point.</td></tr><tr><td><img src="/files/0h9p2hPnLrezkpJJx9h8" alt=""></td><td>Water Splash</td><td>A cartoon-style splash effect where water droplets briefly shoot upward. It represents a small splash when hitting water or landing.</td></tr><tr><td><img src="/files/hxMZ8aWP4ZpTtc53bhSI" alt=""></td><td>Mining</td><td>An effect where small fragments and dust scatter when mining ground or ore. It represents the moment of mining action.</td></tr><tr><td><img src="/files/AaKD8GKJiKXlllca8KNq" alt=""></td><td>Dig</td><td>A cartoon-style digging effect where dirt fragments and dust fly upward. It is used when digging the ground.</td></tr><tr><td><img src="/files/iPuxhUtnHsHW874NCfHS" alt=""></td><td>Item Burst</td><td>An effect where sparkling light and particles appear when obtaining an item. It emphasizes the acquisition moment.</td></tr><tr><td><img src="/files/wA6XmeNerN9Rbr6S9djz" alt=""></td><td>Portal</td><td>An effect where purple energy condenses to form a portal. It represents portal creation or a teleport point.</td></tr><tr><td><img src="/files/n9Ib1qUZiGWukAbIQ42O" alt=""></td><td>Void Portal</td><td>A purple portal effect representing dimensional or spatial movement.</td></tr><tr><td><img src="/files/4kKg8MtifkZ2mkbLm6un" alt=""></td><td>Wood Break</td><td>An effect that occurs when hitting a wooden object. Small wood fragments and dust scatter, representing a light impact.</td></tr><tr><td><img src="/files/93HfV9ysux0p5ccP7MhL" alt=""></td><td>Electric Crackle</td><td>An effect where small sparks scatter in all directions. It represents sparks from environments or machinery.</td></tr><tr><td><img src="/files/lfRIxXPeRehbcrF07Yju" alt=""></td><td>Ball Impact</td><td>An effect where red energy spreads in a circular form at the moment of impact.</td></tr><tr><td><img src="/files/22zLg7BrpzcJLlm7lC1F" alt=""></td><td>Ground Bounce</td><td>An effect where dirt and dust scatter upon hitting the ground. It represents ground collision during landing or bouncing.</td></tr><tr><td><img src="/files/fsJwxmsJayKbhB8lGqLK" alt=""></td><td>Ball Trail</td><td>An effect where small particles follow the projectile path. It represents the direction and trajectory of the shot.</td></tr></tbody></table>

## Movement

<table><thead><tr><th width="170">VFXPreset</th><th width="190.33349609375">Name</th><th>Description</th></tr></thead><tbody><tr><td><img src="/files/VpLxaqd06ViffoxXudAK" alt=""></td><td>Spawn</td><td>An effect where blue light spreads under the character and vertical beams rise upward. It represents the moment a character spawns.</td></tr><tr><td><img src="/files/aUCU2oE2oXEBCxmehGP8" alt=""></td><td>Smoke Explosion</td><td>An effect where purple smoke quickly rises and spreads upward.</td></tr><tr><td><img src="/files/4bwMw99IAxvpMIjcL989" alt=""></td><td>Dash</td><td>An effect where curved energy trails remain around the character during a fast dash. It represents sudden movement and acceleration.</td></tr><tr><td><img src="/files/XuINeBuYLpqG0779J9Ki" alt=""></td><td>Dash Burst</td><td>An effect where a long white afterimage trails behind during fast movement. It emphasizes speed.</td></tr><tr><td><img src="/files/lWSooT1XnHjFFw6Pn1OO" alt=""></td><td>Soccer Dash</td><td>A dash effect where character mesh afterimages appear along the movement path.</td></tr><tr><td><img src="/files/T4RFrNrA019sh3QBWaUW" alt=""></td><td>Landing</td><td>An effect where small dust spreads at the landing point.</td></tr><tr><td><img src="/files/fkOcom6aBB7SUCgnSC0J" alt=""></td><td>Simple Landing</td><td>An effect where a short shockwave and dust spread upon landing. It emphasizes quick landing moments.</td></tr><tr><td><img src="/files/cJ2zru0tyKyJHvKOsZNw" alt=""></td><td>Smoke Burst</td><td>An effect where smoke briefly appears and fades.</td></tr><tr><td><img src="/files/eQskTeSp9sAtlWyAgEFw" alt=""></td><td>Heavy Landing</td><td>An effect where dust and impact spread heavily at landing. It represents a heavy landing after a strong jump.</td></tr><tr><td><img src="/files/3YlZtQXXNGc5VKRMMLCP" alt=""></td><td>Blink</td><td>An effect where yellow light flashes quickly. It represents teleportation or fast movement.</td></tr></tbody></table>

## Skill

<table><thead><tr><th width="170">VFXPreset</th><th width="190.33349609375">Name</th><th>Description</th></tr></thead><tbody><tr><td><img src="/files/vQKNwWCHNmnyDzMsBX3q" alt=""></td><td>Explosion</td><td>A basic explosion effect used in collision situations.</td></tr><tr><td><img src="/files/lZ806N1MMK2yVivK0bc6" alt=""></td><td>Electric Explosion</td><td>A cartoon-style explosion where a bright shockwave spreads outward.</td></tr><tr><td><img src="/files/90igqFsL0GU5UB9pO0Aq" alt=""></td><td>Highlight Burst</td><td>An effect where green smoke spreads densely and puzzle shapes appear.</td></tr><tr><td><img src="/files/MUW255pukC66ZFxhtltm" alt=""></td><td>Floating Puzzle</td><td>An effect where green puzzle pieces appear and spread around.</td></tr><tr><td><img src="/files/8Fuxfbtx6X8WlEfgAfP1" alt=""></td><td>Electric Dragon</td><td>An effect where dragon-shaped electric energy appears briefly, extends forward, and disappears.</td></tr><tr><td><img src="/files/c1X1ESFNMUZhZVqBGrLY" alt=""></td><td>Electric Dragon Strike</td><td>An effect where electric energy in the shape of a dragon’s head appears and emits lightning. It represents a powerful electric attack.</td></tr><tr><td><img src="/files/M0nHr9FGlhnZSgYd8Unl" alt=""></td><td>Snowflake</td><td>An effect where snowflake shapes appear and continuously change color.</td></tr><tr><td><img src="/files/C3g6rfQ23Jvwq6ecu1bq" alt=""></td><td>Tornado</td><td>An effect where a green tornado rapidly spins upward.</td></tr><tr><td><img src="/files/g0My25OhOVF5EUAEO08s" alt=""></td><td>Waterfall Attack</td><td>An effect where water falls like a waterfall from top to bottom.</td></tr><tr><td><img src="/files/dRqldb0MfVBV9E0XofjO" alt=""></td><td>Crack</td><td>An effect where cracks spread on the ground and blue energy bursts when landing or slamming down.</td></tr><tr><td><img src="/files/6gTtejF2tLqL2lvhSrdB" alt=""></td><td>Strong Punch</td><td>An effect where a yellow energy shockwave spreads radially from the impact point.</td></tr><tr><td><img src="/files/PqMd4ztb2UJLPnpQ7aG4" alt=""></td><td>Cast</td><td>An effect where blue energy trails spin rapidly in a circular motion around the character. It emphasizes the start of a skill or action.</td></tr><tr><td><img src="/files/t7RIXCd3V8lwlVIPZGQz" alt=""></td><td>Light Cast</td><td>An effect where, just before the character attacks, pure white energy strongly condenses around the fist to form a glowing sphere, while surrounding light particles are drawn inward toward the center, creating a charging effect.</td></tr><tr><td><img src="/files/kFbEZshVzzRYgJVqprVG" alt=""></td><td>Light Charge</td><td>An effect where purple energy rises and spreads around the character’s body. It represents a charging state where power is gathered for a skill or attack.</td></tr><tr><td><img src="/files/cyFYImelXbWuUCpCfPMp" alt=""></td><td>Cartoon Explosion</td><td>An explosion effect where smoke and fragments spread in a cartoon style.</td></tr><tr><td><img src="/files/Xxi0otGyj3L2b60r8mLy" alt=""></td><td>Toxic Explosion</td><td>An explosion effect where purple energy and smoke spread, representing a toxic or energy-type explosion.</td></tr><tr><td><img src="/files/x66yeU9vPY9bSafTrmPS" alt=""></td><td>Ground Crack</td><td>An impact effect where cracks and energy sparks occur from the center of the impact point.</td></tr><tr><td><img src="/files/2XfFjqdPwbAHQiWojwSx" alt=""></td><td>Flash Cast</td><td>An effect where red energy gathers around the character’s hand and light spreads outward. It represents the moment energy condenses before activating a skill or attack.</td></tr><tr><td><img src="/files/S6GlP5xb7Kj1AhtdWYlA" alt=""></td><td>Wind Cast</td><td>An effect where bright energy trails curve widely and pass quickly around the character. It emphasizes strong motion or pre-skill activation movement.</td></tr><tr><td><img src="/files/nO1dqOTay2scun4am0ss" alt=""></td><td>Energy Pulse</td><td>An effect where a blue energy sphere forms in the hand and blue energy streams swirl and spread around it. It represents gathering or concentrating energy.</td></tr><tr><td><img src="/files/6oExdRZfSN7ayOU0us31" alt=""></td><td>Fire Sweep</td><td>An effect where flames sweep quickly in a horizontal direction. It represents fire-element attacks or passing flame effects.</td></tr><tr><td><img src="/files/r0W8gKNbYA4MBox413uE" alt=""></td><td>Electric Burst</td><td>An effect where electric energy radiates outward from a central axis. It represents the activation of electric energy.</td></tr><tr><td><img src="/files/YDnJ8xnYXoKWGAd3KAy4" alt=""></td><td>Poison Explosion</td><td>An explosion effect where purple smoke spreads and bursts. It represents toxic or contamination-based attacks.</td></tr><tr><td><img src="/files/MZT5ddZ0YYS5hg8txpES" alt=""></td><td>Fire Ground</td><td>An effect where flames leave a lingering trace on the ground. It emphasizes the path of a fire attack.</td></tr><tr><td><img src="/files/wehDFVAto5tpEliquISA" alt=""></td><td>Phantom Leopard</td><td>An effect where a pink leopard image appears and runs forward.</td></tr><tr><td><img src="/files/vNdzWUcFDJ3dudiB7083" alt=""></td><td>Simple Explosion</td><td>An effect where purple smoke quickly expands outward. It represents explosions or strong impacts.</td></tr><tr><td><img src="/files/3wIa90DJRokAmlaMqx58" alt=""></td><td>Energy Orb</td><td>An effect where blue and red energy orbs gather around the character. It represents energy accumulation or power buildup.</td></tr><tr><td><img src="/files/RvdRMQgMnGhAcPcZBaVe" alt=""></td><td>Arc Slash</td><td>An effect where energy wraps around the character and rotates in a circular motion. It represents the start of casting a spell or skill.</td></tr><tr><td><img src="/files/hUnFxL125lLIWMHGybPT" alt=""></td><td>Zombie Hand</td><td>An effect where red zombie hands repeatedly emerge from the ground and move around. Each movement spreads blood and red smoke, emphasizing a horrifying undead theme.</td></tr><tr><td><img src="/files/lpY7knTWe9qnqvvo4c9x" alt=""></td><td>Fire Drop</td><td>An effect where flames fall from above to below. It represents the moment a fire attack strikes downward.</td></tr></tbody></table>

## Status

<table><thead><tr><th width="170">VFXPreset</th><th width="189.6668701171875">Name</th><th>Description</th></tr></thead><tbody><tr><td><img src="/files/T7CjHybF2H9NEgPkoRgz" alt=""></td><td>Soft Heal</td><td>An effect where green light and ring-shaped energy spread around the character with sparkling particles. It represents a healing state being applied.</td></tr><tr><td><img src="/files/05zuQOyVak2Fhj7lKD7p" alt=""></td><td>Block</td><td>An effect where an energy sphere and radial waves spread in front of the character. It represents blocking impact.</td></tr><tr><td><img src="/files/Xwc7tHLlHJPvKkxTP9M1" alt=""></td><td>Buff Zone</td><td>An effect where a blue circular light spreads on the ground, indicating a buff area.</td></tr><tr><td><img src="/files/XgqOcis2u94KKfNwXEF2" alt=""></td><td>SpeedUp</td><td>An effect where upward arrow-shaped lights appear around the character. It represents increased movement speed.</td></tr><tr><td><img src="/files/WyeZ7Aal996tiYLt6zBU" alt=""></td><td>LevelUp</td><td>An effect where a glowing circle appears under the character and blue light rises upward. It represents leveling up.</td></tr><tr><td><img src="/files/ixJVs7FvFSrTI5MLAd8k" alt=""></td><td>Wave Buff</td><td>An effect where circular waves spread on the ground, indicating an effect area.</td></tr><tr><td><img src="/files/Gw4Qg7RHCbZqNuGwq36G" alt=""></td><td>Lightning Arc</td><td>An effect where electric energy crackles around the character. It represents an active electric state.</td></tr><tr><td><img src="/files/lAPXaZwpMecArBtSMQyP" alt=""></td><td>Bounce</td><td>An effect where green energy flares around a sphere. It represents energy activation or charging.</td></tr><tr><td><img src="/files/qH3bbyTb0iZolzDL6b4S" alt=""></td><td>Debuff Toxic</td><td>An effect where green toxic energy spreads around the target. It represents poison or debuff status.</td></tr><tr><td><img src="/files/YQebHommLXySysHnP9rS" alt=""></td><td>Stun</td><td>An effect where stars spin above the character’s head. It represents a stun state.</td></tr><tr><td><img src="/files/f8s0v0r6ZGCV34fxy9qk" alt=""></td><td>Heal</td><td>An effect where green light and a cross icon appear. It represents healing activation.</td></tr><tr><td><img src="/files/QGhh5EXrh2kPDo9abMUv" alt=""></td><td>Barrier</td><td>An effect where an energy field forms around the character, indicating a protection area.</td></tr><tr><td><img src="/files/cjFMoRL0HtVbPNqHf6R1" alt=""></td><td>Small Barrier</td><td>An effect with small shield illustrations surrounding the character, used when blocking attacks.</td></tr><tr><td><img src="/files/zYs1rUvCXDhexBuxNHCw" alt=""></td><td>Guard</td><td>An effect where a blue shield forms around the character with forward energy flow. It represents guard activation.</td></tr><tr><td><img src="/files/Sp3T7vPY4eBjXyjD6gqm" alt=""></td><td>Aura Wave</td><td>An effect where green energy flares around the eyes. It represents special state activation.</td></tr><tr><td><img src="/files/635cUZLLkbhmLYcQfbBq" alt=""></td><td>Swirl Ring</td><td>An effect where green energy spins rapidly in a ring shape.</td></tr><tr><td><img src="/files/x9yGdgA3sa57qdzn3I0q" alt=""></td><td>Power Charge</td><td>An effect where yellow lightning energy erupts around the character. It represents power charging.</td></tr><tr><td><img src="/files/gzJDHkrDuCoIkJGMFfn1" alt=""></td><td>Fire Charge</td><td>An effect where flame energy gathers and burns around the character. It represents fire charging.</td></tr><tr><td><img src="/files/Kdv6v0aManrCnZyGGofy" alt=""></td><td>Toxic Zone</td><td>An effect representing a toxic area or damage-over-time zone.</td></tr><tr><td><img src="/files/xfl0fLqg669WLWb25AY9" alt=""></td><td>Debuff Zone</td><td>An effect where blue light spreads under the character. It represents slow or debuff status.</td></tr></tbody></table>


# VFXRecipe

## Overview

VFXRecipe is an object that lets you combine multiple VFX sources in a layered structure to build a composite effect and control its playback through scripts.

Whereas VFXPreset lets you choose from predefined effects, VFXRecipe lets you compose an effect yourself by placing VFX sources directly on three layers—Base, Detail, and Extra. Parameters such as each source's color, size, and transparency can be controlled at runtime through scripts, enabling a wide range of visual variations.

## How to Use

### Placing a VFXRecipe

<figure><img src="/files/802aIA9XzbuJojlIAf7q" alt=""><figcaption></figcaption></figure>

Place a VFXRecipe at the desired location in the Level Browser.

Select the placed VFXRecipe to edit its layer composition and playback settings in the property panel.

### Layer Composition

A VFXRecipe has three layers: Base, Detail, and Extra.

<table><thead><tr><th width="140">Layer</th><th>Role</th></tr></thead><tbody><tr><td>BaseLayer</td><td>Responsible for the core visual elements of the effect. At least one source must be placed here.</td></tr><tr><td>DetailLayer</td><td>Adds finer details on top of the BaseLayer. Placement is optional.</td></tr><tr><td>ExtraLayer</td><td>Adds supplementary auxiliary effects. Placement is optional.</td></tr></tbody></table>

Click the + button on each layer to add a source. In the added source entry, click the VFX Source field to select a VFX source asset, and enter a name in the Name field. The name is used to identify the source when controlling parameters with `GetParam` / `SetParam` in scripts.

<figure><img src="/files/SdEkDXwA4Utc0PYDtqmh" alt=""><figcaption></figcaption></figure>

### Playback Settings

| Property     | Description                                                                                                                                                                   |
| ------------ | ----------------------------------------------------------------------------------------------------------------------------------------------------------------------------- |
| AutoActivate | If `true`, playback starts automatically when the instance is activated. The default value is `true`.                                                                         |
| InfiniteLoop | If `true`, the effect loops infinitely until `Stop()` is called. The default value is `false`.                                                                                |
| LoopCount    | The number of playback repetitions. Applied only when InfiniteLoop is `false`. The default value is `1`.                                                                      |
| LoopDuration | The duration (in seconds) of a single playback, calculated automatically by analyzing the parameters of the sources registered to the layers. It cannot be modified directly. |

## Controlling with Scripts

### Play and Stop

Control effect playback manually with `Play()` and `Stop()`. When called from a server script, playback is automatically synchronized to all clients.

```lua
local vfxRecipe = script.Parent

-- Disable auto play, then play manually after 2 seconds
vfxRecipe.AutoActivate = false
wait(2)
vfxRecipe:Play()

wait(3)
vfxRecipe:Stop()
```

### Detecting Playback Completion

When InfiniteLoop is `false` and playback finishes LoopCount times, the `Finished` event fires. It does not fire when playback is forcibly stopped with `Stop()`.

```lua
local vfxRecipe = script.Parent

vfxRecipe.InfiniteLoop = false
vfxRecipe.LoopCount = 3

vfxRecipe.Finished:Connect(function()
    print("Playback finished.")
end)

vfxRecipe:Play()
```

### Controlling Parameters

Use `SetParam(SourceName, ParamName, Value)` to change a source's parameters at runtime. Passing an empty string (`""`) as SourceName applies the change to every source on every layer at once.

```lua
local vfxRecipe = script.Parent

-- Change the size of a specific source
vfxRecipe:SetParam("FlameSource", "Size", 2)

-- Change the transparency of all sources at once
vfxRecipe:SetParam("", "Transparency", 0.5)

-- Change the color with a ColorSequence
local colorKeys = {
    ColorSequenceKeypoint.new(0, Color3.fromRGB(255, 100, 0)),
    ColorSequenceKeypoint.new(1, Color3.fromRGB(255, 220, 0)),
}
vfxRecipe:SetParam("FlameSource", "Color", ColorSequence.new(colorKeys))
```

Use `GetParam(SourceName, ParamName)` to read the current parameter value.

```lua
local vfxRecipe = script.Parent

local currentSize = vfxRecipe:GetParam("FlameSource", "Size")
print("Current size:", currentSize)
```

To specify a source by layer name and index instead of the source name, use `SetParamAt` / `GetParamAt`. Indexes start at 0.

```lua
local vfxRecipe = script.Parent

-- Change the size of the first source on the Base layer
vfxRecipe:SetParamAt("Base", 0, "Size", 1.5)

-- Get the transparency of the second source on the Detail layer
local transparency = vfxRecipe:GetParamAt("Detail", 1, "Transparency")
print("Transparency:", transparency)
```

### Parameters Modifiable at Runtime

The parameters that can be changed at runtime with `SetParam` depend on the source's SpawnType.

<table><thead><tr><th width="160">Parameter</th><th width="100">SpawnType</th><th>Description</th></tr></thead><tbody><tr><td>Size</td><td>Common</td><td>Particle size scale</td></tr><tr><td>Color</td><td>Common</td><td>Particle color (ColorSequence)</td></tr><tr><td>Transparency</td><td>Common</td><td>Particle opacity (0–1)</td></tr><tr><td>Offset</td><td>Common</td><td>Particle spawn position offset (Vector3)</td></tr><tr><td>SpawnCount</td><td>burst</td><td>Number of particles spawned at once on activation</td></tr><tr><td>SpawnRate</td><td>rate</td><td>Number of particles spawned per second</td></tr><tr><td>Speed</td><td>rate</td><td>Particle movement speed (0–100)</td></tr><tr><td>BoundSize</td><td>rate</td><td>Size of the particle spawn area</td></tr><tr><td>Duration</td><td>rate</td><td>Emitter duration (seconds)</td></tr></tbody></table>

{% hint style="warning" %}
`LoopCount` is not a source parameter. Set it with `vfxRecipe.LoopCount = N`.
{% endhint %}

### Complete Example

This example plays an effect, changes its color and size during playback, and restores the original values when playback finishes.

```lua
local vfxRecipe = script.Parent

local function playWithEffect()
    -- Set parameters before playback
    vfxRecipe:SetParam("", "Size", 2)
    vfxRecipe:SetParam("", "Color", ColorSequence.new(Color3.fromRGB(0, 150, 255)))

    vfxRecipe.InfiniteLoop = false
    vfxRecipe.LoopCount = 2

    -- Restore original values when playback finishes
    local conn
    conn = vfxRecipe.Finished:Connect(function()
        conn:Disconnect()
        vfxRecipe:SetParam("", "Size", 1)
        vfxRecipe:SetParam("", "Color", ColorSequence.new(Color3.fromRGB(255, 100, 0)))
    end)

    vfxRecipe:Play()
end

playWithEffect()
```

## Scripting

{% content-ref url="/pages/dRrAyIlsFe1CWBZXQbes" %}
[VFXRecipe](/development/api-reference/classes/vfxrecipe)
{% endcontent-ref %}


# Sound

## Overview <a href="#overview" id="overview"></a>

The Sound object is a core element for playing audio and adding sound effects in your game. You can attach it to a World, Part, UI, and more to implement various audio experiences such as background music, sound effects, and voice. This helps increase immersion and enrich interaction with the player.

## How to Use <a href="#how-to-use" id="how-to-use"></a>

### Setting Sound Id <a href="#setting-sound-id" id="setting-sound-id"></a>

To play a sound, place a Sound object and set the SoundId in the properties window.

<figure><img src="/files/O9secsNrGSEsYxxfueIx" alt=""><figcaption></figcaption></figure>

You can copy the Sound Id by right-clicking an audio asset in the Asset Manager and clicking Copy Asset ID to Clipboard. Set the copied Asset ID in the format **ovdrassetid://number**.

<figure><img src="/files/fWlzYhUQJyn0j03em6Ma" alt=""><figcaption></figcaption></figure>

### Sound Loading <a href="#sound-loading" id="sound-loading"></a>

When you set the Sound Id, the sound asset is loaded. You can check the load state with the IsLoaded property.

#### Load-related behavior

When the asset is not loaded:

* Time Position settings are ignored
* Other properties such as Start Time Position, Volume, and Playback Region are applied normally

When the asset has finished loading:

* Time Position is automatically reset to 0
* The Loaded event fires
* The IsLoaded property becomes true

If you connect the Loaded event after loading has already completed, the event will not be called again, so it is best to check the IsLoaded value first in scripts.

### Preview <a href="#preview" id="preview"></a>

When the Sound Id is set, you can click the Preview button to hear the sound.

<figure><img src="/files/FNz6Ok7b2am89WS5jZXJ" alt=""><figcaption></figcaption></figure>

### Property Summary <a href="#property-summary" id="property-summary"></a>

<table><thead><tr><th width="247">Property</th><th>Description</th></tr></thead><tbody><tr><td>Playing</td><td>Whether the sound is playing</td></tr><tr><td>Looped</td><td>Whether the sound loops</td></tr><tr><td>Volume</td><td>Volume (0–10, default 0.5)</td></tr><tr><td>Playback Regions Enabled</td><td>Whether to use PlaybackRegion and LoopRegion. When set to true, Start Time Position is ignored.</td></tr><tr><td>Playback Speed</td><td>Playback speed (1.0 is normal)</td></tr><tr><td>Start Time Position</td><td>Position in seconds where playback starts when Play() is called. Ignored when Playback Regions Enabled is true.</td></tr><tr><td>Time Position</td><td>Current playback position in seconds</td></tr><tr><td>Sound Id</td><td>Asset Id of the sound to play (format: ovdrassetid://number)</td></tr><tr><td>Loop Region</td><td>Section to use for looped playback (e.g. 5–10 seconds). Works when Looped = true and Playback Regions Enabled = true.</td></tr><tr><td>Playback Region</td><td>Playback range (e.g. 3–8 seconds). Works when Playback Regions Enabled = true.</td></tr><tr><td>Play on Remove</td><td>Whether to play automatically when the Sound object is removed</td></tr><tr><td>Sound Group</td><td>The sound group this sound belongs to</td></tr></tbody></table>

### Playback Range Control <a href="#playback-range-control" id="playback-range-control"></a>

Sound can use PlaybackRegion and LoopRegion to play or loop only a specific part of the sound. This lets you use only a portion of a long file or separate an intro from the loop section.

PlaybackRegion is the range used when starting or restarting a sound with Play(), and LoopRegion is the range used when moving to the next loop during looped playback. Therefore, if you call Play() again during looped playback, playback restarts from the beginning of PlaybackRegion, not LoopRegion.

#### Basic rules

Playback range behaves differently depending on the PlaybackRegionsEnabled setting:

**When PlaybackRegionsEnabled = true:**

* PlaybackRegion and LoopRegion control the playback range
* StartTimePosition is ignored entirely
* You can precisely play only a specific part of the sound
* Changes to PlaybackRegion or LoopRegion are applied immediately even while the sound is playing

**When PlaybackRegionsEnabled = false:**

* Only StartTimePosition affects where playback starts
* PlaybackRegion and LoopRegion are ignored
* The sound always plays to TimeLength

#### Quick reference table

| PlaybackRegionsEnabled | Looped | First play start   | Loop start                   | End                          |
| ---------------------- | ------ | ------------------ | ---------------------------- | ---------------------------- |
| true                   | true   | PlaybackRegion.Min | LoopRegion or PlaybackRegion | LoopRegion or PlaybackRegion |
| true                   | false  | PlaybackRegion.Min | -                            | PlaybackRegion.Max           |
| false                  | true   | StartTimePosition  | 0                            | TimeLength                   |
| false                  | false  | StartTimePosition  | -                            | TimeLength                   |

#### Enabling PlaybackRegionsEnabled

To use PlaybackRegion and LoopRegion, set the PlaybackRegionsEnabled property to true first.

> When Playback Regions Enabled is on, Start Time Position is ignored and PlaybackRegion controls the playback range.

#### PlaybackRegion (setting the playback segment)

Set the start and end of the sound in seconds. For example, use it to play only the 5–20 second part of a 30-second sound.

```lua
local Sound = script.Parent

Sound.PlaybackRegionsEnabled = true
Sound.PlaybackRegion = NumberRange.new(5, 20)
Sound:Play()
```

#### LoopRegion (setting the loop segment)

When Looped is true, this sets the segment to repeat on each loop. The first play uses PlaybackRegion; subsequent loops use LoopRegion.

```lua
local Sound = script.Parent

Sound.PlaybackRegionsEnabled = true
Sound.Looped = true

Sound.PlaybackRegion = NumberRange.new(0, 30)

Sound.LoopRegion = NumberRange.new(10, 25)

Sound:Play()
```

**Notes:**

* Negative values for PlaybackRegion and LoopRegion are clamped to 0
* If PlaybackRegion or LoopRegion values exceed TimeLength, the playback range is limited based on TimeLength
* When Min = Max, that Region setting is ignored

#### Practical example

**Background music intro + loop**

```lua
local BGM = script.Parent

BGM.PlaybackRegionsEnabled = true
BGM.Looped = true

BGM.PlaybackRegion = NumberRange.new(0, 60)

BGM.LoopRegion = NumberRange.new(15, 60)

BGM:Play()
```

### Position-Based Playback <a href="#position-based-playback" id="position-based-playback"></a>

Position-based playback lets you make sound attenuate naturally with distance and position. For example, you can represent rain heard in a specific area or engine noise fading as a car moves away. These settings are effective for improving spatial awareness and immersion in the game.

<figure><img src="/files/WRFAa1Hl5GQsYVxgajAt" alt=""><figcaption></figcaption></figure>

If you place a Sound as a child of an object with a position, such as a Part, MeshPart, or Attachment, it plays as 3D sound. Sounds placed elsewhere play as 2D sound, which is heard at the same volume regardless of position.

You can set distance with the Roll Off Max Distance and Roll Off Min Distance properties, and set attenuation with the Roll Off Mode property. Roll Off attenuation is not applied to 2D sounds.

<table><thead><tr><th width="247">Property</th><th>Description</th></tr></thead><tbody><tr><td>Roll Off Max Distance</td><td>Maximum distance at which the sound can be heard</td></tr><tr><td>Roll Off Min Distance</td><td>Minimum distance at which the sound is heard at full volume</td></tr><tr><td>Roll Off Mode</td><td><p>How the sound attenuates with distance</p><ul><li>Inverse: Sound attenuates inversely with distance</li><li>Linear: Attenuates linearly</li><li>Linear Square: Attenuates with the square of distance</li><li>Inverse Tapered: Softer attenuation at close range</li></ul></td></tr></tbody></table>

Each Roll Off Mode type can be used as follows:

* Inverse: Explosion sounds (sound gets gradually quieter as the player moves away)
* Linear: Background music from a radio (sound decreases evenly with distance)
* Linear Square: Gunfire (loud at close range, drops off quickly at distance)
* Inverse Tapered: Wind (gradual decrease at close range)

## Usage Examples <a href="#usage-examples" id="usage-examples"></a>

### Game background music <a href="#game-background-music" id="game-background-music"></a>

```lua
local Workspace = game:GetService("Workspace")
local GameBGM = Workspace.GameBGM

local function PlayGameBGM(isPlay)
    GameBGM.Playing = isPlay
end
PlayGameBGM(true)
```

### KillPart collision sound effect <a href="#killpart-collision-sound-effect" id="killpart-collision-sound-effect"></a>

```lua
local Workspace = game:GetService("Workspace")
local Part = Workspace.Part

local function OnTouched(otherPart)
    local partParent = otherPart.Parent
    local humanoid = partParent:FindFirstChild("Humanoid")

    if humanoid then
        humanoid:TakeDamage(100)

        local killSFX = Instance.new("Sound")
        killSFX.SoundId = "ovdrassetid://1234"
        killSFX.Volume = 1
        killSFX.Parent = Part
        killSFX.Playing = true
    end
end
Part.Touched:Connect(OnTouched)
```

### Button sound effect <a href="#button-sound-effect" id="button-sound-effect"></a>

```lua
local Workspace = game:GetService("Workspace")
local ScreenGui = script.Parent
local ImageButton = ScreenGui.ImageButton

local function OnActivated()
    print("Activated!")

    local buttonSFX = Instance.new("Sound")
    buttonSFX.SoundId = "ovdrassetid://1234"
    buttonSFX.Volume = 1
    buttonSFX.Parent = Workspace
    buttonSFX.Playing = true
end
ImageButton.Activated:Connect(OnActivated)
```

## Advanced Usage <a href="#advanced-usage" id="advanced-usage"></a>

### Sound groups <a href="#sound-groups" id="sound-groups"></a>

SoundGroup is an object that lets you control multiple sounds together.

To attach a Sound to a specific group, you must set the SoundGroup property directly. Simply parenting the Sound under a SoundGroup in the hierarchy does not link it to that group.

A SoundGroup's Volume is applied immediately to connected sounds, and if Volume is set to 0, sounds in that group will not be output.

```lua
local Workspace = game:GetService("Workspace")
local SoundGroup = script.Parent
local Sound = Workspace.Sound

SoundGroup.Volume = 0.2
Sound.SoundGroup = SoundGroup
```


# Outline/Fill

## Overview

Outline and Fill can be used to highlight avatars or objects when they are distant or occluded by other objects.

To prevent unnecessary Outline and Fill effects from being applied to objects used for ActionSequence presentation, the area under the Humanoid’s ActionRunner, where objects configured in the ActionSequence are cloned, is excluded from the effect target.

## Type

<table><thead><tr><th width="123.33331298828125">Object</th><th>Description</th></tr></thead><tbody><tr><td>Outline</td><td>Displays an outline around a BasePart. The thickness can be adjusted via the Thickness property. It is useful for emphasizing distant objects, though the outline may be occluded by other objects.</td></tr><tr><td>Fill</td><td>Fills a BasePart with color, conforming to its shape.<br>The DepthMode property determines whether the Fill object is always visible, visible only when not occluded, or visible only when occluded, making it ideal for providing hints when objects are occluded by other objects.</td></tr></tbody></table>

## Outline

The Outline object in OVERDARE is used to emphasize the contours of specific objects, proving valuable for highlighting interactive elements or key targets in various scenarios.

For a Model containing multiple BaseParts or an avatar Model, creating an Outline on the Model applies it uniformly to all BaseParts within the Model.

<figure><img src="/files/v7dB7N8inYxEgAmaoSr9" alt=""><figcaption></figcaption></figure>

### Outline Properties

<table><thead><tr><th width="145.3333740234375">Property</th><th>Description</th></tr></thead><tbody><tr><td>Enabled</td><td>Specifies whether the Outline effect is enabled or not.</td></tr><tr><td>Archivable</td><td>Determines whether the Outline can be replicated.</td></tr><tr><td>Adornee</td><td>Specifies the target object to apply the Outline effect.</td></tr><tr><td>Parent</td><td>Specifies the Outline’s position in the LevelBrowser hierarchy. The parent object serves as the default target for the Outline effect, but if Adornee is set, the Outline applies to the object set as Adornee regardless of this Parent property.</td></tr><tr><td>Name</td><td>Specifies the name of the Outline object.</td></tr><tr><td>Color</td><td>Specifies the color of the Outline.</td></tr><tr><td>Tickness</td><td><p>Specifies the thickness of the Outline.</p><ul><li>Default: 0.2</li><li>Range: 0.0 to 1.0</li></ul></td></tr></tbody></table>

### Script Feature

```lua
local outline = Instance.new("Outline")
outline.Parent = workspace.TargetPart
outline.Color = Color3.new(1, 0, 0) -- Red
outline.Tickness = 0.5
outline.Enabled = true
```

## Fill

The Fill object provides functionality to fill an object with a specific color and effect. It is useful for depicting character states, providing interaction feedback, or highlighting objects.

For a Model containing multiple BaseParts or a Nutty (avatar model) composed of a Model, creating a Fill on the Model will apply it uniformly to all BaseParts within the Model.

<figure><img src="/files/Yv1vSkHL8Rn5OJ9PL5Wm" alt=""><figcaption></figcaption></figure>

### Fill Properties

<table><thead><tr><th width="142">Property</th><th>Description</th></tr></thead><tbody><tr><td>Enabled</td><td>Specifies whether the Fill effect is enabled or not.</td></tr><tr><td>Archivable</td><td>Determines whether the Outline can be replicated.</td></tr><tr><td>Adornee</td><td>Specifies the target object to apply the Fill effect.</td></tr><tr><td>Parent</td><td>Specifies the Fill’s position in the LevelBrowser hierarchy. The parent object serves as the default target for the Fill effect, but if Adornee is set, the Fill applies to the object set as Adornee regardless of this Parent property.</td></tr><tr><td>Name</td><td>Specifies the name of the Fill object.</td></tr><tr><td>Color</td><td>Specifies the color of the Fill.</td></tr><tr><td>Transparency</td><td><p>Specifies the transparency of the Fill.</p><ul><li>Range: 0.0 to 1.0</li></ul></td></tr><tr><td>DepthMode</td><td><p>Determines the Fill’s display behavior depending on whether the object is occluded, with the following options:</p><ul><li>AlwaysOnTop: The Fill is always displayed, regardless of object occlusion.</li><li>VisibleWhenNotOccluded: The Fill is displayed only when the object is not occluded.</li><li>VisibleWhenOccluded: The Fill is displayed only when the object is occluded by other objects</li></ul></td></tr></tbody></table>

### DepthMode Detailed Descriptions

The **DepthMode** property of the Fill object determines its display behavior based on whether the object is occluded by other objects.

* **AlwaysOnTop**

  Displays the Fill in the foreground of the screen, regardless of whether the object is occluded by other objects.

  <figure><img src="/files/Bq3P3vmCLWUzzwJS5u1E" alt=""><figcaption></figcaption></figure>
* **VisibleWhenNotOccluded**

  Displays the Fill only when the object is not occluded by other objects but is directly visible.\
  In other words, the Fill appears only when the object is clearly within the line of sight.

  <figure><img src="/files/w3HP6xVb8xh5NY5STcTj" alt=""><figcaption></figcaption></figure>
* **VisibleWhenOccluded**

  Displays the Fill only when the object is occluded by other objects.\
  The Fill does not appear when the object is directly visible, but is highlighted only when the object is occluded.

  <figure><img src="/files/rqOgmzhqeKrOw3EASS79" alt=""><figcaption></figcaption></figure>

### Script Feature

```lua
local fill = Instance.new("Fill")
fill.Parent = workspace.TargetPart
fill.Color = Color3.new(0, 1, 0) -- Green
fill.Transparency = 0.4
fill.DepthMode = Enum.FillDepthMode.VisibleWhenOccluded
fill.Enabled = true
```


# ProximityPrompt

## Overview

ProximityPrompt is a feature that displays available interactions and input prompts when a player approaches an object. Players can press the displayed input key to interact with the object.

This feature is used as a UI element that intuitively informs players which objects can be interacted with. It can be applied to various objects such as chests, doors, resources, NPCs, and devices, and is widely used in exploration, RPG, and survival genre games.

ProximityPrompt supports two types of interaction methods: Press input and Hold input.

## How to Use

ProximityPrompt can be used by placing it under BasePart, Attachment, or Model.

When a player character enters the activation distance (MaxActivationDistance) of the object where the prompt is configured, a UI that guides input is automatically displayed.

<figure><img src="/files/bLdq53QWtN689iiEBWj1" alt=""><figcaption></figcaption></figure>

Players can interact with the object by pressing the displayed input key. The input method automatically changes depending on the platform.

* PC : Keyboard input
* Mobile : Touch input

### Property Summary

<table><thead><tr><th width="247">Property</th><th>Description</th></tr></thead><tbody><tr><td>Hold Duration</td><td>Sets the time (in seconds) the button must be held down. If HoldDuration is greater than 0, the button must be held for a certain amount of time for the interaction to be executed.</td></tr><tr><td>Max Activation Distance</td><td>The maximum distance at which the prompt is displayed.</td></tr><tr><td>Object Text</td><td>The text that displays the name of the object being interacted with.</td></tr><tr><td>Action Text</td><td>The interaction text shown to the player. (e.g., Open, Talk, Mine)</td></tr><tr><td>Keyboard Key Code</td><td>Specifies the keyboard input key used for interaction in a PC environment.</td></tr><tr><td>Exclusivity</td><td>Defines the display rule for prompts shown at the same time. Depending on the Exclusivity setting, multiple prompts may not be displayed simultaneously.</td></tr><tr><td>Clickable Prompt</td><td>Determines whether the prompt UI can be clicked to interact in a PC environment.</td></tr><tr><td>Enabled</td><td>Determines whether the prompt is displayed.</td></tr><tr><td>UIOffset</td><td>Sets the screen position offset of the prompt UI.</td></tr><tr><td>Requires Line Of Sight</td><td>Determines whether the prompt should be hidden if the object is obstructed from the camera's view.</td></tr></tbody></table>

### Script Feature

Using scripts, you can execute specific actions when the prompt is triggered.

```lua
local Prompt = script.Parent

local function OnTriggered(player)
    print(player.Name .. " Triggered")
end
Prompt.Triggered:Connect(OnTriggered)

local function OnTriggerEnded(player)
    print(player.Name .. " TriggerEnded")
end
Prompt.TriggerEnded:Connect(OnTriggerEnded)
```

Learn More

{% content-ref url="/pages/9KwgnjyICXhC3zbJ7ott" %}
[ProximityPrompt](/development/api-reference/classes/proximityprompt)
{% endcontent-ref %}

{% content-ref url="/pages/bx3XfB1bjpgrkUWG8FjZ" %}
[Broken mention](broken://pages/bx3XfB1bjpgrkUWG8FjZ)
{% endcontent-ref %}

## Notes

* ProximityPrompt functions properly only when placed under BasePart, Attachment, or Model.
* Whether the prompt is displayed is calculated based on the distance between the player and the center point of the object.
* When Device Emulator is enabled in Studio, or when the experience is running on a mobile device, the KeyboardKeyCode and ClickablePrompt settings do not affect the behavior. In mobile environments, prompts are displayed and interacted with using touch input.

## Usage Examples

* When a player approaches a treasure chest placed in the world, an Open prompt appears. The player can press the input key to open the chest and obtain items or rewards.
* When a player approaches an ore object, a Mine prompt appears, allowing the player to mine the resource and obtain materials.
* When a player approaches an NPC, a Talk prompt appears, allowing the player to start a conversation or interact with quests and shops.
* When a player approaches a door or device, an Open or Activate prompt appears, allowing the player to open the door or operate the device.


# SimulationBall

### Overview <a href="#undefined" id="undefined"></a>

SimulationBall is an object that calculates the ball's movement in advance and then plays back the result. Compared to a regular physics ball, its trajectory is easier to predict, and it can represent the same result more reliably even in environments where multiple players are watching together.

It is especially useful in the following situations.

* Games where the ball's trajectory is important, such as soccer or basketball
* When you need to stage the movement of a ball bouncing off walls or floors
* When you want to preview the ball's movement path while adjusting gameplay

### How to Use <a href="#undefined" id="undefined"></a>

#### Creating a SimulationBall and Setting the Collision Target Trace Channel <a href="#simulationball-bound-trace-channel" id="simulationball-bound-trace-channel"></a>

<figure><img src="/files/IsYg6201u1teigWDHnhD" alt=""><figcaption></figcaption></figure>

Create a `SimulationBall` in the Level Browser and place it where you want to use it.

<figure><img src="/files/f1swXRenFffuRbE7qWeP" alt=""><figcaption></figcaption></figure>

Which objects the SimulationBall collides with is defined through the **Collision Profile** and **StaticObjectTypes**.

* `BallMeshCollisionProfile`: The Collision Profile of the SimulationBall itself. It is referenced when other objects collide with the SimulationBall. However, this profile is not used in the actual simulation.
* `StaticObjectTypes`: The Object Type channels used when the SimulationBall performs its collision simulation. During the actual simulation, the trajectory is calculated based on collisions with these channels.

Therefore, for objects that the ball should collide with, such as walls or floors, you must add their ObjectType to `StaticObjectTypes`.

{% hint style="info" %}
If the `StaticObjectTypes` array is empty, only the `WorldStatic` channel is targeted for collision by default. If the ball also needs to collide with objects on other channels, make sure to add those channels.
{% endhint %}

#### Simulation Preview in the Editor <a href="#simulation-preview" id="simulation-preview"></a>

Finding the right physics values for a simulation ball in your game normally requires testing repeatedly while changing the numbers. To help with this, a preview feature is provided that lets you run various simulations at edit time without actually playing the game.

By entering different values into the SimulationBall's `EditorBallSimParams`, you can immediately see in the editor what kind of trajectory the ball follows. Keeping `EnablePathMarker` turned on at this time displays the calculated trajectory as path markers, making it easy to compare values.

#### Controlling the Simulation with a Script <a href="#simulation-script" id="simulation-script"></a>

Find the SimulationBall, set the starting position and velocity, and run the simulation.

`Simulate()` does not complete its result immediately after being called. Since the simulation is internally divided and calculated asynchronously, **APIs that query the simulation results**, such as `FindNextBallBounce()` or `GetCFrameAtTime()`, must be called after the calculation is finished. On the other hand, `Play()`, which starts playback, can be called right after `Simulate()` as in the example below.

```lua
local Workspace = game:GetService("Workspace")
local Ball = Workspace:WaitForChild("SimulationBall")

-- EnablePathMarker draws the simulated trajectory on screen for preview
Ball.EnablePathMarker = true


local Params = BallSimParams.new()
Params.Mass = 0.43
Params.InitialCFrame = CFrame.new(0, 100, -800)

-- InitialSpeed is in km/h and InitialDirection must be a unit vector
local InitialVelocity = Vector3.new(300, 900, 0) -- velocity vector in km/h scale
Params.InitialSpeed = InitialVelocity.Magnitude
Params.InitialDirection = InitialVelocity.Unit

Params.Simsteps = 120
Params.StepsPerSecond = 30

-- With spin values below, the ball can bounce along its spin direction on the ground
-- or curve in the air by the Magnus effect
--Params.InitialSpinAxis = Vector3.new(0, 1, 0)
--Params.InitialSpinSpeed = 0

Ball:Simulate(Params, false)
Ball:Play()
```

{% embed url="<https://files.gitbook.com/v0/b/gitbook-x-prod.appspot.com/o/spaces%2FhRPi87oM9ttlk5nyu7L7%2Fuploads%2FCL2hnpT5fooLEHZP4qo8%2Fsimball.mp4?alt=media&token=187f8f40-32aa-49fd-9d6f-0f6738d9fc1d>" %}

#### Main Properties of BallSimParams <a href="#ballsimparams" id="ballsimparams"></a>

You can adjust the ball's movement by changing the main settings of `BallSimParams`.

<table><thead><tr><th width="221.6666259765625">Property</th><th>Description</th></tr></thead><tbody><tr><td><strong>InitialCFrame</strong></td><td>Defines the starting position and initial rotation of the ball.</td></tr><tr><td><strong>InitialSpeed</strong></td><td>Defines the launch speed of the ball in km/h.</td></tr><tr><td><strong>InitialDirection</strong></td><td>Defines the direction the ball flies in as a unit vector.</td></tr><tr><td><strong>InitialSpinAxis</strong></td><td>Defines the axis the ball rotates around as a unit vector.</td></tr><tr><td><strong>InitialSpinSpeed</strong></td><td>Defines the rotation speed of the ball in RPM (revolutions per minute), in the range -12000 to 12000. The larger the absolute value, the stronger the Magnus force.</td></tr><tr><td><strong>Mass</strong></td><td>Defines the mass of the ball in kg. Used for collision impulse and rotational inertia calculations.</td></tr><tr><td><strong>BaseGravity</strong></td><td>Adjusts how strongly the ball falls downward (gravitational acceleration) in cm/s². The default is 980; if set to 0, the ball is weightless, and if negative, gravity works in the opposite direction.</td></tr><tr><td><strong>Restitution</strong></td><td>Defines the coefficient of restitution on collision (0–1). The closer to 1, the more the ball bounces.</td></tr><tr><td><strong>Friction</strong></td><td>Defines the friction coefficient against the ground (0–1). The larger the value, the faster the sliding speed decreases on ground contact.</td></tr><tr><td><strong>RollingFriction</strong></td><td>Defines the rolling resistance coefficient (0–1). Determines how quickly the ball slows down while rolling on the ground.</td></tr><tr><td><strong>SpinMagnusWeight</strong></td><td>Defines the weight of the Magnus effect applied when the ball spins (0.0–0.1). The larger the weight, the more the trajectory curves; a natural effect at the level of a soccer or golf ball is around 0.01–0.015.</td></tr><tr><td><strong>Simsteps</strong></td><td>Defines how many steps the simulation is divided into (1–14400). Higher values can improve precision but also increase calculation cost.</td></tr><tr><td><strong>StepsPerSecond</strong></td><td>Defines the simulation frequency in Hz (steps per second), in the range 1–480. Together with `Simsteps`, it determines the total simulation length (`Simsteps ÷ StepsPerSecond`) and precision.</td></tr></tbody></table>

For example, if you want the ball to travel farther, increase the `InitialSpeed` value, and if you want it to start from a higher point, raise the height value of `InitialCFrame`.

{% hint style="info" %}
`EnablePathMarker` is a property of the **SimulationBall object**, not of `BallSimParams`. To display the trajectory on screen, set it directly on the ball object, as in `Ball.EnablePathMarker = true` in the example above.
{% endhint %}

### Using Additional SimulationBall Features <a href="#simulationball-features" id="simulationball-features"></a>

Unlike a typical real-time physics simulation, SimulationBall pre-calculates the ball's trajectory and collisions based on the BallSimParams provided in advance, and then plays the result. This allows you to find out the ball's movement path or collision positions before calling Play.

#### Getting the Ball's Next Bound Position <a href="#bound" id="bound"></a>

After the simulation is finished, SimulationBall can find out information about the next point where the ball will bounce in advance.

This feature is useful in the following cases.

* When you want to check in advance which wall the ball will bounce off
* When you want to place an effect at the next bound position
* When AI or game logic needs to predict the next collision point

```lua
local Workspace = game:GetService("Workspace")
local Ball = Workspace:WaitForChild("SimulationBall")

local Params = BallSimParams.new()

Params.Mass = 0.43
Params.InitialCFrame = CFrame.new(0, 100, -800)

-- InitialSpeed is in km/h and InitialDirection must be a unit vector
local InitialVelocity = Vector3.new(300, 900, 0) -- velocity vector in km/h scale
Params.InitialSpeed = InitialVelocity.Magnitude
Params.InitialDirection = InitialVelocity.Unit

Params.Simsteps = 120
Params.StepsPerSecond = 30


Ball:Simulate(Params, false)
-- Wait until the async simulation finishes before querying results
task.wait()
local NextBounce = Ball:FindNextBallBounce()

if NextBounce.BouncedTime > 0 then
    print("Next Bound Time:", NextBounce.BouncedTime)
    print("Next Bound Position:", NextBounce.BouncedPosition)
end

Ball:Play()
```

The code above uses `FindNextBallBounce()` to get the next bound information.\
The returned value contains the time and position where the bound occurs, so you can check in advance where the ball will bounce.

However, if you call `FindNextBallBounce()` immediately after `Simulate()`, the calculation may not be finished yet and you may not get the desired values. As in the example above, you should wait briefly with `task.wait()` before calling it. If `Simsteps` is large and the calculation is heavy, waiting a single frame may not be enough, so check repeatedly until a valid value is returned, or allow sufficient time before querying.

#### Getting the Ball's Physics Values After N Seconds <a href="#n" id="n"></a>

SimulationBall can also retrieve the state of the ball after a specific amount of time in advance.

This feature is useful in the following cases.

* When you want to know the ball's position after N seconds
* When you want to check how fast the ball is moving
* When you want to predict the future state, including the rotation speed

```lua
local Workspace = game:GetService("Workspace")
local Ball = Workspace:WaitForChild("SimulationBall")

local Params = BallSimParams.new()
Params.Mass = 0.43
Params.InitialCFrame = CFrame.new(0, 100, -800)

-- InitialSpeed is in km/h and InitialDirection must be a unit vector
local InitialVelocity = Vector3.new(300, 900, 0) -- velocity vector in km/h scale
Params.InitialSpeed = InitialVelocity.Magnitude
Params.InitialDirection = InitialVelocity.Unit

Params.Simsteps = 120
Params.StepsPerSecond = 30

Ball:Simulate(Params, false)
-- Wait until the async simulation finishes before querying results
task.wait()

local CheckTime = 2.0

local FutureCFrame = Ball:GetCFrameAtTime(CheckTime)
local FutureVelocity = Ball:GetLinearVelocityAtTime(CheckTime)
local FutureSpeed = Ball:GetSpeedAtTime(CheckTime)
local FutureAngularVelocity = Ball:GetAngularVelocityAtTime(CheckTime)

print("Position in 2s:", FutureCFrame.Position)
print("Velocity vector in 2s:", FutureVelocity)
print("Speed in 2s:", FutureSpeed)
print("Angular velocity in 2s:", FutureAngularVelocity)
```

The example above retrieves the ball's physics values `2 seconds` later in advance.

* `GetCFrameAtTime()` : position and rotation at that time
* `GetLinearVelocityAtTime()` : direction and magnitude of the movement speed at that time
* `GetSpeedAtTime()` : only the speed as a number at that time
* `GetAngularVelocityAtTime()` : rotation speed at that time

In other words, SimulationBall does more than simply play the ball; it can also **query the position, velocity, and rotation at future points in time** in advance.

Here as well, avoid reading values immediately after `Simulate()`; it is better to wait briefly with `task.wait()` before querying.

Also, if `CheckTime` exceeds the current simulation range, you may not get the expected values, so make sure `Simsteps ÷ StepsPerSecond` is sufficiently larger than the time you want to query.

#### Automatically Aiming the Ball at a Target Position <a href="#simulatetotarget" id="simulatetotarget"></a>

With `SimulateToTarget()`, you do not need to calculate the launch speed and direction yourself; simply specify a target position, and it automatically calculates the speed and direction that reach that point and runs the simulation.

This feature is useful in the following cases.

* When you want to implement trick shots that throw the ball exactly to a specific position
* When you want an NPC or AI to throw the ball toward a player's position
* When you want to build a trajectory from only a target point instead of manually calculating the launch speed/direction

```lua
local Workspace = game:GetService("Workspace")
local Ball = Workspace:WaitForChild("SimulationBall")

local Params = BallSimParams.new()
Params.Mass = 0.43
Params.InitialCFrame = CFrame.new(0, 100, -800)
Params.Simsteps = 120
Params.StepsPerSecond = 30

local TargetPosition = Vector3.new(0, 0, 800)

-- UseDesiredSpeed = false: search for both speed and direction to reach the target
-- AutoPlay = true: start playback immediately after the simulation completes
local Result = Ball:SimulateToTarget(Params, TargetPosition, false, true)

if Result.bHit then
    print("Hit time:", Result.HitTime)
    print("Actual launch speed (km/h):", Result.ActualSpeed)
else
    print("Could not find a trajectory that reaches the target")
end
```

`SimulateToTarget()` returns the calculation result immediately as a `BallSimTargetResult`, so unlike `Simulate()`, you can use the return value right away without waiting. You can use `bHit` to check whether a trajectory reaching the target was found, `HitTime` for the arrival time, and `ActualSpeed`/`Direction` for the actual speed and direction used.

#### Using Collision Events <a href="#collision-events" id="collision-events"></a>

SimulationBall fires events when it collides with other objects during playback. Use them to implement collision-based logic such as goal detection, playing sounds, or displaying effects.

* `Touched`: Called when the ball collides with another part.
* `TouchEnded`: Called when the ball separates from a part it was in contact with.
* `Bounded`: Called only when the ball **bounces (collision reflection)** off a part. Sliding contacts are not included.

```lua
local Workspace = game:GetService("Workspace")
local Ball = Workspace:WaitForChild("SimulationBall")

-- Called on every collision
Ball.Touched:Connect(function(otherPart)
    if otherPart.Name == "Goal" then
        print("Goal!")
    end
end)

-- Called only when the ball actually bounces off a part
Ball.Bounded:Connect(function(otherPart, bounce)
    print("Ball bounced off:", otherPart.Name)
    print("Bounce position:", bounce.BouncedPosition)
end)
```

#### Controlling Playback <a href="#playback-control" id="playback-control"></a>

Simulation playback can be controlled in various ways beyond `Play()`.

* `Pause()`: Pauses playback. Calling `Play()` again resumes from where it stopped.
* `Stop()`: Stops playback. Calling `Play()` afterwards replays from the beginning of the simulation.
* `Play(bReset)`: Passing `true` for `bReset` resets the playback time (`PlaybackTime`) before playing. If omitted, it defaults to `false`.
* `SetPlaybackTime(time)`: Moves the playback time to an arbitrary point. It can be called even while playing, so it can be used for rewinding or jumping to a specific moment.
* `SlomoFactor`: The playback speed multiplier. 1.0 is normal speed, 0.5 plays at half speed (slow motion), and 2.0 plays at double speed.

```lua
local Workspace = game:GetService("Workspace")
local Ball = Workspace:WaitForChild("SimulationBall")

Ball:Play()

-- Pause and resume from the same point
Ball:Pause()
Ball:Play()

-- Jump to the 2.5 second mark (also works while playing)
Ball:SetPlaybackTime(2.5)

-- Play at half speed for a slow-motion effect
Ball.SlomoFactor = 0.5

-- Stop, then replay from the beginning
Ball:Stop()
Ball:Play()
```

#### Recalculating the Trajectory Mid-Flight (ReSimulate) <a href="#resimulate" id="resimulate"></a>

You can also recalculate the trajectory of a ball that is currently playing, starting from a specific point in time. This is useful for effects such as intercepting a pass or changing direction in mid-air.

* `ReSimulateWithDelay()`: After the specified delay from the current playback time, recalculates the trajectory with a new direction, speed, and spin.
* `ReSimulateToTargetWithDelay()`: After the delay, recalculates the trajectory to head toward a target position. The spin is calculated automatically based on the current angular velocity.
* `ReSimulateSpinToTargetWithDelay()`: After the delay, recalculates the trajectory toward a target position using the specified spin axis and spin speed.

```lua
local Workspace = game:GetService("Workspace")
local Ball = Workspace:WaitForChild("SimulationBall")

local TargetPosition = Vector3.new(100, 0, 50)

-- After 1 second, recalculate the trajectory toward the target
local Result = Ball:ReSimulateToTargetWithDelay(
    1.0,            -- delay from the current playback time (seconds)
    TargetPosition, -- target position
    100,            -- desired speed (km/h)
    120,            -- step count
    false           -- search for both speed and direction
)

if Result.bHit then
    print("Hit time:", Result.HitTime)
end
```

Like `SimulateToTarget()`, `ReSimulateToTargetWithDelay()` and `ReSimulateSpinToTargetWithDelay()` return a `BallSimTargetResult`.

### Notes <a href="#undefined" id="undefined"></a>

* `Simulate()` does not complete immediately and is processed asynchronously internally. Wait briefly with `task.wait()` before querying simulation results with `FindNextBallBounce()`, `GetCFrameAtTime()`, and similar APIs; if the calculation is heavy, you may need to check repeatedly until a valid value is returned.
* You must run the simulation before playing the ball.
* If `StaticObjectTypes` is empty, only the `WorldStatic` channel is targeted for collision. Make sure to add the channels of the objects the ball should bounce off.
* If the speed value is too small, the ball may appear to barely move.
* When querying future points in time, make sure `CheckTime` does not exceed the total simulation length (`Simsteps ÷ StepsPerSecond`).
* During testing, keeping `EnablePathMarker` enabled helps with verification.

### Reference Documents <a href="#undefined" id="undefined"></a>

{% content-ref url="/pages/ZaoG57umzS7C4yIBXybF" %}
[SimulationBall](/development/api-reference/classes/simulationball)
{% endcontent-ref %}

{% content-ref url="/pages/YqJaPfrqUpMzOMSW6u1P" %}
[BallSimParams](/development/api-reference/datatype/ballsimparams)
{% endcontent-ref %}

{% content-ref url="/pages/oWk6LzQdpvxHPVc76lcD" %}
[BallSimTargetResult](/development/api-reference/datatype/ballsimtargetresult)
{% endcontent-ref %}

{% content-ref url="/pages/v1qaySVS9nEJPM5N38Aw" %}
[BallBounce](/development/api-reference/datatype/ballbounce)
{% endcontent-ref %}


# Character

## **Overview** <a href="#overview" id="overview"></a>

OVERDARE provides an avatar system based on **ODA (OVERDARE Deformable Avatar)**. Creators can use ODA to create games without implementing separate character systems. Using **Cage Mesh Deformer** technology, OVERDARE allows the creation and application of clothing and accessories compatible with various body parts.

## **Character Types** <a href="#character-types" id="character-types"></a>

OVERDARE UGC has two main character types:

* **Default Character**: An ODA-based character created using RigBuilder or imported from external sources.
* **Player Character**: An avatar character that the user can customize with clothing and accessories on the OVERDARE platform and control.

Both characters are ODA-based, with the distinction being whether the character was created by the player on the OVERDARE platform or by the creator within the game. Players can enjoy adventures as their avatar in the UGC world.

Creators can create NPCs for their game or replace player characters with custom ones based on the game’s concept and features.

## **Character Model Structure** <a href="#character-model-structure" id="character-model-structure"></a>

The OVERDARE character model consists of the following structures:

* **Model**: The highest-level object containing the entire character.
* **Humanoid**: Manages the character’s actions and states.
* **HumanoidRootPart**: The RootPart serving as the character’s center.
* **6 MeshParts**: Head, Torso, RightArm, LeftArm, RightLeg, LeftLeg.
* **Skeleton**: Skeletal structure composed of 19 bones.

## **Character** Parts and **Skeleton Structure** <a href="#character-parts-and-skeleton-structure" id="character-parts-and-skeleton-structure"></a>

OVERDARE avatars are based on 6 BodyParts (head, torso, both arms, both legs) and a skeleton structure.

* **6 MeshParts**: The MeshParts are easy to assemble like building blocks, allowing the replacement of body parts without complex rigging in OVERDARE Studio.
* **Skeletal Mesh Conversion**: When the game is launched, the 6 meshes are merged into one and converted into a skeletal mesh with 19 bones.
  * This allows for easy assembly of character appearances, similar to building with LEGO blocks, while also enabling smooth and dynamic animations.

The OVERDARE Avatar Bone Structure is as follows:

<figure><img src="/files/Rqg90cNth6RSu5bbCVCS" alt="" width="375"><figcaption></figcaption></figure>

| No | Name          | Location                               | Attachments |
| -- | ------------- | -------------------------------------- | ----------- |
| 1  | Root          | Center of the character (ground level) |             |
| 2  | LowerTorso    | Waist                                  |             |
| 3  | UpperTorso01  | Lower abdomen                          |             |
| 4  | UpperTorso02  | Upper abdomen                          |             |
| 5  | Head          | Head                                   |             |
| 6  | LeftUpperArm  | Left upper arm                         |             |
| 7  | LeftLowerArm  | Left lower arm                         |             |
| 8  | LeftHand      | Left hand                              |             |
| 9  | LeftItem      | Left equipment position                |             |
| 10 | RightUpperArm | Right upper arm                        |             |
| 11 | RightLowerArm | Right lower arm                        |             |
| 12 | RightHand     | Right hand                             |             |
| 13 | RightItem     | Right equipment position               |             |
| 14 | LeftUpperLeg  | Left thigh                             |             |
| 15 | LeftLowerLeg  | Left calf                              |             |
| 16 | LeftFoot      | Left foot                              |             |
| 17 | RightUpperLeg | Right thigh                            |             |
| 18 | RightLowerLeg | Right calf                             |             |
| 19 | RightFoot     | Right foot                             |             |

## **Humanoid System** <a href="#humanoid-system" id="humanoid-system"></a>

Humanoid is the core class that defines the character’s behavior and state.

### **Properties** <a href="#properties" id="properties"></a>

| Property            | Description                                                                                    |
| ------------------- | ---------------------------------------------------------------------------------------------- |
| DisplayDistanceType |                                                                                                |
| Health              | The character’s current health                                                                 |
| JumpPower           | The character’s jump power. When calculated with gravity, this determines maximum jump height. |
| MaxHealth           | The character’s maximum health                                                                 |
| RootPart            | The character’s base Part (HumanoidRootPart)                                                   |
| WalkSpeed           | The character’s walking speed                                                                  |

### **Humanoid State** <a href="#humanoid-state" id="humanoid-state"></a>

Humanoid supports multiple states (HumanoidStateType), each triggering a default animation. For example, “Jumping” is activated when jumping, and “FreeFall” is activated when falling.

You can use scripts to forcibly change states or restrict them from changing into a specific state.

### **Key Humanoid States**

| No | State    | Description                                                                                                                          |
| -- | -------- | ------------------------------------------------------------------------------------------------------------------------------------ |
| 1  | Running  | Default state; allows movement or jumping.                                                                                           |
| 2  | Jumping  | A brief state immediately after the character jumps. Usually transitions to Freefall or Landed.                                      |
| 3  | Freefall | A state where the character is in free fall through the air. Entered while airborne after jumping or when falling from a high place. |
| 4  | Landed   | A brief state immediately after the character touches the ground following Freefall.                                                 |
| 5  | Climbing | The character is climbing an object.                                                                                                 |
| 6  | Swimming | The character is swimming.                                                                                                           |
| 8  | Ragdoll  | Ragdoll is activated.                                                                                                                |
| 9  | Dead     | The character has died after health reaches 0.                                                                                       |
| 10 | Physics  | Physics is activated.                                                                                                                |

#### **Humanoid State Restrictions**

You can use the `Humanoid:SetStateEnabled` function to restrict state transitions.\
For example, even if a character gets near a Part that can be climbed, you can prevent that state transition with the code below:

{% embed url="<https://files.gitbook.com/v0/b/gitbook-x-prod.appspot.com/o/spaces%2FhRPi87oM9ttlk5nyu7L7%2Fuploads%2FPyWJqwo43mkZOAERasyv%2F2025-07-03%2014-58-35.mp4?alt=media&token=0b071649-71ef-4c36-a318-fee034737cd5>" %}
Climbing state
{% endembed %}

```lua
local Character = script.Parent
local Humanoid = Character.Humanoid

Humanoid:SetStateEnabled(Enum.HumanoidStateType.Climbing, false)
```

{% embed url="<https://files.gitbook.com/v0/b/gitbook-x-prod.appspot.com/o/spaces%2FhRPi87oM9ttlk5nyu7L7%2Fuploads%2FjuG0oxouwcPoxkcXLQn1%2F2025-07-03%2014-59-13.mp4?alt=media&token=c3f5f041-47b2-4919-a130-45137a2db0c7>" %}
When the transition to the Climbing state is prevented
{% endembed %}

When a character comes into contact with a Part or MeshPart that has CanClimb enabled, they will automatically enter the Climbing state.

<div><figure><img src="/files/wAxKh5Av2u2CrpJ3k3Gz" alt=""><figcaption></figcaption></figure> <figure><img src="/files/9rShKoCyhAvbt9xEpaRb" alt=""><figcaption></figcaption></figure></div>

#### **Humanoid State Transitions**

By default, Humanoid States transition automatically based on player input or Humanoid properties.\
For example, when `Health` reaches 0, the state changes to Dead. When the jump button is pressed, the state transitions as follows: Jumping → Freefall → Landed → Running.

#### **Ragdoll State**

The Ragdoll state makes the character appear limp like a ragdoll. In this state, animations and player input are disabled, and the character responds only to physical forces based on the skeleton structure.

The Ragdoll state does not transition automatically and must be manually activated using the `Humanoid:ChangeState` function:

```lua
local Character = script.Parent
local Humanoid = Character.Humanoid

Humanoid:ChangeState(Enum.HumanoidStateType.Ragdoll)
```

{% embed url="<https://files.gitbook.com/v0/b/gitbook-x-prod.appspot.com/o/spaces%2FhRPi87oM9ttlk5nyu7L7%2Fuploads%2F7MLoVVhKEa2pYtSmDIBu%2F2025-02-18%2017-43-47.mp4?alt=media&token=2c730a33-1a14-4248-b36e-6a3830c4b2da>" %}

To get back to the original state from the Ragdoll state, you need to force a state change, as follows:

```lua
local Character = script.Parent
local Humanoid = Character.Humanoid

Humanoid:ChangeState(Enum.HumanoidStateType.Ragdoll)
wait(3)
Humanoid:ChangeState(Enum.HumanoidStateType.Running)
```

#### Physics State

In the Physics state, a character’s movement is governed solely by the physics engine. In this state, previous animations and player inputs do not work, and the character responds exclusively to forces applied via physics instances such as LinearVelocity and VectorForce.

The Physics state does not transition automatically and must be manually enabled using the `Humanoid:ChangeState` function:

```lua
local Character = script.Parent
local Humanoid = Character.Humanoid

Humanoid:ChangeState(Enum.HumanoidStateType.Physics)
```

## **Attachment** <a href="#attachment" id="attachment"></a>

Attachments matched to each bone allow for features such as positioning effects, attaching accessories, and applying physical constraints.\
Attachments operate based on the dynamic movement of bones, enabling creators to easily place items that interact with the character model.

## **Character Animation** <a href="#character-animation" id="character-animation"></a>

{% content-ref url="/pages/YK5NZVV1FAIHbrQSOuHF" %}
[Character Animation](/manual/studio-manual/character/character-animation)
{% endcontent-ref %}


# Character Animation

## Animation Assets

Search for the **Asset Name** in the **Asset Store** to use animation packages.\
(Using the **Asset Id** allows direct use in scripts without placing it in the Level Browser.)

### Default

{% tabs %}
{% tab title="Basic" %}

<table><thead><tr><th width="215">Animation</th><th>Animation Id</th></tr></thead><tbody><tr><td><img src="/files/TM2YWYiO2EmW9vHlQHTR" alt="" data-size="original"></td><td><p>ovdrassetid://18162100</p><ul><li><p>Asset Name : BasicAnimations</p><ul><li><p>BasicIdleAnimation</p><ul><li>Duration: 2.13</li></ul></li></ul></li></ul></td></tr><tr><td><img src="/files/boUUGNOAOJrOIaIobYRe" alt="" data-size="original"></td><td><p>ovdrassetid://18162300</p><ul><li><p>Asset Name : BasicAnimations</p><ul><li><p>BasicWalkAnimation</p><ul><li>Duration: 1.03</li></ul></li></ul></li></ul></td></tr><tr><td><img src="/files/uNmMPOOVvMPYOzvoNpeA" alt="" data-size="original"></td><td><p>ovdrassetid://18163100</p><ul><li><p>Asset Name : BasicAnimations</p><ul><li><p>BasicRunAnimation</p><ul><li>Duration: 0.60</li></ul></li></ul></li></ul></td></tr><tr><td><img src="/files/LEfjMK2r32U42VqT7ILa" alt="" data-size="original"></td><td><p>ovdrassetid://18392100</p><ul><li><p>Asset Name : BasicAnimations</p><ul><li><p>BasicJumpAnimation</p><ul><li>Duration: 0.33</li></ul></li></ul></li></ul></td></tr><tr><td><img src="/files/jkJhz3j7vqKJAQpdWBlM" alt="" data-size="original"></td><td><p>ovdrassetid://18394100</p><ul><li><p>Asset Name : BasicAnimations</p><ul><li><p>BasicJumpLoopAnimation</p><ul><li>Duration: 0.73</li></ul></li></ul></li></ul></td></tr><tr><td><img src="/files/1AhYuI6WeDsWqaJsDsrX" alt="" data-size="original"></td><td><p>ovdrassetid://18394200</p><ul><li><p>Asset Name : BasicAnimations</p><ul><li><p>BasicLandingAnimation</p><ul><li>Duration: 0.73</li></ul></li></ul></li></ul></td></tr><tr><td><img src="/files/5gA3Llwjcx6JEc5IqnA3" alt="" data-size="original"></td><td><p>ovdrassetid://18396100</p><ul><li><p>Asset Name : BasicAnimations</p><ul><li><p>BasicAttackAnimation</p><ul><li>Duration: 0.60</li></ul></li></ul></li></ul></td></tr><tr><td><img src="/files/2515cGxvS7mXxgtcp2aq" alt="" data-size="original"></td><td><p>ovdrassetid://18398100</p><ul><li><p>Asset Name : BasicAnimations</p><ul><li><p>BasicKickAnimation</p><ul><li>Duration: 0.40</li></ul></li></ul></li></ul></td></tr><tr><td><img src="/files/XwwQduQ1I2M9Ltssbvie" alt="" data-size="original"></td><td><p>ovdrassetid://18935100</p><ul><li><p>Asset Name : BasicAnimations</p><ul><li><p>BasicDashAnimation</p><ul><li>Duration: 0.47</li></ul></li></ul></li></ul></td></tr><tr><td><img src="/files/d3z6JZHtBAJCFySVC2dD" alt=""></td><td><p>ovdrassetid://23654100</p><ul><li><p>Asset Name : BasicAnimations</p><ul><li><p>BasicDefenceAnimation</p><ul><li>Duration: 1.06</li></ul></li></ul></li></ul></td></tr><tr><td><img src="/files/7AjWoMqPjey1GiDmx3z8" alt=""></td><td><p>ovdrassetid://23656100</p><ul><li><p>Asset Name : BasicAnimations</p><ul><li><p>BasicFallDieAnimation</p><ul><li>Duration: 0.43</li></ul></li></ul></li></ul></td></tr></tbody></table>
{% endtab %}

{% tab title="State" %}

<table><thead><tr><th width="215">Animation</th><th>Animation Id</th></tr></thead><tbody><tr><td><img src="/files/x0c3wGwz0xRpzFrKI4za" alt="" data-size="original"></td><td><p>ovdrassetid://18414100</p><ul><li><p>Asset Name : BasicStateAnimations</p><ul><li><p>BasicHitAnimation</p><ul><li>Duration: 0.40</li></ul></li></ul></li></ul></td></tr><tr><td><img src="/files/Jp9hsyWEgP1idxh6A7td" alt="" data-size="original"></td><td><p>ovdrassetid://18417100</p><ul><li><p>Asset Name : BasicStateAnimations</p><ul><li><p>BasicDefenceAnimation</p><ul><li>Duration: 0.36</li></ul></li></ul></li></ul></td></tr><tr><td><img src="/files/NUOdap9MF0MptrE12bxN" alt="" data-size="original"></td><td><p>ovdrassetid://18423100</p><ul><li><p>Asset Name : BasicStateAnimations</p><ul><li><p>BasicStunAnimation</p><ul><li>Duration: 2.50</li></ul></li></ul></li></ul></td></tr><tr><td><img src="/files/91EClCc5YjF9Ldx4JWT3" alt="" data-size="original"></td><td><p>ovdrassetid://25702100</p><ul><li><p>Asset Name : BasicStateAnimations</p><ul><li><p>BasicDeathAnimation</p><ul><li>Duration: 1.46</li></ul></li></ul></li></ul></td></tr><tr><td><img src="/files/sPiCE8fIs2YIM0d4Lw9z" alt="" data-size="original"></td><td><p>ovdrassetid://18419100</p><ul><li><p>Asset Name : BasicStateAnimations</p><ul><li><p>BasicDeath_FrontAnimation</p><ul><li>Duration: 1.40</li></ul></li></ul></li></ul></td></tr><tr><td><img src="/files/rWbYY4EEN1eOND4oxyzV" alt="" data-size="original"></td><td><p>ovdrassetid://18932100</p><ul><li><p>Asset Name : BasicStateAnimations</p><ul><li><p>BasicClimbAnimation</p><ul><li>Duration: 0.93</li></ul></li></ul></li></ul></td></tr><tr><td><img src="/files/Kf9jrx75Nmjn4vsdyG1E" alt="" data-size="original"></td><td><p>ovdrassetid://18421100</p><ul><li><p>Asset Name : BasicStateAnimations</p><ul><li><p>BasicFallDieAnimation</p><ul><li>Duration: 0.86</li></ul></li></ul></li></ul></td></tr></tbody></table>
{% endtab %}

{% tab title="Swim" %}

<table><thead><tr><th width="215">Animation</th><th>Animation Id</th></tr></thead><tbody><tr><td><img src="/files/QeLdswMLQ8FzL7AWkJFt" alt=""></td><td><p>ovdrassetid://18441100</p><ul><li><p>Asset Name : BasicSwimAnimations</p><ul><li><p>BasicSwimRallyStartAnimation</p><ul><li>Duration: 2.10</li></ul></li></ul></li></ul></td></tr><tr><td><img src="/files/eKOxA6VqeqPGRf2tl81e" alt=""></td><td><p>ovdrassetid://18440100</p><ul><li><p>Asset Name : BasicSwimAnimations</p><ul><li><p>BasicSwimIdleAnimation</p><ul><li>Duration: 1.63</li></ul></li></ul></li></ul></td></tr><tr><td><img src="/files/fBtAvdONLyMCDLZhrKTC" alt=""></td><td><p>ovdrassetid://18435100</p><ul><li><p>Asset Name : BasicSwimAnimations</p><ul><li><p>BasicSwimBreaststrokeAnimation</p><ul><li>Duration: 1.4</li></ul></li></ul></li></ul></td></tr><tr><td><img src="/files/sPv3kTFazH9sHoIu7YlG" alt=""></td><td><p>ovdrassetid://18436100</p><ul><li><p>Asset Name : BasicSwimAnimations</p><ul><li><p>BasicSwimCroulAnimation</p><ul><li>Duration: 1.36</li></ul></li></ul></li></ul></td></tr><tr><td><img src="/files/H32EFaDsBRsW5PkvS1UR" alt=""></td><td><p>ovdrassetid://18435200</p><ul><li><p>Asset Name : BasicSwimAnimations</p><ul><li><p>BasicSwimDashAnimation</p><ul><li>Duration: 2.36</li></ul></li></ul></li></ul></td></tr><tr><td><img src="/files/jmQiIoGHkkqNK8iE9Lyv" alt=""></td><td><p>ovdrassetid://18434400</p><ul><li><p>Asset Name : BasicSwimAnimations</p><ul><li><p>BasicUnderwaterIdleAnimation</p><ul><li>Duration: 1.63</li></ul></li></ul></li></ul></td></tr><tr><td><img src="/files/FujVIJf8W6ottbdSdqwh" alt=""></td><td><p>ovdrassetid://18438100</p><ul><li><p>Asset Name : BasicSwimAnimations</p><ul><li><p>BasicSwimDeathAnimation</p><ul><li>Duration: 2.76</li></ul></li></ul></li></ul></td></tr></tbody></table>
{% endtab %}
{% endtabs %}

### TPA

{% tabs %}
{% tab title="Melee" %}

<table><thead><tr><th width="215">Animation</th><th>Animation Id</th></tr></thead><tbody><tr><td><img src="/files/kSrfoFkneSAOEtkL7xFg" alt="" data-size="original"></td><td><p>ovdrassetid://18449100</p><ul><li><p>Asset Name : BasicMeleeAnimations</p><ul><li><p>BasicMeleeIdleAnimation</p><ul><li>Duration: 1.60</li></ul></li></ul></li></ul></td></tr><tr><td><img src="/files/r3EFoVEgbtJccOMEMTXA" alt="" data-size="original"></td><td><p>ovdrassetid://18453100</p><ul><li><p>Asset Name : BasicMeleeAnimations</p><ul><li><p>BasicMeleeWalkAnimation</p><ul><li>Duration: 0.93</li></ul></li></ul></li></ul></td></tr><tr><td><img src="/files/XZZVq9iXp1I2bykp3y2a" alt="" data-size="original"></td><td><p>ovdrassetid://18447400</p><ul><li><p>Asset Name : BasicMeleeAnimations</p><ul><li><p>BasicMeleeRunAnimation</p><ul><li>Duration: 0.66</li></ul></li></ul></li></ul></td></tr><tr><td><img src="/files/rGJ6QwW1k20KFlEcbQ4F" alt=""></td><td><p>ovdrassetid://18447200</p><ul><li><p>Asset Name : BasicMeleeAnimations</p><ul><li><p>BasicMeleeJumpAnimation</p><ul><li>Duration: 0.33</li></ul></li></ul></li></ul></td></tr><tr><td><img src="/files/Tl9eIst21M5AfC2iqLnI" alt="" data-size="original"></td><td><p>ovdrassetid://18449300</p><ul><li><p>Asset Name : BasicMeleeAnimations</p><ul><li><p>BasicMeleeJumpLoopAnimation</p><ul><li>Duration: 0.73</li></ul></li></ul></li></ul></td></tr><tr><td><img src="/files/mpuTtspoDSdtEmHOZTKv" alt="" data-size="original"></td><td><p>ovdrassetid://18449200</p><ul><li><p>Asset Name : BasicMeleeAnimations</p><ul><li><p>BasicMeleeLandingAnimation</p><ul><li>Duration: 0.73</li></ul></li></ul></li></ul></td></tr><tr><td><img src="/files/Qrml5x51wtCRBguQIw8I" alt=""></td><td><p>ovdrassetid://18447100</p><ul><li><p>Asset Name : BasicMeleeAnimations</p><ul><li><p>BasicMeleeAttackAnimation</p><ul><li>Duration: 0.56</li></ul></li></ul></li></ul></td></tr></tbody></table>
{% endtab %}

{% tab title="Punch" %}

<table><thead><tr><th width="215">Animation</th><th>Animation Id</th></tr></thead><tbody><tr><td><img src="/files/T1LrCZIrgeJ0uGM1ZvF5" alt=""></td><td><p>ovdrassetid://18168100</p><ul><li><p>Asset Name : PunchAnimations</p><ul><li><p>PunchIdleAnimation</p><ul><li>Duration: 1.00</li></ul></li></ul></li></ul></td></tr><tr><td><img src="/files/3JCi6atCu1XFmB4g2vRq" alt=""></td><td><p>ovdrassetid://18169100</p><ul><li><p>Asset Name : PunchAnimations</p><ul><li><p>PunchAttackAnimation01</p><ul><li>Duration: 0.43</li></ul></li></ul></li></ul></td></tr><tr><td><img src="/files/HhhPKmNoMcBgEiPkGVlZ" alt=""></td><td><p>ovdrassetid://18171100</p><ul><li><p>Asset Name : PunchAnimations</p><ul><li><p>PunchAttackAnimation02</p><ul><li>Duration: 0.53</li></ul></li></ul></li></ul></td></tr><tr><td><img src="/files/d9gsFDex4FIJqcJZ1GVT" alt=""></td><td><p>ovdrassetid://18170300</p><ul><li><p>Asset Name : PunchAnimations</p><ul><li><p>PunchAttackAnimation03</p><ul><li>Duration: 0.70</li></ul></li></ul></li></ul></td></tr><tr><td><img src="/files/iZ9UFfggM9XbLUgjrJQ8" alt=""></td><td><p>ovdrassetid://18173100</p><ul><li><p>Asset Name : PunchAnimations</p><ul><li><p>PunchAttackAnimation04</p><ul><li>Duration: 0.76</li></ul></li></ul></li></ul></td></tr><tr><td><img src="/files/LIpVMiesZnAKHB2nhjQc" alt=""></td><td><p>ovdrassetid://18173200</p><ul><li><p>Asset Name : PunchAnimations</p><ul><li><p>PunchAttackAnimation05</p><ul><li>Duration: 0.73</li></ul></li></ul></li></ul></td></tr><tr><td><img src="/files/QpTS0TeBkyuPJ2u9fxaF" alt=""></td><td><p>ovdrassetid://18173300</p><ul><li><p>Asset Name : PunchAnimations</p><ul><li><p>PunchAttackAnimation06</p><ul><li>Duration: 1.26</li></ul></li></ul></li></ul></td></tr><tr><td><img src="/files/YTL7xk7fGcevpslLqwTu" alt=""></td><td><p>ovdrassetid://23658100</p><ul><li><p>Asset Name : PunchAnimations</p><ul><li><p>PunchAirDamageBackLoopAnimation</p><ul><li>Duration: 1.36</li></ul></li></ul></li></ul></td></tr><tr><td><img src="/files/xXM7TpOGPctwIppm6zAI" alt=""></td><td><p>ovdrassetid://23659200</p><ul><li><p>Asset Name : PunchAnimations</p><ul><li><p>PunchAirDamageLoopAnimation</p><ul><li>Duration: 1.30</li></ul></li></ul></li></ul></td></tr><tr><td><img src="/files/p2UMOsPzRCZKm0THJVPI" alt=""></td><td><p>ovdrassetid://23660100</p><ul><li><p>Asset Name : PunchAnimations</p><ul><li><p>PunchDogdeAnimation</p><ul><li>Duration: 0.80</li></ul></li></ul></li></ul></td></tr><tr><td><img src="/files/Bc4oYFMFS4Tuy7Tz10DH" alt=""></td><td><p>ovdrassetid://18444100</p><ul><li><p>Asset Name : PunchAnimations</p><ul><li><p>PunchDefenceAnimation</p><ul><li>Duration: 1.06</li></ul></li></ul></li></ul></td></tr><tr><td><img src="/files/GB179a3QAZ8rFhVCS1WI" alt=""></td><td><p>ovdrassetid://18175100</p><ul><li><p>Asset Name : PunchAnimations</p><ul><li><p>PunchDamageAnimation01</p><ul><li>Duration: 0.40</li></ul></li></ul></li></ul></td></tr><tr><td><img src="/files/VvEtRHBwsiTtUy1wOM0X" alt=""></td><td><p>ovdrassetid://18176100</p><ul><li><p>Asset Name : PunchAnimations</p><ul><li><p>PunchDamageAnimation02</p><ul><li>Duration: 0.40</li></ul></li></ul></li></ul></td></tr><tr><td><img src="/files/ww1Lie1BxnYkGfYdyEYk" alt=""></td><td><p>ovdrassetid://18178100</p><ul><li><p>Asset Name : PunchAnimations</p><ul><li><p>PunchDamageAnimation03</p><ul><li>Duration: 0.33</li></ul></li></ul></li></ul></td></tr><tr><td><img src="/files/FSYUieU85zt4blmRpjhW" alt=""></td><td><p>ovdrassetid://18179200</p><ul><li><p>Asset Name : PunchAnimations</p><ul><li><p>PunchKnockbackAnimation01</p><ul><li>Duration: 0.66</li></ul></li></ul></li></ul></td></tr><tr><td><img src="/files/qXvy7rSEStpkkxZa3KHs" alt=""></td><td><p>ovdrassetid://20476600</p><ul><li><p>Asset Name : PunchAnimations</p><ul><li><p>PunchKickAttackStrongAnimation</p><ul><li>Duration: 0.70</li></ul></li></ul></li></ul></td></tr><tr><td><img src="/files/vqEO9yF2ObKZ295Rr0Dp" alt=""></td><td><p>ovdrassetid://20476400</p><ul><li><p>Asset Name : PunchAnimations</p><ul><li><p>PunchKickAttackMultipleAnimation</p><ul><li>Duration: 0.60</li></ul></li></ul></li></ul></td></tr><tr><td><img src="/files/nzJ40AqXZ0rsKhq9ttMT" alt=""></td><td><p>ovdrassetid://23661100</p><ul><li><p>Asset Name : PunchAnimations</p><ul><li><p>PunchKnockdownStartAnimation</p><ul><li>Duration: 1.06</li></ul></li></ul></li></ul></td></tr><tr><td><img src="/files/TTZPPPNcIorrIqoz63DP" alt=""></td><td><p>ovdrassetid://23662200</p><ul><li><p>Asset Name : PunchAnimations</p><ul><li><p>PunchKnockdownLoopAnimation</p><ul><li>Duration: 0.80</li></ul></li></ul></li></ul></td></tr><tr><td><img src="/files/W6VWtqRt4P5ouV4Kd7cv" alt=""></td><td><p>ovdrassetid://23662400</p><ul><li><p>Asset Name : PunchAnimations</p><ul><li><p>PunchKnockdownEndAnimation</p><ul><li>Duration: 1.26</li></ul></li></ul></li></ul></td></tr><tr><td><img src="/files/BI5bNZxyseNJdCWqeLVC" alt=""></td><td><p>ovdrassetid://20476900</p><ul><li><p>Asset Name : PunchAnimations</p><ul><li><p>PunchAttackMultipleAnimation</p><ul><li>Duration: 0.26</li></ul></li></ul></li></ul></td></tr><tr><td><img src="/files/F2AB5mdzUToaoDc4vPzl" alt=""></td><td><p>ovdrassetid://20479100</p><ul><li><p>Asset Name : PunchAnimations</p><ul><li><p>PunchAttackStrongAnimation</p><ul><li>Duration: 1.00</li></ul></li></ul></li></ul></td></tr><tr><td><img src="/files/TzmasGnLjJl3NBhD8OVp" alt=""></td><td><p>ovdrassetid://20478700</p><ul><li><p>Asset Name : PunchAnimations</p><ul><li><p>PunchHitGroundAnimation</p><ul><li>Duration: 1.56</li></ul></li></ul></li></ul></td></tr><tr><td><img src="/files/jTrb5t4XCrCtRMjZXYWG" alt=""></td><td><p>ovdrassetid://20479300</p><ul><li><p>Asset Name : PunchAnimations</p><ul><li><p>PunchStompAnimation</p><ul><li>Duration: 0.66</li></ul></li></ul></li></ul></td></tr><tr><td><img src="/files/dRGgjpzqgX4ZfhIjF6Wd" alt=""></td><td><p>ovdrassetid://20479500</p><ul><li><p>Asset Name : PunchAnimations</p><ul><li><p>PunchWhirlwindAnimation</p><ul><li>Duration: 0.23</li></ul></li></ul></li></ul></td></tr></tbody></table>
{% endtab %}

{% tab title="Sword" %}

<table><thead><tr><th width="215">Animation</th><th>Animation Id</th></tr></thead><tbody><tr><td><img src="/files/oTnlSzE9zXHhCSbNvVjA" alt=""></td><td><p>ovdrassetid://18182100</p><ul><li><p>Asset Name : SwordAnimations</p><ul><li><p>SwordIdleAnimation</p><ul><li>Duration: 1.06</li></ul></li></ul></li></ul></td></tr><tr><td><img src="/files/7A7r50lBw6SL70eMAeep" alt=""></td><td><p>ovdrassetid://18182200</p><ul><li><p>Asset Name : SwordAnimations</p><ul><li><p>SwordAttackAnimation01</p><ul><li>Duration: 0.56</li></ul></li></ul></li></ul></td></tr><tr><td><img src="/files/wROzWo7h3rMpZV77qwze" alt=""></td><td><p>ovdrassetid://18184100</p><ul><li><p>Asset Name : SwordAnimations</p><ul><li><p>SwordAttackAnimation02</p><ul><li>Duration: 0.70</li></ul></li></ul></li></ul></td></tr><tr><td><img src="/files/DMXXUKluxbxeYlfPuHcM" alt=""></td><td><p>ovdrassetid://18184200</p><ul><li><p>Asset Name : SwordAnimations</p><ul><li><p>SwordAttackAnimation03</p><ul><li>Duration: 0.83</li></ul></li></ul></li></ul></td></tr><tr><td><img src="/files/3Xp2OWNkBIc7mxqskZfh" alt=""></td><td><p>ovdrassetid://18186200</p><ul><li><p>Asset Name : SwordAnimations</p><ul><li><p>SwordAttackAnimation04</p><ul><li>Duration: 0.90</li></ul></li></ul></li></ul></td></tr><tr><td><img src="/files/eB09G02DaiDzPBKSzNBV" alt=""></td><td><p>ovdrassetid://18182300</p><ul><li><p>Asset Name : SwordAnimations</p><ul><li><p>SwordJumpAttackAnimation</p><ul><li>Duration: 0.50</li></ul></li></ul></li></ul></td></tr><tr><td><img src="/files/z4g9fh3ticZkdAgFmoiD" alt=""></td><td><p>ovdrassetid://18186400</p><ul><li><p>Asset Name : SwordAnimations</p><ul><li><p>SwordEquipAnimation</p><ul><li>Duration: 0.86</li></ul></li></ul></li></ul></td></tr><tr><td><img src="/files/TaVibHuMbFtFYGKf1cVK" alt=""></td><td><p>ovdrassetid://18186700</p><ul><li><p>SwordAnimations</p><ul><li><p>SwordUnequipAnimation</p><ul><li>Duration: 0.43</li></ul></li></ul></li></ul></td></tr><tr><td><img src="/files/Fo6YZQaTjTxdaJ5OszwP" alt=""></td><td><p>ovdrassetid://20462100</p><ul><li><p>SwordAnimations</p><ul><li><p>SwordDefenseAnimation</p><ul><li>Duration: 1.06</li></ul></li></ul></li></ul></td></tr><tr><td><img src="/files/kKNKEBl49EmdgwOy14b6" alt=""></td><td><p>ovdrassetid://20463200</p><ul><li><p>SwordAnimations</p><ul><li><p>SwordPierceAnimation</p><ul><li>Duration: 0.60</li></ul></li></ul></li></ul></td></tr><tr><td><img src="/files/SfBBNApxV2661AqsNmro" alt=""></td><td><p>ovdrassetid://20463400</p><ul><li><p>SwordAnimations</p><ul><li><p>SwordUpperAttackAnimation</p><ul><li>Duration: 0.60</li></ul></li></ul></li></ul></td></tr><tr><td><img src="/files/xUpvg96PYdQ42yLGd58s" alt=""></td><td><p>ovdrassetid://20464200</p><ul><li><p>SwordAnimations</p><ul><li><p>SwordWhirlwindAnimation</p><ul><li>Duration: 0.26</li></ul></li></ul></li></ul></td></tr></tbody></table>
{% endtab %}

{% tab title="TwoHandedSword" %}

<table><thead><tr><th width="215">Animation</th><th>Animation Id</th></tr></thead><tbody><tr><td><img src="/files/uuPphdwapKOpocVy4nRA" alt=""></td><td><p>ovdrassetid://18188100</p><ul><li><p>Asset Name : TwoHandedSwordAnimations</p><ul><li><p>TwoHandedSwordIdleAnimation</p><ul><li>Duration: 1.20</li></ul></li></ul></li></ul></td></tr><tr><td><img src="/files/LZ4lCuw3HNoJ7TICTqMK" alt=""></td><td><p>ovdrassetid://18190100</p><ul><li><p>Asset Name : TwoHandedSwordAnimations</p><ul><li><p>TwoHandedSwordAttackAnimation01</p><ul><li>Duration: 0.86</li></ul></li></ul></li></ul></td></tr><tr><td><img src="/files/h7CHPgkLxDpXzHvZk9qb" alt=""></td><td><p>ovdrassetid://18192100</p><ul><li><p>Asset Name : TwoHandedSwordAnimations</p><ul><li><p>TwoHandedSwordAttackAnimation02</p><ul><li>Duration: 0.86</li></ul></li></ul></li></ul></td></tr><tr><td><img src="/files/xCYIIlvDOmXeAkyuX4Sa" alt=""></td><td><p>ovdrassetid://18193100</p><ul><li><p>Asset Name : TwoHandedSwordAnimations</p><ul><li><p>TwoHandedSwordAttackAnimation03</p><ul><li>Duration: 0.86</li></ul></li></ul></li></ul></td></tr><tr><td><img src="/files/zIwUeBR04RuDKUjRnPB8" alt=""></td><td><p>ovdrassetid://18195100</p><ul><li><p>Asset Name : TwoHandedSwordAnimations</p><ul><li><p>TwoHandedSwordJumpAttackAnimation</p><ul><li>Duration: 0.43</li></ul></li></ul></li></ul></td></tr><tr><td><img src="/files/gWYXTSMIE5qwKA3eu5HP" alt=""></td><td><p>ovdrassetid://18189300</p><ul><li><p>Asset Name : TwoHandedSwordAnimations</p><ul><li><p>TwoHandedSwordEquipAnimation</p><ul><li>Duration: 0.90</li></ul></li></ul></li></ul></td></tr><tr><td><img src="/files/HdPlK1UD3CkXYOMyldXv" alt=""></td><td><p>ovdrassetid://18193300</p><ul><li><p>Asset Name : TwoHandedSwordAnimations</p><ul><li><p>TwoHandedSwordUnequipAnimation</p><ul><li>Duration: 0.63</li></ul></li></ul></li></ul></td></tr><tr><td><img src="/files/vzlZU9JGLOodVS9Z2qd2" alt=""></td><td><p>ovdrassetid://20466100</p><ul><li><p>Asset Name : TwoHandedSwordAnimations</p><ul><li><p>TwoHandedSwordDefenseAnimation</p><ul><li>Duration: 0.80</li></ul></li></ul></li></ul></td></tr><tr><td><img src="/files/XS44sW9K2TrdxTsgdVcm" alt=""></td><td><p>ovdrassetid://23664100</p><ul><li><p>Asset Name : TwoHandedSwordAnimations</p><ul><li><p>TwoHandedSwordAirWhirlwindLoopAnimation</p><ul><li>Duration: 0.20</li></ul></li></ul></li></ul></td></tr><tr><td><img src="/files/jqAdQj4Ioe8ELPWzQnMl" alt=""></td><td><p>ovdrassetid://20468100</p><ul><li><p>Asset Name : TwoHandedSwordAnimations</p><ul><li><p>TwoHandedSwordAirWhirlwindAttackAnimation</p><ul><li>Duration: 0.60</li></ul></li></ul></li></ul></td></tr><tr><td><img src="/files/zrhzxgQuRxioDlcCvdet" alt=""></td><td><p>ovdrassetid://20470100</p><ul><li><p>Asset Name : TwoHandedSwordAnimations</p><ul><li><p>TwoHandedSwordLowerAttackAnimation</p><ul><li>Duration: 0.66</li></ul></li></ul></li></ul></td></tr><tr><td><img src="/files/hRfsi7lvYe9NkD3mQ16K" alt=""></td><td><p>ovdrassetid://20470200</p><ul><li><p>Asset Name : TwoHandedSwordAnimations</p><ul><li><p>TwoHandedSwordUpperAttackAnimation</p><ul><li>Duration: 0.63</li></ul></li></ul></li></ul></td></tr><tr><td><img src="/files/2Bj1K4BpjF4zpLWXQKu7" alt=""></td><td><p>ovdrassetid://20470300</p><ul><li><p>Asset Name : TwoHandedSwordAnimations</p><ul><li><p>TwoHandedSwordWhirlwindAnimation</p><ul><li>Duration: 0.26</li></ul></li></ul></li></ul></td></tr></tbody></table>
{% endtab %}

{% tab title="Bow" %}

<table><thead><tr><th width="215">Animation</th><th>Animation Id</th></tr></thead><tbody><tr><td><img src="/files/6dvsgcIH5WHWg41CnJSo" alt=""></td><td><p>ovdrassetid://18198200</p><ul><li><p>Asset Name : BowAnimations</p><ul><li><p>BowIdleAnimation</p><ul><li>Duration: 1.20</li></ul></li></ul></li></ul></td></tr><tr><td><img src="/files/8PtI2AOqxHdLUyRtESsX" alt=""></td><td><p>ovdrassetid://18198100</p><ul><li><p>Asset Name : BowAnimations</p><ul><li><p>BowChargeAnimation</p><ul><li>Duration: 0.26</li></ul></li></ul></li></ul></td></tr><tr><td><img src="/files/t0ptf5DyolvobKvzwuqT" alt=""></td><td><p>ovdrassetid://18197100</p><ul><li><p>Asset Name : BowAnimations</p><ul><li><p>BowAttackAnimation</p><ul><li>Duration: 0.46</li></ul></li></ul></li></ul></td></tr><tr><td><img src="/files/5YG2vcbfHXMLsSo0lCbo" alt=""></td><td><p>ovdrassetid://18199400</p><ul><li><p>Asset Name : BowAnimations</p><ul><li><p>BowJumpAttackAnimation</p><ul><li>Duration: 0.33</li></ul></li></ul></li></ul></td></tr><tr><td><img src="/files/grH3QdQrk6xutSy2u0Jf" alt=""></td><td><p>ovdrassetid://18199200</p><ul><li><p>Asset Name : BowAnimations</p><ul><li><p>BowEquipAnimation</p><ul><li>Duration: 0.83</li></ul></li></ul></li></ul></td></tr><tr><td><img src="/files/TBUceKzVPiqJpRltXjn9" alt=""></td><td><p>ovdrassetid://18199500</p><ul><li><p>Asset Name : BowAnimations</p><ul><li><p>BowUnequipAnimation</p><ul><li>Duration: 0.46</li></ul></li></ul></li></ul></td></tr><tr><td><img src="/files/vC4upzIemnY4wNSrIlGe" alt=""></td><td><p>ovdrassetid://20460200</p><ul><li><p>Asset Name : BowAnimations</p><ul><li><p>BowStrongChargeAnimation</p><ul><li>Duration: 0.26</li></ul></li></ul></li></ul></td></tr><tr><td><img src="/files/xd98o3ucJc6YuilGB5ZW" alt=""></td><td><p>ovdrassetid://20459100</p><ul><li><p>Asset Name : BowAnimations</p><ul><li><p>BowStrongAttackAnimation</p><ul><li>Duration: 0.36</li></ul></li></ul></li></ul></td></tr></tbody></table>
{% endtab %}

{% tab title="Spear" %}

<table><thead><tr><th width="215">Animation</th><th>Animation Id</th></tr></thead><tbody><tr><td><img src="/files/dNMovt9Ywl17RyDNknmU" alt=""></td><td><p>ovdrassetid://18202400</p><ul><li><p>Asset Name : SpearAnimations</p><ul><li><p>SpearIdleAnimation</p><ul><li>Duration: 1.20</li></ul></li></ul></li></ul></td></tr><tr><td><img src="/files/X2MFNcaHuE7XtLD1aowH" alt=""></td><td><p>ovdrassetid://18201100</p><ul><li><p>Asset Name : SpearAnimations</p><ul><li><p>SpearAttackAnimation01</p><ul><li>Duration: 0.70</li></ul></li></ul></li></ul></td></tr><tr><td><img src="/files/izr8DcMIpP2MHcxKjENm" alt=""></td><td><p>ovdrassetid://18202200</p><ul><li><p>Asset Name : SpearAnimations</p><ul><li><p>SpearAttackAnimation02</p><ul><li>Duration: 0.93</li></ul></li></ul></li></ul></td></tr><tr><td><img src="/files/eRRzhOxikC4UeMTiGcde" alt=""></td><td><p>ovdrassetid://18204100</p><ul><li><p>Asset Name : SpearAnimations</p><ul><li><p>SpearJumpAttackAnimation</p><ul><li>Duration: 0.63</li></ul></li></ul></li></ul></td></tr><tr><td><img src="/files/TPGiJD4llwHx7CrNT29l" alt=""></td><td><p>ovdrassetid://18202300</p><ul><li><p>Asset Name : SpearAnimations</p><ul><li><p>SpearEquipAnimation</p><ul><li>Duration: 0.80</li></ul></li></ul></li></ul></td></tr><tr><td><img src="/files/WpjhxzSp0Vs0UJlJn01y" alt=""></td><td><p>ovdrassetid://18202700</p><ul><li><p>Asset Name : SpearAnimations</p><ul><li><p>SpearUnequipAnimation</p><ul><li>Duration: 0.46</li></ul></li></ul></li></ul></td></tr><tr><td><img src="/files/BP4nin0SnfnH5bbdPKuZ" alt=""></td><td><p>ovdrassetid://20472100</p><ul><li><p>Asset Name : SpearAnimations</p><ul><li><p>SpearDefenseAnimation</p><ul><li>Duration: 0.53</li></ul></li></ul></li></ul></td></tr><tr><td><img src="/files/yGdyZxCG6BRjnL0viMKO" alt=""></td><td><p>ovdrassetid://23668200</p><ul><li><p>Asset Name : SpearAnimations</p><ul><li><p>SpearSpinAttackAnimation</p><ul><li>Duration: 1.10</li></ul></li></ul></li></ul></td></tr><tr><td><img src="/files/Go0ay6cZI6dJPQNKZJTM" alt=""></td><td><p>ovdrassetid://20473100</p><ul><li><p>Asset Name : SpearAnimations</p><ul><li><p>SpearPierceAnimation</p><ul><li>Duration: 0.50</li></ul></li></ul></li></ul></td></tr><tr><td><img src="/files/qc8QacXqtOHHn0sOBI8J" alt=""></td><td><p>ovdrassetid://23667100</p><ul><li><p>Asset Name : SpearAnimations</p><ul><li><p>SpearLowerAttackAnimation</p><ul><li>Duration: 1.33</li></ul></li></ul></li></ul></td></tr><tr><td><img src="/files/LWNfxTUJYuO7m7Yp4nDZ" alt=""></td><td><p>ovdrassetid://20474100</p><ul><li><p>Asset Name : SpearAnimations</p><ul><li><p>SpearRunAnimation</p><ul><li>Duration: 0.66</li></ul></li></ul></li></ul></td></tr></tbody></table>
{% endtab %}
{% endtabs %}

### TPS

{% tabs %}
{% tab title="Handgun" %}

<table><thead><tr><th width="215">Animation</th><th>Animation Id</th></tr></thead><tbody><tr><td><img src="/files/qqYORxXFh9EcxycIaZTU" alt="" data-size="original"></td><td><p>ovdrassetid://18558100</p><ul><li><p>Asset Name : BasicHandgunAnimations</p><ul><li><p>BasicHandgunIdleAnimation</p><ul><li>Duration: 2.00</li></ul></li></ul></li></ul></td></tr><tr><td><img src="/files/Q2f5Wyio6SloEYFMrdsP" alt="" data-size="original"></td><td><p>ovdrassetid://18560100</p><ul><li><p>Asset Name : BasicHandgunAnimations</p><ul><li><p>BasicHandgunWalkAnimation</p><ul><li>Duration: 0.93</li></ul></li></ul></li></ul></td></tr><tr><td><img src="/files/c5gjEGXMGjgIeAS2Z4NO" alt="" data-size="original"></td><td><p>ovdrassetid://18559300</p><ul><li><p>Asset Name : BasicHandgunAnimations</p><ul><li><p>BasicHandgunRunAnimation</p><ul><li>Duration: 0.66</li></ul></li></ul></li></ul></td></tr><tr><td><img src="/files/3e5nM62lzEYXzfCFH6rK" alt="" data-size="original"></td><td><p>ovdrassetid://18563500</p><ul><li><p>Asset Name : BasicHandgunAnimations</p><ul><li><p>BasicHandgunJumpAnimation</p><ul><li>Duration: 0.70</li></ul></li></ul></li></ul></td></tr><tr><td><img src="/files/Z1etSdcp1lymNLDIcz8K" alt="" data-size="original"></td><td><p>ovdrassetid://18563700</p><ul><li><p>Asset Name : BasicHandgunAnimations</p><ul><li><p>BasicHandgunJumpLoopAnimation</p><ul><li>Duration: 0.80</li></ul></li></ul></li></ul></td></tr><tr><td><img src="/files/pudsXwFneMY3bJcxb2Vy" alt="" data-size="original"></td><td><p>ovdrassetid://18565100</p><ul><li><p>Asset Name : BasicHandgunAnimations</p><ul><li><p>BasicHandgunLandingAnimation</p><ul><li>Duration: 0.53</li></ul></li></ul></li></ul></td></tr><tr><td><img src="/files/MFcqYaf6grwgDRVQJQPi" alt="" data-size="original"></td><td><p>ovdrassetid://18562100</p><ul><li><p>Asset Name : BasicHandgunAnimations</p><ul><li><p>BasicHandgunAttackAnimation</p><ul><li>Duration: 0.26</li></ul></li></ul></li></ul></td></tr><tr><td><img src="/files/prpQrG3HLfdqpUpZpNJW" alt="" data-size="original"></td><td><p>ovdrassetid://18563200</p><ul><li><p>Asset Name : BasicHandgunAnimations</p><ul><li><p>BasicHG_ReloadAnimation</p><ul><li>Duration: 2.33</li></ul></li></ul></li></ul></td></tr><tr><td><img src="/files/pDw08lo55UOZ0o5AmBLg" alt="" data-size="original"></td><td><p>ovdrassetid://18566100</p><ul><li><p>Asset Name : BasicHandgunAnimations</p><ul><li><p>BasicHG_Boost_F_LoopAnimaton</p><ul><li>Duration: 0.23</li></ul></li></ul></li></ul></td></tr><tr><td><img src="/files/yyd8Rw8uKuwhkNnudkrS" alt=""></td><td><p>ovdrassetid://18569300</p><ul><li><p>Asset Name : FirearmsEquipAnimations</p><ul><li><p>PistolEquipAnimation</p><ul><li>Duration: 0.40</li></ul></li></ul></li></ul></td></tr><tr><td><img src="/files/Dld5LJVFcpJbSORPNf20" alt=""></td><td><p>ovdrassetid://18569100</p><ul><li><p>Asset Name : FirearmsEquipAnimations</p><ul><li><p>PistolUnequipAnimation</p><ul><li>Duration: 0.40</li></ul></li></ul></li></ul></td></tr></tbody></table>
{% endtab %}

{% tab title="Rifle" %}

<table><thead><tr><th width="215">Animation</th><th>Animation Id</th></tr></thead><tbody><tr><td><img src="/files/Yaqud6QYa5hmW1f0uDfI" alt="" data-size="original"></td><td><p>ovdrassetid://18604100</p><ul><li><p>Asset Name : BasicRifleAnimations</p><ul><li><p>BasicRifleIdleAnimation</p><ul><li>Duration: 2.00</li></ul></li></ul></li></ul></td></tr><tr><td><img src="/files/46BaL1y8eauXaZSHTBFz" alt="" data-size="original"></td><td><p>ovdrassetid://18606100</p><ul><li><p>Asset Name : BasicRifleAnimations</p><ul><li><p>BasicRifleWalkAnimation</p><ul><li>Duration: 0.93</li></ul></li></ul></li></ul></td></tr><tr><td><img src="/files/UGzDlpm9aEHK7mZD4yCH" alt="" data-size="original"></td><td><p>ovdrassetid://18606300</p><ul><li><p>Asset Name : BasicRifleAnimations</p><ul><li><p>BasicRifleRunAnimation</p><ul><li>Duration: 0.66</li></ul></li></ul></li></ul></td></tr><tr><td><img src="/files/YMSxLPfiuSoScdLq5FNi" alt="" data-size="original"></td><td><p>ovdrassetid://18608700</p><ul><li><p>Asset Name : BasicRifleAnimations</p><ul><li><p>BasicRifleJumpAnimation</p><ul><li>Duration: 0.70</li></ul></li></ul></li></ul></td></tr><tr><td><img src="/files/Qllnrl3cOkJBsKw9pwzb" alt="" data-size="original"></td><td><p>ovdrassetid://18611200</p><ul><li><p>Asset Name : BasicRifleAnimations</p><ul><li><p>BasicRifleJumpLoopAnimation</p><ul><li>Duration: 0.80</li></ul></li></ul></li></ul></td></tr><tr><td><img src="/files/UngbALeZWfKfFbXnuuzn" alt="" data-size="original"></td><td><p>ovdrassetid://18612100</p><ul><li><p>Asset Name : BasicRifleAnimations</p><ul><li><p>BasicRifleLandingAnimation</p><ul><li>Duration: 0.63</li></ul></li></ul></li></ul></td></tr><tr><td><img src="/files/NXMPgEHeaClhkaCd6Ckb" alt="" data-size="original"></td><td><p>ovdrassetid://18607800</p><ul><li><p>Asset Name : BasicRifleAnimations</p><ul><li><p>BasicRifleAttackAnimation</p><ul><li>Duration: 0.26</li></ul></li></ul></li></ul></td></tr><tr><td><img src="/files/DPnfEutownFIipm5y2IM" alt="" data-size="original"></td><td><p>ovdrassetid://18608600</p><ul><li><p>Asset Name : BasicRifleAnimations</p><ul><li><p>BasicRifleReloadAnimation</p><ul><li>Duration: 2.63</li></ul></li></ul></li></ul></td></tr><tr><td><img src="/files/I4V5fsn7vvF2VhxcjC0r" alt="" data-size="original"></td><td><p>ovdrassetid://18606400</p><ul><li><p>Asset Name : BasicRifleAnimations</p><ul><li><p>BasicRifleBoost_F_LoopAnimation</p><ul><li>Duration: 0.23</li></ul></li></ul></li></ul></td></tr><tr><td><img src="/files/as8p98eHBVs2A5Wgd8Wf" alt=""></td><td><p>ovdrassetid://18571100</p><ul><li><p>Asset Name : FirearmsEquipAnimations</p><ul><li><p>RifleEquipAnimation</p><ul><li>Duration: 0.46</li></ul></li></ul></li></ul></td></tr><tr><td><img src="/files/wpAhyz18V9Hiu4NLi6pp" alt=""></td><td><p>ovdrassetid://18570100</p><ul><li><p>Asset Name : FirearmsEquipAnimations</p><ul><li><p>RifleUnequipAnimation</p><ul><li>Duration: 0.50</li></ul></li></ul></li></ul></td></tr></tbody></table>
{% endtab %}

{% tab title="Shotgun" %}

<table><thead><tr><th width="215">Animation</th><th>Animation Id</th></tr></thead><tbody><tr><td><img src="/files/xYx1oZHOQ7PEGPdYzRol" alt=""></td><td><p>ovdrassetid://18653100</p><ul><li><p>Asset Name : ShotgunAnimations</p><ul><li><p>ShotgunIdleAnimation</p><ul><li>Duration: 1.73</li></ul></li></ul></li></ul></td></tr><tr><td><img src="/files/v4IfC8iKzzabCtQeMiBR" alt=""></td><td><p>ovdrassetid://18654200</p><ul><li><p>Asset Name : ShotgunAnimations</p><ul><li><p>ShotgunWalkAnimation</p><ul><li>Duration: 0.93</li></ul></li></ul></li></ul></td></tr><tr><td><img src="/files/UpoalnTuBKCgFU5gKZ8y" alt=""></td><td><p>ovdrassetid://18656100</p><ul><li><p>Asset Name : ShotgunAnimations</p><ul><li><p>ShotgunRunAnimation</p><ul><li>Duration: 0.66</li></ul></li></ul></li></ul></td></tr><tr><td><img src="/files/BsiNNZYlJTDN2kv5iF3W" alt=""></td><td><p>ovdrassetid://18663100</p><ul><li><p>Asset Name : ShotgunAnimations</p><ul><li><p>ShotgunJumpStartAnimation</p><ul><li>Duration: 0.70</li></ul></li></ul></li></ul></td></tr><tr><td><img src="/files/FNrN9uI3pLzBVdax1ygJ" alt=""></td><td><p>ovdrassetid://18664100</p><ul><li><p>Asset Name : ShotgunAnimations</p><ul><li><p>ShotgunJumpLoopAnimation</p><ul><li>Duration: 0.80</li></ul></li></ul></li></ul></td></tr><tr><td><img src="/files/pB53fLE6VmLb9kvY9zjv" alt=""></td><td><p>ovdrassetid://18663200</p><ul><li><p>Asset Name : ShotgunAnimations</p><ul><li><p>ShotgunJumpEndAnimation</p><ul><li>Duration: 0.70</li></ul></li></ul></li></ul></td></tr><tr><td><img src="/files/qgGaspWPBhKSm0HVrzab" alt=""></td><td><p>ovdrassetid://18656400</p><ul><li><p>Asset Name : ShotgunAnimations</p><ul><li><p>ShotgunFireAnimation</p><ul><li>Duration: 0.73</li></ul></li></ul></li></ul></td></tr><tr><td><img src="/files/N5tLVQLdQrc8oPpOZvAW" alt=""></td><td><p>ovdrassetid://18668100</p><ul><li><p>Asset Name : ShotgunAnimations</p><ul><li><p>ShotgunReloadAnimation</p><ul><li>Duration: 2.20</li></ul></li></ul></li></ul></td></tr><tr><td><img src="/files/nztFI4tynR7SqrNQAJir" alt=""></td><td><p>ovdrassetid://18666100</p><ul><li><p>Asset Name : ShotgunAnimations</p><ul><li><p>ShotgunLoadAnimation</p><ul><li>Duration: 0.50</li></ul></li></ul></li></ul></td></tr><tr><td><img src="/files/H8eKVeG6gHvcYfqybkYX" alt=""></td><td><p>ovdrassetid://18660300</p><ul><li><p>Asset Name : ShotgunAnimations</p><ul><li><p>ShotgunBoostAnimation</p><ul><li>Duration: 0.23</li></ul></li></ul></li></ul></td></tr><tr><td><img src="/files/W3Zj0rAsiLVxzJxTXXbY" alt=""></td><td><p>ovdrassetid://18669100</p><ul><li><p>Asset Name : ShotgunAnimations</p><ul><li><p>ShotgunEquipAnimation</p><ul><li>Duration: 0.46</li></ul></li></ul></li></ul></td></tr><tr><td><img src="/files/JOTyRA9CELNlWLjTEYOf" alt=""></td><td><p>ovdrassetid://18669200</p><ul><li><p>Asset Name : ShotgunAnimations</p><ul><li><p>ShotgunUnequipAnimation</p><ul><li>Duration: 0.50</li></ul></li></ul></li></ul></td></tr></tbody></table>
{% endtab %}

{% tab title="Bazooka" %}

<table><thead><tr><th width="215">Animation</th><th>Animation Id</th></tr></thead><tbody><tr><td><img src="/files/TptmCPyUK82PODQAQmGJ" alt=""></td><td><p>ovdrassetid://18207300</p><ul><li><p>Asset Name : BazookaAnimations</p><ul><li><p>BazookaIdleAnimation</p><ul><li>Duration: 1.20</li></ul></li></ul></li></ul></td></tr><tr><td><img src="/files/LvNaPj18lS7o1KgZM3M9" alt=""></td><td><p>ovdrassetid://18206100</p><ul><li><p>Asset Name : BazookaAnimations</p><ul><li><p>BazookaAttackAnimation</p><ul><li>Duration: 0.80</li></ul></li></ul></li></ul></td></tr><tr><td><img src="/files/wzyfu4AlCAR7B2aHANeI" alt=""></td><td><p>ovdrassetid://18208100</p><ul><li><p>Asset Name : BazookaAnimations</p><p>BazookaJumpAttackAnimation</p><ul><li>Duration: 0.63</li></ul></li></ul></td></tr><tr><td><img src="/files/bblFOPse6bDV8jgfCZai" alt=""></td><td><p>ovdrassetid://18207100</p><ul><li><p>Asset Name : BazookaAnimations</p><ul><li><p>BazookaEquipAnimation</p><ul><li>Duration: 0.46</li></ul></li></ul></li></ul></td></tr><tr><td><img src="/files/x6TIB7LwtfVnP2X37CiW" alt=""></td><td><p>ovdrassetid://18208200</p><ul><li><p>Asset Name : BazookaAnimations</p><ul><li><p>BazookaUnequipAnimation</p><ul><li>Duration: 0.46</li></ul></li></ul></li></ul></td></tr></tbody></table>
{% endtab %}
{% endtabs %}

### Obby

<table><thead><tr><th width="215">Animation</th><th>Animation Id</th></tr></thead><tbody><tr><td><img src="/files/Vq8fxzNmSe7O6i1TRKW3" alt=""></td><td><p>ovdrassetid://22029100</p><ul><li><p>Asset Name : OBBYAnimations</p><ul><li><p>BalanceIdleAnimation</p><ul><li>Duration: 1.40</li></ul></li></ul></li></ul></td></tr><tr><td><img src="/files/s8czcqrdWMIHccWYsmU0" alt=""></td><td><p>ovdrassetid://22030200</p><ul><li><p>Asset Name : OBBYAnimations</p><ul><li><p>BalanceWalkAnimation</p><ul><li>Duration: 1.40</li></ul></li></ul></li></ul></td></tr><tr><td><img src="/files/eJlRHysnXKHvfDId8poX" alt=""></td><td><p>ovdrassetid://22032100</p><ul><li><p>Asset Name : OBBYAnimations</p><ul><li><p>RopeClimbIdleAnimation</p><ul><li>Duration: 1.60</li></ul></li></ul></li></ul></td></tr><tr><td><img src="/files/yHCbXIqwTNRKZERwe1sw" alt=""></td><td><p>ovdrassetid://22034100</p><ul><li><p>Asset Name : OBBYAnimations</p><ul><li><p>RopeClimbUpAnimation</p><ul><li>Duration: 1.06</li></ul></li></ul></li></ul></td></tr><tr><td><img src="/files/zIZeRrSDdIe9SDLcMxVk" alt=""></td><td><p>ovdrassetid://22035100</p><ul><li><p>Asset Name : OBBYAnimations</p><ul><li><p>RopeClimbDownAnimation</p><ul><li>Duration: 1.60</li></ul></li></ul></li></ul></td></tr><tr><td><img src="/files/dmS8i9hGGkOSshTs0jd7" alt=""></td><td><p>ovdrassetid://18839100</p><ul><li><p>Asset Name : OBBYAnimations</p><ul><li><p>BasicRollingAnimation</p><ul><li>Duration: 0.66</li></ul></li></ul></li></ul></td></tr><tr><td><img src="/files/ioCXr5l4nlZvI6C4zzE9" alt=""></td><td><p>ovdrassetid://22037100</p><ul><li><p>Asset Name : OBBYAnimations</p><ul><li><p>CrashFallingAnimation</p><ul><li>Duration: 1.50</li></ul></li></ul></li></ul></td></tr><tr><td><img src="/files/lQh5rQw5zOPMpHlhkk44" alt=""></td><td><p>ovdrassetid://22039100</p><ul><li><p>Asset Name : OBBYAnimations</p><ul><li><p>FlounderEdgeStopAnimation</p><ul><li>Duration: 1.00</li></ul></li></ul></li></ul></td></tr><tr><td><img src="/files/WhFAKMCxomJHbp4O3QSE" alt=""></td><td><p>ovdrassetid://22040100</p><ul><li><p>Asset Name : OBBYAnimations</p><ul><li><p>EdgeSlipAnimation</p><ul><li>Duration: 1.10</li></ul></li></ul></li></ul></td></tr><tr><td><img src="/files/89fvZu2szaelmnbCOMTI" alt=""></td><td><p>ovdrassetid://22041100</p><ul><li><p>Asset Name : OBBYAnimations</p><ul><li><p>FlounderFallingAnimation</p><ul><li>Duration: 1.33</li></ul></li></ul></li></ul></td></tr><tr><td><img src="/files/Rn7QrSCHH0YgbDmerJGy" alt=""></td><td><p>ovdrassetid://22043100</p><ul><li><p>Asset Name : OBBYAnimations</p><ul><li><p>HardLandingAnimation</p><ul><li>Duration: 2.16</li></ul></li></ul></li></ul></td></tr><tr><td><img src="/files/kgK6mERZv4kSvfYpIur0" alt=""></td><td><p>ovdrassetid://22044100</p><ul><li><p>Asset Name : OBBYAnimations</p><ul><li><p>SlopeSlidingAnimation</p><ul><li>Duration: 0.53</li></ul></li></ul></li></ul></td></tr><tr><td><img src="/files/QCaWV0Hj5oHndbXGntOB" alt=""></td><td><p>ovdrassetid://18889100</p><ul><li><p>Asset Name : OBBYAnimations</p><ul><li><p>HangIdleAnimation</p><ul><li>Duration: 0.80</li></ul></li></ul></li></ul></td></tr><tr><td><img src="/files/f47Tg4PsV8icPMF7ZLej" alt=""></td><td><p>ovdrassetid://23672100</p><ul><li><p>Asset Name : OBBYAnimations</p><ul><li><p>HangMoveAnimation</p><ul><li>Duration: 1.00</li></ul></li></ul></li></ul></td></tr><tr><td><img src="/files/mNfyBnC7KdzrlSzvdpO9" alt=""></td><td><p>ovdrassetid://20487100</p><ul><li><p>Asset Name : OBBYAnimations</p><ul><li><p>JumpSecondaryAnimation</p><ul><li>Duration: 0.56</li></ul></li></ul></li></ul></td></tr><tr><td><img src="/files/z7BRmt81sQnZtSHHZ4uU" alt=""></td><td><p>ovdrassetid://18891100</p><ul><li><p>Asset Name : OBBYAnimations</p><ul><li><p>SquatIdleAnimation</p><ul><li>Duration: 0.80</li></ul></li></ul></li></ul></td></tr><tr><td><img src="/files/PDBErlqFziDoAC97rSNW" alt=""></td><td><p>ovdrassetid://18891300</p><ul><li><p>Asset Name : OBBYAnimations</p><ul><li><p>SquatMoveAnimation</p><ul><li>Duration: 0.80</li></ul></li></ul></li></ul></td></tr><tr><td><img src="/files/TIf4iHYHJDLR0E9XgjjY" alt=""></td><td><p>ovdrassetid://18893100</p><ul><li><p>Asset Name : OBBYAnimations</p><ul><li><p>CrawlIdleAnimation</p><ul><li>Duration: 0.80</li></ul></li></ul></li></ul></td></tr><tr><td><img src="/files/pGA8sQhd6pA14kJrTjqP" alt=""></td><td><p>ovdrassetid://18894200</p><ul><li><p>Asset Name : OBBYAnimations</p><ul><li><p>CrawlMoveAnimation</p><ul><li>Duration: 0.93</li></ul></li></ul></li></ul></td></tr><tr><td><img src="/files/ugJy9wP7cxuYRFsLD3dg" alt=""></td><td><p>ovdrassetid://22847100</p><ul><li><p>Asset Name : OBBYAnimations</p><ul><li><p>ShovingAnimation</p><ul><li>Duration: 0.56</li></ul></li></ul></li></ul></td></tr><tr><td><img src="/files/EsUAo5UabGxmZ6h6hFWf" alt=""></td><td><p>ovdrassetid://22848200</p><ul><li><p>Asset Name : OBBYAnimations</p><ul><li><p>ShoveReactionAnimation</p><ul><li>Duration: 0.63</li></ul></li></ul></li></ul></td></tr><tr><td><img src="/files/8ez84wd8W1yGEFx0ZhCn" alt=""></td><td><p>ovdrassetid://22848400</p><ul><li><p>Asset Name : OBBYAnimations</p><ul><li><p>DodgingBackAnimation</p><ul><li>Duration: 1.00</li></ul></li></ul></li></ul></td></tr><tr><td><img src="/files/SRvc5W8RNSupcgAMzYbc" alt=""></td><td><p>ovdrassetid://22847200</p><ul><li><p>Asset Name : OBBYAnimations</p><ul><li><p>HitOnTheBackAnimation</p><ul><li>Duration: 1.16</li></ul></li></ul></li></ul></td></tr></tbody></table>

### Life

<table><thead><tr><th width="215">Animation</th><th>Animation Id</th></tr></thead><tbody><tr><td><img src="/files/rcC83qRRNcYjKfMYao8e" alt="" data-size="original"></td><td><p>ovdrassetid://18827100</p><ul><li><p>Asset Name : BasicLifeAnimations</p><ul><li><p>BasicSitAnimation</p><ul><li>Duration: 1.33</li></ul></li></ul></li></ul></td></tr><tr><td><img src="/files/RbV0oVBechSura6AHEuO" alt="" data-size="original"></td><td><p>ovdrassetid://18831100</p><ul><li><p>Asset Name : BasicLifeAnimations</p><ul><li><p>BasicSit_LoopAnimation</p><ul><li>Duration: 4.00</li></ul></li></ul></li></ul></td></tr><tr><td><img src="/files/kgKAzNzmEwMYL4w1BCMN" alt="" data-size="original"></td><td><p>ovdrassetid://18826500</p><ul><li><p>Asset Name : BasicLifeAnimations</p><ul><li><p>BasicAttackIdleAnimation</p><ul><li>Duration: 1.06</li></ul></li></ul></li></ul></td></tr><tr><td><img src="/files/MC8NLx6N5MkajZub1qsJ" alt="" data-size="original"></td><td><p>ovdrassetid://18832100</p><ul><li><p>Asset Name : BasicLifeAnimations</p><ul><li><p>BasicConversationAnimation</p><ul><li>Duration: 2.26</li></ul></li></ul></li></ul></td></tr><tr><td><img src="/files/u28BTGE4IiaFRR2Nmc8A" alt="" data-size="original"></td><td><p>ovdrassetid://23673200</p><ul><li><p>Asset Name : BasicLifeAnimations</p><ul><li><p>BasicSolvingAnimation</p><ul><li>Duration: 3.60</li></ul></li></ul></li></ul></td></tr><tr><td><img src="/files/gsMWnfuDPFLzY1L47pe4" alt="" data-size="original"></td><td><p>ovdrassetid://18835100</p><ul><li><p>Asset Name : BasicLifeAnimations</p><ul><li><p>BasicLyingAnimation</p><ul><li>Duration: 0.10</li></ul></li></ul></li></ul></td></tr><tr><td><img src="/files/hHv4H6i8ShY1Trle6bc8" alt="" data-size="original"></td><td><p>ovdrassetid://18836100</p><ul><li><p>Asset Name : BasicLifeAnimations</p><ul><li><p>BasicDiggingAnimation</p><ul><li>Duration: 0.43</li></ul></li></ul></li></ul></td></tr><tr><td><img src="/files/WFsv9MQNCBa9iPcRFsTN" alt="" data-size="original"></td><td><p>ovdrassetid://18838100</p><ul><li><p>Asset Name : BasicLifeAnimations</p><ul><li><p>BasicEattingAnimation</p><ul><li>Duration: 1.53</li></ul></li></ul></li></ul></td></tr><tr><td><img src="/files/dmS8i9hGGkOSshTs0jd7" alt="" data-size="original"></td><td><p>ovdrassetid://18839100</p><ul><li><p>Asset Name : BasicLifeAnimations</p><ul><li>BasicRollingAnimation</li></ul></li></ul></td></tr><tr><td><img src="/files/a71hI8u27nmFG0hbaejh" alt=""></td><td><p>ovdrassetid://18850100</p><ul><li><p>Asset Name : WinLoseTieAnimations</p><ul><li><p>WinAnimation01</p><ul><li>Duration: 1.33</li></ul></li></ul></li></ul></td></tr><tr><td><img src="/files/C4NK1ulYbJLwbfiUzks2" alt=""></td><td><p>ovdrassetid://18848200</p><ul><li><p>Asset Name : WinLoseTieAnimations</p><ul><li><p>WinAnimation02</p><ul><li>Duration: 1.30</li></ul></li></ul></li></ul></td></tr><tr><td><img src="/files/JpDqyW8M5JrUFPKCeB3s" alt=""></td><td><p>ovdrassetid://18848300</p><ul><li><p>Asset Name : WinLoseTieAnimations</p><ul><li><p>WinAnimation03</p><ul><li>Duration: 1.30</li></ul></li></ul></li></ul></td></tr><tr><td><img src="/files/ey70KZQsX0ezd7SU1OqC" alt=""></td><td><p>ovdrassetid://18851100</p><ul><li><p>Asset Name : WinLoseTieAnimations</p><ul><li><p>LoseAnimation01</p><ul><li>Duration: 1.90</li></ul></li></ul></li></ul></td></tr><tr><td><img src="/files/BMUMRZb9uehtqgM0hTrw" alt=""></td><td><p>ovdrassetid://18846200</p><ul><li><p>Asset Name : WinLoseTieAnimations</p><ul><li><p>LoseAnimation02</p><ul><li>Duration: 1.33</li></ul></li></ul></li></ul></td></tr><tr><td><img src="/files/cA9sOHhbC03xmb8QbNfo" alt=""></td><td><p>ovdrassetid://18852100</p><ul><li><p>Asset Name : WinLoseTieAnimations</p><ul><li><p>LoseAnimation03</p><ul><li>Duration: 2.93</li></ul></li></ul></li></ul></td></tr><tr><td><img src="/files/78LGSkjhO8hnpKfa6LMJ" alt=""></td><td><p>ovdrassetid://18853100</p><ul><li><p>Asset Name : WinLoseTieAnimations</p><ul><li><p>TieAnimation01</p><ul><li>Duration: 1.33</li></ul></li></ul></li></ul></td></tr><tr><td><img src="/files/cuSOXgCArg9FYZgqUzUb" alt=""></td><td><p>ovdrassetid://18855100</p><ul><li><p>Asset Name : WinLoseTieAnimations</p><ul><li><p>TieAnimation02</p><ul><li>Duration: 2.40</li></ul></li></ul></li></ul></td></tr><tr><td><img src="/files/C1fAHnbvqd8Xn7xEmWAX" alt=""></td><td><p>ovdrassetid://23675300</p><ul><li><p>Asset Name : WarmUpAnimations</p><ul><li><p>WarmUpAnimation01</p><ul><li>Duration: 3.66</li></ul></li></ul></li></ul></td></tr><tr><td><img src="/files/ZMLr3i3YgI7sOEVsNdmu" alt=""></td><td><p>ovdrassetid://23676200</p><ul><li><p>Asset Name : WarmUpAnimations</p><ul><li><p>WarmUpAnimation02</p><ul><li>Duration: 2.80</li></ul></li></ul></li></ul></td></tr></tbody></table>

### Etc

<table><thead><tr><th width="215">Animation</th><th>Animation Id</th></tr></thead><tbody><tr><td><img src="/files/hBbtUEaBAaOj6Mym2J3z" alt="" data-size="original"></td><td><p>ovdrassetid://18869100</p><ul><li><p>Asset Name : BasicPushAnimtions</p><ul><li><p>BasicPushingAnimation</p><ul><li>Duration: 2.06</li></ul></li></ul></li></ul></td></tr><tr><td><img src="/files/ZsV3WwSHVVOBREXSDJJ4" alt="" data-size="original"></td><td><p>ovdrassetid://18870200</p><ul><li><p>Asset Name : BasicPushAnimtions</p><ul><li><p>BasicPushWalkAnimation</p><ul><li>Duration: 0.93</li></ul></li></ul></li></ul></td></tr><tr><td><img src="/files/Q17l6CzYdqaHl343Stjr" alt="" data-size="original"></td><td><p>ovdrassetid://18872100</p><ul><li><p>Asset Name : BasicCarryAnimations</p><ul><li><p>BasicCarryAnimation</p><ul><li>Duration: 1.80</li></ul></li></ul></li></ul></td></tr><tr><td><img src="/files/QKLrj3prvz9wfODmqL1q" alt="" data-size="original"></td><td><p>ovdrassetid://18873200</p><ul><li><p>Asset Name : BasicCarryAnimations</p><ul><li><p>BasicCarryRunAnimation</p><ul><li>Duration: 0.66</li></ul></li></ul></li></ul></td></tr><tr><td><img src="/files/oDEEy0bpS4TU9ULkz1WG" alt="" data-size="original"></td><td><p>ovdrassetid://18883100</p><ul><li><p>Asset Name : BasicSkillAnimations</p><ul><li><p>BasicSkill_Directed_IdleAnimation</p><ul><li>Duration: 1.36</li></ul></li></ul></li></ul></td></tr><tr><td><img src="/files/kDmWwwwuZXIIIEWDbD4P" alt="" data-size="original"></td><td><p>ovdrassetid://18885100</p><ul><li><p>Asset Name : BasicSkillAnimations</p><ul><li><p>BasicSkill_Directed_ThrowAnimation</p><ul><li>Duration: 0.66</li></ul></li></ul></li></ul></td></tr><tr><td><img src="/files/pYpQGzodx9N1A1Ps6qDU" alt="" data-size="original"></td><td><p>ovdrassetid://18884200</p><ul><li><p>Asset Name : BasicSkillAnimations</p><ul><li><p>BasicSkill_InstantAnimation</p><ul><li>Duration: 0.73</li></ul></li></ul></li></ul></td></tr><tr><td><img src="/files/cOzONUvZXTlcC68C5QXh" alt=""></td><td><p>ovdrassetid://18875100</p><ul><li><p>Asset Name : PullLeverAnimation</p><ul><li>Duration: 0.60</li></ul></li></ul></td></tr><tr><td><img src="/files/QCaWV0Hj5oHndbXGntOB" alt=""></td><td><p>ovdrassetid://18889100</p><ul><li><p>Asset Name : SpecialMovementAnimations</p><ul><li><p>HangIdleAnimation</p><ul><li>Duration: 0.80</li></ul></li></ul></li></ul></td></tr><tr><td><img src="/files/NboBYgTSvTn4X2qShoWi" alt=""></td><td><p>ovdrassetid://18889200</p><ul><li><p>Asset Name : SpecialMovementAnimations</p><ul><li><p>HangMoveAnimation</p><ul><li>Duration: 1.00</li></ul></li></ul></li></ul></td></tr><tr><td><img src="/files/mNfyBnC7KdzrlSzvdpO9" alt=""></td><td><p>ovdrassetid://20487100</p><ul><li><p>Asset Name : SpecialMovementAnimations</p><ul><li><p>JumpSecondaryAnimation</p><ul><li>Duration: 0.56</li></ul></li></ul></li></ul></td></tr><tr><td><img src="/files/z7BRmt81sQnZtSHHZ4uU" alt=""></td><td><p>ovdrassetid://18891100</p><ul><li><p>Asset Name : SpecialMovementAnimations</p><ul><li><p>SquatIdleAnimation</p><ul><li>Duration: 0.80</li></ul></li></ul></li></ul></td></tr><tr><td><img src="/files/PDBErlqFziDoAC97rSNW" alt=""></td><td><p>ovdrassetid://18891300</p><ul><li><p>Asset Name : SpecialMovementAnimations</p><ul><li><p>SquatMoveAnimation</p><ul><li>Duration: 0.80</li></ul></li></ul></li></ul></td></tr><tr><td><img src="/files/TIf4iHYHJDLR0E9XgjjY" alt=""></td><td><p>ovdrassetid://18893100</p><ul><li><p>Asset Name : SpecialMovementAnimations</p><ul><li><p>CrawlIdleAnimation</p><ul><li>Duration: 0.80</li></ul></li></ul></li></ul></td></tr><tr><td><img src="/files/pGA8sQhd6pA14kJrTjqP" alt=""></td><td><p>ovdrassetid://18894200</p><ul><li><p>Asset Name : SpecialMovementAnimations</p><ul><li><p>CrawlMoveAnimation</p><ul><li>Duration: 0.93</li></ul></li></ul></li></ul></td></tr><tr><td><img src="/files/Fc7fkG7vIB46XDSonJHW" alt=""></td><td><p>ovdrassetid://20481200</p><ul><li><p>Asset Name : SportsAnimations</p><ul><li><p>ThrowBallAnimation</p><ul><li>Duration: 0.96</li></ul></li></ul></li></ul></td></tr><tr><td><img src="/files/qt5pBqn4FKV1URJM8PGT" alt=""></td><td><p>ovdrassetid://20481100</p><ul><li><p>Asset Name : SportsAnimations</p><ul><li><p>SwingBatAnimation</p><ul><li>Duration: 0.93</li></ul></li></ul></li></ul></td></tr><tr><td><img src="/files/Lf9TISuMmBlLjfSA0oTc" alt=""></td><td><p>ovdrassetid://20486100</p><ul><li><p>Asset Name : BattleAnimations</p><ul><li><p>ThrowShurikenAnimation</p><ul><li>Duration: 0.20</li></ul></li></ul></li></ul></td></tr><tr><td><img src="/files/jMrFGhsQH4rRY1R2FwkQ" alt=""></td><td><p>ovdrassetid://20486300</p><ul><li><p>Asset Name : BattleAnimations</p><ul><li><p>ChargeEnergyAnimation</p><ul><li>Duration: 1.33</li></ul></li></ul></li></ul></td></tr><tr><td><img src="/files/kX3EPNoHrXyksqQQH4Og" alt=""></td><td><p>ovdrassetid://20481400</p><ul><li><p>Asset Name : BattleAnimations</p><ul><li><p>GrabAnimation</p><ul><li>Duration: 1.00</li></ul></li></ul></li></ul></td></tr><tr><td><img src="/files/MFYvZU9RJOSpdNWxtIHt" alt=""></td><td><p>ovdrassetid://20484100</p><ul><li><p>Asset Name : BattleAnimations</p><ul><li><p>BeGrabAnimation</p><ul><li>Duration: 0.40</li></ul></li></ul></li></ul></td></tr><tr><td><img src="/files/cLCGQSEfPIPGWiBqgg8k" alt=""></td><td><p>ovdrassetid://20485100</p><ul><li><p>Asset Name : BattleAnimations</p><ul><li><p>ThrowAnimation</p><ul><li>Duration: 0.43</li></ul></li></ul></li></ul></td></tr><tr><td><img src="/files/746x1wbnWDwEc3tzEDTg" alt=""></td><td><p>ovdrassetid://20486400</p><ul><li><p>Asset Name : BattleAnimations</p><ul><li><p>FireballAnimation</p><ul><li>Duration: 0.76</li></ul></li></ul></li></ul></td></tr><tr><td><img src="/files/XaLuyC4HVkEYwbSqxpsJ" alt=""></td><td><p>ovdrassetid://20486600</p><ul><li><p>Asset Name : BattleAnimations</p><ul><li><p>ResurrectionAnimation</p><ul><li>Duration: 1.93</li></ul></li></ul></li></ul></td></tr><tr><td><img src="/files/jgJPW8z77S7EEKfb1QkX" alt=""></td><td><p>ovdrassetid://20487200</p><ul><li><p>Asset Name : BattleAnimations</p><ul><li><p>HeroLandingAnimation</p><ul><li>Duration: 1.66</li></ul></li></ul></li></ul></td></tr></tbody></table>

## **Creating Animations** <a href="#creating-animations" id="creating-animations"></a>

The ODA-based Bone (Skeleton) structure allows the use of animations created in external programs.

When creating animations in external programs like Blender, ensure the skeletal mesh matches the ODA Bone structure.

You can export the created animations in FBX format to use in OVERDARE Studio.

{% file src="/files/I0QmYNLWgyaqq5wuRzAl" %}

{% file src="/files/YJFbgik2nuQNIBFId7LC" %}

## **Importing External Animations** <a href="#importing-external-animations" id="importing-external-animations"></a>

Click the **Import3D** button to import the animation FBX file.

<figure><img src="/files/rMqVEHXC8LtsxUjoEkMy" alt=""><figcaption></figcaption></figure>

When an FBX file is imported, OVERDARE Studio sends the animation to the Creator Hub, assigns an Asset Id, and adds it to the Workspace as an Animation instance.

<figure><img src="/files/Am2PAcv7R9OZ3zRuKA0m" alt=""><figcaption></figcaption></figure>

## **Playing Animations** <a href="#playing-animations" id="playing-animations"></a>

To play animations, use the `Humanoid`'s `Animator` to create an animation track for the avatar and play the track.

```lua
local animation = Instance.new("Animation")
animation.AnimationId = "ovdrassetid://Animation_ID"

local animator = character.Humanoid:WaitForChild("Animator")
local animationTrack = animator:LoadAnimation(animation)

-- If the UpperBodyAnimation is set to true, the animation will apply only to the torso.
--AnimationTrack.UpperBodyAnimation = true

animationTrack:Play()
```

## IdleVariation Setup

Idle Variation refers to additional animations that are played randomly or sequentially while the character is in the Idle state.

Among the animations under `Character.Animate.Idle`, the second animation and onward are treated as Idle Variations. If only the first animation remains, only the default Idle animation will be played without any variations.

<div align="left"><figure><img src="/files/slIxQeCiF3paQivo3U5G" alt="" width="563"><figcaption></figcaption></figure></div>

Additionally, the same setup can be configured using the IdleVariations property in HumanoidDescription.

<figure><img src="/files/VUljQQRX2GsPlGtXJHNn" alt=""><figcaption></figcaption></figure>

## Reference Materials

{% content-ref url="/pages/5IpTGP7jviBTxMeIYiuo" %}
[Animation Editor](/manual/studio-manual/asset-and-resource-creation/animation-editor)
{% endcontent-ref %}


# Humanoid Description

## Overview

HumanoidDescription is a useful tool that allows game developers to bring their creative vision and game design intentions to life. By using this function, creators can alter a player’s avatar appearance to fit specific scenarios or themes within the game. This helps maintain a consistent style or atmosphere in the game, and enhance the overall player experience.

HumanoidDescription doesn’t just change the appearance of an avatar. It can also control various character behaviors, such as animations or size. For example, upon entering a specific region, a character might wear a particular outfit or trigger a specific animation. These functions are closely tied to the game’s storytelling and gameplay mechanics to offer players a more meaningful experience in the game.

## Attributes

| Attribute                     | Description                              |
| ----------------------------- | ---------------------------------------- |
| Head                          | Head MeshPart                            |
| Torso                         | Torso MeshPart                           |
| LeftArm                       | Left arm MeshPart                        |
| RightArm                      | Right arm MeshPart                       |
| LeftLeg                       | Left leg MeshPart                        |
| RightLeg                      | Right leg MeshPart                       |
| HeadColor                     | Head mesh color                          |
| TorsoColor                    | Torso mesh color                         |
| LeftArmColor                  | Left arm mesh color                      |
| RightArmColor                 | Right arm mesh color                     |
| LeftLegColor                  | Left leg mesh color                      |
| RightLegColor                 | Right leg mesh color                     |
| HeadTextureId                 | Head mesh texture                        |
| TorsoTextureId                | Torso mesh texture                       |
| LeftArmTextureId              | Left arm mesh texture                    |
| RightArmTextureId             | Right arm mesh texture                   |
| LeftLegTextureId              | Left leg mesh texture                    |
| RightLegTextureId             | Right leg mesh texture                   |
| IdleAnimantion                | Idle animation                           |
| WalkAnimantion                | Walking animation                        |
| RunAnimantion                 | Running animation                        |
| JumpAnimantion                | Jumping animation                        |
| FallAnimantion                | Freefall animation                       |
| LandedAnimation               | Landing animation                        |
| SwimmingIdleAnimation         | Idle swimming animation                  |
| SwimmingBreaststrokeAnimation | Swimming animation                       |
| ClimbingAnimantion            | Climbing animation                       |
| DieAnimation                  | Death animation                          |
| HeightScale                   | Character y-axis scale, character height |
| DepthScale                    | Character z-axis scale, character depth  |
| WidthScale                    | Character x-axis scale, character width  |

\\

## How to Use

HumanoidDescription can be created and applied through the level browser or script.

### Creating HumanoidDescription from the level browser

<figure><img src="/files/U1WfwSOZr9ykS3ixgJil" alt=""><figcaption></figcaption></figure>

<figure><img src="/files/PYS0wZ8cqT2WbmaLzOrG" alt=""><figcaption></figcaption></figure>

### Creating and applying HumanoidDescription using a script

```lua
local function ApplyHumanoidDescription(character)
    local humanoidDesc = Instance.new("HumanoidDescription")
    
    -- BodyPart Mesh
    humanoidDesc.Head     = 8213300
    humanoidDesc.Torso    = 8214200
    humanoidDesc.LeftArm  = 8213200
    humanoidDesc.LeftLeg  = 8213400
    humanoidDesc.RightArm = 8213100
    humanoidDesc.RightLeg = 8214100
    
    -- BodyPart Texture    
    humanoidDesc.HeadTextureId     = 8211400
    humanoidDesc.TorsoTextureId    = 8212600
    humanoidDesc.LeftArmTextureId  = 8212400
    humanoidDesc.LeftLegTextureId  = 8211500
    humanoidDesc.RightArmTextureId = 8212500
    humanoidDesc.RightLegTextureId = 8212500
    
    -- BodyPart Color
    humanoidDesc.HeadColor     = Color3.fromRGB(255, 100, 100)
    humanoidDesc.TorsoColor    = Color3.fromRGB(0, 255, 100)
    humanoidDesc.LeftArmColor  = Color3.fromRGB(255, 0, 0)
    humanoidDesc.LeftLegColor  = Color3.fromRGB(0, 255, 0)
    humanoidDesc.RightArmColor = Color3.fromRGB(0, 0, 255)
    humanoidDesc.RightLegColor = Color3.fromRGB(100, 0, 100)
    
    -- Animations
    humanoidDesc.IdleAnimation   = "ovdrassetid://18558100"
    humanoidDesc.RunAnimation    = "ovdrassetid://18559300"
    humanoidDesc.WalkAnimation   = "ovdrassetid://18560100"
    humanoidDesc.JumpAnimation   = "ovdrassetid://18563500"
    humanoidDesc.FallAnimation   = "ovdrassetid://18563700"
    humanoidDesc.LandedAnimation = "ovdrassetid://18565100"
    
    --Scale
    humanoidDesc.HeightScale = 1.6
    humanoidDesc.DepthScale  = 1.4
    humanoidDesc.WidthScale  = 1.4
    
    humanoidDesc.Parent = character

    local humanoid = character:WaitForChild("Humanoid")
    humanoid:ApplyDescription(humanoidDesc, Enum.AssetTypeVerification.Default)
end
```

### Changing the Appearance

The player avatar that enters the UGC world will appear as it is set up in the app. However, certain game characteristics may require restrictions on the character’s clothing or accessories.

For example, in games like hide-and-seek, where the character must hide to avoid being seen, extravagant avatars may be at a disadvantage. In such cases, it may be necessary to standardize clothing for all players to ensure fair competition. Another example would be assigning players to teams and having them wear uniforms to indicate which team they belong to.

To meet such requirements, the creator can use HumanoidDescription to modify the player’s appearance. This function can help achieve a consistent avatar style that aligns with the game’s characteristics, which may improve both the fun and fairness of the game.

#### **Changing the MeshPart**

<figure><img src="/files/78ka4e9MxDOa1fGu04oA" alt=""><figcaption></figcaption></figure>

<figure><img src="/files/fs5qRI9VLT23yc5GCx32" alt=""><figcaption></figcaption></figure>

#### **Changing the MeshPart Texture and Color**

<figure><img src="/files/ep9buDFJutQiuE7L3T8U" alt=""><figcaption></figcaption></figure>

### Changing the Animation

At OVERDARE Studio, all characters currently use the same default animation, and all players move in the same way. However, in a UGC environment, it can be important to diversify animations based on the player’s status.

For example, if a player is attacked and must transform into a zombie, instead of simply changing the character’s appearance, an animation that makes the character walk like a zombie can be applied. This makes the game more immersive to provide a more realistic experience for players.

By using HumanoidDescription, the character’s default animations (such as idle, walking, running, jumping, landing, dying, etc.) can be easily switched and synchronized. This powerful tool allows for the customization of animations based on various in-game scenarios, enabling creators to enhance the game’s story and interactions.

{% embed url="<https://files.gitbook.com/v0/b/gitbook-x-prod.appspot.com/o/spaces%2FhRPi87oM9ttlk5nyu7L7%2Fuploads%2FhDiclS51wrYpJxxDaVur%2F2025-03-14%2021-40-25.mp4?alt=media&token=92520b7d-1b15-4396-8154-af84be508523>" %}

#### **Regarding Animation Synchronization**

By default, movement-related animations such as idle, walking, and running are not synchronized in real time through the server. Instead, a player’s animation data is initialized and sent to all clients when the player logs into the game. After that, when the character moves or jumps, the client plays the corresponding animations based on the animation data received at the start.

As a result, even if a player’s character equips a weapon and their default movement animation changes, this update is not reflected on other clients. In other words, other players won’t see the change in that character’s movement animations.

<figure><img src="/files/oFqukbcDX0rRFGZJECyW" alt=""><figcaption><p>Even though they are holding a weapon and the HandgunIdle animation is playing on their client, the other player sees the default animation instead of the HandgunIdle animation.</p></figcaption></figure>

To address this, an animation synchronization function is needed. However, creating such a function typically requires a complex script.

To resolve this issue, HumanoidDescription can be used to easily synchronize default animations without the need for complicated synchronization scripts. This allows for a consistent animation experience across the game while simplifying the creator’s workload.

{% embed url="<https://files.gitbook.com/v0/b/gitbook-x-prod.appspot.com/o/spaces%2FhRPi87oM9ttlk5nyu7L7%2Fuploads%2FGTxAvOVUqB5JDC3qKIsR%2F2025-03-14%2021-53-46.mp4?alt=media&token=d01ba13e-6696-47e8-a868-9ea3c5c72baf>" %}
By implementing HumanoidDescription, the character’s animations can be synchronized without a complicated synchronization script.
{% endembed %}


# Hitbox Options

## Overview

The hitbox system defines the unit for the character's hit detection. It offers various hitbox options that can be tailored to your world's style, performance needs, and game design goals.

*Actual hit effects (damage handling, color changes, etc.) must be implemented by the creator. The hitbox system itself only determines which units of the character will be used for hit detection when using physics collisions, **Touched*** ***events**, or **Raycast function.***

## Function Properties

Hitbox options can be configured in the **Workspace**. Once hitbox is set in the **Workspace**, all character hit detection in the world will adhere to the selected hitbox options.

{% hint style="info" %}
**Hitbox options cannot be changed during runtime at the moment**, so they cannot be modified via script while the world is running.
{% endhint %}

<figure><img src="/files/lGFe8Nea0LqaWaolIB2b" alt=""><figcaption></figcaption></figure>

The hitbox option offers the following 3 options:

<table><thead><tr><th width="168.166748046875">Option</th><th>Description</th></tr></thead><tbody><tr><td>Single</td><td>A single hitbox that encapsulates the entire character</td></tr><tr><td>SixBody</td><td>Fixed hitboxes for key body parts (head, torso, limbs)</td></tr><tr><td>FittedSixBody</td><td>Six hitboxes adjusted to match the character's shape and clothing</td></tr></tbody></table>

### Hitbox Option Details

#### **Single**

* **Shape**: A single capsule-shaped hitbox centered on the HumanoidRootPart
* **Features**:
  * Ideal for simple, performance-focused worlds
  * Recommended when part-specific hit detection isn't needed
  * Uses a persistent capsule-shaped hitbox

<figure><img src="/files/LwY6eIpkGjeC1JvYCzLb" alt=""><figcaption></figcaption></figure>

#### **SixBody**

The character is divided into **six fixed body parts: head, torso, arms, and legs**. Separate hitboxes are generated for each part. Each MeshPart contains multiple hitboxes, based on the **Bone Structure defined in the character guide**.

Both **Touched events** and **Raycast** are detected based on the **MeshPart that the hitbox belongs to**. For example, the left arm contains three hitboxes: Upper Arm, Lower Arm, and Hand. Regardless of which hitbox is hit, **Touched events are triggered** for the LeftArm MeshPart.

***\*If using the Single option, part-specific hitboxes are not generated.***

* **Shape**: Divides the body into six parts (head, torso, arms, legs), each with multiple hitboxes
* **Features**:
  * Best suited for precise hit detection, such as per-limb damage or headshots
  * Uses a fixed detection layout, regardless of avatar appearance
  * **Touched events** and **Raycast** work based on the MeshPart of their hitbox

<figure><img src="/files/Jhu3OuaGUezSnRtzwXjL" alt=""><figcaption></figcaption></figure>

#### **FittedSixBody**

Dynamically adjusts the size and position of the hitboxes on the six body parts to fit the avatar's clothing or shape.

* **Shape**: Adjusts the size and position of the hitboxes to fit the body shape based on the **SixBody structure**
* **Features**:
  * Ideal for custom avatars and various outfits
  * Hitbox position is dynamically adjusted based on player appearance
  * **Touched events** and **Raycast** function the same as in **SixBody**

## Using the Hitbox System in Physics-Based Interactions

### Using Collision Groups Based on Hitbox Options

OVERDARE Studio provides **4 system Collision Groups** for physics-based hit detection:

<figure><img src="/files/g5UE4Y0PnGrrly4kFBf2" alt="" width="563"><figcaption></figcaption></figure>

<table><thead><tr><th width="152.6666259765625">Collision Group</th><th width="361.4998779296875">Description</th><th width="231.83343505859375">Notes</th></tr></thead><tbody><tr><td>Default</td><td>The default group for most general Parts and MeshParts</td><td></td></tr><tr><td>RootPart</td><td>Group for the character's HumanoidRootPart</td><td>Activated when using SixBody or FittedSixBody</td></tr><tr><td>BodyPart</td><td>Group for character body parts (arms, legs, and torso)</td><td>Activated when using SixBody or FittedSixBody</td></tr><tr><td>Projectile</td><td>Group for projectiles intended to collide with BodyPart</td><td>Activated when using SixBody or FittedSixBody</td></tr></tbody></table>

> **Collision Groups are activated/deactivated based on the selected hitbox option.**

### Collision Group Behavior by Hitbox Option

* **Single Option**
  * Only the Default group is activated.
  * The HumanoidRootPart belongs to the Default group.
* **SixBody, FittedSixBody Option**
  * RootPart, BodyPart, and Projectile groups are automatically activated
  * In this case, the HumanoidRootPart is reassigned to the RootPart group
  * It's recommended to assign Objects that physically collide with BodyPart to the Projectile group.

### Handling Collisions Between Groups

#### **Default - RootPart**

* The reason characters don't fall through the ground is because the HumanoidRootPart (RootPart group) can collide with most Objects in the Default group.
* When using the **SixBody** or **FittedSixBody** option, the HumanoidRootPart is reassigned to the RootPart group. Therefore, **Default – RootPart collisions must be activated** for the character to interact properly.
* But with the **Single** option, the HumanoidRootPart remains in the Default group, so **collisions work normally without additional setup.**

#### **Default - BodyPart**

* Even if you activate Default – BodyPart collisons, there may be **little noticeable impact** since Default – RootPart collisions are already in effect.
* If you need **part-specific hit detection**, it's more effective to use the Projectile group to handle collisions between projectiles and BodyPart.

#### **RootPart - Projectile**

* When using the **SixBody** or **FittedSixBody** options, make sure to **deactivate collisions between projectiles and the RootPart**.
* This helps prevent unintended hit detection on areas outside the intended body parts.

#### **BodyPart - Projectile**

* With the **SixBody** and **FittedSixBody** options, **projectiles must be able to collide with BodyPart,** so make sure this collision is **activated**.

### Implementing Hit Detection Through Physical Collisions

Hit detection from physical collisions can be handled using the **Touched event** of the MeshParts that make up the character's body.

But for projectiles that move according to physics, there's a chance of them passing through targets without triggering a collision, depending on their speed. For fast-moving Objects like bullets, it's recommended to use Raycast instead of Touched for hit detection.

{% hint style="warning" %}
We've identified an issue where the Touched event behaves unexpectedly depending on the Collision Group and CanCollide settings. This issue will be resolved soon.
{% endhint %}

#### Hit Detection Using Touched Events

<pre class="language-lua"><code class="lang-lua"><strong>local Players = game:GetService("Players")
</strong><strong>local LocalPlayer = Players.LocalPlayer
</strong><strong>local Character = LocalPlayer.Character
</strong>
<strong>local function AttachEvent(character)
</strong>    local BodyParts = 
    {
	character.Head,
	character.Torso,
	character.RightArm,
	character.LeftArm,
	character.RightLeg,
	character.LeftLeg
    }
    
    for _,part in ipairs(BodyParts) do
	part.Touched:Connect(function(otherPart)
	    if(otherPart.Name == "Baseplate") then return end
	    print(part.Name .. " is Hit!")
        end)		
    end	
end
AttachEvent(Character)
</code></pre>

{% embed url="<https://files.gitbook.com/v0/b/gitbook-x-prod.appspot.com/o/spaces%2FhRPi87oM9ttlk5nyu7L7%2Fuploads%2FCdUKaWiM33bg97jZoQzJ%2F2025-07-03%2011-55-12.mp4?alt=media&token=f74fe9cd-3828-4244-89fb-238ccf449d38>" %}

## Using the Hitbox System with Raycast-Based Detection

Depending on the hitbox option, the **parts detected by Raycast** may vary, which can affect how hits are detected.

<table><thead><tr><th width="249">Hitbox Option</th><th>HumanoidRootPart Detection</th><th>Body MeshPart Detection</th></tr></thead><tbody><tr><td><strong>Single</strong></td><td>✅ Detected</td><td>❌ Not detected</td></tr><tr><td><strong>SixBody</strong>, <strong>FittedSixBody</strong></td><td>❌ Not detected</td><td>✅ Detected</td></tr></tbody></table>

* **Single Option**
  * Raycast detects only the HumanoidRootPart.
  * **Body MeshParts** such as the head, arms, and legs **are not detected.**
* **SixBody, FittedSixBody Option**
  * Raycast detects Body MeshParts (Head, Torso, Arms, Legs).
  * **HumanoidRootPart is excluded from detection,** so this option is not suitable when only central hit detection is needed.
* For **precise hit detection by body part**, use `SixBody` or `FittedSixBody` and apply Raycast at the `MeshPart` level.
* For **simple central collision detection**, the `Single` option is ideal, and in this case, `HumanoidRootPart` alone is sufficient for hit detection.

## Recommended Handling Method in Multiplayer (Network) Environments

### Processing Hit Detection on the Client Side

The server **does not play character animations**, so hitbox collisions and hit detection must be **handled on the client**, **based on the character's actual pose as seen on the screen**.

For example, even if the character is raising their hand while dancing on the client, the server only **recognizes the default standing-still pose**. This means that if a projectile is fired at the raised hand, the server **may ignore the hit** because it doesn't recognize the hand as being raised.

So when using the **SixBody** or **FittedSixBody** hitbox options, the following approach is recommended:

* **Client**: Processes hit detection based on the visibility state of the character
* **Server**: Receives hit results (damage, hit confirmation, etc.) from the client and processes them for synchronization

<div><figure><img src="/files/BnIUG828VCJp0DmBaIRI" alt=""><figcaption><p>On the client, the running animation is played,</p></figcaption></figure> <figure><img src="/files/o6oFtKYYVjV8GbNWlr8v" alt=""><figcaption><p>but on the server, the pose data for character animation is not applied.</p></figcaption></figure></div>

### Consistent Visual Synchronization of Projectiles

To make sure projectiles **appear consistently across all clients**, the following approach is recommended:

* **Server**: Sends only the projectile's position and velocity data to each client
* **Client**: Uses that data to generate the projectile and handle visual effects independently

> This method reduces server load, minimizes latency, and distributes some of the processing to clients, which helps provide stable performance in most multiplayer games.

### Sending and Verifying Results on the Server

* The client sends the hit detection results (e.g., hit location, damage amount) to the **server**.
* The server then **broadcasts this information to all clients** to synchronize the state.
* If needed, the server can **verify or adjust** the client's hit result.

### Preventing Server-Client Discrepancies

* Since the server always recognizes characters in their **default pose**, **client-side hit detection should take priority** for accurate results.
* For **consistent gameplay experience**, the server should **rely on the client's hit results** while also having a system in place for **validating them**.

## Selecting Hitbox Type

| World Style/Requirementes                                           | Recommended Hitbox Options |
| ------------------------------------------------------------------- | -------------------------- |
| Performance-first, simple hit detection                             | Single                     |
| <p>Precise detection for headshots and<br>part-specific effects</p> | SixBody                    |
| Adaptive hit detection based on avatar appearance                   | FittedSixBody              |


# Character Movement Parameters

## Overview

In OVERDARE, in addition to the default humanoid properties, extended properties are provided to **precisely control the character's handling and movement.**

These features allow creators to tweak the character's movement, jumping, falling, and friction to achieve a handling feel suitable for the game's genre and concept.

## Function Properties

Advanced character control properties can be set on the **Humanoid instance**, and the set values ​​are immediately applied to all characters that contain that humanoid.

Some properties can restrict actions when set to 0, which can have various effects depending on the game design, such as disabling jumps, restricting movement, or changing gravity.

<div align="left" data-full-width="false"><figure><img src="/files/pHFikeiPBokYt78i2I2n" alt=""><figcaption><p>Humanoid-related properties available in StarterPlayer</p></figcaption></figure></div>

<figure><img src="/files/KsVnCJdhsG5DQazAeZaR" alt=""><figcaption><p>Movement parameters available in Humanoid</p></figcaption></figure>

## Category-Specific Extensions

### Movement

Controls the character's base movement speed, direction changes, deceleration, and climbable slope range.

<table><thead><tr><th width="187.166748046875">Property</th><th>Description</th></tr></thead><tbody><tr><td><strong>MaxAcceleration</strong></td><td>The maximum acceleration the character can reach to achieve the target speed</td></tr><tr><td><strong>MaxWalkSpeed</strong></td><td>The maximum speed at which the character can move</td></tr><tr><td><strong>MaxSlopeAngle</strong></td><td>The maximum slope angle the character can climb</td></tr><tr><td><strong>GroundFriction</strong></td><td>The ground friction applied to movement when changing direction or decelerating</td></tr><tr><td><strong>RotationSpeed</strong></td><td>The speed at which the character rotates</td></tr><tr><td><strong>WalkingDeceleration</strong></td><td>The deceleration when stopping in walking/running states</td></tr></tbody></table>

#### Detailed Behavior

* **MaxAcceleration**
  * A larger value makes the character quickly respond, as if springing forward.
  * A smaller value results in slow acceleration, creating movements like heavy robots or tanks.
  * A larger value is appropriate for games that require immediate responsiveness, such as racing or action games, while a lower value is appropriate for games that require a weighty feel, such as RPGs or simulations.
* **WalkingDeceleration**
  * A larger value provides greater braking force, stopping the character almost immediately upon releasing input.
  * A smaller value causes the character to stop gradually due to inertia, allowing for expressions such as skating or sliding.
  * By adjusting this value and GroundFriction together, you can achieve complex handling, such as "strong braking but slippery curves.
* **MaxSlopeAngle**
  * Lowering the value can create a gimmick that restricts access to certain terrain by preventing the character from climbing even slightly sloped terrain.
  * Increasing the value allows the character to climb almost vertical walls, creating unrealistic but unique movements.
* **GroundFriction**
  * A larger value allows the character to reduce speed more quickly during rotation or stopping and sharply turns closer to the spot when turning a curve.
  * A smaller value allows the character to slide longer when stopping and create a wide turning radius due to centrifugal force during curves when turning a curve.
* **RotationSpeed**
  * A larger value enables instant rotation in the input direction, allowing quick responses but potentially feeling mechanical.
  * A smaller value slows direction changes, suitable for weighty transitions or smooth motions.
  * Since the turning feel is determined in combination with GroundFriction, both values can be adjusted to achieve a desired handling feel.

#### Example of Actual Behavior

**\[GroundFriction]**

<div align="left"><figure><img src="/files/z3994xONLqS0yRNr3EZL" alt="" width="375"><figcaption><p>GroundFriction = 16 (default value)</p></figcaption></figure></div>

<div align="left"><figure><img src="/files/Eg5o65p0FQF8rMZoqkZ2" alt="" width="375"><figcaption><p>GroundFriction = 1</p></figcaption></figure></div>

**\[RotationSpeed]**

<div align="left"><figure><img src="/files/y3lBoCKZJGqmlWUgmW64" alt="" width="375"><figcaption><p>RotationSpeed = 3,000 (default value)</p></figcaption></figure></div>

<div align="left"><figure><img src="/files/2HB1R093LSjlbyccdBFf" alt="" width="375"><figcaption><p>RotationSpeed = 300</p></figcaption></figure></div>

### Jump

Controls basic jumps and variations (e.g., consecutive jumps, stomp jump).

<table><thead><tr><th width="187.166748046875">Property</th><th>Description</th></tr></thead><tbody><tr><td><strong>MaxJumpCount</strong></td><td>The maximum number of times the character can jump consecutively</td></tr><tr><td><strong>StompJumpMultiplier</strong></td><td>An auto-bounce ratio applied to the base jump height when stepping on another character</td></tr></tbody></table>

#### Detailed Behavior

* **MaxJumpCount**
  * A value of 1 allows a single jump, while 2 or higher enables double or triple jumps.
  * This can be used to design specific platformers, such as parkour or puzzles, accessible only in specific sections.
* **StompJumpMultiplier**
  * A value of 1 equals the base jump height, while 2 makes the character jump twice as high.
  * This is useful for creating effects such as Super Mario-style “Stomp Jump” or aerial combo actions.

#### Example of Actual Behavior

**\[MaxJumpCount]**

<div align="left"><figure><img src="/files/370UZmLNFFampHowAlKG" alt="" width="375"><figcaption><p>MaxJumpCount = 1 (default value)</p></figcaption></figure></div>

<div align="left"><figure><img src="/files/2oYOuVcNjmHVObRKsUFQ" alt="" width="375"><figcaption><p>MaxJumpCount = 3</p></figcaption></figure></div>

**\[StompJumpMultiplier]**

<div align="left"><figure><img src="/files/TYmZlLYBI8DdhN9hTu33" alt="" width="375"><figcaption><p>StompJumpMultiplier = 0 (default value)</p></figcaption></figure></div>

<div align="left"><figure><img src="/files/Gelq80GJP0cymidqDqzW" alt="" width="375"><figcaption><p>StompJumpMultiplier = 0.5</p></figcaption></figure></div>

### Fall

Controls the character's aerial movement and how gravity is applied.

<table><thead><tr><th width="210.5001220703125">Property</th><th>Description</th></tr></thead><tbody><tr><td><strong>AirControl</strong></td><td>The degree to which movement input is applied while in the air</td></tr><tr><td><strong>FallingDeceleration</strong></td><td>The amount of deceleration applied when stopping movement input during a fall.</td></tr><tr><td><strong>FallingLateralFriction</strong></td><td>The friction force for horizontal movement of the character in the air</td></tr><tr><td><strong>GravityScale</strong></td><td>The ratio of gravity applied to the character</td></tr></tbody></table>

**Detailed Behavior**

* **AirControl**
  * A value of 0 prevents direction changes after jumping, while 1 allows free direction changes as if moving on the ground.
  * High values are used in platform action games, while low values are appropriate for realistic falling.
* **FallingDeceleration**
  * A larger value results in a quicker stop and easier aerial control.
  * A smaller value increases inertia, causing the character to keep sliding.
* **FallingLateralFriction**
  * A larger value results in faster and more stable direction changes.
  * A smaller value causes the previous movement to persist even when changing direction, making the motion look slippery.
* **GravityScale**
  * A larger value makes the character fall heavier and faster.
  * A negative value pulls the character upward (+Z), creating an anti-gravity effect.

#### Example of Actual Behavior

**\[FallingDeceleration]**

<div align="left"><figure><img src="/files/mIFA9WF73q1u1C8tm1nu" alt="" width="375"><figcaption><p>FallingDeceleration = 2,500 (default value)</p></figcaption></figure></div>

<div align="left"><figure><img src="/files/XOYYFYR2cw6C04s7rImN" alt="" width="375"><figcaption><p>FallingDeceleration = 250</p></figcaption></figure></div>

**\[FallingLateralFriction]**

<div align="left"><figure><img src="/files/vTr9vfYXwuFHsJibIaBb" alt="" width="375"><figcaption><p>FallingLateralFriction = 16 (default value)</p></figcaption></figure></div>

<div align="left"><figure><img src="/files/3vQWlTQJswF2PhqeK0Ti" alt="" width="375"><figcaption><p>FallingLateralFriction = 8</p></figcaption></figure></div>

### Character Collision and Mesh Adjustment

Adjusts the character's collision body size and mesh position to ensure accurate detection.

<table><thead><tr><th width="187.166748046875">Property</th><th>Description</th></tr></thead><tbody><tr><td><strong>CapsuleHeight</strong></td><td>The vertical height of the character's collider capsule</td></tr><tr><td><strong>CapsuleRadius</strong></td><td>The horizontal radius of the character's collider capsule</td></tr><tr><td><strong>CharacterMeshPos</strong></td><td>The interpolation of the relative position between the character mesh and the collider capsule</td></tr></tbody></table>

**Detailed Behavior**

* **CapsuleHeight**
  * A larger value makes the character register as taller, while a smaller value makes it register as shorter, like a dwarf.
* **CapsuleRadius**
  * A smaller value lets the character pass through tight corridors or door gaps, while a larger value causes easier collisions and makes the body appear larger.
* **CharacterMeshPos**
  * This is used to fix issues such as feet floating or sticking into the ground.
  * This must be adjusted when applying a custom avatar or skin.

#### Example of Actual Behavior

**\[CharacterHeight & CharacterMeshPos]**

<div align="left"><figure><img src="/files/wwAuUYPbDCzoqPufESfs" alt="" width="375"><figcaption><p>CapsuleHeight = 164, CharacterMeshPos = Vector3.new(0,-85, 0)</p></figcaption></figure></div>

<div align="left"><figure><img src="/files/zNUk9e8RuZeYSRPeq5Cu" alt="" width="375"><figcaption><p>CapsuleHeight = 82, CharacterMeshPos = Vector3.new(0, -42.5, 0)</p></figcaption></figure></div>

### Environmental Interaction

Controls how the character interacts with platforms or movable objects.

<table><thead><tr><th width="187.166748046875">Property</th><th>Description</th></tr></thead><tbody><tr><td><strong>IgnoreBaseRotation</strong></td><td>Sets whether the character is affected by platform rotation</td></tr></tbody></table>

**Detailed Behavior**

* **IgnoreBaseRotation**
  * Determines whether the character follows the rotation of a moving platform when standing on it.
    * True: The character remains fixed in place without rotating, even when standing on a rotating platform. This allows the character to look stably standing on the surface.
    * False: The character rotates with the platform, and the camera viewpoint rotates along with it.

#### Example of Actual Behavior

**\[IgnoreBaseRotation]**

<div align="left"><figure><img src="/files/LS0U6aOaHzkl4VxJdkiU" alt="" width="375"><figcaption><p>IgnoreBaseRotation = true (default value)</p></figcaption></figure></div>

<div align="left"><figure><img src="/files/g66gu4z3wDKYlMbONNcc" alt="" width="375"><figcaption><p>IgnoreBaseRotation = false</p></figcaption></figure></div>

### Camera Controls

Interpolates the rotation and tracking movements of the camera for smooth expression.

<table><thead><tr><th width="213.83349609375">Property</th><th>Description</th></tr></thead><tbody><tr><td><strong>EnableSmoothFollow</strong></td><td>Enables the camera to follow the character's movements smoothly.</td></tr><tr><td><strong>SmoothFollowSpeed</strong></td><td>The speed at which the camera follows the character's movements</td></tr><tr><td><strong>FollowMaxDistance</strong></td><td>The maximum lag distance allowed when the camera follows the character</td></tr><tr><td><strong>EnableSmoothRotation</strong></td><td>Enable the camera to follow the character's rotation smoothly</td></tr><tr><td><strong>SmoothRotationSpeed</strong></td><td>The speed at which the camera responds to the character's rotation</td></tr></tbody></table>

**Detailed Behavior**

* **EnableSmoothFollow**
  * Sets the camera to track the character's movements smoothly instead of instantly.
    * True: The camera follows but lags behind slightly, providing a smooth and natural view.
    * False: The camera always follows the character instantly, which may be fast but rather mechanical.
* **SmoothFollowSpeed**
  * A higher value means light and quick responses, giving an immediate sense of play.
  * A smaller value causes the camera to follow slowly, creating a cinematic effect.
* **FollowMaxDistance**
  * A larger value may cause the camera to lag further behind but not beyond the threshold.
  * A smaller value causes the camera to stick close to the character when following it.
* **EnableSmoothRotation**
  * Sets the camera to follow character rotation smoothly instead of instantly.
    * True: Rotates at a steady speed, providing smooth and stable movement.
    * False: Instantly rotates to the character's input direction, which is fast but may feel rigid.
* **SmoothRotationSpeed**
  * A larger value means a quicker response, which is close to an instantaneous transition.
  * A smaller value makes the camera to follow slower, allowing for a more relaxed turning motion.

#### Example of Actual Behavior

**\[SmoothFollow]**

<div align="left"><figure><img src="/files/3Xn2aq8OycQyY6rkDwtT" alt="" width="375"><figcaption><p>EnableSmoothFollow = true (default value), WalkSpeed = 1,000<br>SmoothFollowSpeed = 5, FollowMaxDistance = 250</p></figcaption></figure></div>

<div align="left"><figure><img src="/files/w4OeeAPlhL4GhdyIcqqn" alt="" width="375"><figcaption><p>EnableSmoothFollow = false, WalkSpeed = 1,000</p></figcaption></figure></div>

**\[SmoothRotation]**

<div align="left"><figure><img src="/files/pJugk0DWdLe5yqonXlgt" alt="" width="375"><figcaption><p>EnableSmoothRotation = false (default value)</p></figcaption></figure></div>

<div align="left"><figure><img src="/files/Dhmzg0sYojcjvMlGqytN" alt="" width="375"><figcaption><p>EnableSmoothRotation = true, SmoothRotationSpeed = 5</p></figcaption></figure></div>

## Note

If the value is unusually large or small, it may result in unrealistic handling.


# GUI

## Overview <a href="#overview" id="overview"></a>

GUI refers to graphical elements within the game that allow interaction with players. Using GUI, you can add various elements such as buttons, text, images, and progress bars to the game screen.

## GUI Types <a href="#gui-types" id="gui-types"></a>

<table><thead><tr><th width="234">Object</th><th>Description</th></tr></thead><tbody><tr><td>ScreenGui</td><td>An object used to display 2D-based elements on the screen. 2D objects such as Frame, TextButton, ImageButton, etc., must be children of Gui objects such as ScreenGui/SurfaceGui objects to be rendered. ScreenGui itself does not display any information.</td></tr><tr><td>SurfaceGui</td><td>An object used to display 2D UI in a 3D space. Attaches GUI elements to in-game surfaces or objects for interactive purposes.</td></tr><tr><td>BillboardGui</td><td>BillboardGui is an object that displays 2D UI in 3D space, always facing the camera. Because it constantly rotates to align with the player's view, it's commonly used for elements like name tags, health bars, and dialogue boxes.</td></tr><tr><td>Frame</td><td>A 2D object used for designing layouts or grouping elements such as TextLabel, TextButton, ImageLabel, ImageButton.</td></tr><tr><td>ScrollingFrame</td><td>A 2D-based object that provides a scrollable layout. It enables all contained objects to be displayed on screen through scrolling functionality.</td></tr><tr><td>TextLabel</td><td>An object that displays text.</td></tr><tr><td>ImageLabel</td><td>An object that displays images.</td></tr><tr><td>TextButton</td><td>A button that displays text.</td></tr><tr><td>ImageButton</td><td>A button that displays images.</td></tr><tr><td>UIAspectRatioConstraint</td><td>Provides the functionality to set the aspect ratio of 2D-based objects. If you want to set the aspect ratio for objects like Frame, ImageLabel, ImageButton, or TextButton, you can add a UIAspectRatioConstraint as a child and adjust the ratio. The ratio will be maintained based on the current size of the parent object.</td></tr><tr><td>UIListLayout</td><td>An object that arranges child objects within a parent object in a list format, evenly spaced.</td></tr><tr><td>UIGridLayout</td><td>An object that arranges child objects within a parent in a grid format, using consistent sizes and spacing.</td></tr><tr><td>UIStroke</td><td>An object that displays a stroke along the border of its parent UI object or around its text. You can configure properties such as the stroke color, thickness, transparency, position, and corner join style to emphasize UI elements or improve their visibility.</td></tr><tr><td>ProgressBar</td><td>An object that visually displays the current progress or value. It can be used to create horizontal, vertical, circular, and semicircular gauges, with the fill ratio set through the <code>Value</code> property.</td></tr></tbody></table>

## ScreenGui Properties <a href="#screengui-properties" id="screengui-properties"></a>

<table><thead><tr><th width="234">Property</th><th>Description</th></tr></thead><tbody><tr><td>Enabled</td><td>Determines whether all child objects of the ScreenGui are displayed on the screen.</td></tr><tr><td>DisplayOrder</td><td>Determines which ScreenGui will be displayed on top of the screen. Higher value indicates higher priority, making the ScreenGui appear above others.</td></tr></tbody></table>

## SurfaceGui Properties <a href="#surfacegui-properties" id="surfacegui-properties"></a>

<table><thead><tr><th width="234">Property</th><th>Description</th></tr></thead><tbody><tr><td>Enabled</td><td>Determines whether all child objects of the SurfaceGui are displayed on the screen.</td></tr><tr><td>Always on Top</td><td>Ensures that the SurfaceGui is always rendered on top of other 3D objects.</td></tr><tr><td>Light Influence</td><td>Controls how much the SurfaceGui is affected by lighting.</td></tr><tr><td>Max Distance</td><td>Sets the maximum distance at which the SurfaceGui remains visible to the player.</td></tr><tr><td>Active</td><td>Determines whether UI elements within the SurfaceGui, such as buttons and text boxes, can process clicks, touches, or keyboard input.</td></tr><tr><td>Adornee</td><td>Specifies the object on which the SurfaceGui is rendered.</td></tr><tr><td>Face</td><td>Determines which face of the part the GUI is displayed on.</td></tr></tbody></table>

## BillboardGui Properties

<table><thead><tr><th width="234">Property</th><th>Description</th></tr></thead><tbody><tr><td>Enabled</td><td>Controls whether all objects parented to a BillboardGui are visible on the screen.</td></tr><tr><td>Always on Top</td><td>Sets the BillboardGui to always render on top of other 3D objects.</td></tr><tr><td>Light Influence</td><td>Specifies how much the BillboardGui is affected by lighting.</td></tr><tr><td>Brightness</td><td>Sets the brightness applied to the BillboardGui. Higher values make it appear brighter, which is useful for visual emphasis without interaction with 3D lighting. (This can be set only when Light Influence is less than 1.)</td></tr><tr><td>Max Distance</td><td>Sets the maximum distance at which the BillboardGui remains visible to the player.</td></tr><tr><td>Distance Lower Limit</td><td>Sets the distance at which the BillboardGui stops scaling up when it gets too close to the player's camera.</td></tr><tr><td>Distance Upper Limit</td><td>Sets the distance at which the BillboardGui stops scaling down when it gets too far from the player's camera.</td></tr><tr><td>Active</td><td>Determines whether UI elements within the BillboardGui, such as buttons and text boxes, can process clicks, touches, or keyboard input.</td></tr><tr><td>Adornee</td><td>Specifies the object on which the BillboardGui is rendered.</td></tr><tr><td>Clips Descendants</td><td>Specifies whether child UI elements are clipped when they extend beyond the boundaries of the parent GUI. If true, any elements outside the boundaries will not be visible.</td></tr><tr><td>Size</td><td>Sets the size of BillboardGui.</td></tr><tr><td>Position Offset</td><td>Sets the offset from rendering object based on camera.</td></tr><tr><td>Position Offset World Space</td><td>Sets the offset from rendering object based on target object.</td></tr><tr><td>Extents Offset World Space</td><td>Sets the offset from the rendered object in world coordinates. (The value's unit is based on half the size of the model)<br>Adjusts the position of the BillboardGui based on the target's size (Extents). This is useful for naturally placing UI elements such as health bars above characters, as the position automatically adapts to different model sizes.<br>The offset is applied along the target's axes (the parent Part or Adornee) by multiplying the input value (Vector3) with half of the bounding box length (Extents) on each axis.</td></tr><tr><td>Size Offset</td><td>Sets the offset from rendering object based on screen plane.</td></tr></tbody></table>

## Gui Element Properties <a href="#gui-element-properties" id="gui-element-properties"></a>

### Common Properties <a href="#common-properties" id="common-properties"></a>

<table><thead><tr><th width="234">Property</th><th>Description</th></tr></thead><tbody><tr><td>Position</td><td><p>Defines the position of the object on the screen.</p><p>It uses the UDim2 format, where you can input ScaleX, OffsetX, ScaleY, and OffsetY in order.</p><ul><li>Scale: A ratio between 0.0 and 1.0, where 0.1 represents 10%.</li><li>Offset: Set in pixels, where 10 represents 10 pixels.</li></ul><p>The Scale and Offset values are combined to determine the on-screen position. For example, if ScaleX is 0.25 and OffsetX is 10, the object will move 25% to the right from the Anchor Point (the center point of the Frame) and an additional 10 pixels to the right.</p></td></tr><tr><td>Rotation</td><td>Adjusts the rotation angle of the object, where 360.0 represents 360 degrees.</td></tr><tr><td>Size</td><td>Defines the size of the object. Uses the UDim2 format similar to Position.</td></tr><tr><td>Visible</td><td>Determines whether the object is visible or hidden.</td></tr><tr><td>Anchor Point</td><td>Defines the object's anchor point. It uses a Vector2 format, and the default (0.0, 0.0) sets the top-left corner as the anchor point.</td></tr><tr><td>ZIndex</td><td>Determines the stacking order of UI elements. If FrameA is obscured by FrameB, you can use the ZIndex value to ensure FrameA appears above FrameB.</td></tr><tr><td>Clips Descendants</td><td>Clips Descendants: This property determines whether to display the clipped area on the screen if a child UI element clips its parent's UI area.</td></tr></tbody></table>

### Frame <a href="#frame" id="frame"></a>

<table><thead><tr><th width="234">Property</th><th>Description</th></tr></thead><tbody><tr><td>Border Pixel Size</td><td>Defines the thickness of the frame's border.</td></tr><tr><td>Border Mode</td><td>A property that determines how the border is displayed relative to the Frame's edge. You can set it to Insert (inside), Middle (center), or Outline (outside).</td></tr><tr><td>Border Color 3</td><td>Sets the color of the border.</td></tr><tr><td>Background Color 3</td><td>Sets the background color of the frame.</td></tr><tr><td>Background Trnasparency</td><td>Adjusts the background transparency of the frame.</td></tr></tbody></table>

### TextLabel <a href="#textlabel" id="textlabel"></a>

<table><thead><tr><th width="234">Property</th><th>Description</th></tr></thead><tbody><tr><td>Text</td><td>Allows you to input the text to be displayed.</td></tr><tr><td>Text Scaled</td><td>Automatically adjusts the text size to fit the object's size, ignoring the Text Size value.</td></tr><tr><td>Font Face</td><td><p>Specifies the font applied to the displayed text. Clicking the field displays the list of available fonts, and Style and Weight are provided as sub-fields.</p><ul><li>Style : Specifies whether the text is displayed in bold or italic</li><li>Weight : Specifies the thickness of the text</li></ul></td></tr><tr><td>Text Size</td><td>Defines the size of the displayed text in pixels.</td></tr><tr><td>Text Color 3</td><td>Sets the color of the displayed text.</td></tr><tr><td>Text Transparency</td><td>Adjusts the transparency of the displayed text.</td></tr><tr><td>Background Color 3</td><td>Sets the background color.</td></tr><tr><td>Background Transparency</td><td>Adjusts the background transparency.</td></tr></tbody></table>

### ImageLabel <a href="#imagelabel" id="imagelabel"></a>

<table><thead><tr><th width="234">Property</th><th>Description</th></tr></thead><tbody><tr><td>Image</td><td>Sets the AssetId of the image to be displayed. You can use the AssetId of an image registered in the Asset Manager or Asset Store.</td></tr><tr><td>Image Transparency</td><td>Adjusts the transparency of the image.</td></tr><tr><td>Scale Type</td><td><p>Specifies how the image is scaled when the size of the UI element differs from the original image.</p><ul><li>Stretch : Stretches the image to fit the element.</li><li>Slice : Divides the image into nine regions for scaling.</li></ul></td></tr><tr><td>Slice Center</td><td>Specifies the boundaries of the nine regions when ScaleType is Slice. The value is a pixel coordinate based on the top-left corner of the image, entered as four fields X0, Y0, X1, and Y1.</td></tr><tr><td>Slice Scale</td><td>Specifies the scale factor applied to the edges when ScaleType is Slice.</td></tr><tr><td>Background Color 3</td><td>Sets the background color.</td></tr><tr><td>Background Transparency</td><td>Adjusts the background transparency.</td></tr></tbody></table>

### TextButton <a href="#textbutton" id="textbutton"></a>

<table><thead><tr><th width="234">Property</th><th>Description</th></tr></thead><tbody><tr><td>Text</td><td>Allows you to input the text to be displayed.</td></tr><tr><td>Text Scaled</td><td>Automatically adjusts the text size to fit the object's size, ignoring the Text Size value.</td></tr><tr><td>Font Face</td><td><p>Specifies the font applied to the displayed text. Clicking the field displays the list of available fonts, and Style and Weight are provided as sub-fields.</p><ul><li>Style : Specifies whether the text is displayed in bold or italic</li><li>Weight : Specifies the thickness of the text</li></ul></td></tr><tr><td>Text Size</td><td>Defines the size of the displayed text in pixels.</td></tr><tr><td>Text Color 3</td><td>Sets the color of the displayed text.</td></tr><tr><td>Text Transparency</td><td>Adjusts the transparency of the displayed text.</td></tr><tr><td>Background Color 3</td><td>Sets the background color.</td></tr><tr><td>Background Transparency</td><td>Adjusts the background transparency.</td></tr></tbody></table>

### ImageButton <a href="#imagebutton" id="imagebutton"></a>

<table><thead><tr><th width="234">Property</th><th>Description</th></tr></thead><tbody><tr><td>Image</td><td>Sets the AssetId of the image to be displayed. You can use the AssetId of an image registered in the Asset Manager or Asset Store.</td></tr><tr><td>Image Transparency</td><td>Adjusts the transparency of the image.</td></tr><tr><td>Scale Type</td><td><p>Specifies how the image is scaled when the size of the UI element differs from the original image.</p><ul><li>Stretch : Stretches the image to fit the element.</li><li>Slice : Divides the image into nine regions for scaling.</li></ul></td></tr><tr><td>Slice Center</td><td>Specifies the boundaries of the nine regions when ScaleType is Slice. The value is a pixel coordinate based on the top-left corner of the image, entered as four fields X0, Y0, X1, and Y1.</td></tr><tr><td>Slice Scale</td><td>Specifies the scale factor applied to the edges when ScaleType is Slice.</td></tr><tr><td>Background Color 3</td><td>Sets the background color.</td></tr><tr><td>Background Transparency</td><td>Adjusts the background transparency.</td></tr></tbody></table>

### UIAspectRatioConstraint <a href="#uiaspectratioconstraint" id="uiaspectratioconstraint"></a>

When the size of an ImageLabel is set to { 0.5, 0, 0.5, 0 }, or 50% of the client device’s size on both the X and Y axes, adding a UIAspectRatioConstraint as a child and setting its Aspect Ratio property to 1.0 ensures the ImageLabel maintains a 1:1 ratio. This prevents the image from stretching horizontally or vertically.

<table><thead><tr><th width="234">Property</th><th>Description</th></tr></thead><tbody><tr><td>Aspect Ratio</td><td>Sets the desired ratio of the parent object. The default value is 1.0, where the X and Y axes maintain a 1:1 ratio.</td></tr><tr><td>Aspect Type</td><td><p>Determines how the UI element maintains its aspect ratio.</p><ul><li>FitWithinMaxSize : The UI element maintains its ratio while shrinking within the maximum size</li><li>ScaleWithParentSize : The UI element adjusts its ratio based on the parent's size</li><li>SizeRelativeXY : Maintains relative size in both the X and Y directions</li></ul></td></tr><tr><td>Dominant Axis</td><td><p>Determines which axis to prioritize when maintaining the ratio as the UI size changes.</p><ul><li>Width : Adjusts the height based on the width.</li><li>Height : Adjusts the width based on the height.</li></ul></td></tr></tbody></table>

### ScrollingFrame

<table><thead><tr><th width="234">Property</th><th>Description</th></tr></thead><tbody><tr><td>AutomaticCanvasSize</td><td><p>Determines whether to automatically adjust the CanvasSize based on the size of child objects.</p><ul><li>None: No automatic adjustment</li><li>X: Automatic adjustment in the horizontal direction</li><li>Y: Automatic adjustment in the vertical direction</li><li>XY: Automatic adjustment in both horizontal and vertical directions</li></ul></td></tr><tr><td>CanvasSize</td><td>This property sets the size of the scrollable inner area.</td></tr><tr><td>CanvasPosition</td><td>This property allows manual setting or checking of the scroll position.</td></tr><tr><td>ScrollBarImageColor3</td><td>This property sets the image color of the scrollbar.</td></tr><tr><td>ScrollBarImageTransparency</td><td>This property sets the image transparency of the scrollbar.</td></tr><tr><td>ScrollBarThickness</td><td>This property sets the width of the scrollbar in pixels.</td></tr><tr><td>ScrollingDirection</td><td><p>This property sets the scroll direction.</p><ul><li>X: Horizontal scroll</li><li>Y: Vertical scroll</li><li>XY: Both horizontal and vertical scroll</li></ul></td></tr><tr><td>ScrollingEnabled</td><td>This property enables or disables the scrolling function.</td></tr></tbody></table>

### UIListLayout

<table><thead><tr><th width="234">Property</th><th>Description</th></tr></thead><tbody><tr><td>Padding</td><td>Specifies the spacing between UI elements.</td></tr><tr><td>Wraps</td><td>This property determines whether to automatically wrap to the next line.</td></tr><tr><td>FillDirection</td><td><p>Specifies the direction in which UI elements are arranged.</p><ul><li>Horizontal: Arranged horizontally</li><li>Vertical: Arranged vertically</li></ul></td></tr><tr><td>SortOrder</td><td><p>Specifies the way UI elements are sorted.</p><ul><li>LayoutOrder: Sorts by LayoutOrder value for each instance</li><li>Name: Sorts by name</li></ul></td></tr><tr><td>HorizontalAlignment</td><td><p>Specifies the horizontal alignment.</p><ul><li>Left: Align left</li><li>Center: Center</li><li>Right: Align right</li></ul></td></tr><tr><td>VerticalAlignment</td><td><p>Specifies the vertical alignment.</p><ul><li>Top: Top align</li><li>Center: Center</li><li>Bottom: Bottom align</li></ul></td></tr></tbody></table>

### UIGridLayout

<table><thead><tr><th width="234">Property</th><th>Description</th></tr></thead><tbody><tr><td>CellPadding</td><td>Specifies the spacing between cells.</td></tr><tr><td>CellSize</td><td>Specifies the size of a cell.</td></tr><tr><td>FillDirectionMaxCells</td><td>Specifies the maximum number of cells to be filled in the specified direction.</td></tr><tr><td>FillDirection</td><td><p>Specifies the direction in which UI elements are arranged.</p><ul><li>Horizontal: Arranged horizontally</li><li>Vertical: Arranged vertically</li></ul></td></tr><tr><td>SortOrder</td><td><p>Specifies the way UI elements are sorted.</p><ul><li>LayoutOrder: Sorts by LayoutOrder value for each instance</li><li>Name: Sorts by name</li></ul></td></tr><tr><td>HorizontalAlignment</td><td><p>Specifies the horizontal alignment.</p><ul><li>Left: Align left</li><li>Center: Center</li><li>Right: Align right</li></ul></td></tr><tr><td>VerticalAlignment</td><td><p>Specifies the vertical alignment.</p><ul><li>Top: Top align</li><li>Center: Center</li><li>Bottom: Bottom align</li></ul></td></tr></tbody></table>

### UIStroke

<table><thead><tr><th width="234">프로퍼티</th><th>설명</th></tr></thead><tbody><tr><td>ApplyStrokeMode</td><td><p>Determines how the stroke is applied.</p><ul><li>Border: Displays the stroke along the border of the parent UI object.</li><li>Contextual: Displays the stroke according to the type of the parent UI object.</li></ul></td></tr><tr><td>BorderOffset</td><td>Determines the horizontal and vertical offset of the stroke from the border of the parent UI object.</td></tr><tr><td>BorderStrokePosition</td><td><p>Determines where the stroke is displayed relative to the border of the parent UI object.</p><ul><li>Inner: Displays the stroke inside the border.</li><li>Center: Displays the stroke centered on the border.</li><li>Outer: Displays the stroke outside the border.</li></ul></td></tr><tr><td>Color</td><td>Determines the color of the stroke.</td></tr><tr><td>LineJoinMode</td><td><p>Determines how stroke segments are joined at corners.</p><ul><li>Round: Joins corners with a rounded shape.</li><li>Bevel: Joins corners with a beveled shape.</li><li>Miter: Joins corners with a pointed shape.</li></ul></td></tr><tr><td>StrokeSizingMode</td><td><p>Determines how the stroke thickness is calculated when the size of the UI object changes.</p><ul><li>FixedSize: Maintains a constant thickness regardless of the UI object’s size.</li><li>ScaledSize: Adjusts the thickness in proportion to the UI object’s size.</li></ul></td></tr><tr><td>Thickness</td><td>Determines the thickness of the stroke. A higher value displays a thicker stroke.</td></tr><tr><td>Transparency</td><td>Determines the transparency of the stroke. A value closer to <code>0</code> makes the stroke more opaque, while a value closer to <code>1</code> makes it more transparent.</td></tr><tr><td>ZIndex</td><td>Determines the display priority of the stroke when it overlaps other UI objects. A higher value displays the stroke in front of objects with lower values.</td></tr></tbody></table>

## 9-Slice Editor

{% columns %}
{% column width="50%" %}

<figure><img src="/files/rpVLesCUfP9ApSFxchx9" alt=""><figcaption><p>Stretch applied</p></figcaption></figure>
{% endcolumn %}

{% column width="50%" %}

<figure><img src="/files/1jZ5tczInL8kIMipd0oa" alt=""><figcaption><p>9-Slice applied</p></figcaption></figure>
{% endcolumn %}
{% endcolumns %}

9-Slice is a feature that divides a single image into nine regions so that the corners and edges are not stretched even when the size of the UI element changes. It can be used with Image Label and Image Button, and is applied identically not only to ScreenGui but also to GUIs in 3D space such as BillboardGui and SurfaceGui.

### How to Use

<figure><img src="/files/f7XkalijPeXS2bwYDlKJ" alt=""><figcaption><p>Click the … button to open the 9-Slice Editor.</p></figcaption></figure>

<figure><img src="/files/7pdxZjHXnKzjYt5ybMAw" alt=""><figcaption><p>9-Slice Editor</p></figcaption></figure>

1. Add an Image Label or Image Button and enter the Asset Id of the image to display in the Image property.
2. Set Scale Type to Slice. When set to Slice, the Slice Center and Slice Scale properties are displayed.
3. Specify the boundaries of the nine regions with Slice Center. You can enter the value directly in the Properties window, or specify it in the 9-Slice editor by clicking the ··· button in the Slice Center field.
4. Adjust the scale factor of the edges with Slice Scale as needed.

## ProgressBar

<table><thead><tr><th width="234">프로퍼티</th><th>설명</th></tr></thead><tbody><tr><td>Value</td><td>Sets the ratio of the filled area. Values range from <code>0</code> to <code>1</code>, where <code>0</code> represents an empty state and <code>1</code> represents a fully filled state.</td></tr><tr><td>FillDirection</td><td>Sets the direction in which the filled area expands according to the <code>Value</code>. Supports horizontal, vertical, center-expanding, circular, and semicircular gauges.</td></tr><tr><td>StartAngle</td><td>Sets the starting angle of the filled area for circular or semicircular ProgressBars. The value ranges from <code>0</code> to <code>360</code> degrees.</td></tr><tr><td>ArcSize</td><td>Sets the arc range of a circular or semicircular ProgressBar. A value of <code>360</code> represents a circle, while a value of <code>180</code> or less can be used to represent a semicircle.</td></tr><tr><td>TrackImage</td><td>Sets the AssetId of the image displayed in the background area of the ProgressBar.</td></tr><tr><td>TrackTransparency</td><td>Sets the transparency of the background area. Values closer to <code>0</code> appear more opaque, while values closer to <code>1</code> appear more transparent.</td></tr><tr><td>TrackColor3</td><td>Sets the color of the background area.</td></tr><tr><td>TrackCornerRadius</td><td>Sets the corner radius of the background area. This property can be used with linear fill modes; higher values produce more rounded corners.</td></tr><tr><td>FillImage</td><td>Sets the AssetId of the image displayed in the filled area of the ProgressBar.</td></tr><tr><td>FillTransparency</td><td>Sets the transparency of the filled area. Values closer to <code>0</code> appear more opaque, while values closer to <code>1</code> appear more transparent.</td></tr><tr><td>FillColor3</td><td>Sets the color of the filled area.</td></tr><tr><td>FillCornerRadius</td><td>Sets the corner radius of the filled area. This property can be used with linear fill modes; higher values produce more rounded corners on the filled area.</td></tr><tr><td>CornerClipEnabled</td><td>Sets the fill behavior of a linear ProgressBar with rounded corners. When set to <code>true</code>, the filled area is simply clipped. When set to <code>false</code>, the corner radius is preserved while the area is filled.</td></tr></tbody></table>


# Script Manual


# Get Started


# Script Overview

## Overview

OVERDARE Studio provides the **Luau scripting language** to support creative game development. Creators can use Lua scripts to freely implement various game mechanics, such as killing a character that touches a specific object or starting the game after a countdown.

## Script Types

OVERDARE Studio offers three types of scripts, each serving a unique purpose.

<table><thead><tr><th width="158">Script</th><th width="290">Purpose</th><th>Example</th></tr></thead><tbody><tr><td>Script</td><td>Implements functionality that runs on the <strong>server</strong></td><td>Game logic handling</td></tr><tr><td>LocalScript</td><td>Implements functionality that runs on the <strong>client</strong></td><td>Camera handling, GUI management</td></tr><tr><td>ModuleScript</td><td>A script used to structure and separate <strong>common functionality</strong> for reusability</td><td>Implementing monster classes</td></tr></tbody></table>

## Script Location

Scripts can be created in various locations such as Workspace or ReplicatedStorage from the **Level Browser**. Depending on the type of script and its placement, its purpose and execution availability can vary.

<div align="left"><figure><img src="/files/6IHQhrJoIYIwAiiv1bfU" alt=""><figcaption></figcaption></figure></div>

To efficiently manage the functions of scripts, each location is used for the following purposes:

<table><thead><tr><th width="227">Service Location</th><th width="309">Purpose</th><th>Executable Scripts</th></tr></thead><tbody><tr><td>ReplicatedStorage</td><td>Space for objects replicated between the <strong>server and client</strong><br>(Example: ModuleScript)</td><td>ModuleScript</td></tr><tr><td>ServerScriptService</td><td>Space for functionality related to the <strong>server</strong><br>(Example: ServerGameLogic)</td><td>Script<br>ModuleScript</td></tr><tr><td>ServerStorage</td><td>Space for <strong>server objects</strong> that do not need immediate replication<br>(Example: GunBullet)</td><td><p>Script</p><p>ModuleScript</p></td></tr><tr><td>StarterGui</td><td>Space for controlling GUI on the <strong>client</strong><br>(Example: PlayerHUD)</td><td>LocalScript<br>ModuleScript</td></tr><tr><td><p>StarterPlayer.</p><p>StarterCharacterScripts</p></td><td>Space for scripts that run on the <strong>client</strong> when the character spawns<br>(Example: FirstPersonView)</td><td>LocalScript<br>ModuleScript</td></tr><tr><td><p>StarterPlayer.</p><p>StarterPlayerScripts</p></td><td>Space for scripts that run on the <strong>client</strong> when the player enters<br>(Example: InputHandler)</td><td>LocalScript<br>ModuleScript</td></tr><tr><td>Workspace</td><td>Space for objects placed in the world (Example: CheckPoint)</td><td>Script<br>ModuleScript</td></tr></tbody></table>

## Execution Order

#### Script (Server) <a href="#script-server" id="script-server"></a>

When a player enters and the world is created, the server loads and executes Scripts placed in **ServerScriptService** and **Workspace**.

* **Execution order**: ServerScriptService ➡ Workspace
  * This order ensures that server scripts initialize first, and any global settings or object management tasks for the world are prioritized.

#### LocalScript (Client) <a href="#localscript-client" id="localscript-client"></a>

When a client connects to the world, it copies and loads the LocalScripts placed in **StarterGui**, **StarterPlayerScripts**, and **StarterCharacterScripts** to the client and then executes them.

* **Execution order** : StarterGui ➡ StarterPlayerScripts ➡ StarterCharacterScripts
  * This order initializes UI and player-related settings and logic, preparing the client for interaction with the game.

#### ModuleScript (Server or Client) <a href="#modulescript-server-or-client" id="modulescript-server-or-client"></a>

ModuleScripts can be called on both the server and the client, and are used to define common functionality or reusable code in **Scripts** or **LocalScripts**.

Modules are executed when they are called explicitly (`require`). The results are **cached** upon the first call, and subsequent calls return the same value, which enhances execution efficiency and ensures consistency.

* **Execution order (Server)** : Called location (e.g., Workspace, ServerStorage) ➡ ModuleScript location
  * A Script can call a ModuleScript that handles the global logic or server data of the game.
* **Execution order (Client)**: Called location (e.g., StarterPlayerScripts) ➡ ModuleScript location
  * A LocalScript can call a ModuleScript that handles UI or player-related functionality.

**💡 Tip.** If a ModuleScript is placed in ReplicatedStorage, it can be called by both the server and the client, making it useful for implementing common logic.

## Reference Materials

The script functions provided in OVERDARE Studio are all organized in the **API Reference**. If you are writing scripts and find yourself unsure about the usage or functionality of properties, functions, or events, the **API Reference** can help you quickly find the necessary information.

For example, if you are unsure about what the `PlayerAdded` event is and how it works in a script, you can check the API Reference to understand its role and how it operates. The API Reference includes descriptions, usage instructions, and related examples, making it a valuable tool for writing and debugging scripts.

Using the API Reference allows you to **write your code more accurately and efficiently**, and also gain a deeper understanding of the script functions.

{% content-ref url="/pages/6AEYccB3l8tPAsoBNfl1" %}
[API Reference](/development/api-reference)
{% endcontent-ref %}


# Basic Guide to Lua

## Overview

Luau is a lightweight and fast scripting language extended from Lua, which can be easily learned and used even by beginners. In OVERDARE Studio, it serves as an optimized tool for implementing various functionalities while providing high creative freedom.

## Comments

Comments are used to explain the functionality of the code or to disable code from running.

```lua
-- Single-line comment
local  Num1 = 1 

--[[
local Num2 = 2
Multi-line comment
]]--  

local  Num3 = 3
```

## Code Execution Order

Code runs from top to bottom, and you cannot call functions or variables declared below from above.

```lua
SomeFunc() -- Error occurs  

local  function  SomeFunc()
    print("SomeFunc")
end

SomeFunc() -- Works as intended
```

## Variables

In Lua, **you do not specify data types** like integer, float, or string when declaring a variable. The scope of a variable can be defined as either **local** (accessible only within the current script) or **global** (accessible from other scripts).

<pre class="language-lua"><code class="lang-lua">-- Local variable (accessible only within the script where it is declared)
local Num1 = 5
local Num2 = 1.66 
  

-- Global variable (accessible from other scripts as well)
<strong>_G.SomeVar = 50
</strong>print(_G.SomeVar) -- Prints 50


-- Multiple variable assignments possible
local Text1, Text2 = "A", "B"


-- Assign a function to a variable and call it as a variable
local function SomeFunction()
    print("SomeFunction")
end  

local Func = SomeFunction
Func()
</code></pre>

## Functions

Like variables, the scope of a function can be defined as **local** (accessible only within the current script) or **global** (accessible from other scripts).

<pre class="language-lua"><code class="lang-lua">-- If there are more arguments or return values than expected, the extra ones are discarded. If there are fewer, the missing ones are treated as nil.
local function GetVector(x, y, z)
    print("GetVector X", x, "Y", y, "Z", z)
end
<strong>GetVector(1, 0)       -- z is nil
</strong><strong>GetVector(1, 0, 5, 3) -- Last value is discarded  
</strong>  

-- You can return multiple values or use multiple variable assignments.
local function GetVector(x, y, z)
    return x, y, z
end
local x, y, z = GetVecor(1, 0, 1)
  

-- A function's variable arguments are indicated by ...
local function Sum(...)
    local a, b, c = ... -- Missing arguments are treated as nil.
end
Sum(1, 2)
    

-- Variable arguments can also be used with fixed parameters
local function Sum(value, ...)

end

  
-- Return values can also be treated as variable arguments
local function Sum(...)
<strong>    return ...
</strong>end

</code></pre>

## local and global

The variable/function declared with the **local keyword** is only valid within the script in which it is declared and cannot be accessed externally. Therefore, even if local variables/functions with the same name are used in multiple scripts, they do not affect each other.

Variables or functions declared in the **global table (\_G)** can be accessed from any script. However, only one global variable/function with the same name can exist.

## Control Statements

Control statements are used to control the flow (execution order) of the code.

### if

```lua
if SomeNumber > 0 then 
    print("Positive Number")
    
elseif SomeNumber > 0 then
    print("Negative Number")
    
else
    print("Zero")
end
```

### goto

The goto statement is not supported.

### do <a href="#do" id="do"></a>

```lua
local number = 10

do
    local number = 5
    print("number (in do) : ", number)
end

print("number (out do) : ", number)
```

## Loops <a href="#loops" id="loops"></a>

Loops are used to repeatedly execute the same block of code until a specific condition is met.

### for <a href="#for" id="for"></a>

```lua
-- Starting value, condition, increment
for i = 1, 10, 1 do 
    print(i) 
    break
end   

-- The increment in the for loop is optional and defaults to 1 if omitted.
for i = 1, 20 do 
    print(i)
end
```

### while <a href="#while" id="while"></a>

```lua
local ConditionValue = 0

while ConditionValue < 5 do 
    ConditionValue = ConditionValue + 1
    print(ConditionValue)
    
    if ConditionValue > 3 then
    	break
    end
end
```

### repeat <a href="#repeat" id="repeat"></a>

```lua
-- Repeats the code until the condition is true
repeat wait(0.1) until SomeCondition
```

## Logical Operators <a href="#logical-operators" id="logical-operators"></a>

Logical operators are used to combine or evaluate conditions in conditional or control statements.

```lua
-- Using logical operators inside if statements
if isMonster == true and isBoss == true then 
    print("Monster")
end

if isWalk == true or isRun == true then
    print("On the move")
end

if not isCharacter then 
    print("Not Character")
end  
  

-- Returning values based on conditions
local resultA = a and b -- If the first value is false, return the first value, otherwise return the second value
local resultB = a or b -- If the first value is true, return the first value, otherwise return the second value
local resultC = not a -- Returns true if nil or false
```

## Tables <a href="#tables" id="tables"></a>

Tables are complex data structures that store data in key-value pairs, which can also manage data like arrays.

```lua
local NumberList = { 1, 2, 3 }
print(#NumberList) -- Returns the size of the table
  

-- Array implementation
local MatrixData = {}
for x = 1, 5 do
    MatrixData[x] = {}
    for y = 1, 2 do
        MatrixData[x][y] = "Coordinate_" .. x .. "x" .. y
        print(MatrixData[x][y])
    end
end  
  

-- Table consisting of Key(Name) and Index(EquipItemIDList)
local MonsterData =
{
    Name = "Orc",
    EquipItemIDList = 
    {
        1, 5, 4
    }	
}
print(MonsterData.Name)
print(MonsterData["Name"])
for i = 1, #MonsterData.EquipItemIDList do
    print(MonsterData.EquipItemIDList[i])
end
```

## Coroutines <a href="#coroutines" id="coroutines"></a>

Coroutines provide the ability to pause execution and resume it at a later time. Unlike regular functions, coroutines maintain their state when paused and can continue execution from that point, making them useful for asynchronous tasks or complex flow control.

```lua
print("1")

local printCoroutine = coroutine.create(function()
    wait(2)
    print("2")
end)
coroutine.resume(printCoroutine)

print("3") -- Since the coroutine runs asynchronously, the output will be 1 -> 3 -> 2
```

## Luau In-depth Learning

Compared to standard Lua, Luau offers a wide range of advanced features. Refer to the guide below for in-depth learning.

{% content-ref url="/pages/58vjJLJJMYXmYtaViFWN" %}
[Luau Guide](/manual/script-manual/get-started/luau-guide)
{% endcontent-ref %}


# Luau Guide

## Overview

OVERDARE Studio uses Luau, a scripting language extended from Lua. While preserving most of Lua's syntax and functionality, Luau introduces a wide range of features, such as Type Annotations, Type Inference, Compound Assignment, and If Expressions.

These extensions allow developers to write safer and more flexible logic while maintaining high productivity and expressiveness.

## Note

* Type-based **autocompletion is partially supported at the moment**, and some information may not appear in the autocomplete list.
* **Type inference is partially supported at the moment**, and some types may not be accurately recognized.

## Type Annotations

### Variables

**When declaring local variables**, you can specify their types as below (except when declaring global variables).

```lua
local Gold: number = 1
```

### Functions

You can specify function parameters and return values' types as below (can be used for global functions).

```lua
local function Sum(a: number, b: number): number
    return a + b	
end
print(Sum(1, 2))

function AddScalarToVector3(v: Vector3, scalar: number): Vector3
    return Vector3.new(v.X + scalar, v.Y + scalar, v.Z + scalar)
end
local Pos = Vector3.new(50, 0, 10)
print(AddScalarToVector3(Pos, 100))
```

### Variadic Functions

Even variadic functions such as (**...**) can be annotated with types.

```lua
--!nonstrict
local function Sum(...: number): number
    local t, result = {...}, 0
    for i = 1, #t do
        result += t[i]
    end
    return result
end
print(Sum(1, 2, 2, 5))
```

### Tables

Table types can be defined using **{}**, and you can specify the types for each field in braces to fix the types of values found in a table.

```lua
--!nonstrict
local SomeList: {} = { 1, false, "Hello" }

local NumberList: { number } = { 1, 2, 3, 4, 5 }
NumberList[2] = false -- Type 'boolean' could not be converted into 'number'
```

Table type can also define the **types of key and values**.

```lua
local BoolList: { [string]: boolean } = 
{ 
    Key1 = false, 
    Key2 = true 
}
BoolList["Key2"] = 2 -- Type 'number' could not be converted into 'boolean'
```

### Instance

**Objects** such as Player, Part, and Instance can also be assigned with types.

```lua
--!nonstrict
local function InitPlayer(player: Player)
    player:SetAttribute("Score", 0)    
end

local function SetRandomColor(target: Part)
    local r = math.random(1, 255)
    local g = math.random(1, 255)
    local b = math.random(1, 255)
    target.Color = Color3.fromRGB(r, g, b)
end

local function RemoveAllAttributes(target: Instance)
    for key, value in target:GetAttributes() do
        target:SetAttribute(key, nil)
    end
end
```

## Type Checking

### Autocomplete Integration

By declaring types for variables or functions, the **autocomplete function** will also display type information while coding, preventing errors and improving code maintainability.

<figure><img src="/files/QhIBTVYWRJLABekqeEnI" alt=""><figcaption></figcaption></figure>

### Inference Modes

You can specify the type inference modes such as --!nonstrict at the **top of the script.**

<table><thead><tr><th width="173.33331298828125">Inference Modes</th><th>Features</th></tr></thead><tbody><tr><td>--!nocheck (default)</td><td><strong>Completely disables</strong> type checking.</td></tr><tr><td>--!nonstrict</td><td>Checks only the <strong>explicitly specified types</strong>.</td></tr><tr><td>--!strict</td><td><strong>Infers and checks types for every code</strong>.</td></tr></tbody></table>

#### --!nocheck

The **default state** where type checking does not function. (Type errors are ignored, and type inference or warnings do not occur.)

<figure><img src="/files/lP9GHhPjxyLGXYJD57RE" alt=""><figcaption></figcaption></figure>

#### --!nonstrict

Checks only **explicitly specified types**, and skips variables or functions without specified types.

<figure><img src="/files/TOATIDPurF6aN6xIi8CX" alt=""><figcaption></figcaption></figure>

#### --!strict

**Infers and checks types for every code.** Even without specified types, it infers automatically to detect errors.

<figure><img src="/files/byyg7dWVQyjSmGhKMzPc" alt=""><figcaption></figcaption></figure>

## Flexible Type System

### Optional Type

Appending **?** after a type makes it optional. Optional types accept both the **specified types** and **nil values**.

```lua
--!nonstrict
local NumOrNil: number? = 1
NumOrNil = nil

local Num: number = 1
Num = nil -- Type 'nil' could not be converted into 'number'
```

### Type Cast

An error may occur if you assign values to variables of different types. In such cases, you can explicitly **cast the type** using the **:: operator** to avoid type errors.

```lua
--!nonstrict
local SomeNum: number = 100

local NumToString1: string = SomeNum::any
local NumToString2: string = SomeNum -- Type 'number' could not be converted into 'string'
```

### Literal Type Specification

Types such as string or boolean can be specified as **literals**, allowing them to be used like **constants**.

```lua
--!nonstrict
local SomeString: "ConstString" = "ConstString"
local SomeBoolean: true = true

SomeString = "Test"  -- Type '"Test"' could not be converted into ''"ConstString"''
SomeBoolean = false  -- Type 'false' could not be converted into 'true'
```

### Unions and intersections

Using union and intersection types, you can allow a variable to **accept multiple types** or define a **new composite type** by combining multiple types.

**Union types use the | operator** to allow a variable to have a **single value among multiple types**.

```lua
--!nonstrict
local NumberOrString: number | string = 10
NumberOrString = "Test"
NumberOrString = false -- Type 'boolean' could not be converted into 'number | string'; none of the union options are compatible

local SomeString: "Hello" | "World" = "Hello"
SomeString = "World"
SomeString = "Test" -- Type '"Test"' could not be converted into '"Hello" | "World"'; none of the union options are compatible
```

**Intersection types** use the **& operator** to define a **composite object type by combining multiple types**. (Each type must be defined using the **type keyword** before combining.)

```lua
type Type1 = { Name: string }
type Type2 = { Value: number }
local StringAndNumber: Type1 & Type2 = { Name = "Hello", Value = 10 }

local StringAndNumber: Type1 & Type2 = { Name = "Hello", OtherKey = 10 }
--[[
Type
  'StringAndNumber'
could not be converted into
  'Type1 & Type2'
caused by:
  Not all intersection parts are compatible.
  Table type 'StringAndNumber' not compatible with type 'Type2' because the former is missing field 'Value'
]]--
```

## Syntax & Expressions

### Compound Assignment

You can use compound assignment listed in the table below to **combine operations and assignments into a single statement,** which allows code to be written more concisely and efficiently.

However, unlike in other languages, compound assignments **cannot be used in expressions** such as print (a += 2). They must be written as separate statements like a += 2.

<table><thead><tr><th width="146.333251953125">Operator</th><th>Features</th></tr></thead><tbody><tr><td>+=</td><td>a = a + b</td></tr><tr><td>-=</td><td>a = a - b</td></tr><tr><td>*=</td><td>a = a * b</td></tr><tr><td>/=</td><td>a = a / b</td></tr><tr><td>//=</td><td>a = a // b</td></tr><tr><td>%=</td><td>a = a % b</td></tr><tr><td>^=</td><td>a = a ^ b</td></tr><tr><td>..=</td><td>a = a .. b</td></tr></tbody></table>

```lua
local Value = 3
Value += 1 -- 4

local Value = 3
Value -= 1 -- 2

local Value = 3
Value *= 2 -- 6

local Value = 3
Value /= 2 -- 1.5

local Value = 3
Value //= 2 -- 1

local Value = 3
Value %= 2 -- 1

local Value = 3
Value ^= 2 -- 9

local Text = "Hello"
Text ..= " World!" -- Hello World!
```

### if Expressions

You can insert literal values within conditional branches to **return values** immediately based on the conditions.

```lua
local RandomNum = math.random(1, 2)
local Result = if RandomNum == 1 then "true" else "false"
	
print(RandomNum, " -> ", Result)
```

### continue Keyword <a href="#continue" id="continue"></a>

Within a loop statement such as for or while, the **continue keyword** can be used to skip the current loop and move on to the next.

```lua
for i = 1, 5 do
    if i > 3 then
        continue
    end
    print(i)
end
```

### String interpolation

You can use **backticks (\`)** to dynamically insert **variables or expressions** within braces.

```lua
local ItemName = "Sword"
local ItemPrice = 2000
print(`ItemName : {ItemName} / ItemPrice : {ItemPrice}`) -- ItemName : Sword / ItemPrice : 2000
```

## Loop Statement

### Generic For Loops

Without explicitly using iterators like ipairs or pairs, you can directly traverse collections like tables using the **for ... in syntax**. This can also be applied to **array or dictionary** structures.

```lua
local NumberList = { 1, 2, 3 }
for key, value in NumberList do    
    print(key, " : ", value)
end
```

```lua
local PlayerData = 
{
    Name = "Player",
    Level = 5,
    IsValid = true,
    EquipItemIDList =
    {
        1, 3
    }
}

for key, value in PlayerData do
    print(key, " : ", value)
end
```

### Generalized Iteration

By implementing the **\_\_iter metamethod**, you can embed iterator logic directly within a table, enabling **user-defined iteration behavior**.

```lua
--!nonstrict
local NumberList = { 1, 5, 11, 4, 9 }

local SortedIterator = 
{
    __iter = function(t)
        local sorted = table.clone(t)
        table.sort(sorted)

        local i = 0
        return function()
            i += 1
            if i <= #sorted then
                return i, sorted[i]
            end
        end
    end
}
setmetatable(NumberList, SortedIterator)

for key, value in NumberList do
    print(key, " : ", value)
end
```

## User-Defined Types

### Type

You can declare user-defined types using the **type keyword**. This allows for safer and more efficient management of complex data structures such as monsters, skills, or tiles.

```lua
--!nonstrict
type Car = 
{
    Name: string,
    Speed: number,
    Drive: (Car, boolean) -> () -- function
}

local function DriveFunc(self, useBooster)
    print(self.Name, "Speed : ", self.Speed, " / useBooster : ", useBooster)
end

local Taxi: Car =  
{
    Name = "Taxi",
    Speed = 30, 
    Drive = DriveFunc
}

Taxi:Drive(true)
```

You can also **use a function type across multiple functions**, helping to maintain consistent function structures and **enabling broader extensibility**.

```lua
--!nonstrict
type MathFunc = (number, number) -> number

local Sum: MathFunc = function(a, b)
    return a + b
end

local Multiply: MathFunc = function(a, b)
    return a * b
end
```

### Type Exports

When you use the **export type keyword**, types defined in module scripts can be separated and managed for use outside the module.

```lua
--!nonstrict
export type Item = 
{
    Name: string,
    Price: number
}

export type Skill = 
{
    Name: string,
    IsActiveSkill: boolean
}
```

```lua
--!nonstrict
local ReplicatedStorage = game:GetService("ReplicatedStorage")
local ModuleScript = require(ReplicatedStorage.ModuleScript)

local SomeItem: ModuleScript.Item = 
{
    Name = "Sword",
    Price = 10
} 
print(SomeItem)

local SomeSkill: ModuleScript.Skill = 
{
    Name = "FireBall",
    IsActiveSkill = true
}
print(SomeSkill) 
```

## Generic

### Generics

By defining generic types using **\<T>**, you can **dynamically specify** the input type. This makes it possible to express and reuse various forms of data structures flexibly through a single type definition.

```lua
--!nonstrict
type SomeData<T> = 
{
    Name: string,
    Value: T
}

local NumberData: SomeData<number> = 
{
    Name = "Test1",
    Value = 15
}
print(NumberData.Name, " / ", NumberData.Value)

local BooleanData: SomeData<boolean> = 
{
    Name = "Test1",
    Value = false
}
print(BooleanData.Name, " / ", BooleanData.Value)
```

### Function Generics

By applying generics to a function's **parameters**, the type of the data being passed can be dynamically specified **at the time of the function call,** enabling both high code reusability and type safety.

```lua
--!nonstrict
type SomeList<T> = { T }

local NameList: SomeList<string> = { "Bob", "Dan", "Mary" }
local NumberList: SomeList<number> = { 1, 2, 3 }

local function printList<T>(list: SomeList<T>)
    for key, value in list do
        print(key, " : ", value)
    end
end

printList(NameList)
printList(NumberList)
```

## Libraries

Some of Lua's standard libraries, such as io and package, have been removed, while libraries like **table and string have been extended**. (More details on the libraries will be provided in the future.)

### Table Cloning Function

```lua
local T1 = { 1, 2, 3 }
local T2 = table.clone(T1)

T1[1] = 10
print(T1[1])
print(T2[1])
```

### String Splitting Function

```lua
local SomeString = "Hello,World"
local Splits = SomeString:split(",")
print(Splits[1], Splits[2])
```

### Exit Coroutine

```lua
local co = coroutine.create(function()
    for i = 1, 5 do
        wait(1)
        print(i)
    end
end)

coroutine.resume(co)
wait(4)

coroutine.close(co)
```

### Task

```lua
local SomeTask = task.spawn(function()
    for i = 1, 10 do
        wait(2)
        print(i)
    end
end)

print("wait 5s")
local elapsed = task.wait(5)

task.cancel(SomeTask)
print("cancel! / elapsed : ", elapsed)
```

Learn More

{% content-ref url="/pages/WuA9CKqKFMBqC470mQsA" %}
[Conveniently Managing Coroutine Using Task](/manual/script-manual/advanced-gameplay-systems/task)
{% endcontent-ref %}


# Coding Style

## Overview <a href="#overview" id="overview"></a>

Coding style refers to **guidelines designed to ensure consistency and readability of code**. These are **recommended conventions** to reduce ambiguity that may arise when writing code and to improve collaboration and maintenance.

Lua script has a flexible and concise grammar structure compared to other languages, so if developers do not establish a unified convention, the **expression style of the code can become excessively diverse**. Therefore, by using a consistent coding style, you can quickly understand the meaning of the code, such as the scope or purpose of variables, and increase development efficiency.

## Naming Conventions Based on Declaration Scope <a href="#naming-conventions-based-on-declaration-scope" id="naming-conventions-based-on-declaration-scope"></a>

The following rules are used to distinguish between **file-scoped variables**, which are declared at the top of the script, and **local variables**, which are declared within a specific scope, such as a function or control statement.

### Variables <a href="#variables" id="variables"></a>

File-scoped variables declared at the **top of the script** should be named with the **first letter of each word in uppercase**.

```lua
-- Good
local Number = 1       
_G.GlobalValue = 2 


-- Bad
local number = 1 
_G.globalValue = 2
```

Variables declared **within specific scopes** such as functions or control statements should be named with **only the first letter in lowercase**.

```lua
-- Good
local function SomeFunction()
    local value = 3
    
    if value >= 3 then
        local someBoolean = false
    end
end


-- Bad
local function SomeFunction()
    local Value = 3
    
    if Value >= 3 then
        local SomeBoolean = false
    end
end
```

### Functions <a href="#functions" id="functions"></a>

Function names should be capitalized with the **first letter of each word in uppercase**.

```lua
-- Good
local function SomeFunction()
    print("Do Someting")
end

function _G.SomeFunction()
    print("Do Someting")
end


-- Bad
local function someFunction()
    print("Do Someting")
end

function _G.someFunction()
    print("Do Someting")
end
```

## Function Parameters and Return Values <a href="#function-parameters-and-return-values" id="function-parameters-and-return-values"></a>

Function parameters and return values must be named with **the first letter in lowercase**, and spaces should be placed between parameters.

```lua
-- Good
local function Sum(numValue1, numValue2)
    local result = numValue1 + numValue2
    local isSuccess = (result ~= nil)
    return isSuccess, result
end


-- Bad
local function Sum(NumValue1,NumValue2)
    local result = NumValue1 + NumValue2
    local isSuccess = (result ~= nil)
    return isSuccess,result
end
```

## Operators <a href="#operators" id="operators"></a>

Add a **space** between operators.

```lua
-- Good
local Sum = 1 + 5
local IsPositiveNumber = Sum > 0

if SomeValue == 1 && SomeValue == 2 then
    print("Valid Value")
elseif SomeValue == 3 then
    print("Value Exceeded)
else
    print("Invalid Value"")  
end


-- Bad
local Sum=1+5
local IsPositiveNumber=Sum>0

if SomeValue==1&&SomeValue==2 then
    print("Valid Value")
elseif SomeValue==3 then
    print("Value Exceeded)
else
    print("Invalid Value"")  
end
```

## Indentation and Line Breaks <a href="#indentation-and-line-breaks" id="indentation-and-line-breaks"></a>

Use **indentation** to clarify the hierarchy of the code, such as the scope and flow.

```lua
-- Good
if someCondition1 then
    if someCondition2 then
        print("Correct!")
    end
end


-- Bad
if someCondition1 then
if someCondition2 then
    print("Correct!")
end
end
```

Include a **line break** at the beginning of a control statement, such as a table, conditional, or loop.

```lua
-- Good
local NumberList = 
{
    1, 2, 3
}

for i = 1, 5 do
    print(i)
end


-- Bad
local NumberList = {
    1, 2, 3
}

for i = 1, 5 do	print(i)
end
```

## In a Team Project <a href="#in-a-team-project" id="in-a-team-project"></a>

In a collaborative project, it is important to unify the coding style among team members. A consistent coding style improves code readability, makes maintenance easier, and helps smooth collaboration among team members. Therefore, it is advisable to define coding rules in the early stages of the project and ensure that everyone follows them. Agree upon variable names, function names, indentation styles, etc., and proceed with the work based on these guidelines!


# Object Reference

## Overview <a href="#overview" id="overview"></a>

Depending on the type of object, such as Service, Part, or Player, you can get the required object in various ways.

## Getting the Service Object <a href="#getting-the-service-object" id="getting-the-service-object"></a>

A Service object refers to a built-in system object designed to perform specific functions within the game.

```lua
local Workspace = game:GetService("Workspace")
local ReplicatedStorage = game:GetService("ReplicatedStorage")
local ServerScriptService = game:GetService("ServerScriptService")
local ServerStorage = game:GetService("ServerStorage")
local StarterGui = game:GetService("StarterGui")
local StarterPlayer = game:GetService("StarterPlayer")
local Players = game:GetService("Players")
...
```

## Referencing Parent Object <a href="#referencing-parent-object" id="referencing-parent-object"></a>

```lua
-- Parent of an object
local ParentPart   = Part.Parent  

-- Parent of a script
local ScriptParent = script.Parent
```

## Referencing Child Object <a href="#referencing-child-object" id="referencing-child-object"></a>

```lua
-- Return object by address (may fail if object is not loaded yet)
local ChildPart1 = Workspace.ChildPart  

-- Return the first object matching the name
local ChildPart2 = Workspace:FindFirstChild("ChildPart")  

-- Wait for the object to be returned
local ChildPart3 = SomePart:WaitForChild("ChildPart")

```

## Getting All Child Objects <a href="#getting-all-child-objects" id="getting-all-child-objects"></a>

When the hierarchy of the Part is as follows:

<div align="left"><img src="/files/28Dy2MwdLekRfdrz21a8" alt=""></div>

```lua
local Part = Workspace:WaitForChild("Part")  

-- Return all the first child objects of the parent object (Part)
local Children = Part:GetChildren()  

for _, child in ipairs(Children) do
    -- Print ChildPart1, ChildPart2
    print(child.Name)
end  
  

-- Return all descendant objects of the parent object (Part)
local Descendants = Part:GetDescendants()  

for _, descendant in ipairs(Descendants) do
    -- Print ChildPart1, ChildPart1-1, ChildPart2, ChildPart2-1
    print(descendant.Name)
end
```

## Getting All Players <a href="#getting-all-players" id="getting-all-players"></a>

```lua
local Players = game:GetService("Players")
local PlayerList = Players:GetPlayers()

for i = 1, #PlayerList do
    print(PlayerList[i])
end
```

## Getting LocalPlayer (LocalScript) <a href="#getting-localplayer-localscript" id="getting-localplayer-localscript"></a>

```lua
local Players = game:GetService("Players")
local LocalPlayer = Players.LocalPlayer
```

## Getting Humanoid from Player <a href="#getting-humanoid-from-player" id="getting-humanoid-from-player"></a>

```lua
local Character = Player.Character
local Humanoid = Character:FindFirstChild("Humanoid")
local HumanoidRootPart = Character:FindFirstChild("HumanoidRootPart")
```

## Getting Player from Humanoid <a href="#getting-player-from-humanoid" id="getting-player-from-humanoid"></a>

```lua
local Character = Humanoid.Parent
local Player = Players:GetPlayerFromCharacter(Character)
```


# Events & Communication


# Event

## Overview <a href="#overview" id="overview"></a>

Events are used to implement necessary functions for various situations that occur within the game (such as entering, collisions, etc.).

<figure><img src="/files/fNhYPCBl466hrRMFA670" alt="" width="509"><figcaption></figcaption></figure>

## Linking a Function to an Event <a href="#linking-a-function-to-an-event" id="linking-a-function-to-an-event"></a>

Use `:Connect()` to link a function to an event.

```lua
local Part = script.Parent

local function OnTouched(otherPart)
  print("otherPart : ", otherPart.Name)
end
Part.Touched:Connect(OnTouched)
```

## Unlinking a Function from an Event <a href="#unlinking-a-function-from-an-event" id="unlinking-a-function-from-an-event"></a>

If you store the returned value in a variable when you use `:Connect()` to link a function to an event, you can unlink the function from the event when it is no longer needed.

```lua
local Part = script.Parent
local Connection = nil

local function OnTouched(otherPart)
    local partParent = otherPart.Parent
    local humanoid = partParent:FindFirstChild("Humanoid")
 
    if humanoid then
        if Connection ~= nil then
            Connection:Disconnect()	
        end
    end
end
Connection = Part.Touched:Connect(OnTouched)
```

## Waiting for an Event

Using Wait() blocks the current thread until the signal fires once, then returns the arguments that were passed when it fired. The examples below show how to use those return values or chain waits in more involved flows.

When a player joins, wait for their character to be ready, then initialize Humanoid (Server)

```lua
local Players = game:GetService("Players")

local function OnPlayerAdded(player)
    local character = player.Character or player.CharacterAdded:Wait()
    local humanoid = character:WaitForChild("Humanoid")
    humanoid.WalkSpeed = 16
end
Players.PlayerAdded:Connect(OnPlayerAdded)
```

Use the instance returned by Wait() for follow-up work

```lua
local Folder = workspace:FindFirstChild("SpawnContainer")
local AddedChild = Folder.ChildAdded:Wait()
local Nested = AddedChild:FindFirstChild("Config")

if Nested and Nested:IsA("ModuleScript") then
    -- load module or other follow-up logic
end
```

Signals that return multiple values: AncestryChanged passes (child, parent)

```lua
local Part = workspace:FindFirstChild("MovingPart")
Part.Parent = nil
Part.Parent = workspace.TargetFolder

local Child, NewParent = Part.AncestryChanged:Wait()

if NewParent then
    print("New Parent: ", NewParent:GetFullName())
end
```

Wait once for server-sent data via RemoteEvent, then run logic (Client)

```lua
local ReplicatedStorage = game:GetService("ReplicatedStorage")
local RemoteEvent = ReplicatedStorage:FindFirstChild("SessionReady")

if RemoteEvent then
    local sessionId, startTime = RemoteEvent.OnClientEvent:Wait()
    -- use sessionId, startTime for UI update or game logic
end
```

## Commonly Used Events <a href="#commonly-used-events" id="commonly-used-events"></a>

### Collision Events <a href="#collision-events" id="collision-events"></a>

Detects objects that collide with an object to which the event is linked.\
(For example: Detecting characters that touch a Kill Part)

```lua
local Part = script.Parent
local Connection = nil

local function OnTouched(otherPart)
    local partParent = otherPart.Parent
    local humanoid = partParent:FindFirstChild("Humanoid")
 
    if humanoid then
        if Connection ~= nil then
            Connection:Disconnect()	
        end
    end
end
Connection = Part.Touched:Connect(OnTouched)
```

Detects objects that exit the area (collision range) of the object to which the event is linked.\
(For example: Escaping from a trap floor)

```lua
local function OnTouchEnded(otherPart)
    print("TouchEnded : ", otherPart.Name)
end
part.TouchEnded:Connect(OnTouchEnded)
```

### Update Events <a href="#update-events" id="update-events"></a>

An event that is called every frame.\
(For example: Timer calculations, object movement, physics operations)

```lua
local RunService = game:GetService("RunService")
local Timer = 0

local function UpdateEvent(deltaTime)
    Timer = Timer + deltaTime
    
    if Timer >= 3 then
        Timer = 0
        print("Reset!)
    end
end
RunService.Heartbeat:Connect(UpdateEvent)
```

### Player Join/Leave Events <a href="#player-joinleave-events" id="player-joinleave-events"></a>

An event that detects players who join the game.

```lua
local Players = game:GetService("Players")

local function EnterPlayer(player)
    print("EnterPlayer : ", player.Name)
end
Players.PlayerAdded:Connect(EnterPlayer)
```

An event that detects players who leave the game.

```lua
local Players = game:GetService("Players")

local function LeavePlayer(player)
    print("LeavePlayer : ", player.Name)
end
Players.PlayerRemoving:Connect(LeavePlayer) 
```

### Character Spawn/Death Events <a href="#character-spawndeath-events" id="character-spawndeath-events"></a>

These are events that detect when a character is spawned or when a character dies.

```lua
local Players = game:GetService("Players")

local function EnterPlayer(player)
    -- Spawn
    local function SpawnCharacter(character)    
        local humanoid = character:WaitForChild("Humanoid")
        
        -- Die
        local function DeathCharacter()
            print(player.Name, "Die!")
        end
        humanoid.Died:Connect(DeathCharacter)
    end
    player.CharacterAdded:Connect(SpawnCharacter)
end
Players.PlayerAdded:Connect(EnterPlayer)
```

### Button Click Events <a href="#button-click-events" id="button-click-events"></a>

An event that is triggered when a button is clicked.

```lua
local ScreenGui = script.Parent
local Button = ScreenGui.TextButton

local function OnActivated()
    print("Activated")
end
Button.Activated:Connect(OnActivated)
```


# Server-Client Communication

## Overview <a href="#overview" id="overview"></a>

OVERDARE’s world operates based on communication between the server and the client.

<div align="left"><figure><img src="/files/ZyvVjVK19NrppFcZZEfx" alt=""><figcaption></figcaption></figure></div>

* The **server** manages the global state of the game and acts as the **central system** that handles communication with all clients (players).
* The **client** is a **local environment** that runs on an individual player’s device, handling player input, visual effects, UI, and more.

Since the server and client operate independently, in a multiplayer game, **game logic**, **camera control**, and **player input handling** must be implemented and communicated using **RemoteEvent**.

## Types of Communication <a href="#types-of-communication" id="types-of-communication"></a>

Since the server and client have different functionalities, communication between them requires the use of **RemoteEvent**.

For example, GUI elements like buttons are processed only on the client-side, while game logic must be handled on the server-side. In other words, when a skill button click occurs on the client, it needs to send an event to the server to request that the server processes the skill usage logic.

RemoteEvent connects the roles of the server and client, enabling core interactions in multiplayer games.

<table><thead><tr><th width="273">Communication Type</th><th width="99">Sender</th><th width="101">Receiver</th><th>Example</th></tr></thead><tbody><tr><td>Event sent from the sever to all clients</td><td>Server</td><td>Client</td><td>Game Over</td></tr><tr><td>Event sent from the server to a specific client</td><td>Server</td><td>Client</td><td>Display level-up UI on level-up</td></tr><tr><td>Event sent from the client to the server</td><td>Client</td><td>Server</td><td>Skill button click</td></tr></tbody></table>

## RemoteEvent Object <a href="#remoteevent-object" id="remoteevent-object"></a>

**RemoteEvent** is an object provided to handle events between the server and client, supporting **one-way communication**.

For communication between the server and client, the RemoteEvent object must be **accessible from both sides**. To achieve this, **RemoteEvent** is placed in **ReplicatedStorage**, a storage where the server and client can share data. ReplicatedStorage safely synchronizes objects between the server and client, ensuring that the RemoteEvent is accessible in both environments.

![](/files/bSufM1WS34BU6GySZlIe)

💡 Tip. To clearly distinguish whether the **RemoteEvent** is for communication from the server to the client (Server to Client) or from the client to the server (Client to Server), it is recommended to use **prefixes** such as **S2C\_** for server-to-client communication and **C2S\_** for client-to-server communication. This makes the event’s role intuitive, enhancing code readability and maintainability.\
![](/files/eNqLfOpNqFHYVqtP6aeY)

## Communication Using RemoteEvent <a href="#communication-using-remoteevent" id="communication-using-remoteevent"></a>

You can send **arguments** along with events when firing a RemoteEvent. The arguments are passed when calling the FireServer, FireClient, or FireAllClients methods, and the receiving side can receive the data in a callback function.

### FireAllClients (Server ➡ All Client) <a href="#fireallclients-server-all-client" id="fireallclients-server-all-client"></a>

The server sends an event to **all clients**. This is useful for synchronizing global game states or delivering the same information to all players.

**In Script**

```lua
local Players = game:GetService("Players")
local ReplicatedStorage = game:GetService("ReplicatedStorage") 
local S2C_GameEnd = ReplicatedStorage:WaitForChild("S2C_GameEnd")

local function TimeOver()
    local isWin = false
    S2C_GameEnd:FireAllClients(isWin) -- Passing arguments
end
```

**In LocalScript**

```lua
local Players = game:GetService("Players")
local ReplicatedStorage = game:GetService("ReplicatedStorage") 
local S2C_GameEnd = ReplicatedStorage:WaitForChild("S2C_GameEnd")

local function OnGameEnd(isWin)
    print("[OnGameEnd] ", Players.LocalPlayer.Name, " / isWin : ", isWin)
end
S2C_GameEnd.OnClientEvent:Connect(OnGameEnd)
```

### FireClient (Server ➡ Specific Client) <a href="#fireclient-server-specific-client" id="fireclient-server-specific-client"></a>

This method sends an event from the server to a **specific client**. It is used when handling tasks related to an individual player.

**In Script**

```lua
local Players = game:GetService("Players")

local ReplicatedStorage = game:GetService("ReplicatedStorage") 
local S2C_LevelUp = ReplicatedStorage:WaitForChild("S2C_LevelUp")

local function LevelUp(player)
    local prevLevel = 1
    local curLevel = 2
    S2C_LevelUp:FireClient(player, prevLevel, curLevel) -- Passing arguments
end
```

**In LocalScript**

```lua
local Players = game:GetService("Players")

local ReplicatedStorage = game:GetService("ReplicatedStorage") 
local S2C_LevelUp = ReplicatedStorage:WaitForChild("S2C_LevelUp")

local function OnLevelUp(prevLevel, curLevel)
    print("[OnLevelUp] ", Players.LocalPlayer.Name, " / LevelUp : ", prevLevel, " -> ", curLevel)
end
S2C_LevelUp.OnClientEvent:Connect(OnLevelUp)
```

### FireServer (Client ➡ Server) <a href="#fireserver-client-server" id="fireserver-client-server"></a>

This method sends an event from the client to the **server**. It is used when the server needs to handle the user’s input or specific events (e.g., button clicks, skill use requests).

**In LocalScript**

```lua
local ReplicatedStorage = game:GetService("ReplicatedStorage") 
local C2S_UseSkill = ReplicatedStorage:WaitForChild("C2S_UseSkill")

local function ClickSkillButton()
    local skillID = 1
    C2S_UseSkill:FireServer(skillID)
end
```

**In Script**

```lua
local ReplicatedStorage = game:GetService("ReplicatedStorage") 
local C2S_UseSkill = ReplicatedStorage:WaitForChild("C2S_UseSkill")

local function OnUseSkill(player, skillID)
    print("[OnUseSkill] ", player.Name, " / skillID : ", skillID)
end
C2S_UseSkill.OnServerEvent:Connect(OnUseSkill)
```

## Advanced Usage <a href="#advanced-usage" id="advanced-usage"></a>

* Since data sent from the client cannot be trusted, it should always be **validated by the server**.
* Send only the necessary information to the server to reduce network load. (Send **only minimal data** from the client)
* Avoid creating too many RemoteEvents. If tasks can be handled in the same context, process them using a single RemoteEvent.
* Create RemoteEvent connections only when necessary, and **disconnect** when finished to avoid memory leaks. (`Disconnect()` function)
* When using a single RemoteEvent to handle multiple tasks, add the first argument (EventType) to indicate the **task type**. (Example of using EventType: PlayerActionType and ActionID)


# BindableEvent

## Overview <a href="#overview" id="overview"></a>

BindableEvent can be used to implement communication between servers or between clients within the same environment.

## BindableEvent Object <a href="#bindableevent-object" id="bindableevent-object"></a>

**BindableEvent** is an object provided to handle events within the same environment, supporting **one-way communication**.\
\
![](/files/c7VkvG5Fm6rrQb3rSgMK)

💡 Tip. To clearly distinguish whether the communication is between Server to Server or Client to Client when using **BindableEvent**, it is recommended to use **prefixes** such as **S2S\_** or **C2C\_** in the name. This makes the event’s role intuitive and improves code readability and maintainability.

![](/files/eNqLfOpNqFHYVqtP6aeY)

## Implementing Communication with BindableEvent <a href="#implementing-communication-with-bindableevent" id="implementing-communication-with-bindableevent"></a>

When firing an event with BindableEvent, you can send **arguments** along with it. These arguments are passed when calling the Fire method and can be received by the callback function on the receiving side.

### Server ➡ Server <a href="#server-server" id="server-server"></a>

**In Script1**

```lua
local ReplicatedStorage = game:GetService("ReplicatedStorage")
local S2S_SomeEvent = ReplicatedStorage:WaitForChild("S2S_SomeEvent")

local function TestFire()
    local SomeText = "BindableEvents"
    S2S_SomeEvent:Fire(SomeText) -- Passing arguments
end
```

**In Script2**

```lua
local ReplicatedStorage = game:GetService("ReplicatedStorage")
local S2S_SomeEvent = ReplicatedStorage:WaitForChild("S2S_SomeEvent")

local function OnSomeEvent(text)
    print("[SomeEvent]", "Parameter : ", text)
end
S2S_SomeEvent.Event:Connect(OnSomeEvent)
```

### Client ➡ Client <a href="#client-client" id="client-client"></a>

**In LocalScript1**

```lua
local ReplicatedStorage = game:GetService("ReplicatedStorage")
local C2C_SomeEvent = ReplicatedStorage:WaitForChild("C2C_SomeEvent")

local function TestFire()
    local SomeText = "BindableEvents"
    C2C_SomeEvent:Fire(SomeText) -- Passing arguments
end
```

**In LocalScript2**

```lua
local ReplicatedStorage = game:GetService("ReplicatedStorage")
local C2C_SomeEvent = ReplicatedStorage:WaitForChild("C2C_SomeEvent")

local function OnSomeEvent(text)
    print("[SomeEvent]", "Parameter : ", text)
end
C2C_SomeEvent.Event:Connect(OnSomeEvent)
```


# JSON and HTTP Communication

## Overview

You can communicate with external HTTP servers using HttpService. You can retrieve data from an external API server to use in the world, or send data to an external API server and use the response data in the world.

## How to Use

| Function              | Description                                                              |
| --------------------- | ------------------------------------------------------------------------ |
| GetAsync(url)         | Receives a response from the URL                                         |
| PostAsync(url, data)  | Sends data to the URL and receives a response                            |
| JSONEncode(tableData) | Converts tableData in the table format into a JSON string and returns it |
| JSONDecode(json)      | Converts JSON in the JSON format into a table format and returns it      |

## Receiving a response from the URL

This is an example code that sends an HTTP GET request to the URL provided in the baseUrl variable, stores the response in the response variable, and prints it.

```lua
-- Imports HttpService
local HttpService = game:GetService("HttpService")
local baseUrl = "Enter the HTTP URL here"

local success, errorMessageOrResult, response = nil, nil, nil

local function HttpGet()
    -- Handles exceptions with pcall() as asynchronous requests can fail or encounter errors
    success, errorMessageOrResult = pcall(function()
        -- Sends an HTTP GET request to the "baseUrl" address and stores the response in the "response" variable
        response = HttpService:GetAsync(baseUrl)
    end)
    
    local messageSuccess = string.format("success: %s", success)
    local messageErrorOrResult = string.format("errorMessageOrResult: %s", errorMessageOrResult)
    local messageResponse = string.format("response: %s", response)
    
    print("messageSuccess: ", messageSuccess)
    print("messageErrorOrResult: ", messageErrorOrResult)
    print("messageResponse: ", messageResponse)
end
```

## Sending JSON Data to the URL to Receive a Response

This is an example code that encodes table data used in the world to JSON, sends an HTTP POST request to the URL specified in the baseUrl variable, stores the response in the response variable, and prints it.

```lua
-- Imports HttpService
local HttpService = game:GetService("HttpService")
local baseUrl = "Enter the HTTP URL here"

local success, errorMessageOrResult, response = nil, nil, nil

local function HttpPost()
    -- Defines data to send to the URL
    local data = 
    {
        ["message"] = "Hello OVERDARE!",
        ["data"] = 10,
    }

    -- Encodes data to JSON
    local jsonData = HttpService:JSONEncode(data)

    -- Handles exceptions with pcall() as asynchronous requests can fail or encounter errors 
    success, errorMessageOrResult = pcall(function()
        -- Sends an HTTP POST request with "jsonData" to the "baseUrl" address and stores the response in the "response" variable 
        response = HttpService:PostAsync(baseUrl, jsonData)
    end)

    local messageSuccess = string.format("success: %s", success)
    local messageErrorOrResult = string.format("errorMessageOrResult: %s", errorMessageOrResult)
    local messageResponse = string.format("response: %s", response)
    
    print("messageSuccess: ", messageSuccess)
    print("messageErrorOrResult: ", messageErrorOrResult)
    print("messageResponse: ", messageResponse)
end
```

## Using JSON Data Received from the URL

This is an example code that sends an HTTP GET request to the URL provided in the baseUrl variable, stores the response in the response variable, decodes the response (assuming it is JSON) into a table, and prints it.

```lua
-- Imports HttpService
local HttpService = game:GetService("HttpService")
local baseUrl = "Enter the HTTP URL here"

local success, errorMessageOrResult, response = nil, nil, nil

local function HttpGetApplication()
    -- Handles exceptions with pcall() as asynchronous requests can fail or encounter errors
    success, errorMessageOrResult = pcall(function()
        --Sends an HTTP GET request to the "baseUrl" address and stores the response in the "response" variable
        response = HttpService:GetAsync(baseUrl)
        -- Decodes the JSON string into a table and stores it in the "response" variable 
        response = HttpService:JSONDecode(response)
    end)

    local messageSuccess = string.format("success: %s", success)
    local messageErrorOrResult = string.format("errorMessageOrResult: %s", errorMessageOrResult)
    local messageResponse = string.format("response.data: %s", response.data)
    
    print("messageSuccess: ", messageSuccess)
    print("messageErrorOrResult: ", messageErrorOrResult)
    print("messageResponse: ", messageResponse)
end
```

## Note

There may be rate limits, API calls per minute, for each API address. Make sure to check the request limits of the API address when implementing your desired functionality.


# Manage Value

## Overview

By using attribute or value objects, you can **edit values directly in the editor without scripting**, enhancing your work efficiency.

While attributes support various data types and are more memory-efficient, making them ideal for performance, value objects are heavier but ideal for reuse and referencing since they're individual instances.

## Attribute

### Overview

By adding attributes in the Properties panel of objects like Part, you can **easily edit values in the editor** without scripting, leading to higher work efficiency.

Additionally, because the client can directly access values on the server without using RemoteEvent for direct communication, the network communication structure can be kept simple, and the codebase can be optimized more easily with reduced complexity.

Unlike value objects, attributes do not create or destroy separate instances. As a result, they are processed much faster than using Instance.new() or Destroy(), which makes attributes particularly advantageous in scenarios that involve high-frequency operations, large-scale object control, or repeated synchronization—such as dynamically adding or removing values across many objects.

### Supported Data Types

| Data Type  | Supported O/X | Notes |
| ---------- | ------------- | ----- |
| String     | O             |       |
| Boolean    | O             |       |
| Number     | O             |       |
| UDim       | O             |       |
| UDim2      | O             |       |
| BrickColor | O             |       |
| Color3     | O             |       |
| Vector2    | O             |       |
| Vector3    | O             |       |
| CFrame     | O             |       |

### How to Use

When an attribute value is changed **on the server**, the client can read the updated value without requiring a separate RemoteEvent. This simplifies the communication structure and makes the codebase easier to maintain.

Additionally, instead of managing key game data (e.g., monster damage, HP, or player scores) through script variables, you can structure and manage this data at the attribute level. This facilitates the debugging process and allows you to visually monitor it through the Level Browser, which can significantly improve development efficiency.

In particular, since designers and non-developers can directly modify values or link objects through the Properties window in Studio, this structure is well-suited for collaborative workflows involving non-programmers.

<figure><img src="/files/C7pvQtsXlyCMvgJJENj6" alt=""><figcaption></figcaption></figure>

By connecting the **GetAttributeChangedSignal event** or **AttributeChanged event** to an object with attributes, you can trigger only the necessary processes when the value changes. This greatly improves the visibility of the overall data flow, and makes it easier to manage and debug.

```lua
local Monster = script.Parent

-- Wait for attribute values added in the Properties panel to load.
repeat wait() until Monster:GetAttribute("HP")
	
local Init_MonsterType = Monster:GetAttribute("MonsterType")
local Init_IsElite     = Monster:GetAttribute("IsElite")
local Init_HP          = Monster:GetAttribute("HP")
local MaxHP            = Init_HP
local Init_Damage      = Monster:GetAttribute("Damage")
local Init_MoveSpeed   = Monster:GetAttribute("MoveSpeed")

-- Detect changes to a specific attribute value
local function OnChangedHP()
    local hp = Monster:GetAttribute("HP")
    print("[Server OnChangedHP] " .. hp .. " / " .. MaxHP)
end
Monster:GetAttributeChangedSignal("HP"):Connect(OnChangedHP)

-- Detect changes to any attribute values
local function OnAttributeChanged(attribute)
    print(attribute, "is Changed : ", Monster:GetAttribute(attribute))
end
Monster.AttributeChanged:Connect(OnAttributeChanged)
```

When the Change event for the same attribute is connected in the client, the necessary process is triggered whenever values change.

```lua
-- Detect changes to a specific attribute value
local function OnChangedHP()	
    RefreshMonsterHpUI()
end
Monster:GetAttributeChangedSignal("HP"):Connect(OnChangedHP)

-- Detect changes to any attribute values
local function OnAttributeChanged(attribute)
    ...
end
Monster.AttributeChanged:Connect(OnAttributeChanged)
```

## Value Objects

### Overview

By using value objects like IntValue or StringValue, you can **easily edit values in the editor** without scripting, leading to higher work efficiency.

Additionally, because the client can directly access server-side values without using RemoteEvent for direct communication, the network communication structure can be kept simple, and the codebase can be optimized more easily with reduced complexity.

Since value objects exist as individual objects, they are generally heavier than attributes and may affect performance when used in large numbers. However, they are advantageous when frequent reuse or reference linking between instances is needed.

### Supported Data Types

| Data Type    | Supported O/X | Notes                              |
| ------------ | ------------- | ---------------------------------- |
| IntValue     | O             | Integer values only                |
| NumberValue  | O             | Includes integers and float values |
| StringValue  | O             |                                    |
| BoolValue    | O             |                                    |
| ObjectValue  | X             |                                    |
| CFrameValue  | X             |                                    |
| Vector3Value | X             |                                    |
| Color3Value  | X             |                                    |

## How to Use

When a value object’s value is changed by the **server**, the client can read the value directly without using a separate RemoteEvent. This streamlines the communication structure, making the code easier to maintain and debug.

Additionally, instead of managing key game data, such as monster damage, HP, or player scores, through script variables, you can structure and manage this data at the object level. This facilitates the debugging process and allows you to visually monitor through the Level Browser, which can significantly improve development efficiency.

Since designers and non-developers can modify values directly and connect objects through the Studio’s property panel, this structure is effective in collaborative environments with non-programmers.

<figure><img src="/files/i5xH5u0hcTjvRVYn61Bf" alt=""><figcaption></figcaption></figure>

By connecting the Changed event to a value object, you can trigger only the necessary processes when the value changes. This greatly improves the visibility of the overall data flow, and makes it easier to manage and debug.

```lua
local Monster = script.Parent
local Parameter = Monster:WaitForChild("Parameter")

-- Wait for value objects to load using WaitForChild before referencing them.
local HP        = Parameter:WaitForChild("HP")
local Damage    = Parameter:WaitForChild("Damage")
local Defense   = Parameter:WaitForChild("Defense")
local MoveSpeed = Parameter:WaitForChild("MoveSpeed")

local MaxHP     = HP.Value

local function OnChangedHP(newValue) 
    print("[Server OnChangedHP] " .. HP.Value .. " / " .. MaxHP)
end
HP.Changed:Connect(OnChangedHP)
```

When the Changed event for the same value object is connected in the client, the corresponding process is triggered whenever the value changes.

```lua
local function OnChangedHP(newValue) 
    RefreshMonsterHpUI()
end
HP.Changed:Connect(OnChangedHP)
```

## Usage Examples

* When the player's HP changes on the server, the client detects the change in value and refreshes the HpBar UI accordingly.
* When the server processes a skill activation, the client detects the change in value and disables the skill button accordingly.
* When the server changes the active state of a certain object, the client detects the change in the value and displays the corresponding UI icon.
* When the server changes the player's state (e.g., stun, knock-out), the client detects the change in value and applies the effect on the screen.

## Important Notes

* To **prevent issues with loading time**, it is recommended to always use **repeat** or **WaitForChild()** when referencing values during initialization.
* Attributes and value objects only synchronize with the client when the **server changes its value**. However, if the client changes their value, it will not be synced with other clients or the server.
* This method is not suitable for handling complex structures or large-scale data, but it works well for **simple status values** or **individual pieces of information**.
* Excessive use of value objects can clutter the Level Browser, and make it difficult to analyze the structure. **Proper folder organization** and **naming conventions** are required.
* If the values change frequently, **excessive use** of the Changed event may impact performance. It is important to disconnect unnecessary connections using **Disconnect()**.
* **Sensitive values that must be secure** should only be stored in server-only areas, such as **ServerScriptService**, to prevent them from being exposed to the client.


# Input & Controls


# Mobile Input Handling

## Overview <a href="#overview" id="overview"></a>

ContextActionService helps effectively manage various input methods such as keyboard, mouse, and touch during gameplay, making it easy to implement context-sensitive interfaces. It allows you to manage player input conveniently and flexibly assign or remove actions based on the game’s context.

## Features <a href="#features" id="features"></a>

* Can handle multiple input devices such as **keyboards, mice, and touch** in the same way.
* Compatible with both **OVERDARE Studio** environments on PC and **mobile** platforms, simplifying input handling.
* Can enable only the necessary inputs depending on specific situations, such as menu screens or gameplay.
* Provides the ability to distinguish input states via **UserInputState**, allowing for detailed configuration of actions.

## How to Use <a href="#how-to-use" id="how-to-use"></a>

### 1. Creating an Action <a href="#creating-an-action" id="creating-an-action"></a>

You can create an action using the **BindAction function** in a LocalScript. When creating the action, you can specify the action’s name, whether to create a TouchButton, and the input key to be used on the PC.

```lua
local ContextActionService = game:GetService("ContextActionService")

local ActionName = "JumpAction"
local IsCreateTouchButton = true
local KeyCode = Enum.KeyCode.F

local function OnAction(actionName, inputState, inputObject)
    if inputState == Enum.UserInputState.Begin then
        print(actionName .. " triggered!")
    end
end
ContextActionService:BindAction(ActionName, OnAction, IsCreateTouchButton, KeyCode)
```

<figure><img src="/files/w2n3jXpHGIWzHE2KFQQR" alt=""><figcaption></figcaption></figure>

The created action can have its text, button image, and position set as follows.

```lua
ContextActionService:SetTitle(ActionName, "TEST")
ContextActionService:SetImage(ActionName, "ovdrassetid://1234")
ContextActionService:SetPosition(ActionName, UDim2.new(0.5, 0, 0.8, 0))
```

<figure><img src="https://stackedit.io/.gitbook/assets/image%20(1)%20(1)%20(1)%20(1)%20(1)%20(1)%20(1)%20(1)%20(1)%20(1)%20(1)%20(1)%20(1)%20(1)%20(1)%20(1)%20(1)%20(1)%20(1)%20(1).png" alt=""><figcaption></figcaption></figure>

### 2. Disabling an Action <a href="#disabling-an-action" id="disabling-an-action"></a>

When a specific action is no longer needed, such as disabling the attack button when entering a shop, you can deactivate it using the **UnbindAction function**.

```lua
local ContextActionService = game:GetService("ContextActionService")
local ActionName = "JumpAction"

ContextActionService:UnbindAction(ActionName)
```

### 3. Handling Input States <a href="#handling-input-states" id="handling-input-states"></a>

You can implement handling for different input states such as input begin, input change, and input end using **UserInputState**.

```lua
local function OnAction(actionName, inputState, inputObject)
    if inputState == Enum.UserInputState.Begin then
        print("Begin!")
        
    elseif inputState == Enum.UserInputState.Change then
        print("Change!")
        
    elseif inputState == Enum.UserInputState.End then
        print("End!")
        
    elseif inputState == Enum.UserInputState.Cancel then
        print("Cancel!")
    end
end
ContextActionService:BindAction(ActionName, OnAction, IsCreateTouchButton, KeyCode)
```

<table><thead><tr><th width="152">Type</th><th>Description</th></tr></thead><tbody><tr><td>Begin</td><td>When the input starts</td></tr><tr><td>Change</td><td>When the input is ongoing</td></tr><tr><td>End</td><td>When the input ends</td></tr><tr><td>Cancel</td><td>When the input is interrupted (e.g., when the input point moves out of the button area)</td></tr></tbody></table>

### 4. Retrieving a Specific Action <a href="#retrieving-a-specific-action" id="retrieving-a-specific-action"></a>

You can retrieve a specific button using the **GetButton function**.

```lua
local ActionButton = ContextActionService:GetButton(ActionName)
```

### 5. Retrieving All Created Actions <a href="#retrieving-all-created-actions" id="retrieving-all-created-actions"></a>

You can retrieve all buttons using the **GetAllBoundActionInfo function**.

```lua
local ContextActionService = game:GetService("ContextActionService")
local AllActions = ContextActionService:GetAllBoundActionInfo()

for actionName, actionInfo in pairs(AllActions) do
    print("Action Name : ", actionName)
    print("Input Types : ", actionInfo.InputTypes) 
end
```

## Default Input Handling

### Mobile Joystick, Jump Button Display Control

You can control the visibility of the mobile joystick and jump button using the **SetCoreGuiEnabled function**.

```lua
local StarterGui = game:GetService("StarterGui")

StarterGui:SetCoreGuiEnabled(Enum.CoreGuiType.Joystick, false)
StarterGui:SetCoreGuiEnabled(Enum.CoreGuiType.JumpButton, false)
```

### Mobile Screen Touch Detection <a href="#mobile-screen-touch-detection" id="mobile-screen-touch-detection"></a>

Use the **TouchStarted, TouchMoved, and TouchEnded** **events** to process touch start, movement, and end actions. In the function that connects these events, the input and \_gameProcessed variables are delivered as parameters.

* input: An object containing information related to the touch input point, status, location, etc.
* \_gameProcessed: Returns “true” if the input location overlaps with the UI elements specified below.
  * Native UI, such as the chat window
  * Basic control buttons, such as the joystick and jump button
  * GUI buttons for which “Active” is “true”
  * Actions bound to “BindAction”

```lua
local UserInputService = game:GetService("UserInputService")
local ActiveTouches = {} -- Table for individually processing multiple touch inputs that occur simultaneously

local function OnScreenTouchStart(input, _gameProcessed)
    local keyCode = input.KeyCode    
    if keyCode == Enum.KeyCode.Joystick then
        return
    end
    
    table.insert(ActiveTouches, input)
    
    local inputState = input.UserInputState -- Begin
    local inputType = input.UserInputType   -- Touch
    local delta = input.Delta
    local pos = input.Position    

    -- Do Something
end
UserInputService.TouchStarted:Connect(OnScreenTouchStart)

local function OnScreenTouchMove(input, _gameProcessed)
    local keyCode = input.KeyCode    
    if keyCode == Enum.KeyCode.Joystick then
        return
    end
        
    for i = 1, #ActiveTouches do
        -- Searches for touches that correspond to the current input among multiple touch inputs
        if input == ActiveTouches[i] then
            local inputState = input.UserInputState -- Change
            local inputType = input.UserInputType   -- Touch
            local delta = input.Delta
            local pos = input.Position            
            
            -- Do Something
        end
    end
end
UserInputService.TouchMoved:Connect(OnScreenTouchMove)

local function OnScreenTouchEnd(input, _gameProcessed)
    local keyCode = input.KeyCode    
    if keyCode == Enum.KeyCode.Joystick then
        return
    end

    local i
    for j = 1, #ActiveTouches do
        if input == ActiveTouches[j] then
            i = j
            break        
        end
    end
    
    local inputState = input.UserInputState -- End
    local inputType = input.UserInputType   -- Touch
    local delta = input.Delta
    local pos = input.Position 

    -- Do Something

    table.remove(ActiveTouches, i)
end
UserInputService.TouchEnded:Connect(OnScreenTouchEnd)
```

### Mobile Joystick Input Detection <a href="#mobile-joystick-input-detection" id="mobile-joystick-input-detection"></a>

```lua
local UserInputService = game:GetService("UserInputService")

local function OnJoystickStart(input, _gameProcessed)
    local keyCode = input.KeyCode
    if keyCode ~= Enum.KeyCode.Joystick then
        return
    end
    
    local inputState = input.UserInputState -- Begin
    local inputType = input.UserInputType   -- Touch     
    local delta = input.Delta
    local pos = input.Position
    
    -- Do Something
end
UserInputService.TouchStarted:Connect(OnJoystickStart)

local function OnJoystickMove(input, _gameProcessed)   
    local keyCode = input.KeyCode
    if keyCode ~= Enum.KeyCode.Joystick then
        return
    end
    
    local inputState = input.UserInputState -- Change
    local inputType = input.UserInputType   -- Touch 
    local delta = input.Delta
    local pos = input.Position
    
    -- Do Something
end
UserInputService.TouchMoved:Connect(OnJoystickMove)

local function OnJoystickEnd(input, _gameProcessed)   
    local keyCode = input.KeyCode    
    if keyCode ~= Enum.KeyCode.Joystick then
        return
    end
    
    local inputState = input.UserInputState -- Change
    local inputType = input.UserInputType   -- Touch 
    local delta = input.Delta
    local pos = input.Position
    
    -- Do Something
end
UserInputService.TouchEnded:Connect(OnJoystickEnd)
```


# TPS Strafing System

## Overview

The TPS Strafing System is a movement method commonly used in third-person shooter (TPS) games. In this system, the character moves relative to the camera’s direction. The torso stays aligned with the aiming point, while the lower body moves according to the player’s movement direction. This allows the upper and lower body animations to play independently, enabling more flexible aiming and movement control.

## How to Use

### Activate Use Strafing Animations

After selecting the players in the Level Browser, activate **Use Strafing Animations**.

<figure><img src="/files/H0vjkyNY7ZRHekWd8L7f" alt=""><figcaption></figcaption></figure>

When this option is deactivated, the **single movement animation** will play.

When this option is enabled, **animations will play in eight directions** (up, down, left, right, and diagonally) based on the character’s movement direction. This allows the character to move naturally in various directions, such as **strafing, reversing, and diagonal movement**.

<figure><img src="/files/YJhRffvyVHiW0GhRGlwk" alt=""><figcaption><p>Deactivate Use Strafing Animations</p></figcaption></figure>

<figure><img src="/files/kPRuZsIXBEsO7A39pazb" alt=""><figcaption><p>Activate Use Strafing Animations</p></figcaption></figure>

When only the Use Strafing Animations option is enabled, the difference may not be visually noticeable. This feature must be used in conjunction with the following settings to fully experience its effects.

### Set the character’s rotation direction based on the camera’s direction

Set the **RotationType** of UserGameSettings to **CameraRelative** so that the character rotates according to the direction of the camera.

(To restore existing settings, set it to Enum.RotationType.MovementRelative.)

In StarterCharacterScripts, write the following code for LocalScript:

<pre class="language-lua"><code class="lang-lua">local Players = game:GetService("Players")
local LocalPlayer = Players.LocalPlayer

repeat wait() until LocalPlayer.Character
local Character = LocalPlayer.Character
local Humanoid = Character:WaitForChild("Humanoid")

local UserGameSettings = UserSettings().GameSettings
<strong>UserGameSettings.RotationType = Enum.RotationType.CameraRelative
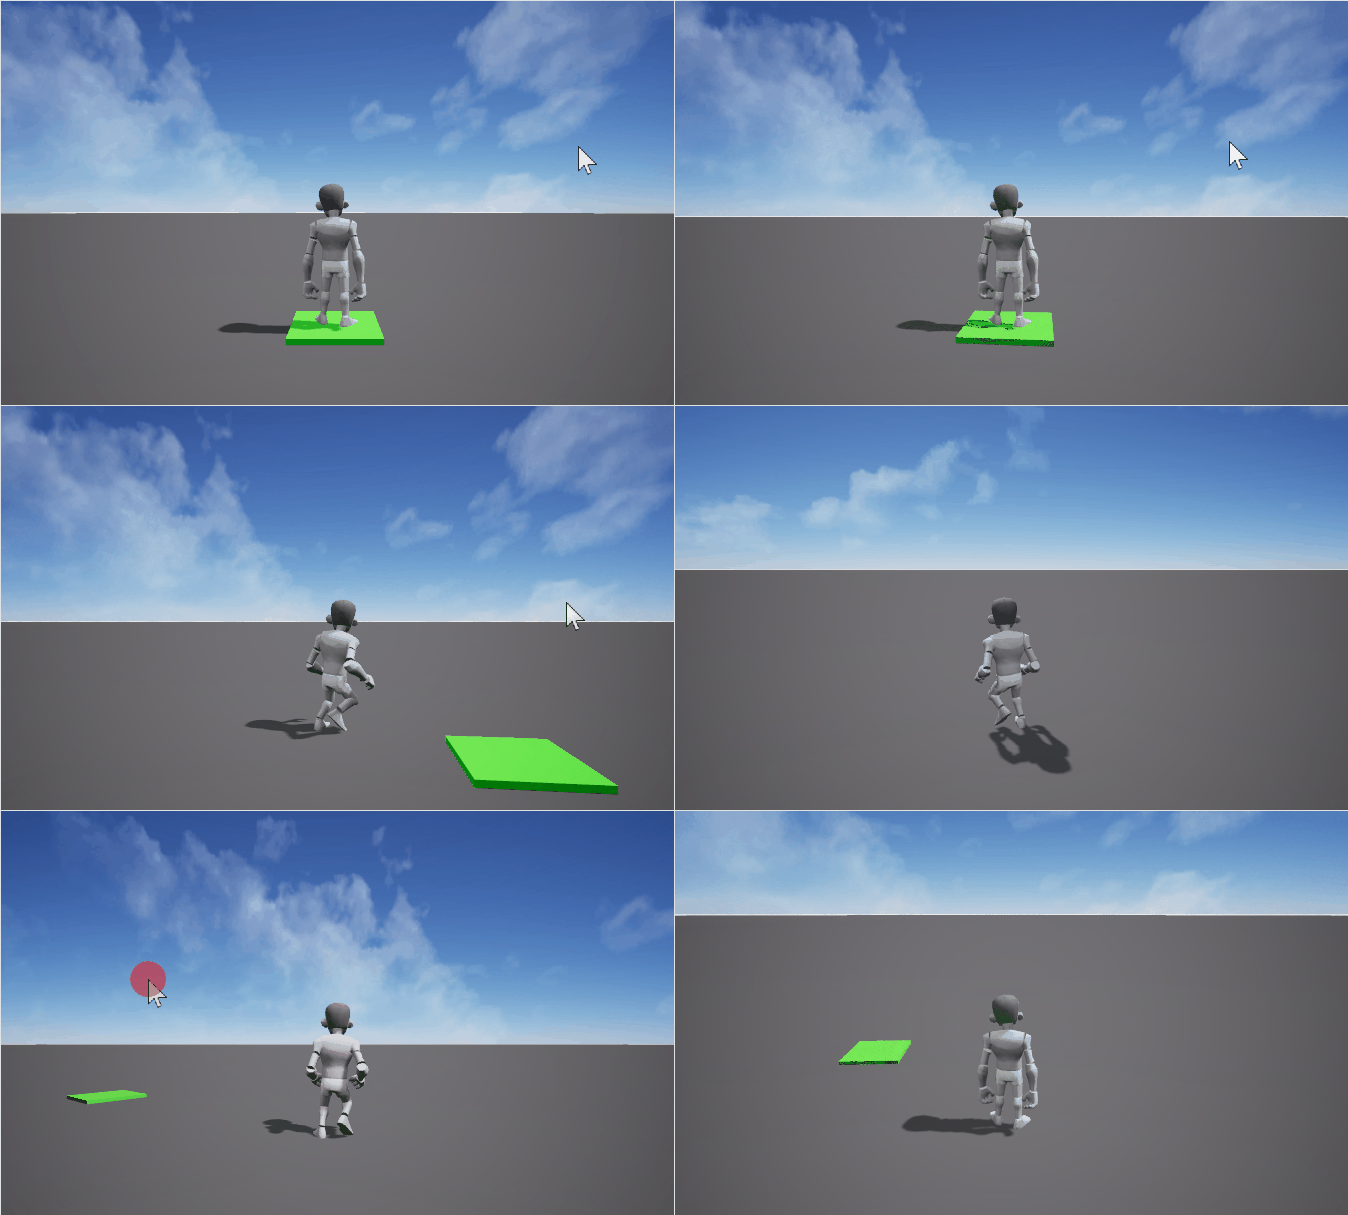
</strong></code></pre>

When the character’s rotation is set to follow the camera (CameraRelative) and the Use Strafing Animations option is enabled, the character will always face the direction of the camera. This setup allows the torso animation to align with the camera (aiming direction), while the lower body animations play independently based on the movement direction.

<figure><img src="/files/tajydcwQ9Hin7B9tHMCV" alt=""><figcaption></figcaption></figure>

If RotationType is set to CameraRelative, the character’s rotation speed based on the camera direction can be controlled using the **CharacterTurnRate** value.\
(The default value is -1, which means the character will rotate instantly.)

```lua
UserGameSettings.CharacterTurnRate = 200
```

### Apply Camera Offset

The camera’s relative position can be adjusted using the **CameraOffset** attribute. In TPS games, the character is typically positioned slightly off-center to prevent the character from overlapping with the aiming point on the screen.

In StarterCharacterScripts, write the following code for LocalScript:

```lua
local Workspace = game:GetService("Workspace")
local Camera = Workspace.CurrentCamera

Camera.CameraOffset = Vector3.new(90, 90, -120)
```

<figure><img src="/files/4tEcKGLUVMYzsSpHYAsV" alt=""><figcaption></figcaption></figure>

### Changing the Torso Animation

The character’s torso and lower body animations can be played separately, regardless of the Use Strafing Animations option. If the **UpperBodyAnimation** attribute is set to “True” in the animation track, the animation will apply only to the torso.

In StarterCharacterScripts, write the following code for LocalScript:

```lua
local Animation = Instance.new("Animation")
Animation.AnimationId = "BasicHandgunIdleAnimation"

local Animator = Humanoid:FindFirstChild("Animator")
local AnimationTrack = Animator:LoadAnimation(Animation)
AnimationTrack.UpperBodyAnimation = true
AnimationTrack.Priority = Enum.AnimationPriority.Movement 

AnimationTrack.Looped = true
AnimationTrack:Play()
```

When Use Strafing Animations and UpperBodyAnimation are used together, the torso follows the aiming direction while the lower body moves according to the movement direction, resulting in more natural and dynamic character animations.

<figure><img src="/files/qT1XmTbx0vCeLI1alvsw" alt=""><figcaption></figcaption></figure>

## Usage Examples

* RotationType settings according to whether a gun is equipped
  * When no gun is equipped, it is set to MovementRelative, and the default movement animations are played
  * When a gun is equipped, it switches to CameraRelative to lock the character’s vision
* RotationType settings according to whether or not the character is aiming when a projectile weapon is equipped
  * When the character is not aiming, it is set to MovementRelative, and the default movement animations are played
  * When the character is aiming, it switches to CameraRelative to lock the character’s vision
* CameraOffset is processed differently depending on the weapon type

## Strafing Animation Assets

Search for the **Asset Name** in the **Asset Store** to use animation packages.\
(Using the **Asset Id** allows direct use in scripts without placing it in the Level Browser.)

Learn How to Play Animations

{% content-ref url="/pages/YK5NZVV1FAIHbrQSOuHF" %}
[Character Animation](/manual/studio-manual/character/character-animation)
{% endcontent-ref %}

{% tabs %}
{% tab title="Basic" %}

<table><thead><tr><th width="215">Animation</th><th>Animation Id</th></tr></thead><tbody><tr><td><img src="/files/idPJOwuQE9Mm8OY8E4yY" alt=""></td><td><p>ovdrassetid://18426300</p><ul><li><p>Asset Name : BasicWalkAnimations</p><ul><li><p>BasicWalkForwardAnimation</p><ul><li>Duration: 1.13</li></ul></li></ul></li></ul></td></tr><tr><td><img src="/files/xhQyShnZ65pzGjnasKPn" alt=""></td><td><p>ovdrassetid://18429100</p><ul><li><p>Asset Name : BasicWalkAnimations</p><ul><li><p>BasicWalkLeftAnimation</p><ul><li>Duration: 1.13</li></ul></li></ul></li></ul></td></tr><tr><td><img src="/files/9cJ2Gb8vujwN7pHbEsUz" alt=""></td><td><p>ovdrassetid://18427600</p><ul><li><p>Asset Name : BasicWalkAnimations</p><ul><li><p>BasicWalkForwardLeftAnimation</p><ul><li>Duration: 1.13</li></ul></li></ul></li></ul></td></tr><tr><td><img src="/files/AT8Yq0solhPkm3INnsMs" alt=""></td><td><p>ovdrassetid://18428100</p><ul><li><p>Asset Name : BasicWalkAnimations</p><ul><li><p>BasicWalkForwardRightAnimation</p><ul><li>Duration: 1.13</li></ul></li></ul></li></ul></td></tr><tr><td><img src="/files/pPTr8RhfjXRIpzoTLziI" alt=""></td><td><p>ovdrassetid://18430100</p><ul><li><p>Asset Name : BasicWalkAnimations</p><ul><li><p>BasicWalkRightAnimation</p><ul><li>Duration: 1.13</li></ul></li></ul></li></ul></td></tr><tr><td><img src="/files/UCFKo88DEpMHZhFzJxt6" alt=""></td><td><p>ovdrassetid://18427200</p><ul><li><p>Asset Name : BasicWalkAnimations</p><ul><li><p>BasicWalkBackLeftAnimation</p><ul><li>Duration: 1.13</li></ul></li></ul></li></ul></td></tr><tr><td><img src="/files/Yr9WvGmWfZ3pN7hOSrUk" alt=""></td><td><p>ovdrassetid://18427400</p><ul><li><p>Asset Name : BasicWalkAnimations</p><ul><li><p>BasicWalkBackRightAnimation</p><ul><li>Duration: 1.13</li></ul></li></ul></li></ul></td></tr><tr><td><img src="/files/86oCJM7WBeiXQQHn0hzq" alt=""></td><td><p>BasicWalkBackAnimation</p><p>or</p><p>ovdrassetid://18426100</p><ul><li><p>Asset Name : BasicWalkAnimations</p><ul><li><p>BasicWalkBackAnimation</p><ul><li>Duration: 1.13</li></ul></li></ul></li></ul></td></tr><tr><td><img src="/files/QRsDuLeWqppQtjekuZvA" alt=""></td><td><p>ovdrassetid://18400100</p><ul><li><p>Asset Name : BasicAnimations</p><ul><li><p>BasicRunForwardAnimation</p><ul><li>Duration: 0.66</li></ul></li></ul></li></ul></td></tr><tr><td><img src="/files/Xw6NzhWj6EyNEeM1Lpis" alt=""></td><td><p>ovdrassetid://18402100</p><ul><li><p>Asset Name : BasicAnimations</p><ul><li><p>BasicRunLeftAnimation</p><ul><li>Duration: 0.66</li></ul></li></ul></li></ul></td></tr><tr><td><img src="/files/DZPGsHB84PBQZhF3RxEs" alt=""></td><td><p>ovdrassetid://18401200</p><ul><li><p>Asset Name : BasicAnimations</p><ul><li><p>BasicRunForwardLeftAnimation</p><ul><li>Duration: 0.66</li></ul></li></ul></li></ul></td></tr><tr><td><img src="/files/VFvO4mCDnLw4xB1rdgIu" alt=""></td><td><p>ovdrassetid://18403200</p><ul><li><p>Asset Name : BasicAnimations</p><ul><li><p>BasicRunForwardRightAnimation</p><ul><li>Duration: 0.66</li></ul></li></ul></li></ul></td></tr><tr><td><img src="/files/P6L09cI9MSle0cXYsDkG" alt=""></td><td><p>ovdrassetid://18406100</p><ul><li><p>Asset Name : BasicAnimations</p><ul><li><p>BasicRunRightAnimation</p><ul><li>Duration: 0.66</li></ul></li></ul></li></ul></td></tr><tr><td><img src="/files/UwsNBBM0xg9Apa2c9mbS" alt=""></td><td><p>ovdrassetid://18408100</p><ul><li><p>Asset Name : BasicAnimations</p><ul><li><p>BasicRunBackLeftAnimation</p><ul><li>Duration: 0.66</li></ul></li></ul></li></ul></td></tr><tr><td><img src="/files/0UZSD3hJxTS5vxfs4RgV" alt=""></td><td><p>ovdrassetid://18409100</p><ul><li><p>Asset Name : BasicAnimations</p><ul><li><p>BasicRunBackRightAnimation</p><ul><li>Duration: 0.66</li></ul></li></ul></li></ul></td></tr><tr><td><img src="/files/v9jA0l2VjYDTQmhVx0IO" alt=""></td><td><p>ovdrassetid://18406200</p><ul><li><p>Asset Name : BasicAnimations</p><ul><li><p>BasicRunBackAnimation</p><ul><li>Duration: 0.66</li></ul></li></ul></li></ul></td></tr></tbody></table>
{% endtab %}

{% tab title="Melee" %}

<table><thead><tr><th width="215">Animation</th><th>Animation Id</th></tr></thead><tbody><tr><td><img src="/files/UDnmAoxGpYsQau3I6sCV" alt=""></td><td><p>ovdrassetid://18497100</p><ul><li><p>Asset Name : MeleeMovingAnimations</p><ul><li><p>MeleeWalkFowardAnimation</p><ul><li>Duration: 1.13</li></ul></li></ul></li></ul></td></tr><tr><td><img src="/files/hPrX3pWSDx8XePOeMwkO" alt=""></td><td><p>ovdrassetid://18491200</p><ul><li><p>Asset Name : MeleeMovingAnimations</p><ul><li><p>MeleeWalkLeftFowardAnimation</p><ul><li>Duration: 1.13</li></ul></li></ul></li></ul></td></tr><tr><td><img src="/files/6yKTrC87TG7pOyngytvp" alt=""></td><td><p>ovdrassetid://18496400</p><ul><li><p>Asset Name : MeleeMovingAnimations</p><ul><li><p>MeleeWalkRightFowardAnimation</p><ul><li>Duration: 1.13</li></ul></li></ul></li></ul></td></tr><tr><td><img src="/files/kOcn05A5S13g3OJtySCD" alt=""></td><td><p>ovdrassetid://18500100</p><ul><li><p>Asset Name : MeleeMovingAnimations</p><ul><li><p>MeleeWalkLeftAnimation</p><ul><li>Duration: 1.13</li></ul></li></ul></li></ul></td></tr><tr><td><img src="/files/gVnoSlTJU4Z9Pin7i1mY" alt=""></td><td><p>ovdrassetid://18493100</p><ul><li><p>Asset Name : MeleeMovingAnimations</p><ul><li><p>MeleeWalkRightAnimation</p><ul><li>Duration: 1.13</li></ul></li></ul></li></ul></td></tr><tr><td><img src="/files/y14hbQhb9vcbdYyjyhmn" alt=""></td><td><p>ovdrassetid://18494200</p><ul><li><p>Asset Name : MeleeMovingAnimations</p><ul><li><p>MeleeWalkBackAnimation</p><ul><li>Duration: 1.13</li></ul></li></ul></li></ul></td></tr><tr><td><img src="/files/bQ5DEq9IsgB3Stt4d9kp" alt=""></td><td><p>ovdrassetid://18489300</p><ul><li><p>Asset Name : MeleeMovingAnimations</p><ul><li><p>MeleeWalkLeftBackAnimation</p><ul><li>Duration: 1.13</li></ul></li></ul></li></ul></td></tr><tr><td><img src="/files/FN1kRaH3sPWzaiwBo9PN" alt=""></td><td><p>ovdrassetid://18487100</p><ul><li><p>Asset Name : MeleeMovingAnimations</p><ul><li><p>MeleeWalkRightBackAnimation</p><ul><li>Duration: 1.13</li></ul></li></ul></li></ul></td></tr><tr><td><img src="/files/RRb31EB4te7aVOVylpj2" alt=""></td><td><p>ovdrassetid://18495100</p><ul><li><p>Asset Name : MeleeMovingAnimations</p><ul><li><p>MeleeRunFowardAnimation</p><ul><li>Duration: 0.66</li></ul></li></ul></li></ul></td></tr><tr><td><img src="/files/qfaGnMpKuftzoUSXKh2p" alt=""></td><td><p>ovdrassetid://18489400</p><ul><li><p>Asset Name : MeleeMovingAnimations</p><ul><li><p>MeleeRunLeftFowardAnimation</p><ul><li>Duration: 0.66</li></ul></li></ul></li></ul></td></tr><tr><td><img src="/files/P8peBvv9vLiLiNd3ZIrO" alt=""></td><td><p>ovdrassetid://18496100</p><ul><li><p>Asset Name : MeleeMovingAnimations</p><ul><li><p>MeleeRunRightFowardAnimation</p><ul><li>Duration: 0.66</li></ul></li></ul></li></ul></td></tr><tr><td><img src="/files/OE645W0hQ0oruw61clPg" alt=""></td><td><p>ovdrassetid://18487300</p><ul><li><p>Asset Name : MeleeMovingAnimations</p><ul><li><p>MeleeRunLeftAnimation</p><ul><li>Duration: 0.66</li></ul></li></ul></li></ul></td></tr><tr><td><img src="/files/9H98oWLmOmTrtVYsAjV9" alt=""></td><td><p>ovdrassetid://18490100</p><ul><li><p>Asset Name : MeleeMovingAnimations</p><ul><li><p>MeleeRunRightAnimation</p><ul><li>Duration: 0.66</li></ul></li></ul></li></ul></td></tr><tr><td><img src="/files/Meip4mO1kpNSoHUXAdzB" alt=""></td><td><p>ovdrassetid://18486100</p><ul><li><p>Asset Name : MeleeMovingAnimations</p><ul><li><p>MeleeRunBackAnimation</p><ul><li>Duration: 0.66</li></ul></li></ul></li></ul></td></tr><tr><td><img src="/files/QXLV9p6YpORJ3i2lNn54" alt=""></td><td><p>ovdrassetid://18486300</p><ul><li><p>Asset Name : MeleeMovingAnimations</p><ul><li><p>MeleeRunLeftBackAnimation</p><ul><li>Duration: 0.66</li></ul></li></ul></li></ul></td></tr><tr><td><img src="/files/6ShN0Q0mRL0Q2LnnJfc6" alt=""></td><td><p>ovdrassetid://18490200</p><ul><li><p>Asset Name : MeleeMovingAnimations</p><ul><li><p>MeleeRunRightBackAnimation</p><ul><li>Duration: 0.66</li></ul></li></ul></li></ul></td></tr></tbody></table>
{% endtab %}

{% tab title="Handgun" %}

<table><thead><tr><th width="215">Animation</th><th>Animation Id</th></tr></thead><tbody><tr><td><img src="/files/ak5hNEjwVUJZvYBPv4hg" alt=""></td><td><p>ovdrassetid://18580200</p><ul><li><p>Asset Name : HandgunMovingAnimations</p><ul><li><p>HandgunWalkFowardAnimation</p><ul><li>Duration: 1.13</li></ul></li></ul></li></ul></td></tr><tr><td><img src="/files/y51l4iCWVCpYikNZsM2s" alt=""></td><td><p>ovdrassetid://18585500</p><ul><li><p>Asset Name : HandgunMovingAnimations</p><ul><li><p>HandgunWalkLeftFowardAnimation</p><ul><li>Duration: 1.13</li></ul></li></ul></li></ul></td></tr><tr><td><img src="/files/SVTZZEAAHjCPnyC9ZUfX" alt=""></td><td><p>ovdrassetid://18587200</p><ul><li><p>Asset Name : HandgunMovingAnimations</p><ul><li><p>HandgunWalkRightFowardAnimation</p><ul><li>Duration: 1.13</li></ul></li></ul></li></ul></td></tr><tr><td><img src="/files/5tdiMQuv64a0t1XAy6Ow" alt=""></td><td><p>ovdrassetid://18585300</p><ul><li><p>Asset Name : HandgunMovingAnimations</p><ul><li><p>HandgunWalkLeftAnimation</p><ul><li>Duration: 1.13</li></ul></li></ul></li></ul></td></tr><tr><td><img src="/files/uD40fo9Y0JKXVhPrwZtn" alt=""></td><td><p>ovdrassetid://18582100</p><ul><li><p>Asset Name : HandgunMovingAnimations</p><ul><li><p>HandgunWalkRightAnimation</p><ul><li>Duration: 1.13</li></ul></li></ul></li></ul></td></tr><tr><td><img src="/files/AWflaoq9oCbZYFwZfvlv" alt=""></td><td><p>ovdrassetid://18574100</p><ul><li><p>Asset Name : HandgunMovingAnimations</p><ul><li><p>HandgunWalkBackAnimation</p><ul><li>Duration: 1.13</li></ul></li></ul></li></ul></td></tr><tr><td><img src="/files/ib6wziNvzpyETWwYobv1" alt=""></td><td><p>ovdrassetid://18583100</p><ul><li><p>Asset Name : HandgunMovingAnimations</p><ul><li><p>HandgunWalkLeftBackAnimation</p><ul><li>Duration: 1.13</li></ul></li></ul></li></ul></td></tr><tr><td><img src="/files/3JejnHxaO60jOrD00aoK" alt=""></td><td><p>ovdrassetid://18589100</p><ul><li><p>Asset Name : HandgunMovingAnimations</p><ul><li><p>HandgunWalkRightBackAnimation</p><ul><li>Duration: 1.13</li></ul></li></ul></li></ul></td></tr><tr><td><img src="/files/JhJXp3c5AJeDNX5xRsOP" alt=""></td><td><p>ovdrassetid://18586100</p><ul><li><p>Asset Name : HandgunMovingAnimations</p><ul><li><p>HandgunRunFowardAnimation</p><ul><li>Duration: 0.66</li></ul></li></ul></li></ul></td></tr><tr><td><img src="/files/y0FankTyoRzZ1lmgW6Sl" alt=""></td><td><p>ovdrassetid://18585100</p><ul><li><p>Asset Name : HandgunMovingAnimations</p><ul><li><p>HandgunRunLeftFowardAnimation</p><ul><li>Duration: 0.66</li></ul></li></ul></li></ul></td></tr><tr><td><img src="/files/asbU6QWgcZ1uuilUOHGr" alt=""></td><td><p>ovdrassetid://18580100</p><ul><li><p>Asset Name : HandgunMovingAnimations</p><ul><li><p>HandgunRunRightFowardAnimation</p><ul><li>Duration: 0.66</li></ul></li></ul></li></ul></td></tr><tr><td><img src="/files/xOKQfsGFc7MiqDzb2Esv" alt=""></td><td><p>ovdrassetid://18581100</p><ul><li><p>Asset Name : HandgunMovingAnimations</p><ul><li><p>HandgunRunLeftAnimation</p><ul><li>Duration: 0.66</li></ul></li></ul></li></ul></td></tr><tr><td><img src="/files/psVynXRZR4DSrliAU3XB" alt=""></td><td><p>ovdrassetid://18577100</p><ul><li><p>Asset Name : HandgunMovingAnimations</p><ul><li><p>HandgunRunRightAnimation</p><ul><li>Duration: 0.66</li></ul></li></ul></li></ul></td></tr><tr><td><img src="/files/WDOt2B1VB0HzuPOYTEFt" alt=""></td><td><p>ovdrassetid://18578100</p><ul><li><p>Asset Name : HandgunMovingAnimations</p><ul><li><p>HandgunRunBackAnimation</p><ul><li>Duration: 0.66</li></ul></li></ul></li></ul></td></tr><tr><td><img src="/files/D58WMBmshtzgbtEFf6mQ" alt=""></td><td><p>ovdrassetid://18576100</p><ul><li><p>Asset Name : HandgunMovingAnimations</p><ul><li><p>HandgunRunLeftBackAnimation</p><ul><li>Duration: 0.66</li></ul></li></ul></li></ul></td></tr><tr><td><img src="/files/sgHd1xDHWttMWSiHO7Pk" alt=""></td><td><p>ovdrassetid://18588100</p><ul><li><p>Asset Name : HandgunMovingAnimations</p><ul><li><p>HandgunRunRightBackAnimation</p><ul><li>Duration: 0.66</li></ul></li></ul></li></ul></td></tr></tbody></table>
{% endtab %}

{% tab title="Rifle" %}

<table><thead><tr><th width="215">Animation</th><th>Animation Id</th></tr></thead><tbody><tr><td><img src="/files/XoMUPP4Bfq61qBQOjRr7" alt=""></td><td><p>ovdrassetid://18618100</p><ul><li><p>Asset Name : RifleRunFowardAnimation</p><ul><li><p>RifleWalkFowardAnimation</p><ul><li>Duration: 1.13</li></ul></li></ul></li></ul></td></tr><tr><td><img src="/files/22XJE6As8esnJzSKHwVL" alt=""></td><td><p>ovdrassetid://18619100</p><ul><li><p>Asset Name : RifleRunFowardAnimation</p><ul><li><p>RifleWalkLeftFowardAnimation</p><ul><li>Duration: 1.13</li></ul></li></ul></li></ul></td></tr><tr><td><img src="/files/ZXrN88PZvWMJrV15CI5B" alt=""></td><td><p>ovdrassetid://18632200</p><ul><li><p>Asset Name : RifleRunFowardAnimation</p><ul><li><p>RifleWalkRightFowardAnimation</p><ul><li>Duration: 1.13</li></ul></li></ul></li></ul></td></tr><tr><td><img src="/files/btl71QEYTB9vtI95dXR0" alt=""></td><td><p>ovdrassetid://18626100</p><ul><li><p>Asset Name : RifleRunFowardAnimation</p><ul><li><p>RifleWalkLeftAnimation</p><ul><li>Duration: 1.13</li></ul></li></ul></li></ul></td></tr><tr><td><img src="/files/tedVgzk3bFF7NUaOVRCG" alt=""></td><td><p>ovdrassetid://18635600</p><ul><li><p>Asset Name : RifleRunFowardAnimation</p><ul><li><p>RifleWalkRightAnimation</p><ul><li>Duration: 1.13</li></ul></li></ul></li></ul></td></tr><tr><td><img src="/files/ltO0frA2iuF3MzUzqu39" alt=""></td><td><p>ovdrassetid://18621100</p><ul><li><p>Asset Name : RifleRunFowardAnimation</p><ul><li><p>RifleWalkBackAnimation</p><ul><li>Duration: 1.13</li></ul></li></ul></li></ul></td></tr><tr><td><img src="/files/1RxD7BLjXWzE7765suGx" alt=""></td><td><p>ovdrassetid://18624100</p><ul><li><p>Asset Name : RifleRunFowardAnimation</p><ul><li><p>RifleWalkLeftBackAnimation</p><ul><li>Duration: 1.13</li></ul></li></ul></li></ul></td></tr><tr><td><img src="/files/yO9BqXhA6vePV7iABkl6" alt=""></td><td><p>ovdrassetid://18628800</p><ul><li><p>Asset Name : RifleRunFowardAnimation</p><ul><li><p>RifleWalkRightBackAnimation</p><ul><li>Duration: 1.13</li></ul></li></ul></li></ul></td></tr><tr><td><img src="/files/xcQ98dpQxMlIh6xmQjw9" alt=""></td><td><p>ovdrassetid://18631100</p><ul><li><p>Asset Name : RifleRunFowardAnimation</p><ul><li><p>RifleRunFowardAnimation</p><ul><li>Duration: 0.66</li></ul></li></ul></li></ul></td></tr><tr><td><img src="/files/Vu6LbBQZ6PHqsy9QwgSV" alt=""></td><td><p>ovdrassetid://18637100</p><ul><li><p>Asset Name : RifleRunFowardAnimation</p><ul><li><p>RifleRunLeftFowardAnimation</p><ul><li>Duration: 0.66</li></ul></li></ul></li></ul></td></tr><tr><td><img src="/files/4yNz3MkmtbtbAsCCmbHw" alt=""></td><td><p>ovdrassetid://18619200</p><ul><li><p>Asset Name : RifleRunFowardAnimation</p><ul><li><p>RifleRunRightFowardAnimation</p><ul><li>Duration: 0.66</li></ul></li></ul></li></ul></td></tr><tr><td><img src="/files/4bzyJw9oRQImI8zfbhrl" alt=""></td><td><p>ovdrassetid://18638100</p><ul><li><p>Asset Name : RifleRunFowardAnimation</p><ul><li><p>RifleRunLeftAnimation</p><ul><li>Duration: 0.66</li></ul></li></ul></li></ul></td></tr><tr><td><img src="/files/nItL5w7s1NBV2r6f4s4X" alt=""></td><td><p>ovdrassetid://18629600</p><ul><li><p>Asset Name : RifleRunFowardAnimation</p><ul><li><p>RifleRunRightAnimation</p><ul><li>Duration: 0.66</li></ul></li></ul></li></ul></td></tr><tr><td><img src="/files/yxHRW2jaOVNTwwg7hj8m" alt=""></td><td><p>ovdrassetid://18622100</p><ul><li><p>Asset Name : RifleRunFowardAnimation</p><ul><li><p>RifleRunBackAnimation</p><ul><li>Duration: 0.66</li></ul></li></ul></li></ul></td></tr><tr><td><img src="/files/gfZryCi4IZlAb3TtU3dv" alt=""></td><td><p>ovdrassetid://18633100</p><ul><li><p>Asset Name : RifleRunFowardAnimation</p><ul><li><p>RifleRunLeftBackAnimation</p><ul><li>Duration: 0.66</li></ul></li></ul></li></ul></td></tr><tr><td><img src="/files/nrnzt4sKQFTzbC4YUKAC" alt=""></td><td><p>ovdrassetid://18627200</p><ul><li><p>Asset Name : RifleRunFowardAnimation</p><ul><li><p>RifleRunRightBackAnimation</p><ul><li>Duration: 0.66</li></ul></li></ul></li></ul></td></tr></tbody></table>
{% endtab %}
{% endtabs %}


# Advanced Gameplay Systems


# Saving & Loading Data

## Overview

Use DataStore to save and retrieve core data, such as the player’s level, EXP, and current gold. This allows you to maintain the player’s progress over time and develop games with growth mechanics, such as in RPGs.

## How to Use

### Supported Data Types

<table><thead><tr><th width="146.66668701171875">Data Type</th><th>Supported O/X</th></tr></thead><tbody><tr><td>number</td><td>O</td></tr><tr><td>string</td><td>O</td></tr><tr><td>bool</td><td>O</td></tr><tr><td>table</td><td>O</td></tr><tr><td>object</td><td>Not supported.</td></tr><tr><td>Functions</td><td>Not supported.</td></tr></tbody></table>

### Default Structure

Use the GetDataStore function of DataStoreService to retrieve DataStore objects with a designated name. You can save or retrieve data using a **key-value format** within the DataStore object.

* **Key**: Unique name that identifies data (e.g. PlayerGold)
* **Value**: Data to be saved (e.g. 1,000)

Additionally, you can store additional information for the key:

* **UserIds (Array)**: A list of UserIds related to the data.
* **Metadata (Table)**: Additional metadata information to be stored.

These two additional fields can be retrieved using **DataStoreKeyInfo**.

```lua
local DataStoreService = game:GetService("DataStoreService") 
local GoldStore = DataStoreService:GetDataStore("PlayerGold")

local function LoadMetadata(player)
    local success, errorMessageOrLoadValue, keyInfo = pcall(function()
       -- Key : PlayerName
        return GoldStore:GetAsync(player.UserId)
    end)

    if not success then
        print("errorMessage : ", errorMessageOrLoadValue)
    else
        local loadValue = errorMessageOrLoadValue
        local userIds = keyInfo:GetUserIds()
        local metadata = keyInfo:GetMetadata()
        print(player.Name, "Load PlayerGold : ", loadValue)
        print(" - UserIds : ", table.concat(userIds, ", "))
        print(" - Metadata: ", metadata)
    end
end
```

<table><thead><tr><th width="210.6666259765625">Function</th><th>Description</th></tr></thead><tbody><tr><td>GetDataStore(name)</td><td>Retrieve Datastore object that corresponds to the name</td></tr><tr><td>GetAsync(key)</td><td>Retrieve data that corresponds to the key in the Datastore object</td></tr><tr><td>SetAsync(key, value)</td><td>Save (overwrite) data in the key in the Datastore object</td></tr><tr><td>IncrementAsync(key, delta, userIds<em>(*optional)</em>, datastoreSetOption<em>(*optional)</em>)</td><td>Increases/Decreases the data corresponding to the key in the Datastore object (only works for number type data)</td></tr><tr><td>UpdateAsync(key, callback)</td><td>Updates the data corresponding to the key in the Datastore object through the callback</td></tr><tr><td>RemoveAsync(key)</td><td>Deletes the data corresponding to the key in the Datastore object</td></tr></tbody></table>

### Data Store Retrieval

```lua
local DataStoreService = game:GetService("DataStoreService") 
local GoldStore = DataStoreService:GetDataStore("PlayerGold") 
```

### Saving

```lua
local function SaveData(player)
    local success, errorMessageOrLoadValue = pcall(function()
        local saveValue = 1 
        
        -- Key : PlayerName / Value : SaveValue
        GoldStore:SetAsync(player.UserId, saveValue) 
    end)

    if not success then
        print("errorMessage : ", errorMessageOrLoadValue)
    end
end
```

### Retrieving

```lua
local function LoadData(player)
    local success, errorMessageOrLoadValue = pcall(function()
       -- Key : PlayerName
        return GoldStore:GetAsync(player.UserId)
    end)

    if not success then
        print("errorMessage : ", errorMessageOrLoadValue)
    else
        local loadValue = errorMessageOrLoadValue
        print(player.Name, "Load PlayerGold : ", loadValue)
    end
end
```

### Updating

When using DataStore to save player data, simply relying on GetAsync and SetAsync can lead to **race conditions** when multiple users are reading and writing data simultaneously. This can result in one user’s saved value being overwritten by another user’s save request, or data loss occurring in some cases.

For example, while fetching a value with GetAsync and processing it, if another event or server call triggers SetAsync and updates the value, there is no way to verify if the value was updated during processing. As a result, the value calculated based on the outdated value could **overwrite** the most recent update, causing the previous changes to be lost.

To prevent such race conditions and ensure data integrity, a more secure data handling approach is required.

#### IncrementAsync

For cases where you simply need to increase (or decrease) a numerical value, IncrementAsync can be used. IncrementAsync supports atomic operations internally, ensuring that multiple users can safely increment the value simultaneously without data conflicts. Therefore, for **number data** that requires simple accumulation, such as coins, experience points, or scores, IncrementAsync is the simplest and most efficient choice.

```lua
local function IncrementGold(player, delta)
    local success, errorMessageOrLoadValue = pcall(function()
        return GoldStore:IncrementAsync(player.UserId, delta)
    end)
    
    if not success then
        print("errorMessage : ", errorMessageOrLoadValue)
    else
        local loadValue = errorMessageOrLoadValue
        print(player.Name, "Load PlayerGold : ", loadValue)
    end
end
```

#### UpdateAsync

However, IncrementAsync is only valid for numeric data types and cannot handle more complex data updates such as multiplication, division, or other conditional logic.

The UpdateAsync function is designed to atomically handle the process of reading, modifying, and saving values in the DataStore. This ensures that even in concurrent access situations, the value can be updated reliably without data loss.

UpdateAsync takes a **callback function** as an argument, passes the currently stored value to the callback, and then saves the value returned by the callback to the DataStore. If multiple requests come in simultaneously and a data conflict occurs, UpdateAsync automatically fetches the latest value and reruns the callback to resolve the conflict. This process repeats until the data is safely updated.

The callback function enables ACID (Atomicity, Consistency, Isolation, Durability) handling, ensuring the stability and integrity of the data transaction. Based on the returned value, the actual application of the update can be determined. For example, if the callback returns nil, the update will be canceled. This functionality allows for the implementation of conditional data updates, integrity checks, and other complex logic.

```lua
local function UpdateGold(player, delta)
    local success, errorMessageOrLoadValue, keyInfo = pcall(function()
        return GoldStore:UpdateAsync(player.UserId, function(currentGold, keyInfo)
            local newGold = (currentGold or 0) + delta		
            return { newGold, keyInfo:GetUserIds(), keyInfo:GetMetadata() }
        end)
    end)
    
    if not success then
        print("errorMessage : ", errorMessageOrLoadValue)
    else
        local loadValue = errorMessageOrLoadValue
        print(player.Name, "Load PlayerGold : ", loadValue)
    end
end
```

### Deleting Data

```lua
local function RemoveData(player)
    local success, errorMessage = pcall(function()
        GoldStore:RemoveAsync(player.UserId)
    end)
    
    if not success then
        print("errorMessage : ", errorMessage)
    end
end
```

## Full Code Example

The following code retrieves data stored on the server **when a player enters the game**. If no saved value is found, the **initial value** is set, and this value is assigned as the player’s Attribute.

When the **save function** is called, the current value of the Attribute is saved to the server.

```lua
DataManager = {}

local Players = game:GetService("Players") 
local DataStoreService = game:GetService("DataStoreService") 

-- Definition of various data types that are saved or retrieved
local PlayerData =
{
    { Name = "PlayerGold", InitValue = 0, Store = nil },
}

for i = 1, #PlayerData do
    PlayerData[i].Store = DataStoreService:GetDataStore(PlayerData[i].Name) 
end

--------------------------------------------------------
-- Saves the current value to the server
function DataManager:SavePlayerData(player)
    repeat wait() until player:GetAttribute("IsDataLoaded")    
    
    print(player, "> SavePlayerData")        
    
    local text = ">>>> Save : "
    
    for i = 1, #PlayerData do
        local playerData = PlayerData[i]
        local store = playerData.Store        
        
        local success, errorMessageOrLoadValue = pcall(function()
            -- Reads the player's Attribute value and saves it to the server.
            local currentValue = player:GetAttribute(playerData.Name)
            
            store:SetAsync(player.UserId, currentValue) 
            
            return currentValue
        end)
    
        if not success then
            text = text .. "errorMessage : " .. errorMessageOrLoadValue
        else
            local loadValue = errorMessageOrLoadValue
            
            if i > 1 then
                text = text .. ", "
            end
            text = text .. player.Name .. " / Save " .. playerData.Name .. " : " .. tostring(loadValue)
        end
    end
            
    print(player, text)
end
-- Automatically saves when the player exits the game.
Players.PlayerRemoving:Connect(function(player) DataManager:SavePlayerData(player) end)

--------------------------------------------------------
-- Retrieves the value saved in the server.
function DataManager:LoadPlayerData(player)
    print(player, "> LoadPlayerData")    
    
    local text = ">>>> Load : "    
    
    for i = 1, #PlayerData do
        local playerData = PlayerData[i]
        local store = playerData.Store        
        
        local success, errorMessageOrLoadValue = pcall(function()            
            return store:GetAsync(player.UserId)
        end)
    
        if not success then
            text = text .. "errorMessage : " .. errorMessageOrLoadValue
        else
            local loadValue = errorMessageOrLoadValue
            
            -- If no saved value exists, the initial value (InitValue) is set and saved to the server.
            if loadValue == nil then      
                loadValue = playerData.InitValue    
                            
                store:SetAsync(player.UserId, loadValue) 
            end    
            
            -- The retrieved value is set as the player's Attribute
            player:SetAttribute(playerData.Name, loadValue)
            
            if i > 1 then
                text = text .. ", "
            end
            text = text .. player.Name .. " / Load " .. playerData.Name .. " : " .. tostring(loadValue)
        end
    end
    
    player:SetAttribute("IsDataLoaded", true)
    
    print(player, text)
end

--------------------------------------------------------
-- Retrieves data when the player enters the game.
local function LoadPlayerDataWhenEnter(player)
    local function onAddCharacter(character)
        print(player.Name ..  " LoadPlayerDataWhenEnter")    
        
        DataManager:LoadPlayerData(player)    
    end
    player.CharacterAdded:Connect(onAddCharacter)    
end
Players.PlayerAdded:Connect(LoadPlayerDataWhenEnter)

--------------------------------------------------------
-- Example of data retrieval
local function LoadExample(player)
    DataManager:LoadPlayerData(player)
end

-- Example of saving data
local function SaveExample(player)        
    -- Example code that changes the value prior to saving
    for i = 1, #PlayerData do
        local playerData = PlayerData[i]
        
        local currentValue = player:GetAttribute(playerData.Name)         
        
        if currentValue ~= nil then
            local newValue = currentValue + 1
            
            player:SetAttribute(playerData.Name, newValue) 
        end
    end        
    
    DataManager:SavePlayerData(player)
end
```

* **LoadPlayerDataWhenEnter(player)**
  * Load when the player logs in to the game\\
* **DataManager:LoadPlayerData(player)**
  * Retrieves player data saved in the server (GetAsync)
    * If no saved value exists, the **initial value (InitValue)** is set and saved to the server.
    * The retrieved value is set as the player’s Attribute\\
* **DataManager:SavePlayerData(player)**
  * Reads the player’s Attribute value and saves it to the server (SetAsync)
  * Automatically saves when the player exits the game through the PlayerRemoving event.

## Usage Example

When saving or retrieving data from DataStore, you can manage both individual user data and **global game data** depending on how the **key value is structured**.

For example, if the key is set up as “RaceGameLeaderBoard” instead of “[Player.Name](http://player.name/),” you can **manage ranking information stored on the server** rather than data specific to an individual player.

This approach allows you to save and retrieve **game data across all areas**, such as leaderboards, event progress, server settings, etc.

## Difference Between Actions in Published and Test Environments

After publishing, data is saved and retrieved on the live server in mobile environments. However, in studio test environments, data is temporarily stored locally. When the studio session ends, this local data is automatically deleted.

## Important Notes

* If the player starts playing the game before the data is fully loaded, an error may occur. To prevent this, display a loading UI until the data has finished loading.
* Design the data to be saved in a structure that is as compact and simple as possible.
* Excessive requests can lead to data save failures, so avoid making repeated saves within a short time frame.
  * API retrieval cannot exceed 150 requests per minute. Exceeding this limit may result in restrictions on the server.
* If the game unexpectedly ends or there is a server collision, data may be lost. To prevent this, ensure that data is saved periodically.
* Saving and retrieval may fail, so use pcall to prevent errors and add a retry logic.


# Tween

## Overview <a href="#overview" id="overview"></a>

Tween is used to smoothly and naturally change the properties of an object. By using Tween, various properties such as the object’s position, rotation, and size can be animated, adding immersive and rich visual effects to the game.

## Features <a href="#features" id="features"></a>

* Tweens excel in both code simplicity and performance, helping to easily implement various effects.
* Tweens support various **Easing styles**, providing smooth and natural animations.
* Tweens are processed internally in an efficient manner, and their performance overhead is lower compared to frame-by-frame updates.
* Tweens automatically terminate once completed, and subsequent tasks can be easily handled in **the Completed event**.

## Components <a href="#components" id="components"></a>

* **TweenService**: The service used to create and manage tweens.
* **TweenInfo**: An object that defines how the tween behaves, including settings for duration, direction, and repeat count.
* **TweenGoals**: Defines the property values to be changed by the tween.

## How to Use <a href="#how-to-use" id="how-to-use"></a>

### 1. Creating a Tween <a href="#creating-a-tween" id="creating-a-tween"></a>

You can define the behavior of a tween animation, such as its duration, easing style, and repeat count, using the **TweenInfo.new function**.

The properties to which the animation will be applied, such as the object’s position or rotation, are set in the **TweenGoals table**.

```lua
local TweenService = game:GetService("TweenService")
local Part = script.Parent

-- Setting Tween information
local TweenInfoData = TweenInfo.new(
    2,                        -- Easing duration (seconds)
    Enum.EasingStyle.Linear,  -- Easing style
    Enum.EasingDirection.Out, -- Easing direction
    0,                        -- Number of repetitions (-1 for infinite) 
    false,                    -- Whether to reverse
    0                         -- Wait time
)

-- Properties to be changed with the tween
local TweenGoals = 
{
    Position = Vector3.new(-400, 50, -350)
}

local Tween = TweenService:Create(Part, TweenInfoData, TweenGoals)
```

### 2. Setting Properties to Be Changed With the Tween <a href="#setting-properties-to-be-changed-with-the-tween" id="setting-properties-to-be-changed-with-the-tween"></a>

The functionality of the tween varies depending on the properties set in the TweenGoals.

<table><thead><tr><th width="180.6666259765625">DataType</th><th>Usage Example</th></tr></thead><tbody><tr><td>CFrame</td><td>CFrame</td></tr><tr><td>Vector3</td><td>Position, Orientation, Size</td></tr><tr><td>Color3</td><td>Color</td></tr><tr><td>number</td><td>Transparency</td></tr><tr><td>bool</td><td>CanCollide</td></tr><tr><td>UDim2</td><td>Position, Size</td></tr></tbody></table>

### 3. Running the Tween <a href="#running-the-tween" id="running-the-tween"></a>

You can create a tween by passing the target object, the pre-configured **TweenInfo**, and **TweenGoals** to the **TweenService:Create function**. Once the tween is created, it can be executed using the **Play function**.

```lua
local TweenService = game:GetService("TweenService")
local Part = script.Parent

-- Setting Tween information
local TweenInfoData = TweenInfo.new(
    2,                        -- Easing duration (seconds)
    Enum.EasingStyle.Linear,  -- Easing style
    Enum.EasingDirection.Out, -- Easing direction
    0,                        -- Number of repetitions (-1 for infinite) 
    false,                    -- Whether to reverse
    0                         -- Wait time
)

-- Properties to be changed with the tween
local TweenGoals = 
{
    Position = Vector3.new(-400, 50, -350)
}

local Tween = TweenService:Create(Part, TweenInfoData, TweenGoals)

Tween:Play()
```

### 4. Controlling the Tween Execution <a href="#controlling-the-tween-execution" id="controlling-the-tween-execution"></a>

A tween that is running can be paused using the **Pause function**.

```lua
...
Tween:Pause() -- Pause
wait(2)​
Tween:Play()  -- Resume
```

The **Cancel function** can be used to cancel a running tween.

```lua
...
Tween:Cancel()
```

### 5. Handling Events After the Tween Ends <a href="#handling-events-after-the-tween-ends" id="handling-events-after-the-tween-ends"></a>

The **Completed event** can be used to handle actions after a tween finishes executing.

```lua
local TweenService = game:GetService("TweenService")
local Part = script.Parent

-- Setting Tween information
local TweenInfoData = TweenInfo.new(
    2,                        -- Easing duration (seconds)
    Enum.EasingStyle.Linear,  -- Easing style
    Enum.EasingDirection.Out, -- Easing direction
    0,                        -- Number of repetitions (-1 for infinite) 
    false,                    -- Whether to reverse
    0                         -- Wait time
)

-- Properties to be changed with the tween
local TweenGoals = 
{
    Position = Vector3.new(-400, 50, -350)
}

local Tween = TweenService:Create(Part, TweenInfoData, TweenGoals)

local function OnCompleted(playbackState)
    print("Tween Complete!", playbackState)
end
Tween.Completed:Connect(OnCompleted)

Tween:Play()
```

## EasingStyle

<figure><img src="/files/aHknlz1bfujz0wUqtG63" alt=""><figcaption></figcaption></figure>

## EasingDirection

<figure><img src="/files/TXmHEO2CVaXL9zM5UAt9" alt=""><figcaption></figcaption></figure>


# Module Script

## Overview <a href="#overview" id="overview"></a>

A ModuleScript is used to structure and separate common functionalities for reuse. It helps reduce code duplication and makes maintenance more efficient.

## Recommended Execution Locations <a href="#recommended-execution-locations" id="recommended-execution-locations"></a>

* For modules used by **both server and client**: It is common to place them in **ReplicatedStorage** (e.g., referencing a VectorUtil module in both Script and LocalScript).
* For modules used **only by the server**: For security and management purposes, it is recommended to place them in **ServerScriptService** (e.g., referencing a ServerGameConstValue module in a Script).
* For modules used **only by the client**: Depending on the use case, it is recommended to place them in **StarterPlayerScripts** or **StarterCharacterScripts** (e.g., referencing a GUI module in a LocalScript).

## How It Works <a href="#how-it-works" id="how-it-works"></a>

Modules are executed when they are called explicitly (`require`). The results are **cached** upon the first call, and subsequent calls return the same value, which enhances execution efficiency and ensures consistency.

### 1. **Implementing a Module Script**

```lua
local UtilityModule = {}

function UtilityModule.PrintMessage(message)
    print("PrintMessage : " .. message)
end

return UtilityModule
```

### 2. **Referencing & Using a Module Script**

```lua
local ReplicatedStorage = game:GetService("ReplicatedStorage")
local UtilityModule = require(ReplicatedStorage.UtilityModule)

UtilityModule:PrintMessage("Hello World!")
```

## Module Script Applications <a href="#module-script-applications" id="module-script-applications"></a>

### Utility Class <a href="#utility-class" id="utility-class"></a>

**In ModuleScript**

```lua
local MathUtil = {}

-- Example Function 1
function MathUtil:Sum(...)
    local numList = { ... }
    local result = 0
    
    for i = 1, #numList do
        result = result + numList[i]
    end
    
    return result 
end

-- Example Function 2
function MathUtil:SomeFunc()
    print("SomeFunc")
end

return MathUtil
```

**In Script or LocalScript**

```lua
local ReplicatedStorage = game:GetService("ReplicatedStorage")
local MathUtil = require(ReplicatedStorage.MathUtil)

local sum = MathUtil:Sum(1, 5, 9, 10)
print(sum)
```

### Data Class <a href="#data-class" id="data-class"></a>

**In ModuleScript**

```lua
local GameConstValue = {}

GameConstValue.RequirePlayerCount = 10
GameConstValue.MaxRound = 5
GameConstValue.RoundLimitTime = 180

return GameConstValue 
```

**In Script or LocalScript**

```lua
local ReplicatedStorage = game:GetService("ReplicatedStorage")
local GameConstValue = require(ReplicatedStorage.GameConstValue)

local function CheckPlayerCount(playerCount)
    if playerCount >= GameConstValue.RequirePlayerCount then
        print("Ready to start the game")
    end
end
```

### Class Inheritance <a href="#class-inheritance" id="class-inheritance"></a>

**In ModuleScript**

```lua
local MonsterClass = {}
MonsterClass.__index = MonsterClass

function MonsterClass:new(name, hp, dam, def)
    local self = setmetatable({}, MonsterClass)
    self._Name = name
    self._Hp = hp
    self._MaxHp = hp
    self._Dam = dam
    self._Def = def
    
    return self
end

function MonsterClass:Attack()
    print(self._Name, "Attack!")
end

function MonsterClass:Move()
    print(self._Name, "Move!")
end

function MonsterClass:Destroy()
    print(self._Name, "Destroy!")
end

return MonsterClass
```

**In Script or LocalScript**

```lua
local ReplicatedStorage = game:GetService("ReplicatedStorage")
local MonsterClass = require(ReplicatedStorage.MonsterClass)

local Goblin = MonsterClass:new("Goblin", 100, 10, 5)
local Orc = MonsterClass:new("Orc", 200, 10, 5)

print(Goblin._Name)
print(Orc._Name)

Goblin:Attack()
Orc:Attack()
```


# Conveniently Managing Coroutine Using Task

## Overview

task is a library that provides functionality for threads scheduling to support asynchronous tasks.

## How to Use

| Features                                    | Description                                                                                                                                                                             |
| ------------------------------------------- | --------------------------------------------------------------------------------------------------------------------------------------------------------------------------------------- |
| task.wait(delay)                            | Can pause a thread for delay for the specified number of delay seconds, after which the current thread will resume. Once executed, it returns the actual time the thread was paused.    |
| task.spawn(functionOrCoroutine, ...)        | Creates a coroutine for functionOrCoroutine and resumes it immediately. All arguments following functionOrCoroutine are passed as parameters to functionOrCoroutine.                    |
| task.delay(delay, functionOrCoroutine, ...) | Creates a coroutine and resumes it after the specified number of delay seconds. All arguments following functionOrCoroutine are passed as parameters to functionOrCoroutine.            |
| task.defer(functionOrCoroutine, ...)        | Schedules a coroutine function to run as soon as the currently running coroutine finishes. All arguments following functionOrCoroutine are passed as parameters to functionOrCoroutine. |
| task.cancel(coroutine)                      | Cancels a coroutine that has not yet started.                                                                                                                                           |

### 1. Pausing the Thread

The following is an example of pausing the current thread for 1 second.

```lua
local elapsedTime = task.wait(1)
print(`task.wait(1) real waited time(sec): {elapsedTime}`)
```

### 2. Creating and Running a Coroutine Immediately

The following is an example of passing and printing multiple types of data to a coroutine that is created and resumed immediately.

```lua
local function TaskSpawn(a, b, c, tbl)
    print("task.spawn executed", a, b, c)
    for k, v in pairs(tbl) do
        print(`["{k}"]: {v} ({typeof(v)})`)
    end
end
task.spawn(TaskSpawn, "arg1", 123, true, {x = 78, y = "90"})
```

### 3. Running the Coroutine Function after a Set Duration

The following is an example of creating a coroutine and resuming it after 1.5 seconds. A string-type message is passed to the coroutine, and the created coroutine is printed.

```lua
local function TaskDelay(message)
    print("task.delay executed: ", message)
end
local delayedCoroutine= task.delay(1.5, TaskDelay, "Here is delayed message")
print(`delayedCoroutine: {delayedCoroutine}`)
```

### 4. Scheduling a New Coroutine Function to Run After the Current Coroutine Ends

The following is an example of passing and printing several pieces of data to a new coroutine that is resumed after the currently running coroutine finishes.

```lua
local function TaskDefer(x, y)
    print("task.defer executed: ", x, y)
end
task.defer(TaskDefer, "defer_arg", 456)
```

### 5. Canceling a Scheduled Coroutine Function

The following example cancels the most recently scheduled coroutine function by using task.spawn(), task.delay(), or task.defer(). Note that coroutines that are already running cannot be stopped.

```lua
local function TaskDelayForCancel()
    print("This should not be print")
end
local cancelCoroutine = task.delay(5, TaskDelayForCancel)
task.cancel(cancelCoroutine)
```


# App Leaderboard

## Overview

The kills, points, and other key indices acquired in gameplay can be converted into score and upload to **WorldRankService’s leaderboard**.

Uploaded score and rank can be checked from both the **app (out-game) and in-game (world)**. Players can compete each other with this and significantly boosts world participation and overall activeness.

## How to Use

### Rank System Activation & Icon Settings

You can configure whether to use the rank system and set the rank icon in the Ranking System section at the bottom of the World Management page.

<figure><img src="/files/mmMugyBN6pfhoF3OgBvh" alt=""><figcaption></figcaption></figure>

* 1️⃣ Ranking System Activation
  * When set to true, ranks are displayed in both the app (out-game) and in-game, and player scores are recorded.
  * When set to false, ranks are not displayed, and score record requests are not processed.
* 2️⃣ Ranking Icon
  * Sets the icon used to display ranks.
  * You can choose an icon that matches the game’s concept and theme, such as a medal, soccer ball, or skull.
  * You can also set a custom icon using a 120 × 120 pixel PNG image, in addition to the provided default icons.

### Feature List

The following feature can only be used in **server script** and cannot be called from client.

<table><thead><tr><th width="390">Feature</th><th>Description</th></tr></thead><tbody><tr><td>WorldRankService:IncrementScore(player, delta)</td><td>Uploads the score variance of a specified player to the leaderboard. Score must be an integer, and variance must be a positive number. The maximum allowed variance is 100,000. Any request with a variance exceeding this limit will not be processed.</td></tr><tr><td>WorldRankService:GetScore(player)</td><td>Returns the current score of the player listed on the leaderboard.</td></tr><tr><td>WorldRankService:SetDisplayEnabled(bool)</td><td>Sets whether the ranking and score are displayed above character.</td></tr><tr><td>WorldRankService:GetDisplayEnabled()</td><td>Returns whether the ranking and score are set to be displayed above the character.</td></tr></tbody></table>

### Score Sorting

The scores in the leaderboard are always **listed in descending order**. This cannot be changed.

### Full Code Example

The following code is an example of uploading the **bonus score** player earned during gameplay to the WorldRankService leaderboard when game is over and retrieving and displaying the uploaded **final score** to ResultUI.

Please be mindful that the IncrementScore function passes **variance of increased score** instead of the final score to the leaderboard.

```lua
local WorldRankService = game:GetService("WorldRankService")
local ReplicatedStorage = game:GetService("ReplicatedStorage")

local UIRemoteEvent = ReplicatedStorage:WaitForChild("UIRemoteEvent")

local function EndRound(player, eventName, delta)
    print(player, eventName)	
	
    WorldRankService:IncrementScore(player, delta)
		
    local score = WorldRankService:GetScore(player)
    UIRemoteEvent:FireClient(player, "SendMyScoreToResultUI", score)
end
```

### Difference Between Actions in Published and Test Environments

Saves and loads data to and from actual server in mobile environment after game is published. Note that this feature does not work in studio test environment and when called, the `WorldRank API is not available in the editor. It only works in the live game environment.` log will be displayed.

## Ranking and Score Display

If player score is uploaded to the leaderboard, current ranking and score are displayed on top of character.

If score is changed, player must **reconnect to world** to see the updated information.

<figure><img src="/files/FmrBjZcF33yEE9AsPuTS" alt=""><figcaption></figcaption></figure>

The **Top Scorer section** is exposed on the world detail screen of the app (out-game); player rankings and scores of the world are displayed as a list.

<figure><img src="/files/TybmXnLN15y09Uu4FwkX" alt=""><figcaption></figcaption></figure>

## Usage Examples

* Convert kills into score and upload it to the leaderboard to fortify competitiveness.
* Provide a goal to players by letting them know that “the top players of this world have achieved this and that score” through the out-game Top Scorer section displayed before players enter their world.
* Build an economic structure in which players are rewarded with skins/costumes based on their accumulated score to promote longer gameplay time.
* Aggregate points in time-limited events to reward top rankers to increase world participation.

## Note

* The value passed to the leaderboard is the **variance of score increase**, not the final score.
* The score uploaded to the leaderboard cannot be **subtracted** nor **deleted (reset)**.


# Debugging & Optimization


# Breakpoint

## Overview <a href="#overview" id="overview"></a>

The **Breakpoint** function is a script debugging tool that allows you to pause the execution of a script at a specific point to examine the state of that point or analyze any issues during the script’s execution.

When a breakpoint is hit, you can check the current execution status through debugging panels such as **Watch and Call Stack** and step through the code for further analysis.

## How to Use <a href="#how-to-use" id="how-to-use"></a>

### 1. Setting a Breakpoint in the Script Editor <a href="#setting-a-breakpoint-in-the-script-editor" id="setting-a-breakpoint-in-the-script-editor"></a>

Open the script that requires debugging, find the line of code where you want to set the breakpoint, and click on the **horizontal bar to the left of the line number** to create a breakpoint.

<figure><img src="/files/dnUlV8YjSwwcu0KvvgTW" alt=""><figcaption></figcaption></figure>

When a breakpoint is created, a red circle (🔴) appears. You can deactivate it by clicking the circle again (⭕).

<figure><img src="/files/z9uBq2j6j5dho9ZuzByC" alt=""><figcaption></figcaption></figure>

You can edit a breakpoint by right-clicking on it and then pressing each function in the menu.

<div align="left"><figure><img src="/files/FqQPrV32F6bxDmVfsmvB" alt=""><figcaption></figcaption></figure></div>

* Edit Breakpoint: Set breakpoint condition
* Disable Breakpoint: Disable breakpoint
* Delete Breakpoint: Delete breakpoint

### 2. Execute the line of code with the breakpoint set in the test play. <a href="#execute-the-line-of-code-with-the-breakpoint-set-in-the-test-play" id="execute-the-line-of-code-with-the-breakpoint-set-in-the-test-play"></a>

Run a test play, then set the game so that the **code line with the breakpoint** is executed.

When the line of code where the breakpoint is set is executed (the breakpoint is hit), the game stops and an **arrow (➡)** is displayed on the line of the hit breakpoint. In this state, you can analyze the Call Stack or Watch.

<figure><img src="/files/jaLxg1AcsqC620pO8fAF" alt=""><figcaption></figcaption></figure>

### 3. Watch Analysis <a href="#watch-analysis" id="watch-analysis"></a>

In the Watch tab, you can check the current state, such as the values of variables or tracking specific variables.

<figure><img src="/files/J0fd0P0bX9LH7ycrAptj" alt=""><figcaption></figcaption></figure>

### 4. Call Stack Analysis <a href="#call-stack-analysis" id="call-stack-analysis"></a>

In the Call Stack tab, you can check the flow of code calls.

<figure><img src="/files/l4KCJxURa72WiB3cvjX2" alt=""><figcaption></figcaption></figure>

By clicking the button at the top of the Call Stack tab, you can exit the hit breakpoint to move to the next one or resume the paused game.

<figure><img src="/files/kvvE7qLFiJCadXizJJnN" alt=""><figcaption></figcaption></figure>

* 1️⃣ Step Into: Enter the **function** on the current line and continue debugging.
* 2️⃣ Step Over: Execute the function on the current line **without entering it, then move to the next line**
* 3️⃣ Step Out: Execute the rest of the current function and return to the **parent function**.

### 5. Breakpoint Bulk Editing <a href="#breakpoint-bulk-editing" id="breakpoint-bulk-editing"></a>

If breakpoints are set in multiple scripts, you can view the entire list in the Breakpoints tab without opening each script. You can also enable/disable or delete all breakpoints by clicking the buttons at the top of the Breakpoints tab.

<figure><img src="/files/LamMug42QB1HlR1f5Y2p" alt=""><figcaption></figcaption></figure>

* 1️⃣ Disable All Breakpoints : Enable/disable all breakpoints
* 1️⃣ Delete All Breakpoints : Delete all breakpoints

### 6. Issues and Solutions <a href="#issues-and-solutions" id="issues-and-solutions"></a>

Based on the Call Stack and Watch information, you can effectively analyze issues during debugging by checking the value of a specific variable, tracking changes in object properties, unexpected function calls, and unintended code flow.

## Usage Example <a href="#usage-example" id="usage-example"></a>

Breakpoints are a highly effective tool for identifying and fixing issues in your code. For example, if the code calculating the cumulative sum in a loop produces unexpected results, you can use the Watch tab to track the variable’s values. This will help you quickly spot errors such as incorrect initial values or mistakes in the calculation formula.

The Call Stack tab is also useful for tracing the order of function calls and understanding the execution path of your code. For example, if a particular function is called with unexpected values or if the call order is off, you can check the Call Stack to pinpoint the root cause of the issue.

By effectively utilizing debugging tools, you can systematically analyze variable states, function call flows, and the logic of your code, which can significantly **speed up problem-solving**.


# Practical Guide to Script Optimization

## Overview

In large-scale RPGs or action games with complex systems, how scripts are designed and executed can significantly impact overall game performance. Poorly optimized scripts can lead to critical issues such as **server crashes**, **client frame drops**, **memory leaks**, or **unexpected errors**. These problems can **negatively affect** **player retention** and **revenue**.

This document explains the **fundamental principles of scripts** and introduces various **performance optimization techniques** that can be applied in real scenarios. It aims to help maintain stable performance and deliver a smooth gameplay experience even under complex logic, large numbers of objects, or frequent communication processing.

## Important Notes

Scripts should be **written with a balance between optimization and code readability**. Over-optimizing for performance can make the code difficult to understand, while excessive abstraction or overly verbose structures can negatively impact performance.

## Script Execution Fundamentals

To write optimized code, it is important to have a deep understanding of how Lua operates at a fundamental level. Knowing how it handles execution, memory management, and data processing helps reduce resource waste and prevent performance bottlenecks.

### Variable Types

In Lua, the behavior of a variable depends on whether it holds a **Value Type** or a **Reference Type**.

<table><thead><tr><th width="209.00006103515625">Type</th><th width="137.7720947265625">Examples</th><th>Characteristics</th></tr></thead><tbody><tr><td>Value Type</td><td>number<br>string<br>boolean<br>nil</td><td><ul><li><strong>Copied</strong> on assignment</li></ul></td></tr><tr><td>Reference Type</td><td><strong>table</strong><br><strong>function</strong><br><strong>coroutine</strong><br><strong>Instance</strong></td><td><ul><li><strong>Reference shared</strong> on assignment</li><li>Since it is a reference and not a copy, changing the value in one will affect the other</li></ul></td></tr></tbody></table>

Reference types store a reference (address) to the data rather than the actual value itself. This means multiple variables can share the same reference. As a result, modifying the value through one variable will affect all other variables that point to the same reference. While this allows for flexible data structures, it also increases the risk of unintended side effects or bugs, so caution is advised.

```lua
local t1 = { score = 100 }
local t2 = t1     -- Reference is shared

t2.score = 200    -- Also affects t1

print(t1.score)   -- Output: 200
print(t2.score)   -- Output: 200
```

### Memory Structure

Internally, Lua uses a **stack** and **heap** memory structure to manage variables. Depending on the variable’s type, the storage location, lifetime, and garbage collection behavior can differ.

<table><thead><tr><th width="194.96484375">Type</th><th width="128.631591796875">Save Location</th><th>Features</th></tr></thead><tbody><tr><td>Value Type</td><td><strong>Stack</strong></td><td><ul><li><strong>Lifetime:</strong> Valid during the execution of a function or block, automatically destroyed when the scope is exited</li><li><strong>Memory Release:</strong> No explicit cleanup is needed, and is automatically removed according to the execution flow</li></ul></td></tr><tr><td>Reference Type</td><td><strong>Heap</strong></td><td><ul><li><strong>Lifetime:</strong> Remains as long as there is a reference to the object; stays in memory as long as at least one reference exists</li><li><strong>Memory Release:</strong> Removed by GC once all references are disconnected</li><li><strong>Features:</strong> A single object can be referenced by multiple variables, offering flexibility, but requires careful memory management</li></ul></td></tr></tbody></table>

Value types are automatically released from memory when they go out of scope. In contrast, reference types are periodically cleaned up by the GC depending on whether they are still being referenced. If unused references are not explicitly cleared, reference types can lead to memory leaks and performance degradation.

However, even for reference types, **if they are only used within the scope and are no longer referenced elsewhere**, they will automatically be eligible for GC and released from memory. But in structures where references are maintained, such as global variables, closures, or circular references between tables, explicit reference removal is required.

```lua
do
    local t = { 1, 2, 3 } 
    print(t[1])           
end
-- Here, t is no longer referenced as it is out of scope 
-- It will be automatically released from memory according to the next GC cycle
```

### GC (Garbage Collection)

Lua uses a **Mark-and-Sweep** style **Garbage Collection (GC)** system for automatic memory management. GC automatically detects objects that are no longer in use and reclaims their memory, so unlike in languages like C++, developers do not need to manually allocate or free memory.

In other words, while Lua handles most of the memory management for you, **it’s important to structure your code and manage access patterns in a way that avoids leaving behind unnecessary references for GC to work efficiently.** As long as a reference to an object remains, Lua considers it “in use” and will not collect it. If you don’t carefully design when and how references are released, memory leaks can occur.

**Mark-and-Sweep**

1. **Mark phase:** Starting from root objects such as global variables, local variables, and the call stack of active functions, the GC traverses all reachable objects and marks those that are still being referenced
2. **Sweep phase:** Objects that were not marked—meaning they are no longer referenced from anywhere—are freed (collected) from memory.

**Conditions for Memory Release**

* Objects with no remaining references
* Objects that have been destroyed via Destroy() and whose references have been set to nil
* Event connection objects that have been disconnected using Disconnect() and whose references have also been cleared to nil

### Why Understanding GC Matters <a href="#why-understanding-gc-matters" id="why-understanding-gc-matters"></a>

Understanding how GC works goes far beyond the idea that “it is convenient because it automatically cleans up memory.” It has real implications for performance, stability, and maintainability.

* GC automatically manages memory, but **it will never collect an object that still has a reference**.
* Explicitly removing GC-eligible objects reduces unnecessary memory usage and helps **keep memory consumption predictable**.
* The more heap objects exist, the more frequently GC is triggered, which can cause frame drops.
* It is important to reduce GC occurrence itself by **avoiding repetitive object creation and deletion and using reuse strategies such as pooling.**
* It helps you **quickly diagnose and fix issues** such as “Why isn’t memory usage going down after Destroy()?” or “Why is the game getting slower over time?”

## Basic Optimization Guidelines

### Performance Optimization

* **Use object pooling instead of creating/destroying instances at runtime** with Instance.new() or Clone()\
  (e.g. instead of creating a new bullet each time with Instance.new(), reuse pre-made objects and store them again after use)
* Avoid the structure of creating/destroying a large number of objects all at once\
  (e.g. rather than spawning 50 monsters simultaneously, spread them out over time to reduce lag)
* Always call **Destroy() and set references to nil** for unused objects
* Always call **Disconnect() and set references to nil** for unused event connections
* In particular, events tied to players and characters must be explicitly disconnected
* Hide unused UI elements from the screen
* **Cache and reuse frequently used references** for objects, services, and instances\
  (e.g. instead of calling game:GetService(“Players”) each time, store it in a variable and reuse it)
* **Cache and reuse** the result of require() when using ModuleScripts
* Avoid using global variables and keep your data scoped locally\
  (e.g. avoid using global variables such as myData, which can affect the entire script)
* Remove any variables that are no longer used
* Precompute and cache values like Vector3 or CFrame\
  (e.g. for fixed values like projectile offsets, calculate them once during initialization instead of recalculating them every time)
* **Design with one-way references** instead of complex circular dependencies (where objects reference each other)\
  (e.g. instead of having the character and the weapon reference each other, have only the weapon reference the character)
* Design your code to reuse tables whenever possible\
  (e.g. instead of creating a new table on each loop iteration, reuse a table declared outside the loop to save memory)
* Avoid overusing **anonymous functions** and minimize the use of unnecessary closures\
  (especially avoid defining a new function inside a for loop just to connect an event each time)
* Use index rather than key to process simple tables\
  (In tables like { “a”, “b”, “c” }, ipairs iterates faster than pairs)
* Use the \* operator if division can be replaced with multiplication\
  (e.g. x \* 0.5 is faster than x / 2)
* For long string concatenations, use \*\*table.concat()\*\* instead of “a” … “b” to improve performance\
  (The … operator allocates new memory for each concatenation, so frequent use can increase GC load)
* Design for, while, and other loops to run conditionally or intermittently, rather than executing them unconditionally\
  (in particular, adjust the loop interval)
* Avoid processing large workloads all at once, and instead use coroutines or chunking to spread the load
* Avoid creating excessive coroutines, and reuse existing ones or set them to nil after they’re finished
* Use frame-based events like Heartbeat only when necessary, and make sure to disconnect them once they’re no longer needed

### Network and Event Optimization

* Handle any logic that can be processed on the client side to minimize server load
* Use RemoteEvent communication only when necessary, and **consolidate similar actions under a single RemoteEvent**\
  (batch frequent calls together before sending)
* Design to minimize **data transfer** as much as possible\
  (e.g. for height data, send a number instead of the full Vector3)
* Use Attribute for passing attributes\
  (performance impact ranking: RemoteEvent > ValueInstance > Attribute)
* Implement a priority queue for network communication to distinguish between critical and optional updates, allowing for more efficient processing\
  (effects and sounds should be processed with lower priority)
* Design your system using an event-driven architecture so that data is processed only when needed
* In situations where events are triggered too frequently, design the system to use get functions instead
* APIs that rely on server communication such as DataStore have rate limits, so design your system to throttle calls per minute accordingly

### Architecture Design

* When handling multiple objects with identical behavior such as multiple KillPart instances, manage them through a single **manager script** rather than attaching individual scripts to each object
* Apply architectural patterns like **MVC** to reduce code dependencies and minimize duplication across your project\
  (e.g. clearly separate responsibilities so that UI updates only when needed, reducing unnecessary processing overhead)
* Use **state machines** for game logic, monsters, etc. to ensure that only the relevant logic is executed and computed at any given time
* Clearly separate data processing and visualization responsibilities to server and client to distribute workload and avoid performance bottlenecks

## High-Priority Performance Optimization Strategies

These strategies are relatively easy to implement and can significantly reduce major issues such as **lag, memory leaks, and overall performance instability.**

### Destroy + nil Cleanup

Explicitly remove references to unused objects to ensure they are collected by GC.

```lua
local Effect = Instance.new("ParticleEmitter")
...
Effect.Parent = Part

wait(3)
Effect:Destroy()  -- Destroy the object
Effect = nil      -- Remove the reference (eligible for GC)
```

### Event Disconnect + nil Cleanup

Unused events must also have their references explicitly removed. This is especially important for events tied to players or characters.

```lua
local Connection = nil

local function OnDied()
    if Connection then
        Connection:Disconnect()  -- Disconnect the event
        Connection = nil         -- Remove the reference (eligible for GC)
    end
end
Connection = Humanoid.Died:Connect(OnDied)
```

### Object Pooling

Instead of repeatedly creating and destroying objects, build a reusable structure to efficiently recycle items such as bullets, effects, and UI slots.

This approach reduces unnecessary memory allocation and deallocation, minimizing GC overhead and helping prevent frame drops or temporary lag spikes.

```lua
local BulletManager = {}

-- Pool to store bullet objects
local PoolList = {}

-- Create bullet template object
local template = Instance.new("Part")
template.Size = Vector3.new(0.2, 0.2, 2)
...
template.Name = "Bullet"

-- Create a specified number of bullets and store them in the pool
function BulletManager:Init(count)
    for i = 1, count do
        local bullet = template:Clone()
        ...
        bullet:SetAttribute("Active", false)

        table.insert(PoolList, bullet)
    end
end

-- Return an available bullet from the pool
function BulletManager:GetFromPool()
    for _, bullet in ipairs(PoolList) do
        if not bullet:GetAttribute("Active") then
            bullet:SetAttribute("Active", true)
            ...

            return bullet
        end
    end
    return nil
end

-- Return a used bullet back to the pool
function BulletManager:Release(bullet)
    bullet:SetAttribute("Active", false)
    ...
end

return BulletManager
```

```lua
local PoolCount = 30 -- Maximum number of reusable objects
BulletManager:Init(PoolCount) -- Initialize the bullet pool and create the objects in advance

local Bullet = BulletManager:GetFromPool() -- Get an available object from the pool

if Bullet then
    Bullet.Position = startPos
    ...

    wait(1)
    BulletManager:Release(Bullet) -- Return the bullet back to the pool for reuse.
end
```

## Usage Examples

This manual is not just a document listing rules to memorize. It serves as a **‘benchmark’** that can be flexibly referenced and applied **based on the project’s nature, structural complexity, and performance requirements.**

* **When implementing new features,** use this as a checklist to consider how the structure and flow of processes might impact performance in advance.
* **If performance issues are suspected during debugging,** quickly review this section to identify potential areas for improvement.
* **In collaborative environments,** this can serve as a foundational document to ensure consistency in coding styles and optimization practices among team members.

**It’s not necessary to enforce every item.** However, keep in mind that the guidelines in this document are intended to help prevent common issues that will inevitably arise as your project grows.


# Quick Start Guide


# Roblox Developer Guide

## Overview

OVERDARE is a UGC platform built on **Unreal Engine 5**, specifically designed for game development.

This document provides Roblox creators with a clear and concise guide to **key features** and the **differences from Roblox**, helping them quickly understand and adapt to OVERDARE Studio.

## Interface

<figure><img src="/files/KyUNvQTYT89Mfg4eUCBy" alt=""><figcaption><p>Roblox / OVERDARE Studio</p></figcaption></figure>

| Roblox        | OVERDARE      |
| ------------- | ------------- |
| Viewport      | Similar       |
| Toolbox       | Asset Store   |
| Asset Manager | Similar       |
| Properties    | Similar       |
| Explorer      | Level Browser |
| Output        | Output Log    |

While some panel names differ, the overall interface structure and layout of Roblox and OVERDARE Studio are largely similar.

## Shortcut Differences

| Roblox | OVERDARE | Function    |
| ------ | -------- | ----------- |
| 1      | Ctrl + 1 | Select Tool |
| 2      | Ctrl + 2 | Move Tool   |
| 3      | Ctrl + 3 | Rotate Tool |
| 4      | Ctrl + 4 | Scale Tool  |

## Features

Unlike Roblox, which uses its own engine, OVERDARE Studio is built on Unreal Engine 5, offering Unreal’s signature graphics quality, performance, and some editor features. This enables creators to develop content in a more flexible and intuitive environment.

Building on this engine, OVERDARE has evolved into a UGC platform optimized for the **mobile** environment, providing creators with an optimized creation and gameplay experience through its **mobile-focused services**.

### Server–Client Architectural Design

OVERDARE Studio, following Unreal Engine’s design philosophy, **clearly separates the server and client environments** and minimizes replication to enhance security against client-side hacking and data tampering.

For Roblox creators, this may feel different because client-side changes are not automatically synchronized to the server. However, this approach provides a more stable and efficient structure in terms of security and performance.

In OVERDARE Studio, **server logic must be written in Scripts and client logic in LocalScripts** for a clear separation. This structure reduces unnecessary synchronization and greatly improves **role separation in code** and **maintenance efficiency**. For example, GUI and Camera-related functions must always run in LocalScripts.

Overall, this architectural design provides a safer, more optimized development environment, giving creators a foundation to build systematic and scalable projects.

## Similarities

* **Support for Lua-based Luau scripting**: Supports Lua and Luau scripts, providing a familiar language environment and similar Script API structure for a degree of code compatibility.
* **Object-oriented hierarchical structure (Instance System)**: All game elements are managed as objects (Instances) and organized in a tree-like hierarchy, similar to Roblox.
* **Similar coordinate and unit system**: Concepts like CFrame and UDim define object position and size in 3D and 2D spaces. Aside from differences in 3D units, the logical structure functions similarly.
* **Consistent object properties and behavior models**: Core properties and events like CanCollide, Transparency, and Touched work in ways similar to Roblox, with only a few exceptions noted in the API Reference.
* **Similar class and inheritance structure**: Object inheritance and referencing work on principles similar to Roblox, minimizing the learning curve for understanding class structures.
* **Authoritative server network model**: Uses an Authoritative Server approach, where the server has the final say on all game states. This prevents client discrepancies and ensures stable network synchronization via Replication and RPC.
* **Similar state synchronization and management**: Object state changes propagate from server to client, maintaining data integrity and consistency.
* **Event-driven operation model**: Interactions between objects are handled through an Event–Signal structure, functioning similarly to Roblox’s event-triggered model.
* **Consistent development workflow**: The creation process (placing objects in the editor → setting properties → connecting scripts) is similar, making it easy for Roblox creators to adapt.

## Structural Differences

### 3D Coordinate Units

OVERDARE Studio, built on Unreal Engine, uses **real-world scale** for in-game coordinates. Here, **1 unit = 1 cm**, allowing creators to intuitively understand and control object sizes and movement distances in realistic measurements.

In contrast, Roblox uses its own unit called a **Stud**, where **1 Stud ≒ 28 cm**. When transferring content from Roblox to OVERDARE, **coordinate scaling** (e.g., 1 Stud → 28 cm) is required. OVERDARE’s unit system, however, offers the advantage of more intuitive measurements.

Learn More

{% content-ref url="/pages/f7dY0KeRkFsA0mxkM6OB" %}
[Coordinate System](/manual/studio-manual/get-started/coordinate-system)
{% endcontent-ref %}

### Asset Paths

OVERDARE Studio uses an independent asset management system, distinct from Roblox, identifying assets with a dedicated Asset ID format `ovdrassetid://number`. This system helps prevent cross-platform confusion and ensures consistent asset referencing.

Learn More

{% content-ref url="/pages/bS79pIBVkO3rjcUR9Zhi" %}
[Asset Import](/manual/studio-manual/asset-and-resource-creation/asset-import)
{% endcontent-ref %}

### Avatars

Roblox offers two character models: R6 and R15. R6 consists of six simple parts (head, torso, arms, and legs), while R15 adds joints and subdivided parts for more flexible animations.

In contrast, OVERDARE Studio uses a **single standard character structure**. All avatars consist of six main MeshParts (head, torso, arms, and legs) and a Skeleton with **19 Bones**. This skeleton follows Unreal Engine’s bone system for smooth and detailed joint movements.

Since OVERDARE uses a unified system, there’s no need for separate rig conversions like R6 and R15. All characters share the same bone structure and animation resources, allowing creators to use a single animation system. This significantly improves production efficiency and compatibility.

Learn More

{% content-ref url="/pages/P7aD7PEJUGDMei1NFhiN" %}
[Character](/manual/studio-manual/character)
{% endcontent-ref %}

### Humanoid Body Hitboxes

In OVERDARE Studio, humanoids use a **single capsule-shaped collision** by default to optimize world performance. As a result, per-body hitbox functionality is disabled by default. If needed, creators can enable the **HitboxType option** to define precise hit detection for each body part.

Learn More

{% content-ref url="/pages/kb68NxcqrCtZvmi5Jkex" %}
[Hitbox Options](/manual/studio-manual/character/hitbox-options)
{% endcontent-ref %}

### Hierarchical Transform Inheritance

In Roblox, objects in a parent–child hierarchy need to be connected using a Weld instance to move together at runtime.

In contrast, OVERDARE Studio follows the **hierarchical transform inheritance** identical to that of Unreal Engine. This means that changes in a parent object’s position, rotation, or size are **automatically propagated to its children at runtime**, allowing natural hierarchical movement without any Weld setup. This enables simpler hierarchies and more efficient object control.

### Models

Like Roblox, a Model instance in OVERDARE Studio is a container that groups multiple objects such as Parts, Attachments, and Scripts. You can perform actions like moving, rotating, or deleting the entire model at once, and it provides a PrimaryPart property to set a specific object as the model’s reference point.

However, since OVERDARE Studio follows Unreal Engine’s **hierarchical transform structure**, it uses a **Parent–Child Relationship for structural grouping** unlike Roblox Models, which rely on physical connections (Welds or joints).

Learn More

{% content-ref url="/pages/kodqQTHOQIcc5MG8T6rz" %}
[Model](/manual/studio-manual/object/model)
{% endcontent-ref %}

{% content-ref url="/pages/UsZh7HiMGqbre3LaCVH9" %}
[Model](/development/api-reference/classes/model)
{% endcontent-ref %}

### UI Control

OVERDARE’s UI system is designed so that all 2D/3D UI elements are primarily controlled and rendered on the client side. This includes HUDs or interfaces using ScreenGui, as well as 3D UI like BillboardGui and SurfaceGui, which are managed locally according to each player’s device environment.

In contrast, Roblox often relies on replication and synchronization between server and client for creating and controlling UI objects, while OVERDARE handles UI entirely on the client side.

This means that most visual feedback, such as UI display and input handling, occurs immediately within client-side local scripts. This approach reduces server load, improves input responsiveness, and helps provide a more consistent user experience across platforms like mobile and PC.

### Difference Between Collision Group and Collision Profile

In Roblox, the Collision Group system fully subordinates an object to a specific group, meaning it can only follow simple, bi-directional collision/non-collision rules set between those groups. Because of this, even a slight variation in behavior—such as a projectile that passes through walls versus one that gets blocked—required creating a brand-new group every single time, which quickly became cumbersome.

On the other hand, the Collision Profile system allows objects to share a single group via channels, while their collision relationships are configured independently and uni-directionally within each object's individual profile. For instance, both types of projectiles can share the exact same 'Projectile Channel,' but by configuring their profiles differently, you can precisely control them so that one Blocks walls while the other Ignores (passes through) them.

Consequently, creators no longer need to mass-produce unnecessary groups. Instead, they can efficiently manage complex collision rules on a shared channel by flexibly combining Block, Overlap, and Ignore profiles.

| Item                             | Collision Group                                          | Collision Profile                                     |
| -------------------------------- | -------------------------------------------------------- | ----------------------------------------------------- |
| **Grouping**                     | Groups and relationship definitions are handled together | Channels provide grouping only                        |
| **Collision Relationship Setup** | Set directly between groups                              | Configured per channel on each profile                |
| **Direction of Relationships**   | Always bidirectional                                     | Configured independently per profile                  |
| **Flexibility**                  | Simple collide/no-collide between groups                 | Fine-grained Block/Overlap/Ignore control per channel |
| **Intended Use**                 | Simple collision filtering                               | Managing complex collision rules                      |

<figure><img src="/files/wYQHaQTyUPW31TZedWGA" alt=""><figcaption></figcaption></figure>

{% content-ref url="/pages/nqkgt9gq9qKLIwJGJzDP" %}
[Collision Profile](/manual/studio-manual/game-development/collision-profile)
{% endcontent-ref %}

## Differences in Features and Properties

### Default Value of Anchored

In OVERDARE Studio, the **default value for Anchored is true**. This minimizes unnecessary physics calculations and optimizes world performance. If needed, you can explicitly disable Anchored to enable physics-based interactions such as falling or collisions.

### Anchoring and Transparency Limits on Humanoid Root Part

Due to Unreal Engine’s structural constraints, unlike Roblox, the HumanoidRootPart cannot use the Anchored property or partial transparency. (Only 0 or 1 values are supported.)

### Humanoid Jump State

In Roblox, the Jumping state is triggered only at the moment of jump input, then immediately transitions to Freefall, and finally changes to Landed upon touching the ground.

In OVERDARE, the Jumping state is maintained during the jump (throughout the animation) and only transitions to Freefall after the animation ends. Landing changes the state to Landed, like in Roblox.

### Rig Builder

Rig Builder currently provides only basic functionality, such as appearance customization and animation playback. Additional runtime features are still under development.

### Animation Editor

OVERDARE Studio’s animation editor offers a workflow similar to Roblox, but some features and behaviors differ due to differences in engine structure and the avatar system.

Currently, features such as IK (Inverse Kinematics), curve graph editing, and easing styles are not supported.

Learn More

{% content-ref url="/pages/5IpTGP7jviBTxMeIYiuo" %}
[Animation Editor](/manual/studio-manual/asset-and-resource-creation/animation-editor)
{% endcontent-ref %}

## Unique Features of OVERDARE

### CanClimb Property

Enabling the CanClimb property on a Part designates it as a climbable object for characters. This helps prevent unintended climbing on surfaces where it’s not desired.

### Character Movement Parameters

OVERDARE provides extended properties that allow fine-tuned control over character movement and behavior, including **maximum speed, ground friction, rotation speed, deceleration, and double jump**. This system is based on Unreal Engine’s detailed character parameter structure that supports more precise movement control and physics response than Roblox.

Creators can adjust movement, jumping, falling, friction, and other mechanics in detail, allowing them to craft controls and feedback that match the game’s genre or concept.

Learn More

{% content-ref url="/pages/wdX8aFEzAW5XVmprIbOj" %}
[Character Movement Parameters](/manual/studio-manual/character/character-movement-parameters)
{% endcontent-ref %}

### Character Ragdoll

In Roblox, creating a ragdoll effect requires complex setup, including rigging, constraints, and collisions. OVERDARE, however, allows the same effect to be achieved simply by changing the Humanoid’s state.

```lua
local Character = script.Parent
local Humanoid = Character.Humanoid

Humanoid:ChangeState(Enum.HumanoidStateType.Ragdoll)
```

Learn More

{% content-ref url="/pages/P7aD7PEJUGDMei1NFhiN" %}
[Character](/manual/studio-manual/character)
{% endcontent-ref %}

### CameraOffset Property of the Camera

The CameraOffset property in OVERDARE Studio allows you to **set the camera’s relative position regardless of its current state**. This makes it easy to use CameraOffset with character-attached Custom cameras or script-controlled Scriptable cameras to implement effects like CameraShake.

### TPS Strafing System

The TPS Strafing System is a movement method commonly used in third-person shooters (TPS), allowing characters to move naturally relative to the camera direction. OVERDARE Studio provides this feature without the need for complex scripting. **View-locked movement, strafing, diagonal movement, and backward movement** in a TPS perspective can be easily implemented using this system.

Learn More

{% content-ref url="/pages/ANxuUr07U7hVCFK7A4Q5" %}
[TPS Strafing System](/manual/script-manual/input-and-controls/tps-strafing-system)
{% endcontent-ref %}

### VFXPreset

A VFXPreset is an object that allows you to easily apply visual effects, such as fire, explosions, barriers, or healing, by **selecting from pre-defined effects**. This lets creators quickly and consistently implement a variety of visual effects without additional editing.

<figure><img src="/files/W89ClWYQVnYsuSY8oo8V" alt=""><figcaption></figcaption></figure>

Learn More

{% content-ref url="/pages/UHaO21fVTwrimnAJr3x3" %}
[VFX](/manual/studio-manual/object/vfx)
{% endcontent-ref %}

### Outline / Fill

Outline and Fill are instances used to emphasize an object’s outline or interior. They function as an expanded and separated version of Roblox’s Highlight feature. By using these two components, you can achieve more detailed control than a single Highlight allows for clearer readability and more effective feedback presentation in your game.

Learn More

{% content-ref url="/pages/h4KudP394x8lFNw1dWjJ" %}
[Outline/Fill](/manual/studio-manual/object/outline-fill)
{% endcontent-ref %}

### Mobility Property

The Mobility property classifies placed instances in the world as either Static or Movable, optimizing rendering and processing based on the nature of each object. Objects that do not move are set to Static, while those requiring dynamic interaction or animation are set to Movable, helping strike an efficient balance between visual quality and performance.

This allows creators to fine-tune performance according to the project’s goals, genre, and intended presentation, allocating resources only where needed and achieving a more stable, high-quality performance environment.

Learn More

{% content-ref url="/pages/aIBsyvFK04JswLlI9MTj" %}
[Mobility Settings](/manual/studio-manual/asset-and-resource-creation/mobility)
{% endcontent-ref %}

### ActionSequence

The ActionSequence is a **timeline-based visual editor** designed to build complex character actions such as dashes, combo attacks, and chained skills.

On Roblox, creators must combine animation tracks with scripting to achieve similar effects. In contrast, OVERDARE Studio’s ActionSequence provides an integrated workflow where **animations, sound, camera work, effects, and events (markers) can all be edited intuitively within a single timeline**.

<figure><img src="/files/sxitGi2xatDxDe7BxX7z" alt=""><figcaption></figcaption></figure>

Learn More

{% content-ref url="/pages/P9IC3JUvm3Er0Yx21SvQ" %}
[ActionSequence](/manual/studio-manual/game-development/actionsequence)
{% endcontent-ref %}

### Simulation Ball

The Simulation Ball is a ball-type object that runs on **pre-simulated data** rather than a calculation-heavy physics engine. All clients share the same precomputed trajectory data, ensuring identical movement and rotation regardless of network conditions.

Because this system is unaffected by server–client latency and does not perform per-frame physics calculations, it delivers **high performance efficiency**. Creators can also instantly query any state in time (position, speed, rotation, etc.) using the simulation data, which guarantees **predictable results and consistent behavior**.

<figure><img src="/files/9Bq8j8FVj0zCTnqRwGZe" alt=""><figcaption></figcaption></figure>

Learn More

{% content-ref url="/pages/H8Zx8NxQOhJ15GZAjyMW" %}
[SimulationBall](/manual/studio-manual/object/simulationball)
{% endcontent-ref %}

## Unavailable Features

OVERDARE Studio continues to expand its development tools and editor environment through ongoing updates. The items listed below are major features that are currently unavailable or still under development, and will be rolled out in stages.

### **C**reation & Editor Features

* Terrain Editor / Mesh Editor / Plugin
* Server Test

### Physics & Interaction Features

* Weld
* ForceField
* ClickDetector
* Pathfinding
* Seat / VehicleSeat / Motor6D

### Data & Network Features

* ReplicateFirst / StarterPack
* RemoteFunction / BindableFunction
* OrderedDataStore
* TeamService
* PreloadAsync / StreamingEnabled

### Graphics & Rendering Features

* SurfaceAppearance / Post Processing
* TextBox / ViewportFrame / UICorner / UIGradient, etc.
* RichText
* Skeletal Mesh / Animation Controller

### Other Features

* Parallel execution (Actor)
* Dynamic insertion of Toolbox assets

## Script Behavior Differences

### Reference Clearing by Destroy

When the Destroy() method is called, **any variables referencing that object are automatically set to nil**. The object is then completely removed from memory, and any attempt to access it afterward will trigger a runtime error stating: “Object \[path] has already been destroyed.” When this error occurs, script execution stops, so you should always verify that an object is valid before using it for proper logic processing.

Comparisons like `== nil` on a variable after Destroy() are not yet supported. To check whether an object is valid, you must use the **global function isnil()**.

```lua
PartVar:Destroy()

if isnil(PartVar) == true then
    print("The object has already been destroyed.")
end
```

Unlike Roblox, which allows continued access to Destroy() objects, OVERDARE adopts a **safer reference-handling model that uses explicit invalidation and runtime errors**. This prevents unnecessary references and unexpected behaviors, while allowing developers to manage object lifecycles more clearly.

### PlayerAdded Event Behavior

The event system in local scripts has been extended to allow player initialization and character logic to be handled on the client side. Because of this, the **timing of event calls may differ** from Roblox code.

In OVERDARE, the PlayerAdded and CharacterAdded events are triggered for every player join and spawn, even within **LocalScripts**.

```lua
Players.PlayerAdded:Connect(function(player)
    print(player.Name .. " joined")
end)
```

When this code runs inside a LocalScript, OVERDARE **triggers the event for all users**, including yourself. In other words, it detects **“you,” “users who joined before you,” and “users who join after you.”**

In contrast, in Roblox, the same code inside a LocalScript does not detect yourself or existing users, and the event is only triggered for **users who join after you**. Any initialization or self-related logic must be handled via the server using a RemoteEvent.

OVERDARE allows the client to detect all join events directly. This eliminates the need to relay events to the server or wait for responses, significantly reducing server traffic and communication costs. Processing is completed instantly on the client, which leads to faster and more immediate responsiveness without loading delays.

However, if you use Roblox code as-is, **differences in event call order** may lead to unexpected behavior. For example, logic in Roblox that only “displays effects for users who join after you” may also trigger for yourself in OVERDARE.

<table><thead><tr><th width="144.333251953125">Category</th><th>Roblox</th><th>OVERDARE</th></tr></thead><tbody><tr><td>Main Purpose</td><td>UI updates, handling users who join late</td><td>Handling all user joins</td></tr><tr><td>Call Scope</td><td>Only users who join after you</td><td>All users, including yourself</td></tr></tbody></table>

### Detecting Touch and Joystick Events

In Roblox, mobile input is handled through a structure where events detected by UserInputService are processed by the ControlModule under the PlayerModule. The ControlModule automatically generates joystick and jump button UI at runtime using modules like TouchThumbstick and TouchJump, and links them to character movement.

In contrast, OVERDARE provides these input controls directly through its API. Touch and joystick inputs can be detected immediately via UserInputService touch events, with event parameters providing information such as input position, state, and type.

Learn More

{% content-ref url="/pages/MS4oQBHYxUxZLKzFIpSr" %}
[Mobile Input Handling](/manual/script-manual/input-and-controls/contextactionservice)
{% endcontent-ref %}

### Character Position Updates

Unlike Roblox, in OVERDARE, periodically updating the HumanoidRootPart’s Position or CFrame using Heartbeat or a while loop can cause the character to jitter or teleport as the target position conflicts with Unreal’s CharacterMovementComponent.

This happens because Unreal Engine handles character movement internally using a physics-based system and performs collision checks on a per-frame basis. For this reason, handling using repetitive loops is not recommended in OVERDARE.

## API Support Scope

Some APIs are still under development or have limited support, and there may be differences in API structure, inheritance, or behavior compared to Roblox. In particular, incomplete or unlinked features may not work correctly when called.

To confirm exact support and see available properties, methods, and events, be sure to read the API Reference page. This helps prevent confusion or unexpected errors due to differences from Roblox behavior.

Learn More

{% content-ref url="/pages/6AEYccB3l8tPAsoBNfl1" %}
[API Reference](/development/api-reference)
{% endcontent-ref %}

## Quick Guide: Transitioning from Roblox to OVERDARE

When migrating a project from Roblox to OVERDARE, it’s recommended to review the following items to ensure **compatibility**.

* Hierarchical transform inheritance (Weld not supported)
* 3D world coordinates use cm instead of Studs
* Default Anchored value is true
* Asset IDs use the format ovdrassetid://number
* Calling Destroy() sets variables to nil; use the isnil() function to check validity
* Check the event scope for PlayerAdded and CharacterAdded in LocalScripts

💡 **Tip**: Rather than directly porting Roblox behavior, it’s more reliable to **refactor** to fit OVERDARE Studio’s structure. This not only prevents unexpected behavior but also benefits long-term project maintenance and scalability.

## External IDE Integration Support

Unlike Roblox, OVERDARE always saves map files locally as well, and scripts are automatically generated as Lua files in a local folder. This setup allows you to edit scripts directly in external IDEs such as Visual Studio Code, and integrate various development tools to improve workflow efficiency and productivity.

<figure><img src="/files/lr0e47dTRoz1uJR9FPsT" alt=""><figcaption></figcaption></figure>

## Asset Creation Guidelines

When importing assets, OVERDARE supports a more limited range of file formats compared to Roblox. This is to maintain Unreal Engine-level graphic quality while targeting markets with a high proportion of low-spec devices, such as Brazil. To provide a stable and consistent user experience across various device environments, we recommend that you follow the guidelines below when creating resources.

Learn More

{% content-ref url="/pages/bS79pIBVkO3rjcUR9Zhi" %}
[Asset Import](/manual/studio-manual/asset-and-resource-creation/asset-import)
{% endcontent-ref %}

## Useful Resources

### Character Animations

By using the animation packages registered in the **Asset Store**, you can easily implement character animations for various genres, including Obby, TPA, TPS, and Life, without creating them from scratch. These packages support a wide range of actions, from basic movement, jumping, and falling to combat and emotional expressions.

Learn More

{% content-ref url="/pages/YK5NZVV1FAIHbrQSOuHF" %}
[Character Animation](/manual/studio-manual/character/character-animation)
{% endcontent-ref %}

## Getting Started

{% content-ref url="/pages/typwieDogVPbeQ35t7B6" %}
[Studio Interface](/manual/studio-manual/get-started/studio-interface)
{% endcontent-ref %}

{% content-ref url="/pages/qYhw5UH1oZyiB64tOPSb" %}
[Script Overview](/manual/script-manual/get-started/script-overview)
{% endcontent-ref %}

{% content-ref url="/pages/H6rf9dC6lmJk9zs8HT6y" %}
[OVERDARE App](/overdare/get-started/install-app)
{% endcontent-ref %}

## Development Support

Join the [OVERDARE Creator Community Server](https://discord.com/invite/CbxxNTva98) on Discord to actively engage in game development, ask questions, share information, and participate in community activities!


# Unity Developer Guide

## Overview <a href="#overview" id="overview"></a>

OVERDARE is a powerful **game creation platform** that handles everything from **multiplayer game development** to **deployment**. Unlike Unity which is client-based, OVERDARE is designed for multiplayer environments, resulting in a different structure than Unity.

This document is designed to help Unity developers quickly adapt to OVERDARE Studio. Explore **new possibilities** for creating multiplayer games with OVERDARE!

## Interface <a href="#interface" id="interface"></a>

<figure><img src="/files/fkSHsYtlfLxrWzz0qybJ" alt=""><figcaption><p>Unity / OVERDARE Studio</p></figcaption></figure>

| Unity     | OVERDARE      |
| --------- | ------------- |
| Game      | X             |
| Scene     | Viewport      |
| Hierarchy | Level Browser |
| Inspector | Properties    |
| Project   | X             |
| Console   | Output Log    |

Unlike Unity, OVERDARE Studio does not provide a Game View or Project panel. Instead, when you run the game, **the Viewport panel switches to the play screen**.

In Unity, all assets such as scripts, materials, and meshes are managed in the Project panel. In OVERDARE Studio, scripts are managed in the **Level Browser**, while externally imported assets like meshes, images, and audio are managed separately through the **Asset Manager**.

## Shortcut Differences <a href="#keyboard-shortcuts" id="keyboard-shortcuts"></a>

| Unity    | OVERDARE   | 기능          |
| -------- | ---------- | ----------- |
| Q        | Ctrl + 1   | Select Tool |
| W        | Ctrl + 2   | Move Tool   |
| E        | Ctrl + 3   | Rotate Tool |
| R        | Ctrl + 4   | Scale Tool  |
| Ctrl + P | F5         | Play        |
| Ctrl + P | Shift + F5 | Stop        |

## 3D World Coordinate System

<figure><img src="/files/XYmkhDrdUFqkST528oDJ" alt=""><figcaption><p>Unity / OVERDARE Studio</p></figcaption></figure>

Unity and OVERDARE have similar coordinate system structures in that the X and Y axes point in the same directions, but there is a difference in the **direction of the Z-axis**. In Unity, the **forward direction is +Z**, while in OVERDARE, the **forward direction is -Z**. This difference is important because it means the reference axis for setting the forward direction of characters and cameras, as well as for calculating movement and rotation, is reversed.

## Importing Assets

<figure><img src="/files/HdA9EMYNb9nyjhJk6arV" alt=""><figcaption><p>Unity / OVERDARE Studio</p></figcaption></figure>

In client-based Unity, external assets can be easily imported via drag-and-drop. On the other hand, OVERDARE Studio is designed as a **platform for creators**, requiring a **server upload** process when using external assets. This allows creators to easily share assets and use them in game development.

To import external assets, click the **Import button** in the top menu of OVERDARE Studio. When an asset is imported, it is uploaded to the server, and **once processing is complete, it appears in the Asset Store**.

### Dynamic Resource Loading

In Unity, resources can be loaded at runtime using **Resources.Load**, which loads assets located in the Resources folder within the Project panel by specifying their path. For example, you might use Resources.Load to load a texture asset and then apply it to a material.

In contrast, OVERDARE references external assets through a unique **Asset Id** assigned to each asset. Rather than assigning the texture itself to the mesh, OVERDARE sets the Asset Id of the texture. This difference stems from the fundamental system distinction between Unity, which focuses on editor-based internal resource management, and OVERDARE, which is centered around a **network-based external resource reference structure**.

Learn More

{% content-ref url="/pages/bS79pIBVkO3rjcUR9Zhi" %}
[Asset Import](/manual/studio-manual/asset-and-resource-creation/asset-import)
{% endcontent-ref %}

## Object Structure Differences

<figure><img src="/files/64gPnkrgfMnS9mbRPXsD" alt=""><figcaption><p>Unity / OVERDARE Studio</p></figcaption></figure>

In Unity, core functionalities are component-based, allowing you to freely combine components like cameras, colliders, and audio to define an object’s behavior. In contrast, OVERDARE Studio has **fixed object types for specific functionalities**.

For example, in Unity, you need to add a Rigidbody component to enable physics for an object. In OVERDARE Studio, you need to disable the Anchored property in a Part object that has built-in physics functionality.

### Transform

In Unity, you directly control the Position, Rotation, and Scale properties using the **Transform component**, and you can clearly distinguish between local and world coordinate systems.

In OVERDARE, while Position and Orientation are also provided, typically the **CFrame** is used to handle position and rotation together, and scale is managed separately in the Size property. Notably, OVERDARE generally performs all position and rotation operations **relative to the world coordinate system**, and you need to manually calculate transformations if you want to use local coordinates.

This highlights the structural difference in how Unity has clearly separated properties for each component, while OVERDARE groups position and rotation together in a single CFrame.

Learn More

{% content-ref url="/pages/f7dY0KeRkFsA0mxkM6OB" %}
[Coordinate System](/manual/studio-manual/get-started/coordinate-system)
{% endcontent-ref %}

### Collision

In Unity, you use the **Collider component** for physics-based collision detection, and you can choose from various collider types such as BoxCollider, SphereCollider, and MeshCollider. For collisions to work, objects need both a Collider and a Rigidbody, and you can use the **isTrigger option** to set triggers. Collision events are detected via callbacks like OnCollisionEnter and OnTriggerEnter, and you can use collision groups or layer masks for detailed filtering.

In OVERDARE, all Parts have **built-in collision capabilities** by default, and you control whether they collide using the **CanCollide** property. Instead of OnCollisionEnter or OnTriggerEnter events, all collision events are handled using the **Touched event**. If CanCollide is disabled, it behaves like Unity's trigger events. OVERDARE also allows you to set collision filtering using collision groups.

Learn More

{% content-ref url="<https://github.com/overdare/creator-guide-eng/blob/main/manual/studio-manual/game-development/collision-groups.md>" %}
<https://github.com/overdare/creator-guide-eng/blob/main/manual/studio-manual/game-development/collision-groups.md>
{% endcontent-ref %}

### Rigidbody (Physics)

In Unity, adding a **Rigidbody component** to an object allows it to be influenced by the physics engine. You can precisely control the object's motion using properties such as velocity and angularVelocity, as well as methods such as AddForce and AddTorque for force-based interactions.

In OVERDARE, all Parts come with **built-in physics properties** by default. If an object's **Anchored** property is disabled, it will respond to physical effects such as gravity, collisions, and friction. Physics-based motion control is implemented through **dedicated physics objects** such as LinearVelocity, AngularVelocity, and VectorForce.

Learn More

{% content-ref url="/pages/92QXleNfbim97B0uhIQs" %}
[Physics](/manual/studio-manual/object/physics)
{% endcontent-ref %}

### Camera

In Unity, you can freely place Camera components in a scene and configure multiple cameras for various purposes, such as scene cameras or UI cameras. A common method is to **switch cameras** that are active by pre-placing several cameras and toggling their SetActive state to change the viewpoint.

In contrast, OVERDARE uses Workspace.CurrentCamera to control the **single active camera**, as only one camera exists in the system and it is always active. By default, this camera follows the player's Humanoid, but by setting the CameraType property to Scriptable, you can directly control the camera's position and rotation. Instead of switching between multiple cameras like in Unity, you change the viewpoint by **directly modifying properties** like CFrame and FieldOfView on the CurrentCamera.

Learn More

{% content-ref url="/pages/9PnP9ep5dV1amCBMPyXG" %}
[Camera](/manual/studio-manual/object/camera)
{% endcontent-ref %}

### ParticleSystem

In Unity, you can add a **ParticleSystem component** to an object to create various effects. The ParticleSystem itself has multiple modules such as Emission, Shape, Velocity, and Lifetime, allowing for complex effect combinations.

In contrast, OVERDARE uses **effect objects** like ParticleEmitter, Beam, and Trail, which are attached to Parts. Each effect type is a separate object with limited configurable properties. For example, the ParticleEmitter allows setting properties such as speed, direction, color, and lifetime, but it does not support the multi-module combinations that Unity's system does. Additionally, particles are emitted based on the Part they're attached to, without separate position settings.

Learn More

{% content-ref url="/pages/UHaO21fVTwrimnAJr3x3" %}
[VFX](/manual/studio-manual/object/vfx)
{% endcontent-ref %}

### UI

In Unity, the root of the UI system is the **Canvas component**, and all UI elements are placed under this Canvas for rendering. UI elements are typically laid out using RectTransform, and through the use of anchors, pivots, and panel hierarchies, you can design complex and responsive UIs.

In contrast, all OVERDARE UI elements are organized using components such as **ScreenGui** and **SurfaceGui**. ScreenGui is used for fixed UIs like HUDs or menus, and UI elements are positioned using UDim2 values, which combine pixel and scale components.

Learn More

{% content-ref url="/pages/Hgp8bh8C44modKPwUBkg" %}
[GUI](/manual/studio-manual/gui)
{% endcontent-ref %}

### RectTransform

In Unity, the **RectTransform component** controls the position, size, and alignment of UI elements. Unlike the standard Transform, it is designed specifically for 2D UI, allowing for relative positioning and auto-alignment based on the parent using anchors, pivots, and offsets. It plays a central role in creating responsive UIs within the canvas, and users can dynamically adjust position and size based on screen resolution and parent size.

In OVERDARE, UI elements are managed with Position, Size, and AnchorPoint properties. The **UDim2 type** used for Position and Size allows mixing pixel and scale values, partially replacing Unity properties such as Anchored Position and Stretch.

Learn More

{% content-ref url="/pages/f7dY0KeRkFsA0mxkM6OB" %}
[Coordinate System](/manual/studio-manual/get-started/coordinate-system)
{% endcontent-ref %}

## Prefab

In Unity, frequently used objects like monsters or UI slots are set up as **prefabs**, which can be efficiently managed and reused. Prefabs are stored as assets in the **Project panel** and can be dynamically created at runtime using **Instantiate()**. This system emphasizes **reusability** and **maintenance efficiency**, ensuring that any updates to the original prefab are automatically applied to all references.

In contrast, OVERDARE does not have a separate panel like Unity's Project panel, and all objects are managed through the **LevelBrowser (Hierarchy)**. To create dynamic objects, they must be pre-placed in **ServerStorage** and created using **Clone()** to Workspace or elsewhere as needed. This approach focuses on runtime object cloning and security, and objects can be stored safely in ServerStorage as they are only accessible by the server and not the client.

## Animation

In Unity, **animations for every game object including camera, character, and UI** can be created using the **Animation panel**. These animations are organized in the **Animator panel** using a **State Machine**, allowing for visual control through transition conditions and parameters.

In contrast, OVERDARE's **Animation Editor only supports character animation creation**, and editor-based animation creation for UIs or other objects is not currently supported. Additionally, there is no Animator state machine, meaning **all animation playback and control must be implemented directly in scripts**. For example, animations for character movement, attacks, or emotions must be **manually played through code** or managed with logic-based states.

Learn More

{% content-ref url="/pages/5IpTGP7jviBTxMeIYiuo" %}
[Animation Editor](/manual/studio-manual/asset-and-resource-creation/animation-editor)
{% endcontent-ref %}

{% content-ref url="/pages/YK5NZVV1FAIHbrQSOuHF" %}
[Character Animation](/manual/studio-manual/character/character-animation)
{% endcontent-ref %}

## Scripting <a href="#scripting" id="scripting"></a>

OVERDARE Studio uses **Luau script** as its scripting language for game development. Luau is a lightweight scripting language known for its easy-to-learn syntax, fast execution speed, and high flexibility. These characteristics make Luau more accessible and productive than C# scripting, allowing both beginners and experienced developers to use it effectively.

### Features <a href="#features" id="features"></a>

| Feature                           | Unity (C#)                                                                        | OVERDARE (Luau)                                                                         |
| --------------------------------- | --------------------------------------------------------------------------------- | --------------------------------------------------------------------------------------- |
| Explicit data types               | O                                                                                 | X                                                                                       |
| Access modifiers                  | such as private, public, static                                                   | local, global                                                                           |
| Object-Oriented programming (OOP) | Supports OOP through classes, interfaces, inheritance, polymorphism, etc.         | Does not natively support OOP but allows similar implementations using Metatables       |
| Code Structure                    | Class-based; all code is written inside classes, utilizing methods and properties | Simple function-based structure; no classes, uses Tables to organize data and functions |
| Functions                         | Functions are class members                                                       | Functions can be used as variables (First-class functions)                              |
| Collection                        | List, Dictionary, etc.                                                            | Table                                                                                   |
| Switch Statement                  | O                                                                                 | X                                                                                       |
| Single-line Comment               | //                                                                                | --                                                                                      |
| Multi-line Comment                | /\* and \*/                                                                       | --\[\[ and ]]--                                                                         |
| Semicolons                        | Required                                                                          | Optional                                                                                |

Learn More

{% content-ref url="/pages/NOEJ9tHsrRdTP8H1HtZK" %}
[Basic Guide to Lua](/manual/script-manual/get-started/basic-guide-to-lua)
{% endcontent-ref %}

### Code Execution Flow <a href="#code-execution-flow" id="code-execution-flow"></a>

Lua scripts are dynamically typed, and the script is executed sequentially from top to bottom. **Forward referencing is not supported**, meaning any functions or variables must be defined before they are referenced. This design characteristic stems from Lua’s focus on simplicity and runtime performance.

```lua
PrintText("Hello, Lua Script!") -- Error (forward referencing not allowed)  

local function PrintText(message)
    print(message)
end  

PrintText("Hello, Lua Script!") -- Works
```

### Accessing Variables/Functions from Other Scripts <a href="#accessing-variablesfunctions-from-other-scripts" id="accessing-variablesfunctions-from-other-scripts"></a>

If variables or functions are declared as **global**, they can be accessed from anywhere. However, since global variables can be modified from anywhere, this can reduce code stability.

```lua
_G.GlobalText = "Hello, World!" -- Declaring a global variable  

-- Declaring a global function
function _G.GlobalFunction()
    print("This is a global function!")
end
```

```lua
print(_G.GlobalText) -- Accessing a global variable
_G.GlobalFunction()  -- Calling a global function
```

To avoid the risks of global variables, you can use **module scripts** to encapsulate variables and functions within a table and return them. This approach is safer than using global variables and helps structure your code.

```lua
local SomeModule = {} -- Creating a table  

-- Module variable
SomeModule.Text = "Hello from module!"  

-- Module function
function SomeModule:Function()
    print("This is a function inside a module!")
end  

return SomeModule -- Returning the table
```

```lua
local ReplicatedStorage = game:GetService("ReplicatedStorage")
local SomeModule = require(ReplicatedStorage.SomeModule) -- Loading the module  

print(SomeModule.Text) -- Accessing a module variable
SomeModule.Function()  -- Calling a module function
```

Alternatively, you can use BindableEvent to handle communication between scripts in the same environment, such as server-to-server or client-to-client.

Learn More

{% content-ref url="/pages/e3wO4BcMNkD8WqBXjSNK" %}
[Module Script](/manual/script-manual/advanced-gameplay-systems/modulescript)
{% endcontent-ref %}

{% content-ref url="/pages/Q32XFSXYYZ9OlmkQ8s28" %}
[BindableEvent](/manual/script-manual/events-and-communication/bindableevent)
{% endcontent-ref %}

### Execution Location and Order <a href="#execution-location-and-order" id="execution-location-and-order"></a>

Since OVERDARE is designed for **multiplayer environments**, the purpose and execution of scripts depend on their location. For example, client-only features like cameras or GUIs run only on the client, whereas game logic or object movements requiring synchronization must be handled on the server. This structure clearly separates the roles of the client and server, ensuring efficient and stable multiplayer behavior.

In Unity, script execution order can be explicitly set using the Script Execution Order settings. In OVERDARE Studio, the execution order is automatically determined based on the **type of script** (e.g., Script or LocalScript) and its **execution location** (e.g., Workspace, ServerScriptService).

<figure><img src="/files/TlPVB5cdJFlurdnJDNA8" alt=""><figcaption><p>Unity / OVERDARE Studio</p></figcaption></figure>

Learn More

{% content-ref url="/pages/qYhw5UH1oZyiB64tOPSb" %}
[Script Overview](/manual/script-manual/get-started/script-overview)
{% endcontent-ref %}

### Server-Client Communication <a href="#server-client-communication" id="server-client-communication"></a>

OVERDARE is designed for multiplayer games, where the game is implemented using a combination of **Script** (executed on the server) and **LocalScript** (executed on the client). Communication between the server and client is handled using **RemoteEvent**.

Learn More

{% content-ref url="/pages/mfqBcNA4eO76WSB23UO8" %}
[Server-Client Communication](/manual/script-manual/events-and-communication/remoteevent)
{% endcontent-ref %}

## Script Feature Comparison <a href="#script-feature-comparison" id="script-feature-comparison"></a>

### print <a href="#print" id="print"></a>

{% tabs %}
{% tab title="Unity (C#)" %}

```csharp
using UnityEngine;

public class Example : MonoBehaviour
{
    void Start()
    {
        print("Hello, World!");
    }
}
```

{% endtab %}

{% tab title="OVERDARE (Lua)" %}

```lua
print("Hello, World!")
```

{% endtab %}
{% endtabs %}

### Start Event <a href="#start-event" id="start-event"></a>

{% tabs %}
{% tab title="Unity (C#)" %}

```csharp
using UnityEngine;

public class Example : MonoBehaviour
{
    void Start()
    {
        print("Start!")
    }
}
```

{% endtab %}

{% tab title="OVERDARE (Lua)" %}

```lua
print("Start!")
```

{% endtab %}
{% endtabs %}

### Update Event <a href="#update-event" id="update-event"></a>

{% tabs %}
{% tab title="Unity (C#)" %}

```csharp
using UnityEngine;

public class Example : MonoBehaviour
{
    private float Timer = 0f;

    void Update()
    {
        Timer += Time.deltaTime;
    }
}
```

{% endtab %}

{% tab title="OVERDARE (Lua)" %}

```lua
local RunService = game:GetService("RunService")
local Timer = 0

local function UpdateEvent(deltaTime)
    Timer = Timer + deltaTime
end
RunService.Heartbeat:Connect(UpdateEvent)
```

{% endtab %}
{% endtabs %}

### Reference Object <a href="#reference-object" id="reference-object"></a>

{% tabs %}
{% tab title="Unity (C#)" %}

```csharp
using UnityEngine;

public class Example : MonoBehaviour
{
    void Start()
    {
        GameObject object = GameObject.Find("Monster/Orc");
    }
}
```

{% endtab %}

{% tab title="OVERDARE (Lua)" %}

```lua
local Workspace = game:GetService("Workspace")
local Orc = Workspace.Monster.Orc
```

{% endtab %}
{% endtabs %}

### Transform <a href="#transform" id="transform"></a>

{% tabs %}
{% tab title="Unity (C#)" %}

```csharp
using UnityEngine;

public class Example : MonoBehaviour
{
    void Start()
    {
        transform.position = new Vector3(500, 0, 0);
        transform.rotation = new Vector3(0, 90, 0);
        transform.localScale = new Vector3(0.5f, 0.5f, 0.5f);
    }
}
```

{% endtab %}

{% tab title="OVERDARE (Lua)" %}

```lua
local Part = script.Parent

Part.Position = Vector3.new(500, 0, 0)
Part.Orientation = Vector3.new(0, 90, 0)
Part.Size = Vector3.new(50, 50, 50)
```

{% endtab %}
{% endtabs %}

### Collision Event <a href="#collision-event" id="collision-event"></a>

{% tabs %}
{% tab title="Unity (C#)" %}

```csharp
using UnityEngine;

public class Example : MonoBehaviour
{
    private void OnCollisionEnter(Collision collision)
    {
        print("Collision started with : " + collision.gameObject.name);
    }

    private void OnCollisionStay(Collision collision)
    {
        print("Collision ongoing with : " + collision.gameObject.name);
    }

    private void OnCollisionExit(Collision collision)
    {
        Drint("Collision ended with : " + collision.gameObject.name);
    }
}
```

{% endtab %}

{% tab title="OVERDARE (Lua)" %}

```lua
local Part = script.Parent

local function onTouched(otherPart)
    print(Part.Name, "Touched :", otherPart.Name)
end
Part.Touched:Connect(onTouched)

local function onTouchEnded(otherPart)
    print(Part.Name, "Touch Ended :", otherPart.Name)
end
Part.TouchEnded:Connect(onTouchEnded)
```

{% endtab %}
{% endtabs %}

### Create & Destroy <a href="#create--destroy" id="create--destroy"></a>

{% tabs %}
{% tab title="Unity (C#)" %}

```csharp
using UnityEngine;

public class Example : MonoBehaviour
{
    public GameObject Prefab;

    void Start()
    {
        GameObject newObject = Instantiate(Prefab, new Vector3(300, 0, 0));
        newObject.name = "NewObject";
        newObject.transform.parent = transform;

        Destroy(newObject);
    }
}
```

{% endtab %}

{% tab title="OVERDARE (Lua)" %}

```lua
local Workspace = game:GetService("Workspace")
local Part = Workspace.Part

local ClonedPart = Part:Clone()
ClonedPart.name = "NewPart"
ClonedPart.Parent = Part
ClonedPart.Position = Vector3.new(300, 0, 0)

Part:Destroy()
```

{% endtab %}
{% endtabs %}

### Coroutine

{% tabs %}
{% tab title="Unity (C#)" %}

```csharp
using System.Collections;
using UnityEngine;

public class CoroutineExample : MonoBehaviour
{
    private IEnumerator co;

    void Start()
    {
        co = SomeCoroutine();
        StartCoroutine(co);
        print("2")
    }

    IEnumerator SomeCoroutine()
    {
        Debug.Log("1");
        yield return new WaitForSeconds(2.0f);
        Debug.Log("3");
    }
}
```

{% endtab %}

{% tab title="OVERDARE (Lua)" %}

```lua
local function SomeCoroutine()
    print("1")
    wait(2)
    print("3")
end

local co = coroutine.create(SomeCoroutine)
coroutine.resume(co)  
print("2")
```

{% endtab %}
{% endtabs %}

## Reference Materials <a href="#reference-materials" id="reference-materials"></a>

To learn more about the scripting features provided by OVERDARE Studio, refer to the documentation below.

{% content-ref url="/pages/6AEYccB3l8tPAsoBNfl1" %}
[API Reference](/development/api-reference)
{% endcontent-ref %}

## Developer Support

Join the [OVERDARE Creator Community Server](https://discord.com/invite/CbxxNTva98) on Discord to actively engage in game development, ask questions, share information, and participate in community activities!


---

[Next Page](/llms-full.txt/1)